Advertisement
Quick Links
Baby Trend, Inc.
13048 Valley Blvd.
Fontana CA 92335
1-800-328-7363
(8:00 a.m. ~ 4:30 p.m. PST)
www.babytrend.com
PY05XXXC/S_2L_042225
Read all instructions BEFORE assembly and USE of product.
KEEP INSTRUCTIONS FOR FUTURE USE.
Lea todas las instrucciones ANTES de armar y USAR el
producto. CONSERVE LAS INSTRUCCIONES PARA USO FUTURO.
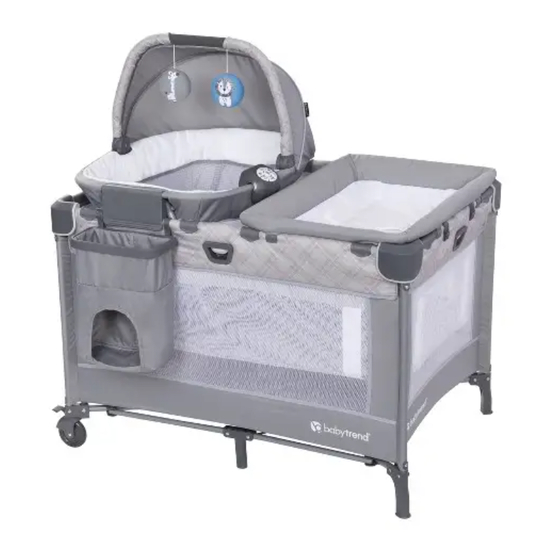
Nursery Den Playard with Napper
Instruction Manual
Manual de Instrucciones
*Toys may vary
*Los juguetes pueden variar
PY05XXXC/S
Copyright © 2025, Baby Trend Inc., All Rights Reserved. Tous droits réservés.
Advertisement

Related Manuals for BABYTREND PY05 C Series


Summary of Contents for BABYTREND PY05 C Series
- Page 1 *Los juguetes pueden variar Instruction Manual PY05XXXC/S Manual de Instrucciones Baby Trend, Inc. 1-800-328-7363 13048 Valley Blvd. (8:00 a.m. ~ 4:30 p.m. PST) Fontana CA 92335 www.babytrend.com PY05XXXC/S_2L_042225 Copyright © 2025, Baby Trend Inc., All Rights Reserved. Tous droits réservés.
-
Page 2: Warranty
Customer Service Department can be contacted at 1 (800) 328-7363 Monday through Friday between 8:00 a.m. and 4:30 p.m. (PST). Return Authorizations are required prior to returning product(s) to Baby Trend®. Please visit http://babytrend.com/ pages/limited-warranty for complete warranty details. GARANTIA NO DEVUELVA SU PRODUCTO A LA TIENDA. - Page 3 WARNING WARNING Playard Warnings Playard Warnings NEVER LEAVE INFANT IN PRODUCT WITH SIDES DOWN. WARNING: Infant may roll into space between pad and loose mesh side Failure to follow these warnings and the causing suffocation. instructions could result in death or serious injury. •...
- Page 4 WARNING ADVERTENCIA • NUNCA utilice bolsas de plástico u otras películas plásticas como Advertencias de Corralito: fundas de colchones que no se vendan ni estén destinadas a ese ADVERTENCIA: fin. Pueden causar asfixia. La inobservancia de las advertencias e instrucciones podría causar lesiones graves o la •...
-
Page 5: Maintenance And Cleaning Instructions
ADVERTENCIA ADVERTENCIA MAINTENANCE AND CLEANING • Proporcione SIEMPRE la supervisión necesaria para la seguridad INSTRUCTIONS: continua de su niño. Cuando se use para jugar, NUNCA deje al niño Use only household mild soap and warm water. solo. El niño en la cuna grande debe estar bajo supervisión en todo DO NOT USE BLEACH. - Page 6 PARTS PIEZAS PARTS PIEZAS Check the parts to make sure you have all the parts for this model before assembling the playard. Revise la lista de piezas para asegurarse de que tiene todas las piezas para este modelo antes de armar el corralito. Napper Parts Partes de Camita Playard...
- Page 7 WARNING ADVERTENCIA IMPORTANT ! To ensure safe operation of your product, please follow these instructions carefully. Please keep these instructions for future reference. IMPORTANT ! Before assembly and each use, inspect this product for damaged hardware, loose joints, missing parts or sharp edges.
- Page 8 ASSEMBLY ENSAMBLAR ASSEMBLY ENSAMBLAR TO ASSEMBLE PLAYARD Center at 1-800-328-7363 or visit our website at www.babytrend.com. IMPORTANT: The handle located in the center of the playard MUST remain in the ARMADO DEL CORRALITO raised position (Approximately 45.7 cm or 18 inches), when locking the side bars. If the center is not lifted the bars will NOT lock.
- Page 9 ASSEMBLY ENSAMBLAR ASSEMBLY ENSAMBLAR 5) • Insert the hook & loop fasteners located on the 3) • Once all four (4) top rails are locked in place, underside of the mattress through the slots in the push down on the center handle (Fig. 3a). The floor of each end of the playard (Fig.
- Page 10 ASSEMBLY ENSAMBLAR ASSEMBLY ENSAMBLAR • To operate the brakes on the wheels, press downward on the brake levers. To release, lift upward on the lever (Fig. 6). • Para operar los frenos en las rueditas, presione las palancas de freno hacia abajo. Para liberar, levante la palanca (Fig.
- Page 11 ASSEMBLY ENSAMBLAR ASSEMBLY ENSAMBLAR Su corralito vendrá con la opción A o B Your playard will either come with Option A or B Opción A Option A • Gire el asa central 90 grados en sentido antihorario y levante el Fig.
- Page 12 ASSEMBLY ENSAMBLAR ASSEMBLY ENSAMBLAR 8) • Locate the rail latch release button in the 10) • Secure the hook and loop fasteners by center of each rail. While holding the handle feeding them through the loops on the end up approximately 18 inches, lift each rail and of the mattress then fold them back onto press the buttons to unlock (Fig.
- Page 13 WARNING WARNING ACCESSORIES FULL-SIZE BASSINET • NEVER use plastic shipping bags or other plastic film as mattress covers not sold and intended for that purpose. They can cause WARNING Failure to follow these warnings and the suffocation. instructions could result in or death or serious injury •Use the full-size bassinet with only one child at a time.
- Page 14 WARNING ADVERTENCIA • Use ONLY mattress/pad provided with this product or contact the • ¡Los cordones pueden causar estrangulamiento! No coloque manufacturer for a replacement mattress/pad. elementos con cordones alrededor del cuello del niño, tales como • NEVER add a pillow, comforter, or another mattress for padding. • cordones de capuchas o de chupetes.
- Page 15 ADVERTENCIA ASSEMBLY ENSAMBLAR TO ASSEMBLE THE FULL-SIZE BASSINET • El niño puede quedar atrapado y morir cuando se colocan redes o CÓMO ARMAR LA CUNA DE TAMAÑO COMPLETO cubiertas improvisadas encima del corralito. Nunca coloque estos artículos para recluir al niño dentro del corralito. •...
- Page 16 ASSEMBLY ENSAMBLAR WARNING ACCESSORIES CHANGING TABLE: • Position the Full-size bassinet over and down into the fully assembled Playard. WARNING FALL HAZARD: Secure in place by pushing down firmly Children on each plastic support clip until all are have suffered serious injuries after falling from changing tables. Falls snapped into place (Fig.
- Page 17 ADVERTENCIA ASSEMBLY ENSAMBLAR ACCESSORIOS El CAMBIADOR: TO ASSEMBLE CHANGING TABLE ARMADO DEL ORGANIZADOR PARA PADRES ADVERTENCIA: PELIGRO Changing Table Assembly will require the following parts: DE CAÍDA: Los niños han sufrido lesiones graves Para ensamblar el cambiador, se necesitan las siguientes parte: como consecuencia de haberse caído de mesas para cambiar bebés.
- Page 18 ASSEMBLY ENSAMBLAR ASSEMBLY ENSAMBLAR • • Lay the changing table cover on a flat surface with the back side facing up. Locate Attach the Left and Right Short the Curved Connector Bar (1) and Straight Connector Bar (2) (Fig. 14a). Curved Bar with the Curved and Straight Connector Bars (Fig.
- Page 19 ASSEMBLY ENSAMBLAR ASSEMBLY ENSAMBLAR TO USE CHANGING TABLE RESTRAINT SYSTEM TO SECURE THE CHANGING TABLE TO THE PLAYARD PARA USAR EL SISTEMA DE RESTRICCIÓN DEL CAMBIADOR PARA SUJETAR EL CAMBIADOR AL CORRALITO IMPORTANT! When the changing table is on the upper position, the 16) •...
-
Page 20: Fall Hazard
ASSEMBLY ENSAMBLAR WARNING TO REMOVE THE CHANGING TABLE Set Up Napper PARA RETIRAR EL CAMBIADOR WARNING: Failure to follow these warnings and the NOTE: Before folding the product, ensure instructions could result in death or serious injury. to remove the changing table. SUFFOCATION HAZARD •... - Page 21 WARNING WARNING WARNING: • NEVER place a child under the napper. NEVER leave child unattended. • NEVER store the napper in the playard while in use. • To reduce the risk of SIDS, pediatricians recommend healthy infants be • To help prevent heat build-up inside the playard and to avoid placed on their back to sleep, unless otherwise advised by your physician.
- Page 22 ADVERTENCIA ADVERTENCIA ADVERTENCIA: ARMADO DEL CAMITA OVALADA: NUNCA deje al niño solo. ADVERTENCIA: • Para reducir el riesgo de SMIS, los pediatras recomiendan acostar a los La inobservancia de las niños sanos boca arriba para dormir, a menos que el médico indique lo advertencias e instrucciones podría causar la muerte o lesiones contrario.
- Page 23 ADVERTENCIA ADVERTENCIA • NUNCA coloque al niño debajo de la cuna. • NUNCA guarde la cuna en el corralito mientras está en uso. • Para prevenir la acumulación de calor dentro del corralito y evitar que su hijo sufra calor en exceso, cuando utilice la cuna NUNCA utilice un dosel para la intemperie.
- Page 24 ASSEMBLY ENSAMBLAR ASSEMBLY ENSAMBLAR TO ASSEMBLE NAPPER • Insert the two napper short frame bars with the attached clip into the canopy connector as shown. Ensure the pin(s) are facing outward and it "clicks" into the ARMADO DEL CAMITA canopy joint (Fig. 18a). Make sure the short frame bars are on the side of the fabric ATTENTION: Playard and Full-size bassinet must be fully assembled and cover with the two openings.
- Page 25 ASSEMBLY ENSAMBLAR WARNING ACCESSORIES • Insert the left and right frame bars into each of the right and left ends of the NOTE: napper main brackets. Slide inward until they lock in place (Fig. 18b). WARNINGS FOR TOY ACCESSORIES From the back side, ensure that the pins “click” into the main bracket INCLUDING TOYBAR / MOBILE / •...
- Page 26 WARNING ASSEMBLY ENSAMBLAR ACCESSORIOS CANOPY ASSEMBLY ENSAMBLAJE DEL DOSEL ADVERTENCIAS ACCESORIOS DE JUGUETE, 19) • Push down on the ends of the INCLUYENDO BARRA canopy bar to secure it onto DE JUGUETES / MÓVIL / CUBIERTA CON the top of the frame (Fig. 19a). JUGUETES: •...
- Page 27 ASSEMBLY ENSAMBLAR ASSEMBLY ENSAMBLAR • Secure the Canopy fabric: Pull the fabric over the napper frame (Fig. 19c). Use the TO SECURE THE OVAL NAPPER TO THE PLAYARD PARA ASEGURAR LA CAMITA AL JUEGO NOTE: strap to secure the fabric over to the back side of the main bracket (Fig. 19d). Ensure it wraps completely over the main bracket and its counterparts IMPORTANT! When the napper is on the upper (Fig.
- Page 28 ASSEMBLY ENSAMBLAR ASSEMBLY ENSAMBLAR TO REMOVE NAPPER SIDE POCKET ORGANIZER PARA QUITAR LA CAMITA ORGANIZADOR DE BOLSILLOS LATERALES WARNING: WARNING: WARNING: Care must be taken when folding and Do not place hot liquids or more than Do not place hot liquids or more than unfolding to prevent finger entrapment.
- Page 29 ® BABY TREND CUSTOMER SERVICE The Customer Service Department can be contacted at 1 (800) 328-7363 Monday through Friday between 8:00 a.m. and 4:30 p.m. (PST). Return Authorizations are required prior to returning product(s) to Baby Trend®. ® BABY TREND SERVICIO AL CLIENTE El Departamento de Servicio al Cliente puede ser contactado a 1 (800) 328-7363 Lunes a viernes entre...
Need help?
Do you have a question about the PY05 C Series and is the answer not in the manual?
Questions and answers