Advertisement
Quick Links
Baby Trend, Inc.
13048 Valley Blvd.
Fontana CA 92335
PY86xxxB_2L_031422.1_BP
1-800-328-7363
(8:00 a.m. ~ 4:30 p.m. PST)
www.babytrend.com
Read all instructions BEFORE assembly and USE of product.
KEEP INSTRUCTIONS FOR FUTURE USE.
Lea todas las instrucciones ANTES de armar y USAR el
producto. CONSERVE LAS INSTRUCCIONES PARA USO FUTURO.
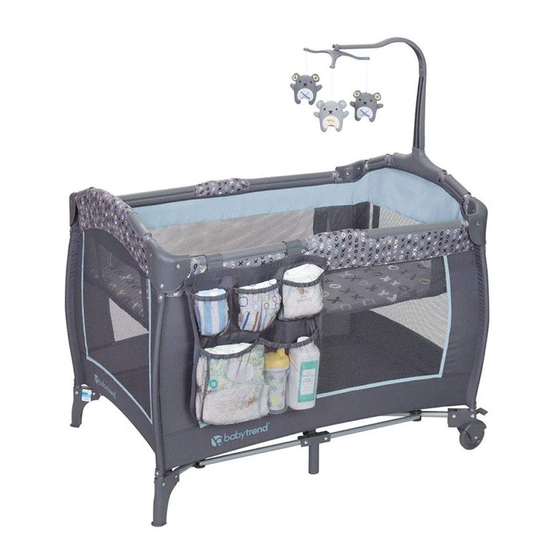
Nursery Center
*Toys and mobile may vary
*Los juguetes y el móvil pueden variar
Instruction Manual
Manual de Instrucciones
PY86XXXB
Advertisement

Related Manuals for BABYTREND PY86 B Series


Summary of Contents for BABYTREND PY86 B Series
- Page 1 CONSERVE LAS INSTRUCCIONES PARA USO FUTURO. Nursery Center *Toys and mobile may vary *Los juguetes y el móvil pueden variar Instruction Manual PY86XXXB Manual de Instrucciones Baby Trend, Inc. 1-800-328-7363 13048 Valley Blvd. (8:00 a.m. ~ 4:30 p.m. PST) Fontana CA 92335 www.babytrend.com PY86xxxB_2L_031422.1_BP...
-
Page 2: Warranty
Customer Service Department can be contacted at 1 (800) 328-7363 Monday through Friday between 8:00 a.m. and 4:30 p.m. (PST). Return Authorizations are required prior to returning product(s) to Baby Trend®. Please visit http://babytrend.com/pages/ limited-warranty for complete warranty details. GARANTIA NO DEVUELVA SU PRODUCTO A LA TIENDA. - Page 3 WARNING WARNING • NEVER place the product near a window where cords Playard Warnings from blinds or drapes can strangle a child. WARNING: Failure to follow the instructions could • Child can become entrapped and die when improvised netting or covers are placed on top of result in serious injury or death.
- Page 4 • En los espacios entre acolchado adicional y el lado de la cuna, y • En colchones blandos • Utilice SÓLO la almohadilla suministrada de BabyTrend®. • NUNCA agregue colchones, almohadas, edredones ni rellenos. • El colchón corralito/almohadilla está especialmente diseñado para evitar la asfixia.
- Page 5 ADVERTENCIA ADVERTENCIA ADVERTENCIA: • Cuando el niño sea capaz de levantarse agarrándose PELIGRO DE a objetos, quite las almohadillas protectoras, los ESTRANGULAMIENTO: ADVERTENCIA: NUNCA DEJE AL juguetes grandes y demás objetos que puedan servirle NIÑO EN EL PRODUCTO CON LOS COSTADOS BAJOS. El de escalones para trepar y salir.
- Page 6 PARTS PIEZAS IMPORTANT! ¡IMPORTANTE! IMPORTANT ! This model may not include some features shown below. Check the parts list on the back To ensure safe operation of your product, cover to make sure you have all the parts for this model before assembling the playard. please follow these instructions carefully.
- Page 7 ASSEMBLY MONTAJE ASSEMBLY MONTAJE TO ASSEMBLE PLAYARD • Top rails must be fully erected before lowering center. Pull up one rail at a time, ARMADO DEL CORRALITO hold one hand on each side of the rail and pull up sharply, do not pull from the middle where the center latch release is located, make sure both tubes latch in place and each rail is rigid (Fig.
- Page 8 ASSEMBLY MONTAJE ASSEMBLY MONTAJE • Place the Mattress on the floor of the • Once all four (4) top rails are locked in place, push down on the center handle Playard with the padded side facing up (Fig. 4). (Fig. 3a). The center mechanism will automatically lock in place.
- Page 9 ASSEMBLY MONTAJE ASSEMBLY MONTAJE FOLDING PLAYARD • Locate the rail latch release in the center CÓMO PLEGAR EL CORRALITO and bottom side of each rail. Squeeze Center latch Tube Sujetador central the lever with two hands until the rail Tubo releases the two tubes (Fig.
-
Page 10: Fall Hazard
ASSEMBLY MONTAJE ASSEMBLY MONTAJE ACCESSORIES • Gather four (4) corners and center all together tightly (Fig. 9). Wrap Mattress Full-Size Bassinet & Cradles Warnings: around Playard frame with padded side facing inward. WARNING: Failure to follow these warnings and • Junte las cuatro (4) esquinas y el centro the instructions could result in serious injury or death. - Page 11 WARNING ADVERTENCIA ACCESSORIOS • The playard, including side rails, must be fully erected prior to use. Make sure each latch is secure. Advertencias de moisés y la cuna de tamaño completo : • NEVER leave the bassinet in place when child is in playard.
- Page 12 ADVERTENCIA ASSEMBLY MONTAJE • La cuna deberá estar totalmente armada e instalada TO ASSEMBLE THE FULL-SIZE BASSINET CÓMO ARMAR LA CUNA DE TAMAÑO COMPLETO antes de usar. • El corralito, junto con las barandas laterales, deberán estar totalmente erguidos antes de usar. Asegúrese de que las trabas estén firmes.
- Page 13 ASSEMBLY MONTAJE ASSEMBLY MONTAJE DIAPER STACKER ASSEMBLY • Position the Bassinet over and down into (if equipped) the fully assembled Playard. Secure in ARMADO DEL PORTAPAÑALES ((si está incluida) place by pushing down firmly on each plastic support clip until all are snapped into place (Fig.
- Page 14 ASSEMBLY MONTAJE WARNING PREMIUM POCKET ORGANIZER ACCESSORIES (if equipped) ORGANIZADOR DE BOLSILLO DE LUJO (si está incluida) Warnings for Toy Accessories including Toybar / Mobile / Canopy with toys: WARNING: Premium Pocket Organizer Organizador de bolsillo de lujo • Possible entanglement injury. •...
- Page 15 ADVERTENCIA ASSEMBLY MONTAJE ACCESSORIOS MOBILE ASSEMBLY ARMADO DEL MÓVIL Advertencias Accesorios de juguete, incluyendo Barra de juguetes / Móvil / Cubierta con juguetes: ADVERTENCIA: • Es posible que se lastime al enredarse. 1 Mobile Lower Arm 1 Mobile Arm Holder 1 Mobile Upper Curved Arm 1 Brazo inferior de móvil 1 Soporte de brazo de móvil...
- Page 16 ASSEMBLY MONTAJE ASSEMBLY MONTAJE • Insert the Mobile Lower Arm (a) into the • Snap the Mobile Tri-shaped Arm (d) Mobile Arm Holder (b) until they lock onto the end of the Upper Curved Arm together (Fig. 15). (a, b, c) (Fig. 17). Connect each of the three Toys (e) to the Mobile by •...
- Page 17 Maintenance Mantenimento Maintenance Mantenimento MAINTENANCE AND CLEANING INSTRUCTIONS: Use only household mild soap and warm water. DO NOT USE BLEACH. DO NOT MACHINE WASH. INSTRUCCIONES DE LIMPIEZA Y MANTENIMIENTO: Utilice sólo jabón suave y agua tibia. NO USE BLANQUEADOR. NO LAVE A MÁQUINA. ®...
- Page 18 Copyright © 2022, Baby Trend Inc., All Rights Reserved. Todos los derechos reservados. Copyright © 2022, Baby Trend Inc., All Rights Reserved. Todos los derechos reservados.
Need help?
Do you have a question about the PY86 B Series and is the answer not in the manual?
Questions and answers