Advertisement
Available languages
Available languages
Quick Links
Baby Trend, Inc.
13048 Valley Blvd.
Fontana CA 92335
1-800-328-7363
(8:00 a.m. ~ 4:30 p.m. PST)
www.babytrend.com
PY86XXXJ_3L_050922.2_
Read all instructions BEFORE assembly and USE of product.
KEEP INSTRUCTIONS FOR FUTURE USE.
Lea todas las instrucciones ANTES de armar y USAR el
producto. CONSERVE LAS INSTRUCCIONES PARA USO FUTURO.
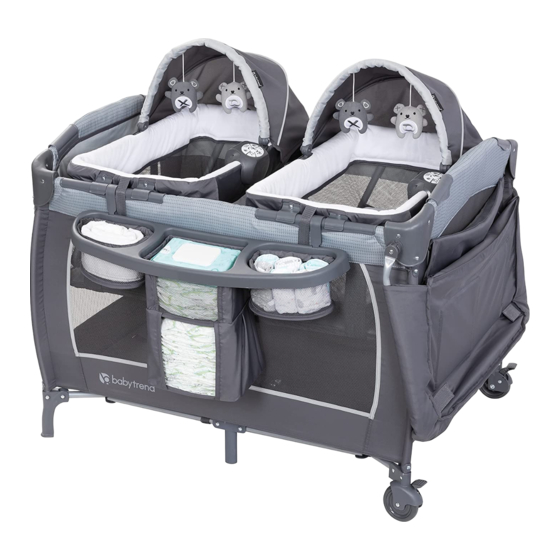
Lil' Snooze Deluxe III For Twins
Instruction Manual
Instruction Manual
Manual de Instrucciones
Manual de Instrucciones
*Additional Rock-A-Bye. Toys may vary.
*Cuna Rock-A-Bye Adicional. Los juguetes pueden variar.
PY86xxxJ
Advertisement

Related Manuals for BABYTREND PY86 J Series


Summary of Contents for BABYTREND PY86 J Series
- Page 1 *Additional Rock-A-Bye. Toys may vary. *Cuna Rock-A-Bye Adicional. Los juguetes pueden variar. Instruction Manual Instruction Manual PY86xxxJ Manual de Instrucciones Manual de Instrucciones Baby Trend, Inc. 1-800-328-7363 13048 Valley Blvd. (8:00 a.m. ~ 4:30 p.m. PST) Fontana CA 92335 www.babytrend.com PY86XXXJ_3L_050922.2_...
-
Page 2: Warranty
Customer Service Department can be contacted at 1 (800) 328-7363 Monday through Friday between 8:00 a.m. and 4:30 p.m. (PST). Return Authorizations are required prior to returning product(s) to Baby Trend®. Please visit http://babytrend.com/pages/ limited-warranty for complete warranty details. GARANTIA NO DEVUELVA SU PRODUCTO A LA TIENDA. - Page 3 WARNING WARNING Playard Warnings FALL HAZARD: Always check that the bassinet WARNING: is securely locked on the base/stand by pulling Failure to follow these warnings and upwards on the bassinet. the instructions could result in serious injury or death. This product including side rails, must be fully erected WARNING: STRANGULATION HAZARD: prior to use.
- Page 4 WARNING WARNING • If equipped or added as a feature: Refer to your parts • Do not use this playpen for a child who can climb out of it or who is taller than 89 cm. page and refer to the complete instructions for any •...
- Page 5 PARTS PARTS Ensure you have all the parts for this model before assembling the playard. (4) Rock-A-Bye Bassinet Bars **(2) Canopies Mattress Travel / Storage Bag Playard (4) Short Bar with Connectors (4) Straight Bars 2 Long Curved Bars 2 Short Bar with Connector Knobs 1 Changing Table With Vibration Without Vibration...
- Page 6 2) • Top rails must be fully locked before lowering Center at 1-800-328-7363 or visit us online at center. Pull up one rail at a time, hold one hand www.babytrend.com. Fig. 4 on each side of the rail and pull up sharply, do...
- Page 7 ASSEMBLY ASSEMBLY BRAKES 9) • Gather all four (4) corners and the center together tightly (Fig. 9). Wrap Mattress around Playard frame with padded side facing inward. 6) • To activate the wheel brakes, press downward on the levers. To release, lift upward on the lever (Fig.
- Page 8 WARNING WARNING ACCESSORIES • NEVER leave Changing Table in place when child is in the playard. Full-Size Bassinet & Cradles Warnings: • Discontinue use of full-size bassinet when child begins to WARNING: push up on hands and knees or has reached the height Failure to follow these warnings and of 25 in.
- Page 9 ASSEMBLY ASSEMBLY TO ASSEMBLE FULL-SIZE BASSINET 13) • Place the Mattress into the Bassinet with the padded side facing upward (Fig. 13). ATTENTION: Playard must be fully assembled and securely locked before installing or using the Bassinet feature (See To Assemble Playard section). You will need to remove the mattress from the bottom of the Playard to use inside your Bassinet.
- Page 10 ASSEMBLY WARNING ACCESSORIES TO ASSEMBLE CHANGING TABLE Changing Table: ATTENTION: Playard and Full-size bassinet must be fully assembled and securely locked WARNING: before installing or using the changing table feature (See To Assemble Playard and Full-size Do not use this accessory if you bassinet sections).
- Page 11 ASSEMBLY ASSEMBLY 15) • Insert Connector Knob Prongs into holes 16) • Locate the hook and loop fasteners on the located on both corners of the Playard (Fig. bottom of the changing table and inside the 15a). side rails of the playard (Fig. 16). •...
- Page 12 ASSEMBLY ASSEMBLY TO USE THE CHANGING TABLE RESTRAINT PARENT ORGANIZER ASSEMBLY SYSTEM WARNING: Storage basket only. Do not 19) • Place child on the changing table, make sure overload. max. weight: 3 lb. hands and arms are clear of the restraint. Bring (1.36 kg).
-
Page 13: Fall Hazard
WARNING WARNING FALL HAZARD: TO ASSEMBLE ROCK-A-BYE BASSINETS Check this accessory regularly WARNING: before using it, and do not use it if any part is loose or Do not use this accessory if you cannot missing or if there are any signs of damage. Do not exactly follow the instructions that come with it. - Page 14 ASSEMBLY WARNING • NEVER use plastic shipping bags or other plastic film as ATTENTION: Playard and full-size bassinet must be fully assembled and securely mattress covers not sold and intended for that purpose. locked before installing or using the Rock-a-Bye bassinet feature. (See To Assemble Playard and full-size bassinet sections).
- Page 15 ASSEMBLY ASSEMBLY 22) • Lay the Rock-A-Bye Bassinet fabric on a flat • Attach the Short Bars with the 2 Connectors to the Straight Bars surface with the bottom side facing up. Locate the 2 Straight Bars (Fig. 22a). (Fig. 22d). NOTE: Open the flaps as needed to assemble the bars (Fig.
- Page 16 ASSEMBLY ASSEMBLY 23) • Keep the bassinet with the clips and leg mounts facing up (Fig. 23a). Pull the flaps of • Before inserting them into the housing check that the foot extensions all point the fabric over the bar housing as shown in the diagram (Fig. 23b). inward as seen in the diagram (Fig.
- Page 17 ASSEMBLY ASSEMBLY ACCESSORIES TO ASSEMBLE CANOPY Warnings for Toy Accessories including Toybar/Mobile ATTENTION: The canopy is NOT a carry handle. Canopy with toys WARNING: Canopy 25) • Push down on the ends of the canopy to • Possible entanglement injury. secure it onto the top of the bassinet frame •...
- Page 18 ASSEMBLY ASSEMBLY 27) • To open the canopy: push forward on the front edge of the canopy while holding TO SECURE THE ROCK-A-BYE BASSINET TO THE PLAYARD the rear of canopy in place (Fig. 27a). IMPORTANT! • To fold the canopy: pull backwards on the front edge (Fig. 27b). When the Rock-A-Bye Bassinet is on the upper position, it must be secured to the playard frame by using the snap buttons, straps, or fasteners provided.
- Page 19 ASSEMBLY ASSEMBLY You may install 2 Rock-A-Bye Bassinets side by side. Repeat step 22-28 to TO FOLD REMOVABLE ROCK-A-BYE BASSINET install the additional bassinet. WARNING: Care must be taken when folding and unfolding to prevent finger entrapment. CAUTION: Do not allow children near while folding and unfolding.
- Page 20 ACCESSORY ACCESSORY MUSIC CENTER WARNING: Keep batteries out of children's reach. Old and new batteries should not be mixed. Alkaline, standard carbon-zinc, and rechargeable batteries should not be mixed. Remove batteries before storing music center for a long period of time. *With Vibration *Without Vibration *Type may vary...
- Page 21 WARNING WARNING AVERTISSEMENT ADVERTENCIA Advertencias de Corralito: FCC Statement ADVERTENCIA: La inobservancia de las This device complies with Part 15 of the FCC rules. Operation is subject to the following two conditions: advertencias e instrucciones podría causar 1 this device may not cause harmful interference, and lesiones graves o la muerte.
- Page 22 ADVERTENCIA AVERTISSEMENT ADVERTENCIA • SIEMPRE coloque al niño de espaldas para dormir. • NUNCA deje al niño en el producto con los costados • NUNCA use bolsas de plástico para transporte u bajos. Asegúrese de que los costados estén levantados otras envolturas plásticas para cubrir el colchón no y trabados toda vez que el niño esté...
- Page 23 ADVERTENCIA AVERTISSEMENT ADVERTENCIA ¡IMPORTANTE ! • Controle el corral de manera regular antes de usarlo, Para asegurar el funcionamiento y no lo utilice si falta alguna parte o si existen signos de seguro de su producto, siga estas instrucciones que está dañado. No sustituya partes. Comuníquese cuidadosamente.
- Page 24 PIEZAS PIEZAS Asegurarse de tener todas las partes de este modelo antes de ensamblar el corallito. **(2) Cubiertas (4) Barras para la Cuna Rock-A-Bye Colchón Bolsa de viaje y portaobjetos Corralito (4) Barras Cortas con Conectoras (4) Barras Rectas 2 Barras curvadas largas 2 Barras cortas con 1 Cambiador Perillas conectoras...
-
Page 25: Montaje
1-800-328-7363 Fig. 4 tubos estén asegurados en su lugar y que o visítenos en www.babytrend.com. todas las barandillas estén rígidas (Fig. 2). IMPORTANTE: El centro debe estar elevado mientras se aseguran las barandillas. Si una... - Page 26 MONTAJE MONTAJE 6) • Para operar los frenos en las rueditas, presione 9) • Junte las cuatro (4) esquinas y el las palancas de freno hacia abajo. Para liberar, centro con firmeza (Fig. 9). Envuelva el colchón alrededor de la estructura levante la palanca (Fig.
- Page 27 ADVERTENCIA AVERTISSEMENT ADVERTENCIA ACCESSORIOS • NUNCA use bolsas de plástico para transporte u otras envolturas plásticas para cubrir el colchón no Advertencias de moisés y cuna de tamaño completo: diseñadas o comercializadas para ese fin. Pueden causar asfixia. ADVERTENCIA: No use este accessorio si •...
- Page 28 MONTAJE MONTAJE PELIGRO DE ASFIXIA: 12) • Coloque la cuna dentro del corralito Portador totalmente armado. Asegúrela puede volcarse en superficies blandas y asfixiarse. presionando firmemente sobre cada NUNCA colocar portador en camas, sofás, o en otras gancho de soporte de plástico hasta superficies blandas.
- Page 29 MONTAJE ADVERTENCIA ACCESSORIOS ARMADO DEL ORGANIZADOR PARA PADRES El Cambiador: ATENCIÓN: El corralito y la cuna de tamaño completo debe estar montado por completo ADVERTENCIA: y trabado en forma segura antes de instalar o usar la función del cambiador (Consulte la No use este accessorio si no sección Cómo montar el corralito y la cuna de tamaño completo).
- Page 30 MONTAJE MONTAJE 15) • Introduzca los Dientes de la Perilla conectora 16) • Localize la cinta de gancho y bucle debajo de en los agujeros situados en ambas esquinas la mesa cambiadora y del lado de adentro de del Corralito (Fig. 15a). los rieles de los lados (Fig.16).
- Page 31 MONTAJE MONTAJE PARA USAR EL SISTEMA DE RESTRICCIÓN ARMADO DEL ORGANIZADOR PARA DEL CAMBIADOR PADRES ADVERTENCIA: 19) • Coloque al niño sobre el cambiador y Cesta del almacenaje asegúrese de que las manos y brazos no estén Organizador para padres solamente.
- Page 32 ADVERTENCIA AVERTISSEMENT ADVERTENCIA ADVERTENCIA: ARMADO DEL ROCK-A-BYE CUNAS NUNCA deje al niño solo. ADVERTENCIA: PELIGRO DE ASFIXIA: No use este accessorio si Portador puede volcarse en superficies blandas y asfixiarse. NUNCA no puede seguir las instrucciones que vienen con él colocar portador en camas, sofás, o en otras de manera exacta.
- Page 33 MONTAJE ADVERTENCIA • ADVERTENCIA: Es posible que se lastime al enredarse • NUNCA utilice este producto si hay sujeciones sueltas con los juguetes adheridos.Mantenga fuera del o ausentes, uniones flojas, piezas rotas o si la tela o alcance del bebé. la malla están rasgadas.
- Page 34 MONTAJE MONTAJE 22) • Coloque el tejido de la cuna Rock-A-Bye • Sujete las barras cortas con los dos sobre una superficie plana con la parte conectores a las barras rectas (Fig. posterior hacia arriba. Ubique las 2 barras 22d). rectas (Fig.
- Page 35 MONTAJE MONTAJE 23) • Mantenga la cuna con los clips y soportes de las piernas hacia arriba (Fig. 23a). • Antes de insertarlas en las arandelas, verifique que las todas extensiones de los pies Tire de las solapas de la tela sobre la arande la de la barra como se muestra en el apunten hacia adentro, como se ve en el diagrama (Fig.
- Page 36 MONTAJE ADVERTENCIA ACCESSORIOS CÓMO MONTAR LA CUBIERTA Advertencias Accesorios de juguete, incluyendo Barra ATENCIÓN: La cubierta NO es un asa de transporte. de juguetes /Móvil / Cubierta con juguetes: Canopy ADVERTENCIA: 25) • Presione los extremos de la cubierta / barra de juguetes para sujetarla a la parte superior •...
- Page 37 MONTAJE MONTAJE 27) • Para abrir la cubierta: empuje hacia delante el borde delantero de la cubierta PARA SUJETAR LA ROCK-A-BYE CUNA AL CORRALITO mientras sostiene la parte trasera de la misma en su sitio (Fig. 27a). ¡IMPORTANTE! • Para plegar la cubierta: empuje hacia atrás el borde delantero (Fig. 26b). Par cuando la Cuna Rock-A-Bye esta echada hacia arriba debe estar asegurada a el...
- Page 38 MONTAJE MONTAJE Puede instalar 2 Cunas Rock-A-Bye uno al lado del otro. Repita el paso PARA PLEGAR LA CUNA DESMONTABLE ROCK-A-BYE 22-28 para instalar el moisés adicional. ADVERTENCIA: Se debe ser prudente al plegar y desplegar para evitar que queden dedos atrapados.
- Page 39 ACCESORIOS ACCESORIOS CENTRO MUSICAL FUNCIONAMIENTO DE LA MÚSICA ADVERTENCIA: Mantenga las pilas fuera del alcance de los niños. Las pilas viejas y nuevas no deben mezclarse. Las pilas alcalinas, estándar de carbón y zinc, y las pilas recargables no deben mezclarse.
- Page 40 ADVERTENCIA AVERTISSEMENT Declaración de la FCC Este dispositivo cumple con las normas de la Parte 15 de la Comisión Federal de Comunicaciones (FCC). El funcionamiento está sujeto a las siguientes dos condiciones: 1 este dispositivo no puede producir interferencias perjudiciales y 2 este dispositivo debe aceptar cualquier interferencia que reciba, incluyendo las que puedan provocar un funcionamiento no deseado.
Need help?
Do you have a question about the PY86 J Series and is the answer not in the manual?
Questions and answers