Zoom H2n, H6 Manual
- Quick start manual (3 pages) ,
- User manual (13 pages) ,
- Manual (9 pages)
Advertisement
Introduction
Why Use Specialized Equipment?
You may ask, "Why wouldn't I just use my phone? It sounds fine."
While using a phone to record an interview can be adequate in many instances, there are several reasons to consider using specialized equipment like the Zoom H2n or H6:
Consistency:
Phones vary in audio quality, making it difficult to maintain a consistent, broadcast-ready standard.
Specialization:
Dedicated microphones are designed for high-fidelity recording, unlike phone microphones, which are often minimalistic and multi-purpose.
Compartmentalizing:
Using a dedicated device ensures reliability. Phones can run out of battery, receive calls, or have apps crash during recording.
Professionalism:
A microphone lends credibility and seriousness to your work, making interviewees more likely to take you seriously.
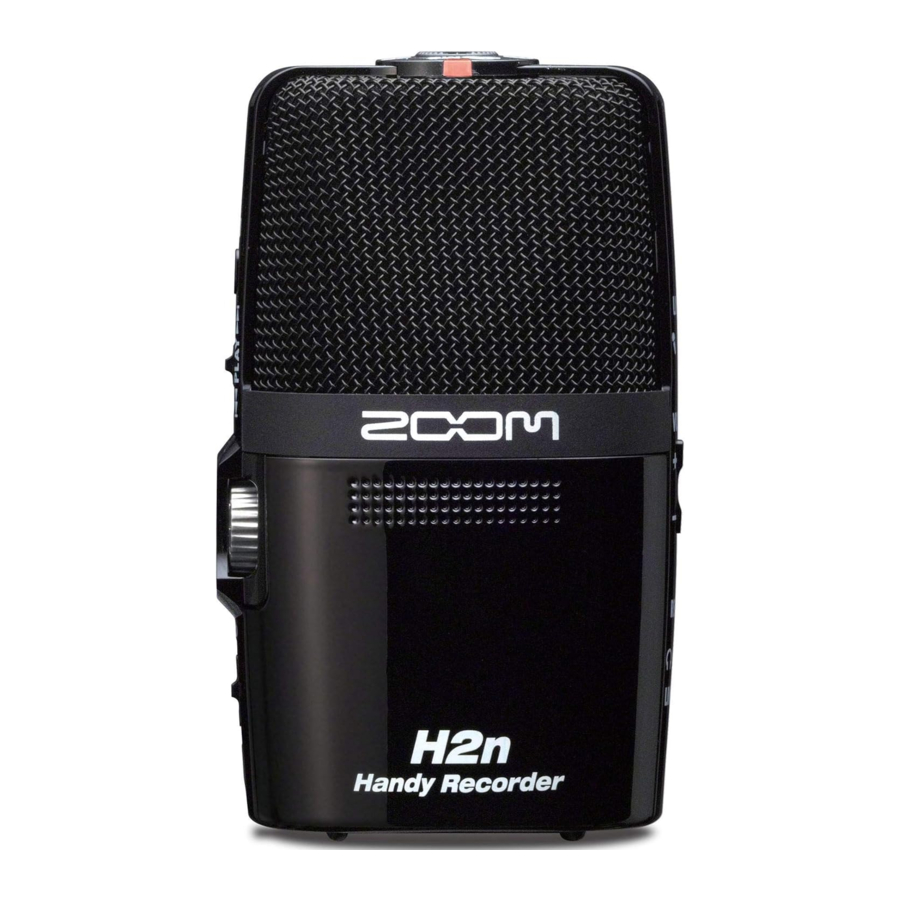
Key Features of Zoom H2n
The Zoom H2n is a lightweight, versatile recorder ideal for on-the-go interviews. Key features include
4 Microphone Capsules:
Allows recording in stereo and surround sound.
Mode Selection Dial:
Choose configurations like XY for interviews or 4-channel for larger groups.
Gain Knob:
Adjusts the amplification of incoming audio signals.
SD Card Slot:
Essential for storing recordings.
Key Features of Zoom H6
The Zoom H6 is a more advanced, durable recorder with additional functionality:
6 Configurable Microphone Lines:
Record multiple sources simultaneously.
Durable Rubber Case:
Ideal for mobile recording in dynamic environments.
Gain Knobs for Each Input:
Independent volume control for each microphone line.
SD Card Slot:
Stores recordings for later access.
Basic Setup for Zoom H2n
Follow these steps to set up and use the Zoom H2n
Select a Mode:
Use XY mode for interviews.
Use 4-channel mode for larger groups.
Monitor Using Headphones:
Plug in headphones to ensure audio quality before recording.
Hit Record:
Press the red button to start recording. Press it again to stop and save the file to the SD card.
Basic Setup for Zoom H6
Follow these steps to set up and use the Zoom H6
Plug in Cables and Microphones:
Connect all necessary cables and microphones.
Arm each channel by pressing its respective button (red means armed).
Set Levels Using Dials:
Adjust the gain knobs for each input to optimize audio levels.
Monitor Using Headphones:
Plug in headphones to check audio quality before recording.
Press Record:
Hit the red button to start recording. Press it again to stop and save the file to the SD card.
Tips for Clear Audio
To ensure the best possible audio quality, follow these tips
Microphone Placement:
Keep the microphone 6–12 inches from the sound source.
Avoid Background Noise:
Move away from noisy environments to minimize interference.
Avoid Wind:
Never record in windy conditions, as it can overpower and ruin your audio.
Use Headphones:
Always monitor audio in real-time to catch issues early.
Check Batteries:
Ensure your batteries are fully charged and the correct size.
Conclusion
Recording professional-quality audio doesn't have to be complicated. With the Zoom H2n or H6, you can achieve consistent, high-fidelity results by following the simple steps outlined in this guide. Remember to monitor your audio, keep your equipment charged, and minimize background noise for the best results.
Documents / ResourcesDownload manual
Here you can download full pdf version of manual, it may contain additional safety instructions, warranty information, FCC rules, etc.
Advertisement


Need help?
Do you have a question about the H2n and is the answer not in the manual?
Questions and answers