Advertisement
Table of Contents
Contents
ZOOM R4 Manual
Inserting microSD cards

- Always turn the power off before inserting or removing a microSD card.
- To remove a microSD card, push it further into the slot and then pull it out.
Supported recording media:
microSDHC: 4 GB – 32 GB
microSDXC: 64 GB – 1 TB
Turning the power on

Making settings when first turned on
Setting the date and time
- Use
![]() to select a setting item, and press
to select a setting item, and press ![]() to confirm.
to confirm.

- Use
![]() to change the date/time, and press
to change the date/time, and press ![]() to confirm.
to confirm.

- After setting all the items, select "OK" and press
![]() to complete setting the date and time.
to complete setting the date and time.

 to select a setting item, and press
  to confirm.
 to confirm.

Setting the battery type
Throughout these instructions use  buttons according to the screen to select and confirm (execute).


After setting is complete, the Home Screen will open.

Recording
Connecting guitars and mics

Selecting tracks for recording

- Press
![]() to cycle through the input sources that can be assigned to the track.
to cycle through the input sources that can be assigned to the track.
Press![]() to return to the Home Screen.
to return to the Home Screen.


 to cycle through the input sources that can be assigned to the track.
 to return to the Home Screen.
| Input source | Explanation |
| - | Use when nothing is connected (when not recording) |
| INPUT A | Use when connecting guitars or dynamic mics |
INPUT A  | Use when connecting condenser mics |
| INPUT B | Use when connecting guitars or dynamic mics |
| INPUT B | Use when connecting condenser mics |
| MIC | Use for the built-in mic |
- Phantom power will be supplied if INPUT A
![]() or INPUT B
or INPUT B ![]() is selected.
is selected. - Do not supply phantom power to devices that are not compatible with it. Doing so could damage the device.
Adjusting the volume
- Use the faders to adjust track levels

- Connect headphones and adjust the volume


Setting effects
- Effects can be applied to INPUT A or the built-in mic and recorded.

- Press
![]() to return to the Home Screen.
to return to the Home Screen.


 to return to the Home Screen.
Setting the rhythm

- Press
![]() to return to the Home Screen.
to return to the Home Screen.


 to return to the Home Screen.
| Item | Explanation |
| Rhythm | This turns the rhythm on/off. |
| Pattern | This selects the rhythm type. |
| Tempo | This sets the tempo. |
| Volume | This adjusts the volume. |
| Pre Count | This turns the precount on/off. |
Recording

| Operation button | Operation when recording | Operation when stopped |
 | Stop recording | Move to beginning |
 | Stop recording (Continue playback) | Resume recording |
Use the same procedures to record additional tracks.
Playing recordings

| Operation button | Operation when playing | Operation when stopped |
 | Press and hold to search backward/ forward | Move playback position forward/ backward |
 | Stop playback | Move to beginning |
 | Stop playback | Resume playback |
Adjusting the mix and bouncing
Adjusting the mix
Adjust EQ and panning

- Press
![]() to return to the Home Screen.
to return to the Home Screen.


 to return to the Home Screen.
| Item | Explanation |
| High | This boosts or cuts high frequencies. |
| Middle | This boosts or cuts mid-range frequencies. |
| Low | This boosts or cuts low frequencies. |
| Pan | This sets the left-right sound position. |
| Echo | This adjusts echoes. |
| Reverb | This adjusts reverberations and reflections. |
Use faders to adjust track levels

While listening to playback, use the faders to adjust the balance.
Bouncing tracks
Tracks 1–4 can be combined in a BOUNCE track. Quick Bounce and Real Time Bounce options are available.
| Item | Explanation |
| Quick Bounce | This can quickly combine tracks 1–4 in the BOUNCE track. |
| Real Time Bounce | This allows faders to be used to adjust levels while bouncing tracks 1–4 to the BOUNCE track. |

- Press
![]() to cancel when bouncing.
to cancel when bouncing. - During a Real Time Bounce, pressing
![]() ,
, ![]() or
or ![]() will bounce the recording up to that moment to the BOUNCE track.
will bounce the recording up to that moment to the BOUNCE track. - To revert a bounce to the previous state (restore the original recordings to tracks 1–4), press. The
![]() function can only be used on the most recent bounce.
function can only be used on the most recent bounce.
 to cancel when bouncing.
  ,
,  or
or  will bounce the recording up to that moment to the BOUNCE track.
  function can only be used on the most recent bounce.
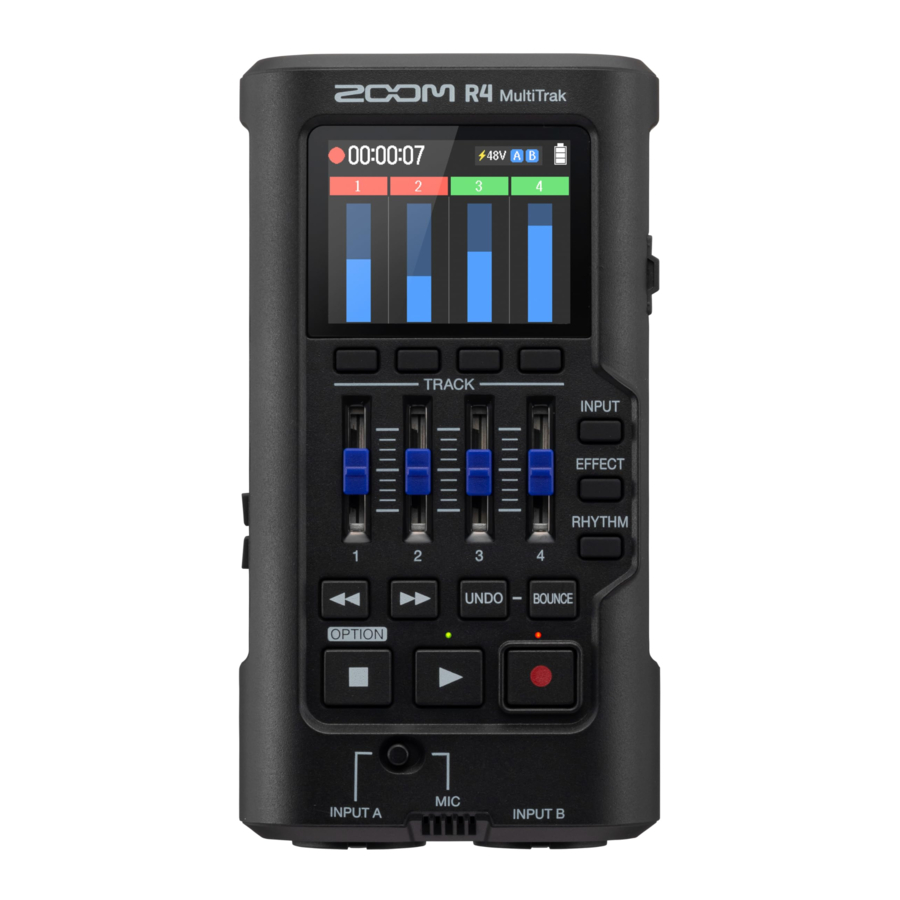
 Names of parts

Other functions
| USB audio interface | Connected to a computer, smartphone or tablet, this can be used as a 2-in/2-out audio interface. |
| USB file transfer | By connecting with a computer, data on the microSD card can be checked and copied. |
| Online help (2D code) | Detailed documents related to the product can be viewed by reading the 2D code with a smartphone. |
Troubleshooting
Sound is not output or the volume is very low
- Check the headphone connection.
- Confirm that the headphone volume is not lowered.
- Check the orientation of the mic or the volume settings of the connected equipment.
Monitored sound is distorted
- Adjust the volume.
Built-in mic sound is distorted
- Use the R4 farther away from the sound source.
INPUT A/B sound is distorted
- Adjust the volumes of connected devices.
Recording is not possible
- Confirm that the microSD card has open space.
- Confirm that a microSD card is loaded properly in the card slot.
The recorded sound breaks up
- Test the microSD card.
- See the Operation Manual for details.
- Use the R4 to format the microSD card.
- We recommend using microSD cards that have been confirmed to operate with this recorder.
See the ZOOM website (zoomcorp.com) for information about microSD cards that have been confirmed to work with this unit.
Not recognized by computer when connected
- Use a USB cable that supports data transfer.
Date and time are frequently reset
- If power is not supplied by an AC adapter or batteries for a long time, date and time settings will be reset. If the Set Date/Time Screen appears during startup, set them again.
ZOOM CORPORATION
4-4-3 Kanda-surugadai, Chiyoda-ku, Tokyo 101-0062 Japan
zoomcorp.com
Documents / Resources
References
Download manual
Here you can download full pdf version of manual, it may contain additional safety instructions, warranty information, FCC rules, etc.
Advertisement


Need help?
Do you have a question about the R4 and is the answer not in the manual?
Questions and answers