Advertisement
PX246 Wave
The color and the appearance may differ depending on the product, and the specifications are subject to change without prior
notice to improve the performance.
The contents of this manual are subject to change without notice to improve quality.
Copyright © 2024 Pixio USA Inc. I Pixio is a registered trademark of Pixio USA Inc. I All Rights Reserved.
Use or reproduction of this manual in parts or entirety without the authorization of Pixio USA Inc is prohibited.
All other trademarks are owned by their respective owners.
Advertisement
Table of Contents

Related Manuals for Pixio PX246 Wave


Summary of Contents for Pixio PX246 Wave
- Page 1 The contents of this manual are subject to change without notice to improve quality. Copyright © 2024 Pixio USA Inc. I Pixio is a registered trademark of Pixio USA Inc. I All Rights Reserved. Use or reproduction of this manual in parts or entirety without the authorization of Pixio USA Inc is prohibited.
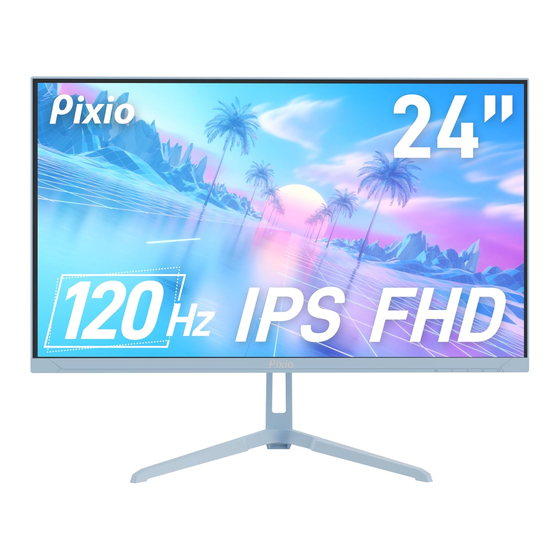
- Page 2 Pixio 23.8in IPS FHD 120Hz Gaming Monitor PX246 Wave ENS2407010140E00301R SKU: PX246WAVE, PX246WAVEW, PX246WAVEB, PX246WAVEK...
- Page 8 Product Includes: Product Includes: Monitor Monitor Stand Stem Stand Stan...
- Page 9 Product Includes: Product Includes: Monitor Stand Stand Base Screws M5*15m M4*12m Monitor Stand Stem Stand Base M4*12mm Screw M5*15mm Screw HDMI Cable DP Cable Power Adapter M5*15mm Screw DP Cable Monitor Stand Stem Stand Base M4*12mm Screw HDMI Cable Power Adapter Stand Base VESA Adapter HDMI Cable...
- Page 10 VESA Adapter Installation & Screw Guide: Screws Use four screws to secure the VESA plate to the adapter. Then, use the remaining screws to attach the monitor to the VESA plate. Installation Warning: Use the correct screws to avoid damaging the monitor. Incorrect screws can get stuck inside the monitor.
-
Page 11: Product Assembly
Product Assembly: Take out the product with foam still attached, and gently place it on a desktop or table. Screw Screw HDMI Cable DP Cable Power Adapter Open the package, and assemble the separated stand base to the Stand assembly completed. stand stem with the M5 x 15mm screw as shown in the illustration. - Page 12 60.08mm 542mm 100mm 75mm 182.82mm Net Weight: 4.2kg (9.26lb) l Gross Weight: 5.2kg (11.46lb) Net Weight: 3.2kg (7.05lb) Gross Weight: 4.75kg (10.47lb)
-
Page 13: Monitor Inputs
Monitor Inputs. HDMI HDMI 2.0, 120Hz, Adaptive Sync Earphone Short Short *WARNING: Always use the appropriate power cord. - Page 14 Input selection Short Key Preset selection Short Key Crosshair(LoS) selection Short Key Open the Main OSD Menu Input selection Short Key Input selection Short Key Input selection Short Key Preset selection Short Key Preset selection Short Key Turn the monitor On or Off Preset selection Short Key Crosshair(LoS) selection Short Key Crosshair(LoS) selection Short Key...
- Page 15 Resolution: 1920x1080@260Hz How to Reconfigure Input Auto Select Display DP1 (1.4) Setup Manual Image Color Audio Input Preset Adjust Adjust Adjust Select Menu Exit the Main OSD Menu. Color Setup DP2 (1.4) Resolution: 1920x1080@260Hz HDMI1 (2.0) Gaming Setup Go Up on the Main OSD Menu / Decrease the value of a selected item. How to Reconfigure Audio Adjust HDMI2 (2.0)
- Page 16 OSD Menu. Display 1920x1080 120Hz Adaptive Sync •Brightness: Adjust the display brightness value from 0 to 100. HDMI (2.0) •Contrast: Adjust the display contrast value from 0 to 100. Display Brightness Image Setup Contrast •Black Equalizer: Adjust the Black Equalizer value from 0 to 100. Color Black Equalizer Gaming Setup...
-
Page 17: Image Setup
Image Setup 1920x1080 120Hz Adaptive Sync Adjust OSD Setup from H Position, V Position, HDMI (2.0) Clock, and Phase Display H. Position H Position: Adjust 0-100 Image Setup V. Position V-Position: Adjust 0-100 Color Clock Clock: Adjust 15-60 Gaming Setup Phase Phase: Adjust 0-100 Input... - Page 18 Gaming Setup •Adaptive Sync: Turn Adaptive Sync On or Off. •Overdrive: Select Overdrive from Off, Low, Middle, and High. •Game Assist: Select Assist from Time, Crosshair(LoS), and FPS Counter. 1920x1080 120Hz Adaptive Sync Timer: Select Timer from Off, 15:00, 30:00, 45:00, 60:00 HDMI (2.0) and 90:00 Display...
- Page 19 Input 1920x1080 120Hz Adaptive Sync HDMI (2.0) •Switch the signal input to Auto Select, VGA, or HDMI (2.0). Display Auto Select Image Setup Color HDMI (2.0) Gaming Setup Input System Setup User Data V1.0...
-
Page 20: System Setup
System Setup •Language: Change the OSD menu display language •OSD Setup: Select OSD Setup from H Position, V Position, OSD Timeout, Transparency. 1920x1080 120Hz Adaptive Sync HDMI (2.0) H Position: Adjust 0-100 Display Language V-Position: Adjust 0-100 Image Setup OSD Setup OSD Timeout: Adjust 15-60 Color Audio... - Page 21 User Data 1920x1080 120Hz Adaptive Sync HDMI (2.0) •User Data: Load/Save Brightness, Contrast, Black Equalizer, Display User1 Load Saturation, Preset, Color Temperature, Gamma, Image Setup User2 Save Overdrive, Volume, Mute, Low blue light settings Color User3 Gaming Setup on the monitor. Input System Setup User Data...
-
Page 22: Adaptive Sync
Adaptive Sync... -
Page 24: Color Setup
Color Setup •Color Temperature: Select from Normal, Cool, Warm, sRGB, 1920x1080 120Hz Adaptive Sync or User HDMI (2.0) Display Color Temperature Normal •Gamma: Select Gamma from Off, 1.8, 2.0, 2.2, or 2.4. Image Setup Gamma •Hue: Adjust value from 0 - 100. Color Gaming Setup Saturation...
Need help?
Do you have a question about the PX246 Wave and is the answer not in the manual?
Questions and answers