Table of Contents
Advertisement
Quick Links
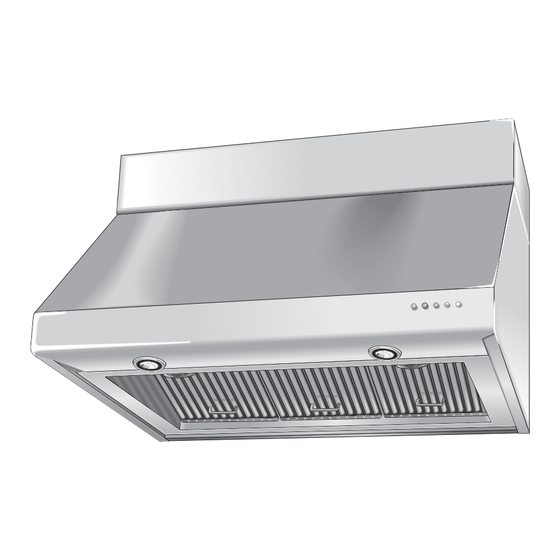
EUROCHEF - PRO WALL HOOD
EUROCHEF - PRO WALL HOOD
Shown with accessory Duct Cover Kit and accessory Warming Lamp Kit
Air-2
INSTALLATION INSTRUCTIONS
APPROVED FOR ALL RESIDENTIAL APPLIANCES
FOR RESIDENTIAL USE ONLY
PLEASE READ ENTIRE INSTRUCTIONS BEFORE PROCEEDING.
INSTALLATION MUST COMPLY WITH ALL LOCAL CODES.
IMPORTANT:
Save these Instructions for the Local Electrical Inspector's use.
INSTALLER:
Leave these Instructions with this unit for the owner.
OWNER:
Retain these instructions for future reference.
Turn off power circuit at service panel and lock out panel
before wiring this appliance.
REQUIREMENT: 120VAC, 60 Hz. 20A Branch Circuit
READ AND SAVE THESE INSTRUCTIONS
41 MERCEDES WAY SUITE 25 EDGEWOOD NEW YORK 11717 – TEL. 866-844-6566
WWW.DELONGHIMAJORAPPLIANCES.COM
SAFETY WARNING
EUROCHEF U.S.A.
WWW.DELONGHI RANGES.COM
3
1
2
TIMER
1
Advertisement
Table of Contents

Related Manuals for DeLonghi EUROCHEF - PRO


Summary of Contents for DeLonghi EUROCHEF - PRO
-
Page 1: Installation Instructions
EUROCHEF - PRO WALL HOOD EUROCHEF - PRO WALL HOOD INSTALLATION INSTRUCTIONS Shown with accessory Duct Cover Kit and accessory Warming Lamp Kit APPROVED FOR ALL RESIDENTIAL APPLIANCES PLEASE READ ENTIRE INSTRUCTIONS BEFORE PROCEEDING. INSTALLATION MUST COMPLY WITH ALL LOCAL CODES. - Page 2 EUROCHEF - PRO WALL HOOD HOODS 24” range hood with 600 CFM blower 30” range hood with 600 CFM blower 36” range hood with 600 CFM blower 48” range hood with 1200 CFM blower ACCESSORIES WARMING LAMP KIT Includes 175W Warming Lamps, rocker switches, quick connect wiring. Field installable.
-
Page 3: Considerations Before Installing Hood
EUROCHEF - PRO WALL HOOD READ THESE INSTRUCTIONS COMPLETELY AND CAREFULLY WARNING TO REDUCE THE RISK OF FIRE, ELECTRICAL SHOCK OR INJURY TO PERSONS, OBSERVE THE FOLLOWING: A. Use this unit only in the manner intended by the manufac- turer. If you have any questions, contact the manufacturer. -
Page 4: Table Of Contents
EUROCHEF - PRO WALL HOOD CONTENTS AND PAGE NUMBER Product Dimensions... pg.4 Advance Planning...pg.5 Using Duct Cover Accessories... pg.5 Tools and Materials Required ... pg.5 Remove the packaging... pg.6 Parts Provided... pg.6 Step 1: Determine Ductwork and Wiring Locations... pg.7 Step 2: Prepare hood for installation... -
Page 5: Advance Planning
EUROCHEF - PRO WALL HOOD ADVANCE PLANNING Cabinetry and electrical placement for 24-inch deep wall hoods. USING DUCT COVER ACCESSORIES To avoid gaps, plan the hood installation height for duct cover use. Recirculating Kit Cover 4” (if used) 1. Duct covers and Recirculating Kit covers are stackable. -
Page 6: Parts Provided
EUROCHEF - PRO WALL HOOD REMOVE THE RANGEHOOD DO NOT GRAB BODY HERE GRAB BODY HERE LOCATION OF COMPONENTS PARTS PROVIDED Locate the parts packed with the hood. Grease Trays (2 with 24”, 30” models) (3 with 36” models) (4 with 48” models) Stainless Steel Grease Filters (2 with 24”, 30”... -
Page 7: Step 1: Determine Ductwork And Wiring Locations
EUROCHEF - PRO WALL HOOD STEP 1 DETERMINE HOOD, DUCTWORK AND WIRING LOCATIONS • Use a level to draw the cooktop centerline vertically up the wall to the ceiling. • Measure desired distance from the bottom of the hood to the cooking surface, 24"... - Page 8 EUROCHEF - PRO WALL HOOD BLOWER POSITION CHART Hood size 24” 30” 30” 36” 36” 48” (*) with Blower Upgrade Kit BLOWER POSITION OPTION model 24 Vertical Discharge model 24 Horizontal Discharge Motor Recirculating Kit option model 30 36 Vertical Discharge...
-
Page 9: Security Screw
EUROCHEF - PRO WALL HOOD IF CHANGING BLOWER POSITION 1. Disconnect motor from power supply 2. Remove Blower security screw from blower bracket and remove blower. 3. Loosen 4 screws from blower bracket. 4. Shift blower to right and Remove Blower. -
Page 10: Step 3A: Install Hood Onto Wall
EUROCHEF - PRO WALL HOOD STEP 3A: INSTALL HOOD ONTO WALL (see enclosed template) SKIP THIS STEP IF INSTALLING BENEATH A SOFFIT OR CABINET, GO TO STEP 3B. • Affix enclosed paper template to wall. • From the line indicating the bottom of the hood, measure 17”... - Page 11 EUROCHEF - PRO WALL HOOD STEP 3B: ALTERNATE MOUNTING METHOD INSTALL HOOD TO SOFFIT OR BENEATH CABINETS SKIP THIS STEP IF USING WALL MOUNTING METHOD When necessary, the hood may be installed so that it is supported by the soffit.
-
Page 12: Step 4: Connect Ductwork
EUROCHEF - PRO WALL HOOD STEP 4: CONNECT DUCTWORK • Install ductwork. • Secure joints in ductwork and transition with sheetmetal screws and duct tape for an airtight seal. • ATTENTION: Be sure that screws do not hamper the dampers movement. -
Page 13: Step 7: Tighten Hanging Screws
EUROCHEF - PRO WALL HOOD STEP 7: TIGHTEN - HANGING SCREWS • With Filter Frame still removed from Step 2 • Adjust hood up to eliminate any gaps at ceiling. Tighten hanging screws. • Add (2) more security screws + Washers at wood bracket. -
Page 14: Step 9: Install Filter
EUROCHEF - PRO WALL HOOD STEP 9: INSTALL FILTER • Place filter drip trays into the bottom rear of the hood. • Insert top of grease filter first, than rotate bottom filter and drop into grease tray. • To remove the filters, grasp the handle, push the filter up and lift out. -
Page 15: Care And Use Instructions
EUROCHEF - PRO WALL HOOD CARE AND USE REPLACING HALOGEN BULB ROTATE • After waiting for lamp to be cool, twist off lamp bezel as shown, and pull out bulb. • Replace bulb with 20W G4 base halogen bulb purchased at your local hardware store. - Page 16 EUROCHEF - PRO WALL HOOD EUROCHEF U.S.A. 41 MERCEDES WAY SUITE 25 EDGEWOOD NEW YORK 11717 – TEL. 866-844-6566 WWW.DELONGHIMAJORAPPLIANCES.COM WWW.DELONGHI RANGES.COM Air-2...
Need help?
Do you have a question about the EUROCHEF - PRO and is the answer not in the manual?
Questions and answers