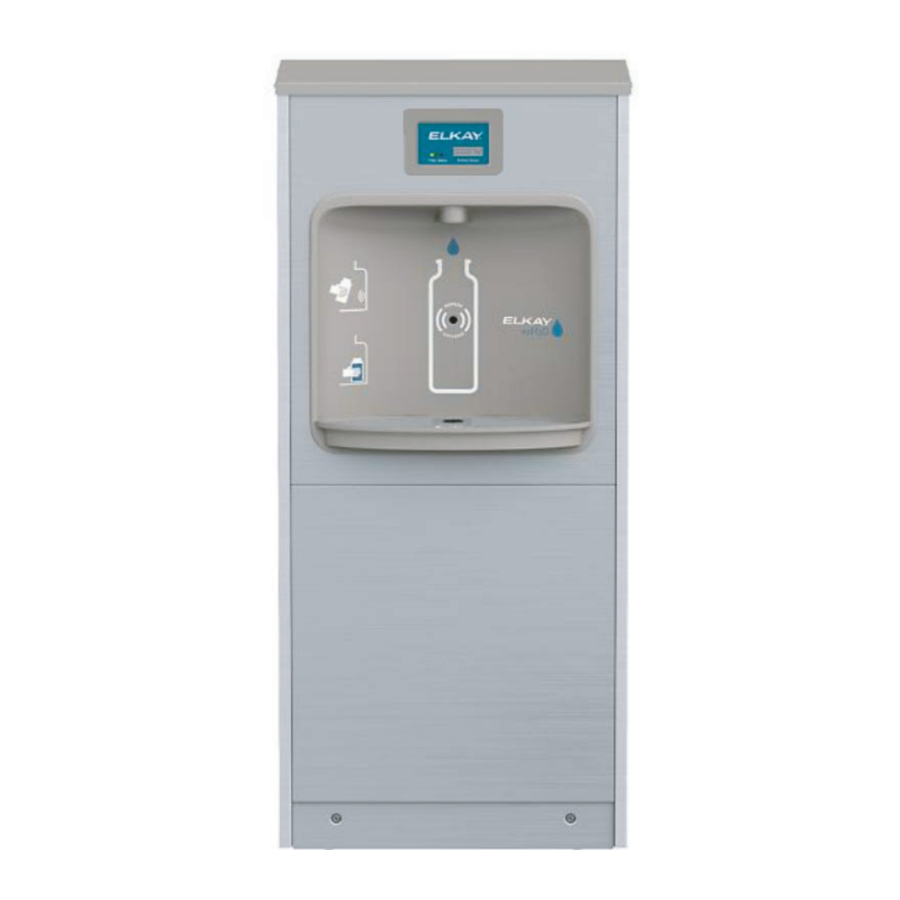
Elkay EZH2O Manual
- Installation manual (21 pages) ,
- Installation, care & use manual (9 pages) ,
- Care & use manual (9 pages)
Advertisement
- 1 Pre-installation steps for Connected models only
- 2 General Information
- 3 Device Rough-In
- 4 Tools and Supplies
- 5 Preparation
- 6 Installation of the Product
- 7 Startup
- 8 Accessing the Programming Button
- 9 Cleaning Instruction
- 10 Filter Cartridge Replacement for Filtered Units Only
- 11 Wiring Diagrams
- 12 Programming Instruction
- 13 Enhanced Unit Error Codes
- 14 Safety
- 15 Contact Information
- 16 Documents / Resources
Pre-installation steps for Connected models only
Install Zurn Gateway and Register Product in plumbSMART
- Install Zurn Gateway (required and sold separately) per the gateway instructions manual, if an existing gateway is not within communication range.
- Be sure the gateway is powered on and connected (per gateway installation instructions) prior to installing your bottle filler. Serial number located on back of the Gateway, is required to register the gateway to your tenant
- If you have not already set up an tenant account and your administrator access, request at
844-987-6737 or
zurnconnectedproducts@zurn.com - Log into plumbsmart.zurn.com
- Register Connected product in plumbSMART using plumbSMART Registration ID located on plumbSMART ID Registration Label, (see Fig. 4). (Watch How-To videos to get started. Located in the support section inside the portal.)


Cancer and Reproductive Harm - www.P65Warnings.ca.gov
General Information
Installation Manual
Read all instructions carefully BEFORE starting the installation. and familiarize yourself with the various parts of this product.
This manual contains step-by-step installation, instructions for the DSSBF8S series bottle filling stations. Followed carefully, these instructions will result in troublefree installation of this Elkay Manufacturing Company (Elkay) product.
Any deviations, additions, and/or deletions from the described methods, without prior written approval of Elkay, will void the warranty covering this product. Make sure the installation and use of this product meets all local, state, and federal plumbing and electrical codes
Save these instructions for future reference
To avoid product or property damage, personal injury, or even possible death, carefully read, understand, and follow all the instructions in this Installation & Use Manual before installing his product.
Improper installation of this product could cause a dangerous situation that results in injury or death.
Do not operate power tools unless you read and understand the instructions and warnings in this and all other applicable labels or manuals. Proper use of tools and the products described in this guide is your responsibility.
Failure to follow these instructions could result in personal injuries, water damage, and other damage to floors, pipes, walls, and other portions of your building or home.

Serial Number Location

Please use the serial number located on the underside of the water cooler when contacting us with questions concerning the installation of this product.
Device Rough-In

NOTE:
NEW INSTALLATIONS MUST USE GROUND FAULT CIRCUIT INTRUPTER (GFCI) IT IS HIGHLY RECOMMENDED THAT THE CIRCUIT BE DEDICATED AND THE LOAD PROTECTION BE SIZED FOR 20 AMPS.
NOTE:
INSURE PROPER VENTILATION BY MAINTAINING 4" (102mm) MINIMUM CLEARANCE FROM THE CABINET LOUVERS TO THE WALL ON EACH SIDE OF THE COOLER.
Tools and Supplies
Tools Required
| Tool | Used For |
| Power Drill | Installation of anchor fasteners for securing unit to floor |
| Adjustable Pliers | Installation of P-trap |
| Adjustable Wrench | Installation of water inlet valve |
| Hacksaw | Trimming waste outlet pipe |
| Flat Blade Screwdriver | Adjustment of pressure regulator and coldness control valve |
| 5/16" Nut Driver | Removal of mounting bracket and front panel |
| Tubing Cutters | To trim excess poly tube |
| Phillips Screwdriver | To install the top access panel on top of the cooler unit |
Installer-Supplied Parts
| Description | Qty. |
| Fasteners to anchor unit to floor (varies due to flooring surface) | 2 |
| Flat washers | 2 |
| P-trap with 1-1/2" inlet (single unit) | 1 |
| Quarter turn shut-off valve with angled 3/8" outlet (filtered units) | 1 |
Preparation
General Information
- This water cooler is designed for indoor use only and should not be installed outdoors or in a humid environment. A water supply pressure below
NOTICE
20 psi will result in decreased water flow through the unit and damage to the product. A pressure above 105 psi will also cause damage to the product.
- Make sure the water supply pressure to the product is between 20 and 105 psi. The filtered units require 40 psi minimum water pressure.
- Use care when opening and removing the packaging to prevent damage to the product.
- Inspect the product for any shipping damage and report it immediately to the location of purchase. Installation of a damaged product will void the warranty.
- Confirm that all parts have been included for the proper installation of this product. Contact the location of purchase if damaged parts are found.


NOTICE
Make sure no electrical wiring, potable water inlet pipes, or drain water outlet pipes will be damaged during installation of the product. Damage to any of these items can cause electrical damage, fire, and/or water damage.
- Shut off the water supply source and disconnect power to the electrical outlet being used to operate the product before starting installation.
NOTICE
Mounting hardware to be supplied by customer.
Water/Waste and Electrical Locations
This section contains general information for the required utilities for the cooler. Use the Location Drawing in each section to determine the exact location of the utilities.
- Install water supply in accordance with local plumbing codes.
- Use at least 3/8" O.D. unplated copper tube for supply line.
- Pipe should extend 3" (76mm) maximum from wall.
- Install a quarter-turn, installer supplied, shut-off valve.
NOTICE
Connect shut-off valve to water inlet. Do not use a piercing-type saddle valve for supply water which will reduces water flow and clogs easier.
Note: This water cooler has been designed and built to provide water to the user which has not been altered by materials in the cooler waterways. The grounding of electrical equipment such as telephones, computers, etc. to water lines is a common procedure. The grounding may be in the building but may also occur away from the building. This grounding can cause electrical feedback into a water cooler creating an electrolysis, which creates a metallic taste of causes an increase in the metal content of the water.
NOTICE
Water cooler must be connected to the water supply using a dielectric coupling. The cooler is furnished with a non-metallic strainer which meets this requirement. The drain trap which is provided by the installer should also be plastic to completely isolate the cooler from the building plumbing system.
- Install a waste water drain.
- Waste outlet must be minimum 1-1/4" O.D. for single units.
- Pipe should extend 2" (50mm) from wall.
- Install a grounded, three-prong electrical outlet on a dedicated circuit.
- 115 Volt, 60 Hz AC.
- Install a dedicated 20A fused circuit.
- Ground-fault circuit interrupter (GFCI) protection is required by the National Electrical Code (NFPA 70). For optimal performance a 20 amp hospital grade GFCI protection device is suggested.

To prevent electrical shock, fire, or electrocution, install a grounded three-prong outlet.
Do not modify supplied power cord.
Do not use an adapter or extension cord.
SAFETY INSTRUCTIONS
To ensure proper electrical safety, the electrical supply circuit should have GFCI protection and AFCI protection, as required by federal and local electrical safety codes and standards.
Installation of the Product

See Figs. 7-10
| 115V PARTS LIST | ||
| ITEM NO. | PART NO. | DESCRIPTION |
| 1 | 36287C | Power Cord |
| 2 | *36322C | Compressor Serv. Pak EMIS70HHR |
| 3 | 0000000238 | Kit - Electricals /OL/Relay/Cvr |
| 4 | 56092C | Tubing - Poly (Cut To Length) |
| 5 | 66703C | Drier |
| 6 | 98773C | Kit - Cold Control/Screws |
| 7 | 98775C | Kit - Fan Motor Assy/Blade/Motor/Shroud/Nut |
| 8 | 98776C | Kit - Condenser/Drier |
| NS | 98777C | Kit - Compr Mtg Hdwe |
| 10 | 98778C | Kit - 66576C Heatx/Drier |
| 11 | 1000004544 | Alpha Numeric LED Board (Enhanced Only) |
| 2000000832 | Alpha Numeric LED Board (Connected Only) | |
| 12 | 1000005219 | Kit - IR Sensor K+ |
| 13 | 1000004573 | Kit - Solenoid 120V (BF) |
| 14 | 98546C | Kit - Aerator Replacement |
| 15 | 1000005077 | Nameplate - Elkay Filtered |
| NS | 98549C | Kit - Hardware & Waterway (BF) |
| NS | 1000004546 | Harness - Bottle Filler |
| NS | 1000004549 | Harness - LED/IR Board |
| NS | 1000004547 | Harness - Cooler |
| NS | 1100000025 | Endpoint Board Service Kit |
NS = Not Shown
*INCLUDES RELAY & OVERLOAD. IF UNDER WARRANTY, REPLACE WITH SAME COMPRESSOR USED IN ORIGINAL ASSEMBLY.
NOTE: All correspondence pertaining to any of the above water coolers or orders for repair parts MUST include Model No. and Serial No. of cooler, name and part number of replacement part.
- Remove the drain access panel by removing the 5/16" hex screws on the rear side of the cooler unit.

- Position the cooler unit facing front side.

- Remove the lower front panel by removing the two hex screws on the cooler unit using a 5/16" socket or nut driver.

- Take the filter box and drain kit package out of the cooler unit.
Note: Filter box and drain kit are packed inside the cooler unit during shipment.

- Attach the nut, the seal, and the elbow tube to the drain outlet and tighten it fully.

- Connect one end of P-trap to the water drain tube and other end to the drain outlet.
Note: P-trap is installer supplied part.

- Remove the top access panel by removing the four phillips screws on the top of the cooler unit using a phillips screwdriver.

- Connect the unit water line to shut-off valve.
Note: Shut-off valve not shown (installer supplied part). - Connect the water inlet tube to the inlet of filter assembly.

- Installation of filter.

- Remove the filter from the carton.
- Remove the protective cap.
- Mark the current date on the water filter label.
- Attach the filter to the filter head with label facing outward by firmly inserting into the head and by rotating the filter head clockwise, if required.


Note: Filter label should be readable from the front of the filter during installation.
- Use the four phillips screws to install the top access panel on top of the cooler unit. Tighten the four phillips screws fully using a phillips screwdriver.

- Secure the cooler unit to the floor using the existing holes in the base plate with anchor fasteners.


Startup
- Make sure that there are no leaks on the drain connections and installed as per local regulations.
- Plug-in the water cooler unit.
- Once power is applied to the bottle filler, the GREEN LED light will illuminate showing good filter status along with the LCD Bottle Counter.
- Verify proper dispensing by placing cup or any object infront of sensor area and verify water dispenses.
Note: The first initial dispenses might have air in line which may cause a sputter. This will be eliminated once all air is purged from the line.

- Check all the lines and connections for water leaks. Repair connections if necessary.
- Dispense at least two gallons of water to bleed off any trapped air from supply lines and fine carbon particles from the filter. If there are no leaks and unit is functioning correctly, re-install the front cover by installing the two hex screws on the bottom side of the cooler using a 5/16" socket or nut driver.

- Upon initial startup, the plastic bottles saved indicator panel should show several bottles saved due to the water used to initially start up of the unit.


| GREEN: | 0 - 80% of Filter Life or 0 - 11 Months. |
| YELLOW: | 80 - 100% of Filter Life or 11 - 12 Months (Whichever Comes First). |
| RED: | 100% Plus of Filter Life or 12 Months (Whichever Comes First). |
Accessing the Programming Button
- Remove the bottle filler top cover by removing the four phillips screws using a phillips screwdriver. Do not discard the screws, they are required for reassembly.
- Locate the programming button at the top left side of the unit on the control board.
Cleaning Instruction
Stainless Steel
- General Cleaning: Use an ordinary mild detergent and soft cloth, rinse and towel dry.
- Steel soap pads should never be used; particles can adhere to a stainless steel basin surface and will eventually rust.
- Light scratches are normal for stainless steel over time they will blend into the uniform finish pattern.
Plastic Components
- General cleaning: Use an ordinary mild detergent and soft cloth, rinse and towel dry.
- Wiping the surface clean to remove debris or build up will not hurt the antimicrobial properties.
Filter Cartridge Replacement for Filtered Units Only

See Figs. 5
| WATERSENTRY Filter Detail | ||
| WATERSENTRY FILTER PARTS LIST | ||
| ITEM NO. | PART NO. | DESCRIPTION |
| 1 | 51300C | Filter 3000 Gal (standard) |
| 2 | 51600C | Filter 6000 Gal (high capacity) |
| 3 | 71300C | Filter 2250 Gal (PFOA/PFAS) |
| 4 | 1000005214 | Kit - Filter Head Fittings includes John Guest Fittings & 3/8" Elbow Filter Bracket/Screws |
| 5 | 1000004409 | Kit - NFC Board/Cover |
- Shut off water supply using the shut off valve. Turn water shut off valve handle to the OFF position (clockwise).
Note: This view may be different depending on model and configuration.

- Activate the water dispenser with a water bottle to relieve pressure and access water in the water line.

- Shut OFF power to the unit by unplugging.

- Remove the top access panel by removing the four phillips screws on the top of the cooler unit using a phillips screwdriver.

- Locate current filter on the top of cooler unit.

- Place a towel under the filter to absorb any water that leaks out of the filter when it is removed.
- Twist the filter clockwise until it is disengaged. Remove the filter and keep upright; remove towel.

- Drain the filter before disposing in a trash can.
- Remove protective cap from the new filter.

- Mark the current date on the filter label.
- Attach the filter to the filter head with label facing outward by firmly inserting into the head and by rotating the filter head counterclockwise, if required.
Note: Filter label should be readable from the front of the filter during installation. (see Fig. 3)

![]()
- Restore power back to the unit.
- Turn on water supply.
- Verify proper dispensing by placing cup or any object in front of sensor area and verify water dispenses. Dispense at least two gallons of water to bleed off any trapped air from supply lines and fine carbon particles from the filter.

- Check all the lines and connections for water leaks. Repair connections if necessary.
Note: Once power is applied to the bottle filler, the GREEN LED light should illuminate showing good filter status along with the LCD Bottle Counter.


| GREEN: | 0 - 80% of Filter Life or 0 - 11 Months (Whichever Comes First). |
| YELLOW: | 80 - 100% of Filter Life or 11 - 12 Months (Whichever Comes First). |
| RED: | 100% Plus of Filter Life or 12 Months (Whichever Comes First). |
- Attach the top cover on the cooler unit.

- Install the 4 phillips screws using a phillips screwdriver.

Wiring Diagrams

See Figs. 1-2
- INGESTION HAZARD: This product contains a button cell or coin battery.
- DEATH or serious injury can occur if ingested.
![]()
A swallowed button cell or coin battery can cause Internal Chemical Burns in as little as 2 hours.- KEEP new and used batteries OUT OF REACH of CHILDREN
- Seek immediate medical attention if a battery is suspected to be swallowed or inserted inside any part of the body.


OPERATION OF QUICK CONNECT FITTINGS (Fig. 6)
Programming Instruction

Enhanced Unit Error Codes
| Error Code | Error Description | Corrective Action |
| Bottle filler area obstructed |
| |
E013 | Missing or Incompatible Filter |
|
E013 & E014 | Missing NFC Board |
|

Scan for trouble shooting and to sign up for auto replenishment of authentic Elkay filters.
Safety
Think Safety
Before performing any work, read and understand the safety instructions in this manual.
General
The Elkay Manufacturing Company (Elkay) cannot anticipate every possible circumstance that might involve a potential hazard during the installation or maintenance of this product. The warnings and instructions in this Installation Manual are, therefore, not all-inclusive. If a tool, installation procedure, or work method that is not specifically recommended by Elkay is used, you must be satisfied that it is safe for yourself and others. You should also make sure that the product will not be damaged by the methods you choose.
Most work related accidents are caused by failure to observe basic safety rules or precautions. An accident can often be avoided by recognizing potentially hazardous situations before an accident occurs. As you install and maintain this product, you must be alert to potential hazards. You should also have the necessary training, skills, and tools to perform any installation or maintenance procedure.
Safety Alert Symbol
This is the safety alert symbol. It is used to alert you to potential personal injury hazards. Obey all safety messages that follow this symbol to avoid possible injury or death.
This manual contains WARNINGS, CAUTIONS, NOTICES, SAFETY INSTRUCTIONS, and NOTES which must be followed to prevent the possibility of improper service, damage to the equipment, personal injury, or death. The following key words call the reader's attention to potential hazards.
Hazards are identified by the "Safety Alert Symbol" and followed by a signal word such as "WARNING" or "CAUTION".
Personal Safety
These warnings indicate a potentially hazardous situation which, if not avoided, could result in serious injury or death. Follow all instructions related to the installation and/or maintenance of this product (unit).
 Personal Protection
Be sure to use all personal protective equipment, such as sturdy safety glasses, work shoes, hearing protection, and cut resistant gloves, whenever necessary, to ensure your own safety.

To avoid eye injury, always wear protective glasses with side shields when using power tools. Also, make sure no one else can be injured by flying particles when using power tools.

To prevent possible damage to your hearing, always wear ear protection, such as earmuffs or earplugs, when using power tools

This product is heavy and can cause bodily injury, due to its weight or if the unit is dropped. Use two people to lift the product when unpacking the unit or installing it onto the hanger brackets.

Wear protective gloves during installation to protect against sharp edges from sheet metal components.

Lifting Hazard
- To avoid personal injury, always use these proper lifting techniques and use two people to move heavy cartons.
- Use appropriate lifting devices to move the load.
- Always use two people when lifting heavy or bulky cartons. DO NOT attempt to lift objects that are too heavy.

Power Tool Hazard
To prevent personal injury or possible death, always follow the electrical safety recommendations of the power tool's manufacturer.
- Do not use power tools in an unsafe manner.
- Power tools should only be connected to a circuit protected by a ground-fault circuit interrupter (GFCI).
- If an extension cord is required, always use an OSHA approved extension cord.

Shock and Electrocution Hazards
Failure to follow these instructions could result in severe burns, significant injuries, and even death.


Water will conduct electric current to create a short circuit, resulting in injury or death.
- Never use electric power tools around water or wet floors/surfaces.
- Keep all liquids away from electrical cords and power tools.
- If an extension cord is required, always use an OSHA approved cord.
- DO NOT create a short circuit between a source of electricity and a liquid by being in contact with both simultaneously.

Contacting live electrical wiring with power tools or hand tools can cause serious injury or death.
- Make sure all related circuit breakers are turned OFF.
- Test for live circuits or wiring inside any wall where installation of the product requires cutting into a wall.

Prior to any maintenance, make sure the unit is unplugged and circuit breakers are turned OFF.

Prior to installation, test for live circuits or wiring inside the wall before cutting or drilling into the wall.

These cautions indicates a potentially hazardous situation which, if not avoided, may result in minor or moderate injury. Follow all instructions related to installation and/or maintenance of this product.

Tripping Hazard
Personal injury can result from tripping over power cords, tools, or other installation items. DO NOT leave items laying around the work area.

Cutting Hazard
The installation of this product may require using power tools.
Keep hands away from the cutting edge of any tool used in the installation of our product.
Placing fingers in or around the cutting blades could result in serious personal injury.

Use Proper Tools
Always use proper tools which are in good working condition during the installation of the product. Using tools other than those listed could adversely affect the product and could result in property damage.
Property Damage

Inspect Before Cutting
Make sure no electrical wiring or plumbing is present before cutting into a wall.
Contact Information
General Information
Elkay Manufacturing Company
1333 Butterfield Road
Suite 200 Downers Grove, IL 60515
Phone: 630.574.8484
Email: consumer@elkay.com
Website: http://www.elkay.com
USA/Canada Customer Care
Phone: 800.476.4106
Email: CustCare@Elkay.com
International Customer Care
Phone: 630.575.4755
Email: IntlCare@Elkay.com
Installation Services
Phone: 800.952.8064
Email: installservice@elkay.com
Website: http://www.elkay.com/contact-us/install
FOR PARTS, CONTACT YOUR LOCAL DISTRIBUTOR OR CALL 1.800.834.4816
REPAIR SERVICE INFORMATION TOLL FREE NUMBER 1.800.260.6640
ELKAY MANUFACTURING COMPANY • 1333 BUTTERFIELD ROAD • DOWNERS GROVE, IL 60515 • 630.574.8484 • www.elkay.com
Documents / Resources
References
![www.p65warnings.ca.gov]() http://www.p65warnings.ca.gov
http://www.p65warnings.ca.gov![www.elkay.com]() Elkay | Sinks, Faucets, Bottle Filling Stations, Drinking Fountains
Elkay | Sinks, Faucets, Bottle Filling Stations, Drinking Fountains![www.elkay.com]() Installation Services Form
Installation Services FormplumbSMART

Download manual
Here you can download full pdf version of manual, it may contain additional safety instructions, warranty information, FCC rules, etc.
Advertisement


Need help?
Do you have a question about the EZH2O and is the answer not in the manual?
Questions and answers