GE JP389BJBB - 30" Electric Modular Cooktop Use And Care Manual
"select-top" built-in modular downdraft cooktop
Hide thumbs
Also See for JP389BJBB - 30" Electric Modular Cooktop:
- Use and care & installation manual (40 pages)
Table of Contents
Advertisement
Quick Links
"Select-Top" Built-In Modular Downdraft Cooktop
_/_ iii I
Safety
Instructions
.............. 4, 5
Operating
Instructions,
Tips
Coil Surface
Unit Module
............. 10, 11
Controls
..................................................
9
Cooktop
Comparison
............................
8
Cooktop
Vent System
.........................
22
Features
.............................................
6, 7
Griddle
Accessory
.........................
18-20
Griddle
Cooking
Guide ....................
20
Grill Module
...................................
14-17
Grill Cooking
Guide .........................
17
Home
Canning
Tips ............................
21
Radiant
Module
.............................
12-14
_---_
Problem
Solver ...................35, 36
Installation
Instructions
........................................................
28-34
Consumer
Services
...............
39
Important
Phone Numbers
................
39
Model
and Serial
Numbers
................... 2
Modules
and Accessories
....................
3
Warranty
................................
Back Cover
Care
and
Am
m
L;teanmg
............ 23-27
Coil Surface
Unit Module
...................
26
Control
Panel and Knobs ...................
23
Grease
Collector
Jar ...........................
23
Griddle
Accessory
...............................
25
Grill Cover ............................................
25
Grill Module
.........................................
25
Radiant
Module
..............................
26, 27
Vent System .........................................
24
I Model:
JP389
]
GEAppliances.com
Advertisement
Table of Contents

Related Manuals for GE JP389BJBB - 30" Electric Modular Cooktop


Summary of Contents for GE JP389BJBB - 30" Electric Modular Cooktop
- Page 1 "Select-Top" Built-In Modular Downdraft Cooktop Safety Instructions ....4, 5 _---_ Problem Solver ....35, 36 Installation Instructions Operating Instructions, Tips ............28-34 Coil Surface Unit Module ..... 10, 11 Controls .........._/_ iii I Cooktop Comparison ......Cooktop Vent System ......
-
Page 2: Model And Serial Numbers
HELP US HELP YOU... Before using your cooktop, If you received a damaged cooktop... read this guide carefully. Immediately contact the dealer (or builder) that sold you the cooktop. It is intended to help you operate and maintain your new cooktop properly. Save time and money. -
Page 3: Modules And Accessories
GEAppliances.com MODULES AND ACCESSORIES General Information A full selection of modules are available See each module section for specific instructions for installing and removing that module. the cooktop. The modules can be interchanged quickly and easily. Each module has an electrical To purchase, contact your nearest GE Appliances plug which fits into a receptacle... -
Page 4: Important Safety Instructions
IMPORTANT SAFETY INSTRUCTIONS Read all instructions before using this appliance. When using eleclrical appliances, basic safety • Do not let cooking grease or other flammable materials accumulate on or near the cooktop. precautions should be followed, including tile following: • Do not store flammable materials near the •... - Page 5 GEAppliance_com • Only certain types of glass, glass/ceramic, • Never use the glass cooktop surface as a cutting earthenware or other glazed containers are board {on radiant modules only). suitable for cooktop service: others may break • Do nol place or store items on top of the glass because of the sudden change in temperature.
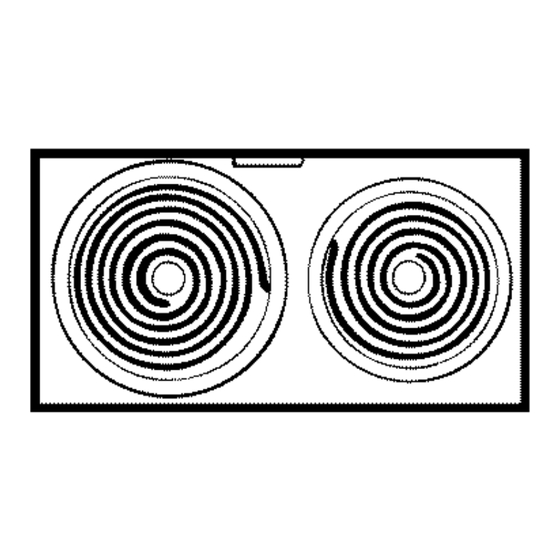
- Page 6 FEATURES OF YOUR COOKTOP /--7 • ,,// ../_ ¢ ® ® €...
- Page 7 GEAppliances.com 1 Radiant Surface Unit Module 3, 5, 8, 12-14, 26, 27 2 Griddle Plate Accessory 3, 4, Use with the Grill Module heating element 18-20, and reflector pan. 3 Grill Grate 4, 14-17, Part of the Grill Module. Use with the heating element and the reflector pan.
- Page 8 DOES THIS COOKTOP COMPARE YOUR ONE? Your new modular cooktop may have several types of The following chart will help you to understand cooking surface units. You will notice some differences differences among the various cooking surface units when you use each one. and how they differ from others you may have used in the past.
-
Page 9: How To Set The Controls
GEAppliances.com CONTROLS Surface Cooking With Infinite Heat Controls At both OFF and HI the control "clicks" into position. You may hear slight "clicking" sounds during cooking, indicating the control is keeping the unit at the heat level you set. Switching heats to a higher setting always shows a quicker change than switching to a lower setting. -
Page 10: Coil Surface Unit Module
COIL SURFACE UNIT MODULE How to Insert the Module 1. Be sure the controls are turned 2. Slide the module toward the 3. Lower the inside edge of the to OFF. To install the module, outlet in the side of the cooktop module into the cooktop until it is flush with the cooking... -
Page 11: Deep Fat Frying
GEAppliances.com Deep Fat Frying Do not overfill cookware with fat that may spill over when adding food. Frosty foods bubble vigorously. Watch food frying at high temperatures. Keep cooktop and hood clean from grease. Wok Cooking We recommend that Do not use woks that you use only a fiat- have support rings. -
Page 12: Radiant Module
RADIANT MODULE How to Insert the Module 1. Be sure the controls are turned 2. Slide the module toward the 3. Lower the inside edge of the to OFF. To install the module, outlet in the side of the cooktop module into the cooktop until it is flush with the cooking... - Page 13 Types of Cookware The following intbrmation will help you choose Glass-ceramic: usable, but not recommended cookware which will give good performance. Poor perforraance. May scratch surface. Stoneware: usable, but not recommended Stainless Steel: highly recommended Especially good with a sandwich clad bottom. The Poor performance.
-
Page 14: Grill Module
RADIANT MODULE (continued) CAUTION • Do not slide cookware across the • Never cook directly on the glass. Always use cookware. cooktop because it can scratch the glass--the glass is scratch resistant, not scratch proof. • Do not use the surface as a •... - Page 15 GEAppliances.com Removing the Grill Module When removing the parts of the grill module to clean, be sure all switches are in the OFF position and the module is cool. Remove the grill grate and then slide the heating element toward the center of the cooktop until it is unplugged.
- Page 16 GRILL MODULE (continued) Grill Tips • Do not leave the grill unattended while in use. • Allow space between foods when placing them on the grill. Air needs to circulate around the food for • Be sure to preheat according to the cooking guide.
-
Page 17: Grill Cooking Guide
GEAppliances.com GRILL COOKING GUIDE Do not leave cooktop unattended during "preheat" (knobs turned to HI) or any time the knobs are turned to HI with food on the grill. 1. Preheat 5 minutes before grilling. Refer to the setting in the guide for a particular food. -
Page 18: Griddle Accessory
GRIDDLE ACCESSORY You must have the grill module to use the griddle accessory. Your non-stick coated griddle provides an extra-large cooking surface for meats, pancakes, or other food usually prepared in a frying pan or electric skillet. WARNING: Do not use griddle modules JXDD43 JXDD46 with these cooktops. -
Page 19: Griddle Tips
GEAppliances.com How to Set The Griddle Controls Front and rear sections of the griddle heating element are controlled separately. Heat only half the griddle surface for cooking small portions or set each half at a different temperature for cooking different types of foods. Push in the control knob depending on which side of the cooktop... -
Page 20: Griddle Cooking Guide
GRIDDLE ACCESSORY (continued) Questions and Answers Q. Can my griddle be switched to the other side of Q. Do I need special cookware for use with the cooktop where it would be more convenient my griddle? for me? A. Avoid using metal cookware with sharp points or A. -
Page 21: Home Canning Tips
GEAppliances.com HOME CANNING TIPS HOWEVER, DO NOT USE LARGE DIAMETER Canning should be done on the Coil Surface Units or CANNERS OR OTHER LARGE DIAMETER POTS the Radiant Units only. FOR FRYING OR BOILING FOODS OTHER THAN Pots that extend beyond 1 inch of the surf'ace unit aJcenot WATER. -
Page 22: Cooktop Vent System
COOKTOP VENT SYSTEM The blower comes on automatically when the grill or griddle is turned on and turns off automatically when the grill or griddle is turned off. If the vent is turned on using the knob, the blower will not turn off automatically and must be turned off using the knob. -
Page 23: Care And Cleaning
GEAppliances.com CARE AND CLEANING NOTE: Let cooktop parts cool before touching or handling. Proper care and cleaning are important so your cooktop will give you efficient and satisfactory service. Follow these directions carefully caring for your cooktop to assure safe and proper maintenance. Porcelain Enamel Finish (onsomemodels) Brushed Chrome... -
Page 24: Vent System
CARE AND CLEANING (continued) Cooktop Wipe out tub with hot soapy water-- or a soap-filled or plastic scouring pad. Rinse with a damp cloth. Make sure the drain hole is not blocked. Clean with a cotton swab or toothpick. Vent System Before cleaning the vent grille, be sure exhaust... -
Page 25: Grill Grate
GEAppliances.com Modules CAUTION • Do not immerse plug-in surface units in liquids of any kind. • Be sure all controls are turned OFF before attempting to remove a module or heating element. • Do not bend the plug-in surface unit plug terminals. •... -
Page 26: Coil Surface Unit Module
CARE AND CLEANING (continued) Coil Surface Unit Module Clean the area surrounding the surface units Repeated lilting of the surface unit more than according to either the Brushed Chrome or Porcelain 1 inch above the drip pan can permanently damage the receptacle. -
Page 27: Glass Surface - Potential For Permanent Damage
GEAppliances.com Cleaning the Radiant Module (continued) Burned-On Residue Metal Marks and Scratches WARNING: DAMAGE to your glass surface 1. Be careful not to slide pots and pans across your occur if you use scrub pads other than BLUE radiant module. It will leave metal markings the surface. -
Page 28: Before You Begin
Electrical Requirements Before you begin CAUTION: FOR PERSONAL SAFETY, Read these instructions completely REMOVE HOUSE FUSE OR CIRCUIT carefully. BREAKER BEFORE BEGINNING Important--Save these instructions INSTALLATION. local inspector's use. This appliance must be supplied with the Important--Observe all governing codes proper w)ltage and frequency, as listed in these ordinances. - Page 29 Step I Step 2 Preparing for Installation Preparing the Base Cabinet Positioning the cooktop This cooktop is designed to fit easily into a variety of cabinets. Howeveg some cabinets may require The cooktop is designed to look best when centered modifications.
- Page 30 Step 4 Step 5A Attach the Blower Transition Duct Preparing the Countertop Clearance between inside front of cabinet and The blower transition duct is not packed rear of countertop cutout must be 2@A"in order with your cooMop. For all downward duct installations connect to a transition duct with a...
- Page 31 Step 5C Install ductwork, making male-female connections in direction of airflow as shown. Ducting's Equivalent Length Determine Flexible Secure all joints with sheet metal screws 1. Measure the actual amount of offset duct tape to assure airtight seal. (maximum 3" recommended). The effect upon Duct Tape Over Seam airflow is dependent...
- Page 32 TABLE1 Equivalent Number Equivalent Duct Pieces Length* x Used = Length Calculate Total Equivalent Ductwork Length 5" round Equivalent Number Equivalent to 31/4"x10" Duct Pieces Length*x Used = Length transition 5" round S" round 90° elbow 37 ft. X ( (_straight ft.)t= 10"...
- Page 33 Step 7 Tighten the clamping screw Install 112" Flexible Conduit with Supplied until the clamping Clamp tab is fully seated against the wire NOTE: A clamp compartment. has been included Clampin Screw with the cooktop Clamping for installing the Clamp flexible 1/2"...
- Page 34 Step 9 4-Conductor Branch Circuit When connecting cooktop to a 4-conductor Before Making Electrical Connections circuit, connect the red leads of the cooktop Note to Electrician: The power leads supplied the power supply to the branch circuit red lead; with this appliance are U.
- Page 35 GEAppliances.com QUESTIONS? USE THIS PROBLEM SOLVER PROBLEM POSSIBLE CAUSE MODULES • Difficulty may be in the main distribution panel of your house, caused by a NOT FUNCTIONING blown circuit fuse, a tripped circuit breaker, the main fuse oi"the main circuit PROPERLY breake1: depending on nature of the power supply.
-
Page 36: Problem Solver
PROBLEM SOLVER (continued) PROBLEM POSSIBLE CAUSE TINY SCRATCHES - Incorrect cleaning methods have been used. cookware with rough bottoms has may appear as cracks_ OR been used. or coarse particles (salt or sand) were between the cookware and the ABRASIONS ON RADIANT surface of cooktop. - Page 37 NOTES...
- Page 38 NOTES...
-
Page 39: Parts And Accessories
We'll Be There With the purchase of your new GE appliance, receive the assurance that if you ever need infbrmation or assistance fiom GE, we'll be there. M1 you have to do is call--toll-fiee! GEAppliances Website www.GEAppliances.com Have a question or need assistance with... -
Page 40: Full One-Year Warranty
This warranty gives you specific legal rights, and you may also have other rights which vary from state to state. To know what your legal rights are in your state, consult your local or state consumer affairs office or your state's Attorney General. Warrantor: General Electric Company If further...
Need help?
Do you have a question about the JP389BJBB - 30" Electric Modular Cooktop and is the answer not in the manual?
Questions and answers