Advertisement
INTRODUCTION
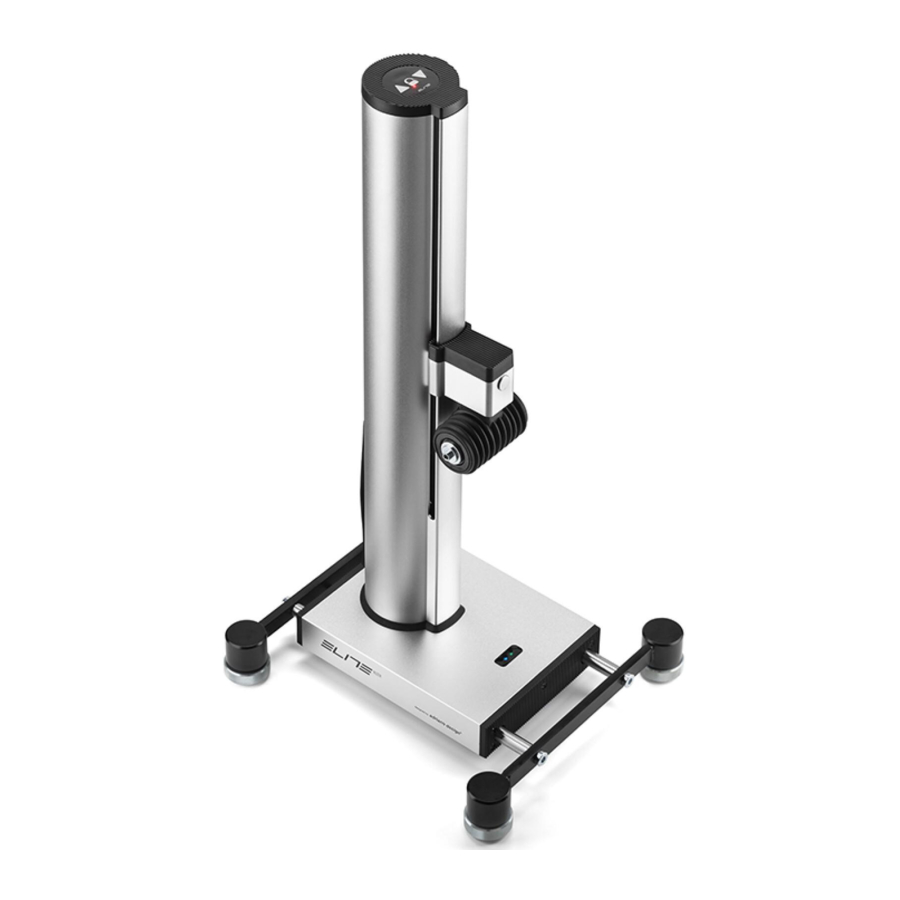
RIZER is a device that improves your home training. This device lets your bicycle tilt in order to replicate the gradient of the road you're on and lets the handlebar rotate, so working out at home is akin to cycling outdoors.
RIZER lets you simulate negative gradients up to -10% and positive up to 20%.
Another important feature is the ability to steer your handlebar. RIZER features a fork support so you can rotate the handlebar, an elastic system that drags the handlebar back to its central position. Moreover, there's also a sensor measuring the steering angle value, which is then sent to the software for an even more immersive simulation.

RIZER can be used and/or configured via the keyboard on its top part (Ref. Y) or via a control app.
Note: some functions / configurations are only available via the app. Here's a list of the features that can be configured via the app:
- creating and configuring profiles: profiles allow for an even more accurate simulation even with different bikes and/or users.
- adjusting zero level: this option lets you accurately set the RIZER so it's perfectly horizontal when simulating a flat surface.
- adjusting max or minimum gradient: you can set a limit to max or minimum gradient depending on the cyclist's needs. For instance, I don't feel confident when RIZER simulates any gradient above 15%. Or when at -10% the crank touches the floor.
YOU CAN FIND all the features that can be configured in the "User profiles" and "Advanced Settings" paragraph.
CONTROL APP
Elite developed a dedicated app to make it easier to configure the RIZER.
You don't need to use this app for the RIZER to work, though it contains a series of configurations to better address the user's needs.
The app is called RIZER and is available on the App Store (iOS) and Google Play (Android).

elitecy.com/launch-rizer-app-store


elitecy.com/launch-rizer-google-play

There are two ways to use the control app:
- during training, where you can display the current gradient simulated by the RIZER to change mode and/or gradient.
- to configure the RIZER, by accessing all of its parameters.
FIRST INSTALLATION
Please complete the following operations to use the RIZER device:
- install the bike on the RIZER;
- match up home trainer and RIZER.
The RIZER is now ready for use.
The RIZER also features more configurations for a more complete use; you can check them out by reading this manual.
INSTALLING THE BICYCLE
- Install the bicycle on a RIZER-compatible home trainer.
- Place the RIZER on a flat surface and operate on the adjustable feet by raising or lowering them as needed (Pic. 1).

- Connect the power supply and wait for the RIZER to conduct the zeroing procedure. The cursor will begin moving downwards and set itself about halfway on the vertical tube
- Insert the adapters in the RIZER fork support, choose them based on the diameter of the front wheel pin.
- Quick Release Adapter (Ref. B - Pic. 2)

- Thru-axle Adapter 12x100mm (Ref. C - Pic. 3)

- Thru-axle Adapter 15x100mm (Ref. D - Pic. 4)

- Thru-axle Adapter 15x110mm (Ref. E - Pic. 5)

- Quick Release Adapter (Ref. B - Pic. 2)
- Remove the front wheel of the bicycle and place the RIZER in front of the fork.


Installation on a Bicycle with Quick Release.
- Insert the quick release provided (Ref. F) on the RIZER wheel support (Pic. 6).

- Place the bicycle on the RIZER by laying the dropouts of the front wheel on the adapters. (Pic. 7)


Firmly and properly tighten the quick release. The pressure obtained must allow for the dropouts of the bicycle to remain locked onto the RIZER.
Installation on Bicycle with thru-axle.
- Place the bicycle on the RIZER, lining up the front dropouts with the holes of the adapter on the RIZER. (Pics 8-9)

- Insert the thru-axle through the fork and the adapters on the RIZER. (Pic. 10)


Firmly secure the thru-axle making sure it's properly tightened. The pressure obtained must allow the dropouts to remain locked onto the RIZER.
- Make sure the RIZER is properly centered by pulling the front feet towards the bicycle until the end position (Pic. 11).


- Make sure that the base of the RIZER is aligned with the bicycle. (Pic. 12)

- Before starting your workout, make sure that the fork is secured to the RIZER support by pushing/pulling it.


Repeat the aforementioned procedures as indicated in steps 8-10 before beginning each workout session.
Always use the RIZER on a flat surface.
HOME TRAINER PAIRING
In order to use the RIZER it is necessary to connect it to the home trainer you're using for your workout. To do so you must begin the pairing procedure. This procedure activates by pressing and holding the lock symbol ![]() on the top part of the RIZER for 3 seconds. When the LED light starts blinking the RIZER will search for home trainers close by and select the closest one based on the signal received. The same procedure can be activated via the RIZER control app.
on the top part of the RIZER for 3 seconds. When the LED light starts blinking the RIZER will search for home trainers close by and select the closest one based on the signal received. The same procedure can be activated via the RIZER control app.
Note: should there be multiple home trainers in the same room, we suggest turning off or at least move the home trainers that do not need to connect to the RIZER further away to avoid any mismatch.
Now the RIZER is fully configured and in working order. In order to use it with a simulation software, make sure that the LED light ![]() of the keyboard is on (Simulation mode)
of the keyboard is on (Simulation mode)
OPERATING THE UNIT
RIZER features 2 operating modes:
- MANUAL: RIZER only moves following the cyclist's commands.
- SIMULATION: RIZER automatically moves according to the simulation commands that the software sends to the home trainer.
MANUAL
MANUAL mode is selected when the LED light close the the "lock" ![]() symbol of the keyboard (Ref. Y) on the RIZER is turned off. Should the LED light be on, the SIMULATION mode is set and to get to MANUAL mode just tap the "lock"
symbol of the keyboard (Ref. Y) on the RIZER is turned off. Should the LED light be on, the SIMULATION mode is set and to get to MANUAL mode just tap the "lock" ![]() key on the keyboard; you can also do this via the RIZER app. In Manual mode the cyclist sets the tilt of the bicycle via the two arrow
key on the keyboard; you can also do this via the RIZER app. In Manual mode the cyclist sets the tilt of the bicycle via the two arrow ![]() keys on the RIZER keyboard or via the RIZER app.
keys on the RIZER keyboard or via the RIZER app.
By tapping the up / down key ![]() the RIZER increases / decreases the bicycle's tilt by 1%.
the RIZER increases / decreases the bicycle's tilt by 1%.
To ensure safety and make it easier to hop on the bicycle and step off it, RIZER automatically sets itself to zero after 5 seconds at home trainer speed 0 (zero).
Please check the "Safety Mode" paragraph for further info.
SIMULATION MODE
Simulation is selected when the LED light under the "lock" ![]() symbol on the RIZER keyboard is on. If the LED light is off (Manual mode) just tap on the "lock" to switch to Simulation mode. Modes can also be switched via the RIZER app.
symbol on the RIZER keyboard is on. If the LED light is off (Manual mode) just tap on the "lock" to switch to Simulation mode. Modes can also be switched via the RIZER app.
Tilt is automatically adjusted in simulation mode as a function of the road conditions that the home trainer is simulating. The software sends the home trainer the simulation command of a predetermined gradient and, then sends it to the RIZER which moves the cursor in order to create the slope indicated by the software.
To ensure safety and make it easier to hop on the bicycle and step off it, RIZER automatically sets itself to zero after 5 seconds at home trainer speed 0 (zero).
USING THE KEYBOARD AND THE APP
The keyboard (Ref. Y) activates the following main functions:
Home trainer pairing:
holding the lock key  for 3 seconds
Mode Change between Manual and Simulation*:
tap the lock key 
1% Tilt increase**: 
1% Tilt decrease**: 
Profile change***: 
* LED light close to the lock key indicates the current mode. LED light on ![]() indicates Simulation mode, while if it's off
indicates Simulation mode, while if it's off ![]() it indicates the Manual mode.
it indicates the Manual mode.
** Only works if the RIZER is in Manual mode
*** LED light blinks as many times as the selected profile number (for instance, Profile 3 → 3 blinks).
Control app manages the same functions as the keyboard and many other parameters.
HANDLEBAR ROTATION
Other than raising and lowering the bicycle's fork, RIZER also rotates the handlebar, thanks to the fork support configuration (Ref. X, Pic. 13).
Handlebar rotation is measured and data is sent via Bluetooth and ANT protocols to a software that elaborates its value and can activate other functions.
Unlike the gradient simulation, you must connect the RIZER directly to the software in the software configuration page for the device to enable the rotation angle.
This configuration changes from software to software. Please contact the software manufacturer to learn if it manages the handlebar rotation angle picked up by the RIZER and how to configure it.


Not all software connects to the RIZER steering function. Please check the Sterzo RIZER compatibility with the software/app manufacturer.
CONNECTIONS
For the gradient simulation to work the home trainer must send workout data via the ANT+ FE-C profile.
Note: Every Elite's interactive home trainer sends workout data via the ANT+ FE-C protocol even if they're connected via Bluetooth.
When a home trainer does not send workout data via ANT+ FE-C, the RIZER cannot work its Simulation mode.
To use handlebar rotation, RIZER sends data via both the ANT and Bluetooth protocols.
STATUS LED LIGHT
There are 3 (three) different types of LED light on the RIZER: 2 on its base that indicate connection status with the home trainer and/or training software; one on the keyboard that indicates the current mode.
LED lights on the base
The two LED lights on the base indicate the connection status.
Right LED light.
LED light off means that the RIZER has not conducted the pairing procedure with the home trainer. To use RIZER the pairing procedure with the home trainer must be conducted.
Blinking green LED light means the RIZER is waiting to connect to the home trainer.
A fixed green LED light means the RIZER has connected to the home trainer.
Left LED light.
Blinking blue light means the RIZER is ready to connect to the software.
A fixed blue LED light means the RIZER is connected to a software and/or the RIZER configuration app.
Both blue LED lights means that RIZER is updating its firmware.
Keyboard LED light
On: RIZER is in Simulation mode
Off: RIZER is in Manual mode
Blinking: LED light might blink after two different operations:
- home trainer pairing: after a pairing command the LED light starts blinking for a few dozen seconds.
- profile change: after a profile change command the LED light blinks as many times as the number of the selected profile, For instance, 4 blinks means that profile number #4 has been selected.
STAND-BY
RIZER enters stand-by mode after 15 minutes of inactivity, that is 15 minutes when home trainer speed is zero and the handlebar sensor picks up no movements.
To reactivate it just tap on one of the keys in the top part of the RIZER.
Alternatively, you can reactivate the RIZER by rotating the handlebar over 10° (left of right).
COMPATIBLE HOME TRAINERS
RIZER is compatible with all home trainers that support the ANT+FE-C profile, though for it to work properly with the RIZER, the home trainer must be able to let the bicycle frame rotate freely.
If it isn't so, using RIZER might risk damaging the frame in the spot where it's locked in with the home trainer.
Check RIZER compatibility with the home trainer manufacturer.
USER PROFILES
To make it possible for multiple people in the same family to use the RIZER or to be able to use different types of bicycles it is possible to configure up to 5 user profiles that can be set with parameters identifying the user and/or the bicycle being used.
PROFILE SETTINGS
Setting parameters in the profiles can only be done via the RIZER app. The user profile contains the following parameters:
Profile name: you can name each profile (10 digits max) so it's easier to identify;
Cyclist weight: on home trainers that do not send gradient data to the RIZER, the RIZER needs to know the cyclist weight to be able to accurately calculate the gradient to simulate.
Bicycle weight: on home trainers that do not send gradient data to the RIZER, the RIZER needs to know the bicycle weight to be able to accurately calculate the gradient to simulate.
Max gradient: value (percentage) that limits RIZER positive range. Value must be between 0% and 20%. For instance, by setting 15, RIZER will never get over 15% tilt;
Min gradient: value (percentage) that limits RIZER negative range. Value must be between 0% and 10%. For instance, by setting 5, RIZER will never get under -5% tilt; These settings are also useful should the crank touch the floor while simulating gradient.
Wheelbase: value expressed in mm that indicates the wheelbase of the two bicycle wheels, necessary to calculate the cursor range, to which the front fork is connected, to set the proper inclination
Safety: Safety parameter. This parameter enables or disables the function that brings the bicycle to zero tilt after 5 seconds at zero speed.
Default values for profile 1 are:
- name: default;
- bicycle weight: 10 Kg;
- cyclist weight 75 Kg;
- max gradient limit: 20%;
- min gradient limit: -10%;
- wheelbase: 1000 mm;
- safety: active;
To select a profile different from the first one you must first create it and fill out all the parameters. To create a new profile you must use the RIZER configuration app.
Once you've created one or more profiles the user can select any valid profile. The selected profile is indicated as "active".
By activating a profile, all parameters set at its inception are enabled.
A profile can be edited or deleted via the configuration app. Profile 1 can NEVER be deleted, though it can be renamed and/or edited by the user.
USING PROFILES
It is possible to activate one profile (only if valid) via the RIZER keyboard or via the configuration app.
To switch the active profile, press the ![]() keys simultaneously. RIZER will switch to the following available profile, displaying the activated profile number, via a correspondent number of blinks.
keys simultaneously. RIZER will switch to the following available profile, displaying the activated profile number, via a correspondent number of blinks.
We suggest only activating the user profiles you need for your workouts to facilitate switching profiles via the RIZER keyboard.
You can also switch the active profile via the RIZER app. Access the profiles screen and select the profile to activate.
ADVANCED SETTINGS
Most of the settings that follow need the RIZER app to be configured.
ZERO SETTING AND HOME TRAINER ALIGNMENT
After turning the RIZER on it moves the cursor downwards searching for the zero setting point. Once it's found, the cursor gets back to zero gradient height.
If the RIZER recognizes the home trainer it adapts the zero gradient position as a function of the home trainer it's connected to.
Should the RIZER not recognize the home trainer or for any reason should it not be perfectly level, it is still possible to edit the zero setting via the RIZER app.
Via the app you can raise or lower the zero setting of.5 mm at a time until the RIZER places the fork at the desired height.
RIZER automatically memorizes said position for the following workouts.
RESET
Via the use of the configuration app you can partially or totally reset the RIZER parameters and bring it back to its factory settings.
You can partially reset the parameters related to:
Profile reset
Paired home trainer reset
Difficulty parameter reset
Total reset to default values
DIFFICULTY
Some simulation software let you lower/raise the training parameters, so they're consistent with your physical abilities.
These parameters are sometimes called Difficulty.
This reduction/increase means a correspondent reduction/ increase of the tilt command that the software sends to the home trainer. For instance, if the difficulty settings is at 50% and the software plans for an 8% uphill climb, the command sent to the home trainer equals 4%. In normal conditions, as the RIZER receives its commands from the home trainer and not the software, it will receive a command to simulate 4% as the home trainer got to a 4% simulation command.
This parameter lets you correct this incorrect behavior so the RIZER can simulate the same gradient displayed on the software, though preserving the workout difficulty level.
In the previous example, after setting the Difficulty parameter with the same value set in the program (that is, 50%), RIZER raises the bicycle by properly tilting it at 8% even though the simulation software sent the home trainer a 4% command.
This parameter can only be modified via the RIZER app.
NEGATIVE TILT
The negative tilt value in some workout simulation software is reduced (halved with Zwift) so the pedalling experience isn't as real as it can be. For instance, if the gradient simulation is -4%, the home trainer is sent a -2% command and as a consequence the RIZER only tilts about -2%.
This parameter lets you take back the negative tilt value to the value indicated in the simulation control screen.
In the previous example, if you activate the double gradient option in the RIZER, even if the RIZER is sent a -2% command, the RIZER itself will correctly simulate the -4%. This parameter can only be modified via the RIZER app.
SAFETY MODE
The RIZER moves your bicycle during workout and can get to steep gradients (+20%).
This is all part of the simulation but it can also be potentially harmful. To reduce risks, after 5 seconds of zero speed on the RIZER, the RIZER itself will lower the gradient to zero.
This is a default safety configuration but it can be removed via the RIZER command app.

disabling this feature makes the user responsible for a reduction in safety.
NOTES
- Not all home trainers can send a gradient command received by the simulation software to the RIZER. RIZER also works with these home trainers as it calculates the equivalent gradient as a function of power, speed and cyclist weight data. Unfortunately this system is not as accurate as power and speed do not always change with the same promptness. In some cases, especially when there are sudden power and/or speed variations, there might be temporary gradient oscillations before the RIZER sets itself on the correct gradient. This system means that the RIZER can communicate with all home trainers sending workout data via the ANT+FE-C protocol, even though they're not specifically designed to work with the RIZER. Check the "compatible home trainers" paragraph for more info on RIZER compatibility.
- Wheelbase setting in the profile allows the RIZER to simulate gradient more accurately. RIZER still works even if the settings aren't there or they're inaccurate, though in these cases the gradient adjusted by the RIZER might not be accurate.
- RIZER can send steering angle measurements, though not every cycling workouts software can manage such information. Please contact the software producer to check its compatibility with the angle data sent by the RIZER.
- App is connected via the Bluetooth Smart protocol.
- In order to set the proper tilt for the bicycle, RIZER uses the "wheelbase" parameter to calculate the cursor movement. An inaccurate value makes the gradient simulated by the RIZER inaccurate even if it does not affect its operations.
MAINTENANCE
RIZER needs no specific maintenance.
Should you hear a creaking sound when the RIZER is moving you can lubricate the central lifting spindle.
We suggest using a high viscosity moist or wet chain lubricant to lubricate. Dry lubricants or low viscosity ones quickly evaporate so they do not last as long.
This is the procedure:
- Tap and hold the three keys at the same time for 5 seconds. The keyboard LED light will start blinking and the cursor will set itself at the minimum level.
- Once the fork support has been lowered, you can see the screw that closes the lubrication hole. Remove the screw.
- Lubricate the central pin with short sprays or a spray lubricant with straw.
- Tap one of the keys. RIZER will start moving up and down multiple times, spreading the lubricant all along the pin. Once this is done, the RIZER cursor will reposition at the minimum value.
- Close the lubricant hole with the screw you previously removed and make sure it does not stick out of the structure as it might limit the fork support (Ref. X) movement range during its operations.
- Tap one of the keys to complete the procedure. The cursor will reposition on the zero value.
Note: do not use unblocking or degreasing agents.
PACKAGING
Proper packaging is essential should the RIZER need to be sent to customer support or for other reasons.
- Remove the RIZER power supply cord;
- Place the RIZER in its original packaging;
On shipments, packages are often mistreated and undergo strongs shocks, so if the device isn't properly packed or it sits in a packaging different from the original one, it might get irreparably damaged. This type of damage is not covered by the warranty conditions.
Note: before shipping the RIZER or any of its components to our customer support, please check with Elite, its distributor or the retailer.
Any unplanned shipment might be rejected.
SAFETY WARNINGS
For your health and safety, please read the following instructions carefully before using this workout device.
- This device is not for users (including children) with limited physical, mental or sensorial abilities, or lack of experience and knowledge, unless supervised and instructed about it.
- Children should be supervised so they don't improperly play with the device. Children and pets should be kept far from the device during use - do not place your hands, other body parts or objects near its moving parts.
- Make sure to undergo a physical checkup that states you're in good health before working out on this device.
- Choose a training mode that's compatible with your health conditions and physical resistance level.
- Immediately stop using the device should you feel fatigue or pain while working out and consult your physician.
- Use the RIZER device with home trainers that allow for the rear axle of the bicycle to be locked onto the home trainer to workout (check Elite home trainers compatibility). A non-compatible home trainer might damage the frame of your bicycle in the spot where it locks onto the device.
- Only use the provided power supply. RIZER conformity to community directives might be voided if you do not use the provided power supply. Do not place it close to heat sources or under rugs or tissues that might accumulate in the power supply itself.
- Do not put rugs or other objects that might compromise its integrity over the power supply cable.
- Make sure the bicycle is properly installed on the RIZER before beginning any workout. Your bicycle must be in a vertical position and firmly installed on the proper supports as indicated in the instructions manual. Make sure it's properly in place by pushing and pulling the top tube of the frame and holding the saddle. Do not continue with your workout if the whole setting isn't properly installed and stable.
- RIZER has been designed for cyclists weighing up to 120 kg. Any more than that might cause permanent damages.
- While working out, RIZER moves the front axle of the bicycle upwards and downwards based on the gradient profile set, to avoid losing your balance hold on to the handlebar during tilt variations.
- After installing the bicycle, on Manual mode, carefully test the maximum and minimim gradient, so you can verify that there are no obstacles of any kind for the movement of the bicycle. Should the pedals touch the floor during negative gradients, reduce minimum gradient (profile settings) to avoid such contacts.
The aforementioned warnings are general in nature and do not include all the precautions that must be taken for a safe and proper use of the RIZER lifting device, for which the user is solely responsible.
Technical assistance: support.elite-it.com
Documents / Resources
References
![www.apple.com]() App Store - Apple
App Store - AppleElite RIZER on the App Store
![play.google.com]() Google Play
Google Playhttp://elitecy.com/launch-rizer-google-play
Elite Support
Download manual
Here you can download full pdf version of manual, it may contain additional safety instructions, warranty information, FCC rules, etc.
Advertisement


Need help?
Do you have a question about the RIZER and is the answer not in the manual?
Questions and answers