
Related Manuals for Elite QUBO


Summary of Contents for Elite QUBO
-
Page 1: Rimozione Della Bicicletta
ISTRUZIONI PER L'USO DEL TELAIO FRAME ASSEMBLY INSTRUCTIONS BEDIENUNGSANLEITUNG FUER DEN RAHMEN NOTICE D’UTILISATION DU CADRE INSTRUCCIONES PARA EL USO DEL CUADRO GEBRUIKSAANWIJZING VOOR FRAME... -
Page 2: Table Of Contents
• INTRODUZIONE • MONTAGGIO UNITÁ • INSTALLAZIONE DELLA BICICLETTA • RIMOZIONE DELLA BICICLETTA • MONTAGGIO PIEDI DI LIVELLAMENTO • ATTENZIONI • CONSIGLI PER L'UTILIZZO • INTRODUCTION • UNIT ASSEMBLY • FITTING THE BICYCLE • BIKE REMOVAL • LEVELLING FEET ASSEMBLY •... -
Page 3: Attenzioni
• INTRODUCTION • ASSEMBLAGE UNITE • INSTALLATION DE LA BICYCLETTE • ENLÈVEMENT DE LA BICYCLETTE • ASSEMBLAGE DES PIEDS DE NIVELAGE • ATTENTION • CONSEILS POUR L’UTILISATION • INTRODUCCIÓN • MONTAJE UNIDAD • INSTALACIÓN DE LA BICICLETA • CÓMO SACAR LA BICICLETA •... -
Page 4: Introduction
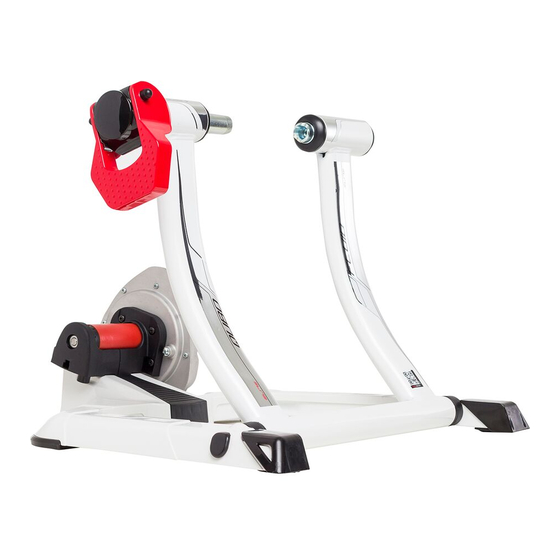
Thank you for choosing the Qubo INTRODUCTION ATTENTION Check the presence of all the following components: Resistance unit depicted here may vary from production models N°1 Qubo frame (Ref. A) N°1 Unit (Ref. B) N°1 Quick release (Ref. C) N°2 M6 Unit screws (D) -
Page 5: Unit Assembly
UNIT ASSEMBLY ø30 ø45 • Unfold the frame (A) from its packaged position (Fig. 1) and place it on a flat surface (Fig. 2) • Tighten the M6 screws (D) (Fig. 5 and Fig. 6) completely, utilizing the correct holes for the dif- ferent roller diameter options. -
Page 6: Fitting The Bicycle
FITTING THE BICYCLE • Make sure the quick release of the bicycle rear parallel wheel is properly fixed. • Turn the lever (F) to the “open” position (Fig. 7). • Close the lever (F), making sure it starts pres- sing the quick release inside the predefined work area;... - Page 7 unit left or right as necessary, and re-tighten the bolts (Fig.16, Fig.17 and Fig.18). • If the lever (F) starts pressing the quick release in the delayed work position (Fig. 13), unscrew the left bushing pin (G) (Fig. 14) so that the lever starts working inside the predefined work area (between 55°...
-
Page 8: Bike Removal
• Push the bicycle towards the resistance unit until the rear wheel touches the roller (Fig. 19). • Verify the stability of the bike by pushing and pulling the horizontal tube of the frame and the saddle. Should the bike still not appear stable, make sure its quick release and lever are correct- ly positioned, that the lever (F) is in a “closed”... -
Page 9: Levelling Feet Assembly
LEVELLING FEET ASSEMBLY • The Cube frame (A) comes equipped with level- ling feet (E) to compensate for uneven surfaces that do not allow the four feet to make complete • The levelling feet (E) can be mounted under the contact, and to allow the bike to be perfectly ver- rear feet (Fig. -
Page 10: Attention
ATTENTION • Keep people, children and animals away from the roller during use, since the moving and rota- ting parts of the roller and the bicycle can cause damage in case of contact. • Before starting training, position the trainer in a dry place, away from potentially hazardous objects (furniture, tables, chairs, etc.) in order to avoid any risk of inadvertent or accidental contact... -
Page 11: Einleitung
NOTES... -
Page 12: Montage Der Einheit
NOTES... -
Page 13: Installierung Des Fahrrads
ELITE srl - 35014 Fontaniva (PD) - ITALY - Fax +39 049 594 0064 - e-mail: contatto@elite-it.com...
Need help?
Do you have a question about the QUBO and is the answer not in the manual?
Questions and answers
Hi, I have an old Elite Qufora that someone gave me a few years ago. I’m recuperating from a broken ankle and need to start with a static bike. I was not given the Quick release bar with it so am I unable to fit it. Can you advise which bar I should purchase please? Are there different lengths etc? Many thanks
The Elite Qubo trainer requires a quick release that is compatible with the bushings of the stand. If the existing quick release is not compatible, it should be replaced with the one supplied by the manufacturer. The document does not mention different lengths being available.
This answer is automatically generated