Table of Contents
Advertisement
Quick Links
Advertisement
Table of Contents

Related Manuals for Kogan KAMU10COPKA


Summary of Contents for Kogan KAMU10COPKA
- Page 1 6L 10-in-1 Multi Cooker KAMU10COPKA...
-
Page 2: Table Of Contents
Safety & Warnings Components Overview Assembly Operation Cleaning & Care Specifications Troubleshooting Notes... -
Page 3: Safety & Warnings
These safety guidelines aim to prevent risks or damage caused by unsafe or incorrect use of the appliance. • Ensure the packaging and appliance are intact upon arrival. If you discover any damage, contact help.Kogan.com immediately for support. • For safety reasons, modifications or alterations to the appliance are strictly prohibited. •... - Page 4 Caution • This appliance is for household use only. Do not use outdoors. • This appliance is not intended for use by persons with reduced physical, sensory or mental capabilities or lack of experience and knowledge, unless they have been given supervision or instruction concerning use of the appliance by a person responsible for their safety.
- Page 5 Never use the cooker for deep or shallow frying when pressurised. • Do not attempt to repair the appliance yourself. If the appliance is damaged, cease use immediately and contact help.Kogan.com for support. • Ensure no foreign objects (e.g., needles, metal shavings) are inserted into gaps.
-
Page 6: Safety Precautions
• Do not attempt to repair the appliance yourself. If the appliance or its power cord is damaged, cease use immediately and contact help.Kogan.com for support. • Keep the appliance out of children's reach to avoid electric shock and burns. - Page 7 Cautions • Never unplug with wet hands to avoid electric shock. • Pull the plug directly rather than tugging the cord. • During operation, keep hands away from the exhaust port and lid to avoid burns. • Do not exceed the maximum food and water capacity marked inside the cooker. •...
-
Page 8: Components
Components Spoon Soup Spoon Measuring Cup Steaming Rack Steamer Yoghurt Cup Steamer Yoghurt Cup Yoghurt Cup Lid User Guide... -
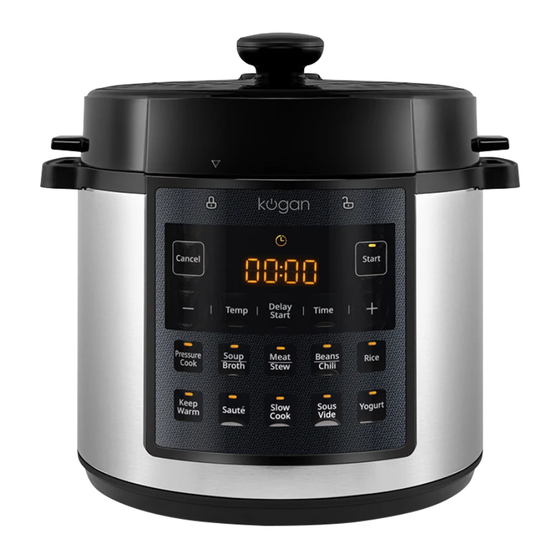
Page 9: Overview
Overview Steam Release Valve Vents Float Valve Upper Cover Handle Seal Ring Sealing Ring Block Proof Cover Inner Pot Cooker Body Handle Control Panel Cooker Body... -
Page 10: Assembly
Seal Ring • Avoid pulling the seal ring, as distortion may affect its sealing and pressure performance. • If the seal ring is damaged, cease use immediately and contact help.Kogan.com for support. Seal ring Pull upwards to Press downwards disassemble... -
Page 11: Sealing Ring
Sealing Ring • Do not pull the sealing ring, as this may distort it and impact its effectiveness. • To install the sealing ring: a. Ensure the float valve is in the down position. b. Press the self-locking slider with your left hand, rotate the lid, and press the sealing ring into place with your right hand. - Page 12 Prepare for Cooking Step 1: Open the Lid Hold the lid handle and turn it anticlockwise approximately 30° to unlock. Lift the lid carefully. Unlocked Step 2: Check the Lid Components • Verify that the floater valve and exhaust valve are not jammed. •...
- Page 13 Step 4: Place the Inner Pot in the Cooker • Wipe the external surface of the inner pot to remove moisture and debris. • Turn the inner pot slightly left and right to ensure proper contact with the heating plate. Step 5: Close the Lid Safely •...
- Page 14 Steam Release Valve • Turn the ‘Steam Release’ valve to the sealing position for pressure cooking. • Turn the valve to the exhaust position for pressure release. Avoid placing hands or face near the exhaust opening during this process. • Ensure the float valve is in the down position before starting.
-
Page 15: Operation
Operation Control Panel Cancel Button Delay Start Button Display Screen + Button - Button Time Button Temperature Button Function Buttons Start Button Keep Warm Button... - Page 16 Function Operation • Press the ‘Cancel’ button at any time to stop the current operation and return to standby mode. Cancel • Press and hold the ‘Cancel’ button for 10 seconds to restore default parameters. • To adjust the temperature in this function, press the ‘Temp/Time’...
- Page 17 In standby mode, press the ‘Sous Vide’ button. The indicator will illuminate, and the screen will display the default temperature. Adjust the temperature using the ‘+’ or ‘-’ buttons. Sous Vide Press ‘Temp/Time’ to switch to time adjustment, then use ‘+’ or ‘-’.
- Page 18 Safely Open the Lid Step 1: Power Off Disconnect the appliance from the power. Step 2: Exhausting Pressure • Quick Release: For non-fluid foods, turn the steam release valve to the exhaust position to release pressure until the float valve drops. •...
-
Page 19: Cleaning & Care
Cleaning & Care • Unplug and Cool Down: Unplug the power cord and allow the product to cool before performing cleaning or maintenance. • Lid and Inner Pot: Remove the lid and inner pot. Clean them with detergent, rinse thoroughly with water, and dry with a soft cloth. •... -
Page 20: Specifications
Specifications Capacity 6.0L Power Supply 220-240V~ 50Hz Rated Power 1000W Working Pressure 70kPa Keep Warm Temperature 60°C~80°C... -
Page 21: Troubleshooting
Parts of the power cord or plug become unusually hot. Cease use immediately and contact Power cord flexibility results in help.Kogan.com for support. intermittent power supply. The multi cooker exhibits abnormal heating or emits a bad odour. Abnormal noise or vibration occurs when the appliance is powered on. - Page 22 Food debris on the Clean the sealing ring. sealing ring. Steam leaks from the lid. Contact help.Kogan.com to Sealing ring damaged. replace the sealing ring. The lid is not closed Ensure the lid is closed correctly. properly. Food debris on the float Clean the float valve gasket.
-
Page 23: Notes
Notes... - Page 24 Need more information? We hope that this user guide has given you the assistance needed for a simple set-up. For the most up-to-date guide for your product, as well as any additional assistance you may require, head online to help.Kogan.com.
Need help?
Do you have a question about the KAMU10COPKA and is the answer not in the manual?
Questions and answers