Advertisement
Package Contents

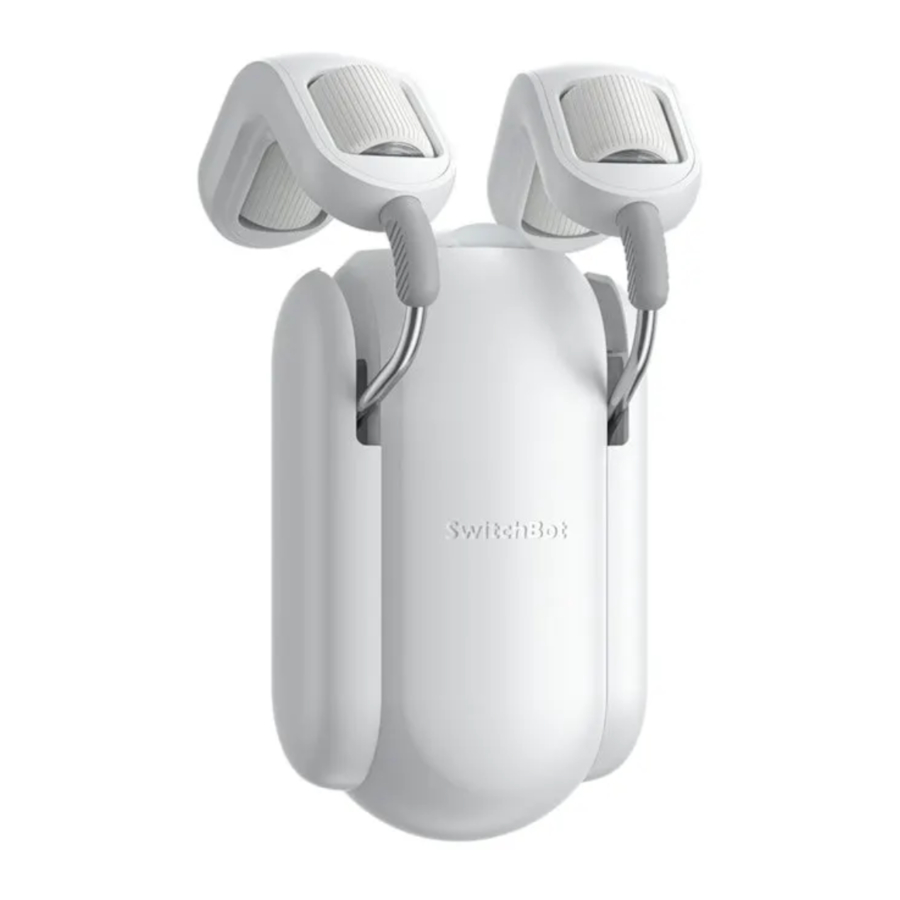
List of Components

Preparation
- A smartphone or tablet using Bluetooth 4.2 or later.
- The latest version of our app, downloadable via the Apple App Store or Google Play Store.
- SwitchBot account, you can register via our app or sign in to your account directly if you already have one.
- A fully charged SwitchBot Curtain.
Please note: If you intend to use Cloud Services for voice control, you will need a SwitchBot Hub Mini (sold separately).


iOS 11.0+


Android OS 5.0+
Check your Curtain Track
SwitchBot Curtain Rod 2 supports curtain track with the following measurements:

If SwitchBot Curtain Rod 2 does not work on your curtain track, please contact: support@wondertechlabs.com
Installation
- Add your Curtain to the SwitchBot app
Open the SwitchBot app and sign in to your account. Tap "+" at the top right of the home page, find the Curtain icon and select, then follow the instructions to add your Curtain. - Install your Curtain on curtain track


- Ring Top Curtains
- Fully close your curtain, then remove the first curtain hook from the ring.

- Stretch the separate Hook arm and attach it between the first and second ring onto the rod.

- Attach another Hook with the main unit onto your curtain track, then pull the separate Hook downwards slightly and install it back to the main unit. You will hear a click when it is firmly attached.

- Adjust your SwitchBot Curtain to keep it perpendicular to the ground and make sure the SwitchBot logo faces indoors. Then hang your curtain back in place and hide SwitchBot Curtain behind your fabric curtain.

- Fully close your curtain, then remove the first curtain hook from the ring.


- Grommet Curtains
- Install your SwitchBot Curtain at the back of this type of curtain.

- Stretch the separate Hook arm and attach it between the first and second grommet onto the rod.

- Attach another Hook with the main unit onto your curtain track, then pull the separate Hook downwards slightly and install it back to the main unit. You will hear a click when it is firmly attached.

- Adjust your SwitchBot Curtain to keep it perpendicular to the ground and make sure the SwitchBot logo faces indoors.

- Refer to the pictures below to install the beads fixer (with beads installed) at the top of the grommets. Make sure that you clip them to the grommets firmly. Finish by cutting the remaining beads or put it behind your curtain.

- Install your SwitchBot Curtain at the back of this type of curtain.


- Tab Top Curtains
Use the clips provided to help install your SwitchBot Curtain on tab top curtains.

Close your curtain, attach a clip on the first tab.

Attach the remaining clips on other tabs as shown on the picture.

Beware that all other clips should be attached the opposite way against the first clip, make sure all the clips are sitting on the top of the rod and are aligned with each other.

- Install your SwitchBot Curtain at the back of this type of curtain.

- Stretch the separate Hook arm and attach it between the first and second tab onto the rod.

- Attach another Hook with the main unit onto your curtain track, then pull the separate Hook downwards slightly and install it back to the main unit. You will hear a click when it is firmly attached.

- Adjust your SwitchBot Curtain to keep it perpendicular to the ground and make sure the SwitchBot logo faces indoors.

- Install your SwitchBot Curtain at the back of this type of curtain.


- Back Tab Curtains
Use the clips provided to help install your SwitchBot Curtain on back tab curtains.

Close your curtain, attach a clip on the first tab.

Attach the remaining clips on other tabs as shown on the picture.

Beware that all other clips should be attached the opposite way against the first clip, make sure all the clips are sitting on the top of the rod and are aligned with each other.

- Install your SwitchBot Curtain at the back of this type of curtain.

- Stretch the separate Hook arm and attach it between the first and second tab onto the rod.

- Attach another Hook with the main unit onto your curtain track, then pull the separate Hook downwards slightly and install it back to the main unit. You will hear a click when it is firmly attached.

- Adjust your SwitchBot Curtain to keep it perpendicular to the ground and make sure the SwitchBot logo faces indoors.

- Install your SwitchBot Curtain at the back of this type of curtain.


How to Control Double-Sided Curtains
If you are using a double-sided curtain, we recommend you use two SwitchBot Curtains to open your curtains from the middle.

If you have only purchased 1 SwitchBot Curtain, you may use the clips provided to join your curtains together and turn them into a single-sided curtain. Please note: Using just 1 SwitchBot Curtain to control a double-sided curtain may affect user experience.
- Calibration
After you have added and installed your SwitchBot Curtain, you will need to calibrate it to set its route on your curtain track. Please follow the instructions in our app to make sure that the actual movement of your curtain is the same as the animation in the app. You can choose to recalibrate the Curtain or change its opening direction whenever you want by going to Curtain > Settings > Calibration. Please note: You can group two SwitchBot Curtains via our app should you plan to open your curtains from the middle. Before you calibrate, please make sure the positions of your SwitchBot Curtains are the same as shown in our app.
Usage Methods
App Control
Open or close your curtain with just the tap of a button. We offer intuitive app control for iOS and Android users, with weekly/bi-weekly updates. OTAfirmware updates are also available to give you a better user experience.

Touch & Go
When SwitchBot Curtain senses you drawing your curtain for more than 5 cm, it will automatically start and do the work for you. For a double-sided curtain, you only need to pull one side of it to activate your Curtain. Please note: You can turn off this feature on the Advanced Settings page of the Curtain at any time.
*5 cm lowers the possibility of false triggers by foreign objects, pets, children, etc.

Voice Control and Home Automation*
You can link multiple third-party services to your SwitchBot account to control your SwitchBot Curtain or trigger Scenes using voice commands.
How to realize voice control and home automation:
- Connect your smartphone or tablet to the Internet.
- Set up a SwitchBot Hub Mini (sold separately).
- Turn on Cloud Services via SwitchBot Curtain's Settings page.
- Link third-party services to your SwitchBot account.
Alexa, close the curtain.
Hey Google, close my bedroom curtain.
Hey Siri, open the living room curtain.
* Requires SwitchBot Hub Mini (sold separately)

Control with SwitchBot Remote (Sold Separately)

A wireless remote to place anywhere. You can also control your SwitchBot Curtain using a SwitchBot Remote. There are two buttons on the Remote and you can set an action for each via our app, for example, one button for fully opening and another for fully closing your Curtain. One Remote can also control 2 SwitchBot Curtains that have been grouped. Please refer to the user manual of Remote for more information.
Settings
Light Sensor (Beta)
This allows you to set automations based on the illuminance level or the relative intensity of sunlight around your device. This is a beta stage function and is being upgraded continuously. You can find more details in future app releases.
Delay
You can set 1 Delay for a countdown action. You can set the countdown time, percentage of opening or closing, and Motion Mode.
Schedule
You can set up to 5 Schedules locally on your device, or unlimited Schedules with a SwitchBot Hub. You can set the day, time, percentage of opening or closing, and Motion Mode.
Charging, Firmware Upgrades, and Resetting Factory Settings
Charging
It takes about 6.5 hours to fully charge your device battery and this can last for up to 8 months after one full charge. You may also purchase our Solar Panel to charge using sunlight.
- A 5 V
![]() 1 A adapter is required to charge your device.
1 A adapter is required to charge your device. - Battery life is tested under conditions of opeing and closing a 8 kg (17 lbs) curtain on a 3-meter-long track once a day under 25ºC. Actual battery life may vary depending on different conditions.
- Charging with Solar Panel requires a level 6 illuminance level at least.
Firmware Upgrades
In order to improve user experience, we will regularly release firmware updates to introduce new functions and solve any software defects that may occur during usage. When a new firmware version is available, we will send an upgrade notification to your account via our app. When upgrading, please make sure your product has sufficient battery and make sure your smartphone is within range to prevent interference.
Resetting Factory Settings

Press and hold the Reset button for 15 seconds until the indicator light lights up, then release the button.

You may lose all previous settings after factory reset and you will need to add the device again and redo calibration. If you are using a double-sided curtain, you will need to recalibrate both Curtains.
Specifications
Model: W0701600
Color: White/Black
Material: ABS plastic with UV-resistant coating
Size (Main Unit): 42 x 51 x 110 mm (1.7 x 2 x 4.3 in.)
Weight (Main Unit): 135 g (4.8 oz.)
Power: Type-C, DC 5V  1A,
1A,
3350 mAh lithium-ion battery or by Solar Panel 1
Battery Life: 8 months2 or unlimited with Solar Panel
Network Connectivity:
Bluetooth 5.0, long range transmission
Sensor: Accelerometer, light sensor
Strength: Supports curtain of up to 8 kg (17 lbs)
(from controlled experiments in our lab)
Max Runway: 3 m (9.8 ft.)
Schedule: Up to 5, or unlimited with a SwitchBot Hub3
Voice Control (SwitchBot Hub Required): Amazon Alexa,
Google Assistant, Siri Shortcuts, SmartThings, IFTTT, and LINE CLOVA
Please note: Use your device under room temperature only.
- SwitchBot Solar Panel is sold separately.
- Battery life is tested under conditions of opeing and closing a 8 kg (17 lbs) curtain on a 3-meter-long track once a day under 25C. Actual battery life mayvary depending on different conditions.
- SwitchBot Hub Mini is sold separately.
Contact & Support
Setup and Troubleshooting: support.switch-bot.com
Support Email: support@wondertechlabs.com
Feedback: If you have any concerns or problems when using our products, please send feedback via our app through the Profile > Feedback page.
Find Out More
Please visit support.switch-bot.com for more details.

Documents / Resources
References
Download manual
Here you can download full pdf version of manual, it may contain additional safety instructions, warranty information, FCC rules, etc.
Advertisement


Need help?
Do you have a question about the Curtain Pod 2 and is the answer not in the manual?
Questions and answers