Advertisement
- 1 Package Contents
- 2 List of Components
- 3 Preparation
- 4 Installation
- 5 Control Methods
- 6 Device Settings
- 7 Charging, Firmware Upgrades, and Resetting Factory Settings
- 8 Specifications
- 9 Contact & Support
- 10 Documents / Resources
Package Contents
Please read this user manual carefully before using the device.

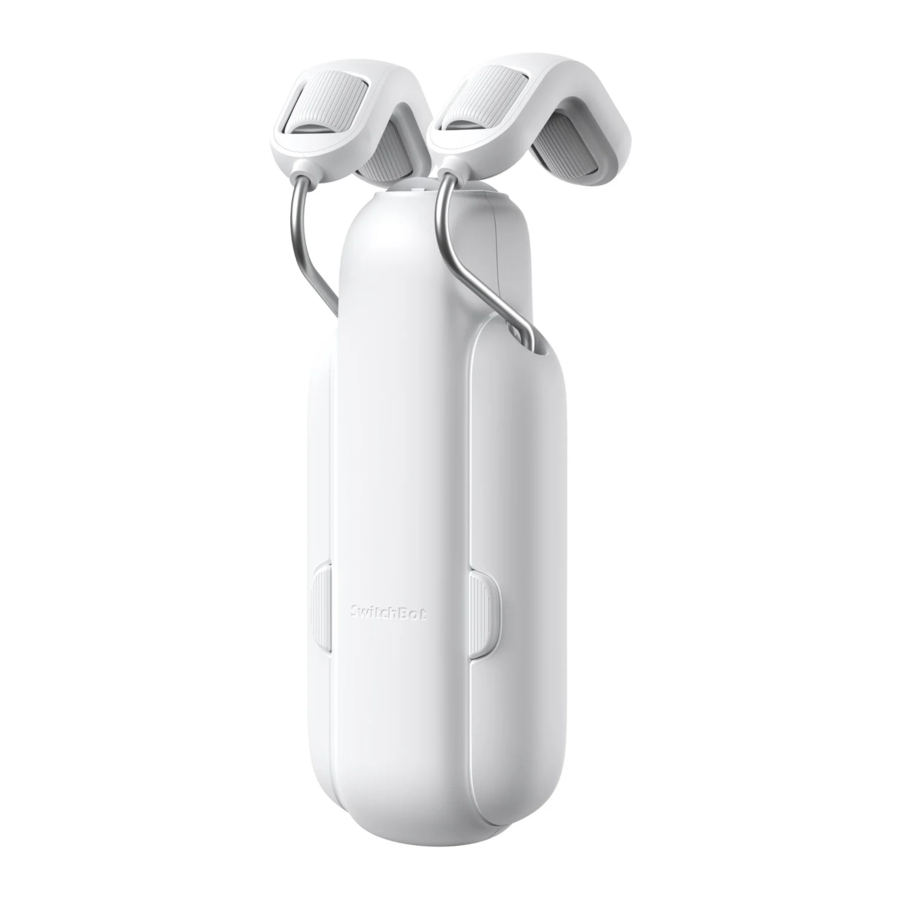
List of Components


Preparation
- A smartphone or tablet using Bluetooth 4.2 or later.
- The latest version of our app, downloadable via the Apple App Store or Google Play Store.
iOS 11.0+


Android OS 5.0+


- A SwitchBot account, you can register via our app or sign in to your account directly if you already have one.
- A fully charged SwitchBot Curtain.
 Please note: If you intend to use Cloud Services for voice control, you will need a SwitchBot Hub (sold separately).
Check your Curtain Track
SwitchBot Curtain Rod 3 supports curtain track with the following measurements:

If SwitchBot Curtain Rod 3 does not fit your curtain track, please contact our customer support at support@switch-bot.com
Installation
Step 1: Add your SwitchBot Curtain Rod 3 to our app
Open our app and sign in to your account. Tap "+" at the top right-hand corner of the home page, find the Curtain icon, and select. Then follow the instructions to add your SwitchBot Curtain Rod 3.
Step 2: Install SwitchBot Curtain Rod 3 onto your curtain track
Stretchable Hook Arm

Ring Top Curtains
- Fully close your curtain and remove the first curtain hook from the ring.

- Install two detachable Hooks one by one onto your curtain rod between the first and the second ring.

- Pull one detachable Hook downwards with one hand, and hold the Main Unit (with the SwitchBot logo on it facing indoors) upwards against the rod with another hand. Align the snaps and attach the Main Unit to the Hook. You will hear a clicking sound when firmly attached. Then attach another Hook to the Main Unit.
![warning]() Please note: do not apply excessive force when pulling the Hook downwards without supporting your rod, or your rod may break or detach from your wall.
Please note: do not apply excessive force when pulling the Hook downwards without supporting your rod, or your rod may break or detach from your wall.

- Adjust your SwitchBot Curtain Rod 3 to keep it perpendicular to the ground. Hang your curtain back in place and hide SwitchBot Curtain Rod 3 behind your curtain fabric.


Grommet Curtains
- Install your SwitchBot Curtain Rod 3 at the back of this type of curtain.

- Install two detachable Hooks one by one onto your curtain rod between the first and the second ring.

- Pull one detachable Hook downwards with one hand, and hold the Main Unit (with the SwitchBot logo on it facing indoors) upwards against the rod with another hand. Align the snaps and attach the Main Unit to the Hook. You will hear a clicking sound when firmly attached. Then attach another Hook to the Main Unit.
![warning]() Please note: do not apply excessive force when pulling the Hook downwards without supporting your rod, or your rod may break or detach from your wall.
Please note: do not apply excessive force when pulling the Hook downwards without supporting your rod, or your rod may break or detach from your wall.

- Adjust your SwitchBot Curtain Rod 3 to keep it perpendicular to the ground.

- Refer to the pictures below to install the beads fixer (with beads installed) at the top of the grommets. Make sure that you clip them to the grommets firmly. Finish by cutting the remaining beads or put it behind your curtains.

If the distance between the clips does not fit your curtains, you can adjust them as shown below.


Tab Top Curtains
Use the clips provided to help install your SwitchBot Curtain Rod 3 on tab top curtains.

Close your curtain, attach a clip on the first tab.

Attach the remaining clips on other tabs as shown in the picture.

Beware that all other clips should be attached the opposite way against the first clip, make sure all the clips are sitting on the top of the rod and are aligned with each other.

- Install your SwitchBot Curtain Rod 3 at the back of this type of curtain.

- Install two detachable Hooks one by one onto your curtain rod between the first and the second ring.

- Pull one detachable Hook downwards with one hand, and hold the Main Unit (with the SwitchBot logo on it facing indoors) upwards against the rod with another hand. Align the snaps and attach the Main Unit to the Hook. You will hear a clicking sound when firmly attached. Then attach another Hook to the Main Unit.
![warning]() Please note: do not apply excessive force when pulling the Hook downwards without supporting your rod, or your rod may break or detach from your wall.
Please note: do not apply excessive force when pulling the Hook downwards without supporting your rod, or your rod may break or detach from your wall.

- Adjust your SwitchBot Curtain Rod 3 to keep it perpendicular to the ground.


Back Tab Curtains
Use the clips provided to help install your SwitchBot Curtain Rod 3 on back tab curtains.

Close your curtain, attach a clip on the first tab.

Attach the remaining clips on other tabs as shown in the picture.

Beware that all other clips should be attached the opposite way against the first clip, make sure all the clips are sitting on the top of the rod and are aligned with each other.

- Install your SwitchBot Curtain at the back of this type of curtain.

- Install two detachable Hooks one by one onto your curtain rod between the first and the second ring.

- Pull one detachable Hook downwards with one hand, and hold the Main Unit (with the SwitchBot logo on it facing indoors) upwards against the rod with another hand. Align the snaps and attach the Main Unit to the Hook. You will hear a clicking sound when firmly attached.
Then attach another Hook to the Main Unit.
![warning]() Please note: do not apply excessive force when pulling the Hook downwards without supporting your rod, or your rod may break or detach from your wall.
Please note: do not apply excessive force when pulling the Hook downwards without supporting your rod, or your rod may break or detach from your wall.

- Adjust your SwitchBot Curtain Rod 3 to keep it perpendicular to the ground.


Step 3: Install Magnet Attachment
The magnet attachment will help your SwitchBot Curtain run precisely to close your curtains in future operation. Follow the steps below to install the magnet attachment before route calibration.
To ensure the magnet attachment firmly attaches to your track surface, please use the wet wipe provided to clean the surface first. Dirt or dust will affect adhesion and may cause dropping at a later time.

Situation 1: A rod bracket is holding the rod at the closed position
- Remove the magnet attachment from the liner. Stick it to the bottom of the rod along the bracket, with the magnet piece inside parallel with the rod.
If you use double-sided curtains, stick two magnet attachments along both sides of the middle bracket symmetrically.

- Pull your SwitchBot Curtain, make it roll onto the magnet attachment and stop within the area as shown in the picture.

- Hide your SwitchBot Curtain behind your fabric curtain to finish.


Situation 2: Double-sided curtains without a bracket in the middle.
- Fully close your curtains. Use the red long sticker to mark the middle position.
![warning]() Please note: only using your eyes to measure the position may cause deviation. Please be sure to use the provided sticker.
Please note: only using your eyes to measure the position may cause deviation. Please be sure to use the provided sticker.

- Open your curtains. Peeloff the tape liners of your magnet attachments, and stick them along both sides of the dotted line symmetrically.
![warning]() Please note:
Please note: - Two magnet attachments need to be close to each other, wrapping the rod at the bottom.
- The magnet pieces inside the attachments need to be parallel with the rod.

- Pull your two SwitchBot Curtain devices separately, make them roll onto the magent attachment and stop within the area as shown in the picture.

- Remove the red sticker. Hide your SwitchBot Curtain behind your fabric curtains to finish.


Step 4: Calibration
After you have added and installed SwitchBot Curtain Rod 3, you will need to calibrate your device to set its route on your curtain track.
Please follow the instructions in our app to make sure that the actual movement of your curtain is the same as the animation in the app. You can choose to recalibrate your device or change its opening direction whenever you want by navigating to Curtain > Settings > Calibration.
Please note: You can group two SwitchBot Curtain Rod 3 units together should you plan to open your curtains from the middle. Before you calibrate, please make sure the positions of both devices are the same as shown in our app.
Control Methods
App Control
Open and close your curtains with just the tap of a button. We offer intuitive app control for iOS and Android users, with weekly/bi-weekly updates. OTA firmware updates are also available to give you a better user experience.
Touch & Go
When SwitchBot Curtain Rod 3 senses you drawing your curtain (more than 5 cm in distance), your device will automatically open or close depending on where your device is. For double-sided curtains, you only need to pull one side to activate.
Please note: you can turn this feature off in the Advanced Settings page of your device at any time.
*5cm lowers the possibility of false triggers by foreign objects, pets, children, etc.
Home Automation Using Voice Commands*
* SwitchBot Hub required (sold separately).
You can link multiple third-party smart assistants to your SwitchBot account to control your SwitchBot Curtain Rod 3 or trigger Scenes using voice commands.
How to realize voice control and home automation:
- Connect your smartphone or tablet to the Internet.
- Set up a SwitchBot Hub (sold separately).
- Turn on Cloud Services via SwitchBot Curtain's Settings page.
- Link third-party services to your SwitchBot account.
"Alexa, close the curtains."
"Hey Google, close my bedroom curtains."
"Hey Siri, open the living room curtains."

Using Your Device with SwitchBot Remote
A wireless remote to place anywhere.
You can also control your SwitchBot Curtain using SwitchBot Remote (sold separately) with two buttons located on the remote that can be set as an action via our app. One Remote can also control 2 SwitchBot Curtain devices that have been grouped, Please refer to the user manual of Remote for more information.
Device Settings
Light Sensor (Solar Panel)
By connecting your SwitchBot Curtain Rod 3 to the SwitchBot Solar Panel 3 (sold separately), you can set up automations based on the light level data. The light level curve will tell you the optimal time period of sunlight in a day and you can set the automatic charging schedule accordingly for your SwitchBot Curtain Rod 3.
Delay
You can set a delay for a countdown action including countdown time, percentage of opening or closing, and Motion mode.
Schedules
You can set up to 5 Schedules locally on your device, or unlimited Schedules when used with a SwitchBot Hub. You are able to set the day, time, percentage of opening or closing, and Motion mode.
Charging, Firmware Upgrades, and Resetting Factory Settings
Charging
It takes about 6.5 hours to fully charge your device battery and this can last for up to 8 months after one full charge. You may also purchase SwitchBot Solar Panel to charge using sunlight.
- A 5V
![]() 1A adapter is required to charge your device.
1A adapter is required to charge your device. - Battery life is tested by opening and closing 8 kg (17 lbs) curtains on a 3-meter-long track once a day under temperature conditions of 25C. Actual battery life may vary depending on different conditions.
- With only 3 hours per day exposed under sunlight that can cast clear shadow, SwitchBot Solar Panel can generate sufficient power to sustain your SwitchBot Curtain Rod 3 forever. The upgraded Solar Panel greatly improved efficiency even under weak sunlight. As long as your window can receive sunlight, we recommend purchasing our Solar Panel to charge your device. This way, you can ensure that your SwitchBot Curtain Rod 3 remains powered and ready to use whenever you need it.
 1A adapter is required to charge your device.
Firmware Upgrades
In order to improve user experience, we will regularly release firmware updates to introduce new functions and solve any software defects that may occur during usage. When a new firmware version is available, we will send an upgrade notification to your account via our app. When upgrading, please make sure your product has sufficient battery and make sure your smartphone is within range to prevent interference.
Resetting Factory Settings
Use the reset tool provided to press and hold the Reset button for 3 seconds until the indicator light is visible and then release.

Specifications
Model: W2400000
Color: White
Material: ABS + PC (Anti-UV, fire-resistance rating V-0)
Size (Main Unit): 42 x 51 x 173 mm (1.7 6.8 in.)
Weight (Main Unit): 280 g (9.9 oz.)
Power: Type-C, DC 5V=1A, 3350 mAh lithium-ion battery or by Solar Panel1
Battery Life: 8 months2 or unlimited with Solar Panel
Network Connectivity: Bluetooth 5.0, long range transmission
Strength: Supports curtain of up to 15 kg (33 lbs) (from controlled experiments in our lab)
Max Runway: 3 m (9.8 ft.)
Schedule: Up to 5, or unlimited with a SwitchBot Hub3
Voice Control (SwitchBot Hub Required): Amazon Alexa, Google Assistant, Siri Shortcuts, SmartThings, IFTTT
Please note: we recommend using your device in room temperature conditions only.
1 SwitchBot Solar Panel is sold separately.
2 Battery life tested under conditions of opeing and closing a 8 kg (17 lbs) curtain on a 3-meter-long track once a day at a temperature of 25 oc. Actual battery life may vary.
3 SwitchBot Hub sold separately.
Contact & Support
Setup and Troubleshooting: support.switch-bot.com
Support Email: support@switch-bot.com
Feedback: If you have any concerns or problems when using our products, please send feedback via our app through the Profile > Help & Feedback page.
Find Out More
Please visit support.switch-bot.com for more details.

Documents / Resources
References
Download manual
Here you can download full pdf version of manual, it may contain additional safety instructions, warranty information, FCC rules, etc.
Advertisement


Need help?
Do you have a question about the Curtain Pod 3 and is the answer not in the manual?
Questions and answers