Advertisement
- 1 Introduction
- 2 What's In The Box?
- 3 Getting to Know Your Deep Cleaner
- 4 Cleaning Formulas
- 5 Assembly
- 6 Fill Clean Water Tank
- 7 Cleaning Your Carpet
- 8 Empty Collection Tank
- 9 Cleaning Machine After Use
- 10 Replacing Belts & Brush Rolls
- 11 Hard Floor Cleaning (select models only)
- 12 Troubleshooting
- 13 Service
- 14 IMPORTANT SAFETY INSTRUCTIONS
- 15 Documents / Resources
Introduction
We love to clean and we're excited to share one of our innovative products with you. We want to make sure your deep cleaner works as well in one year as it does today, so this guide has tips on using, maintaining, and if there is a problem, troubleshooting.
In just a few simple assembly steps, you'll be ready to deep clean.
What's In The Box?

NOTE: Standard accessories may vary by model. To identify what should be included with your purchase, please refer to the "Carton Contents" list located on the carton top flap.
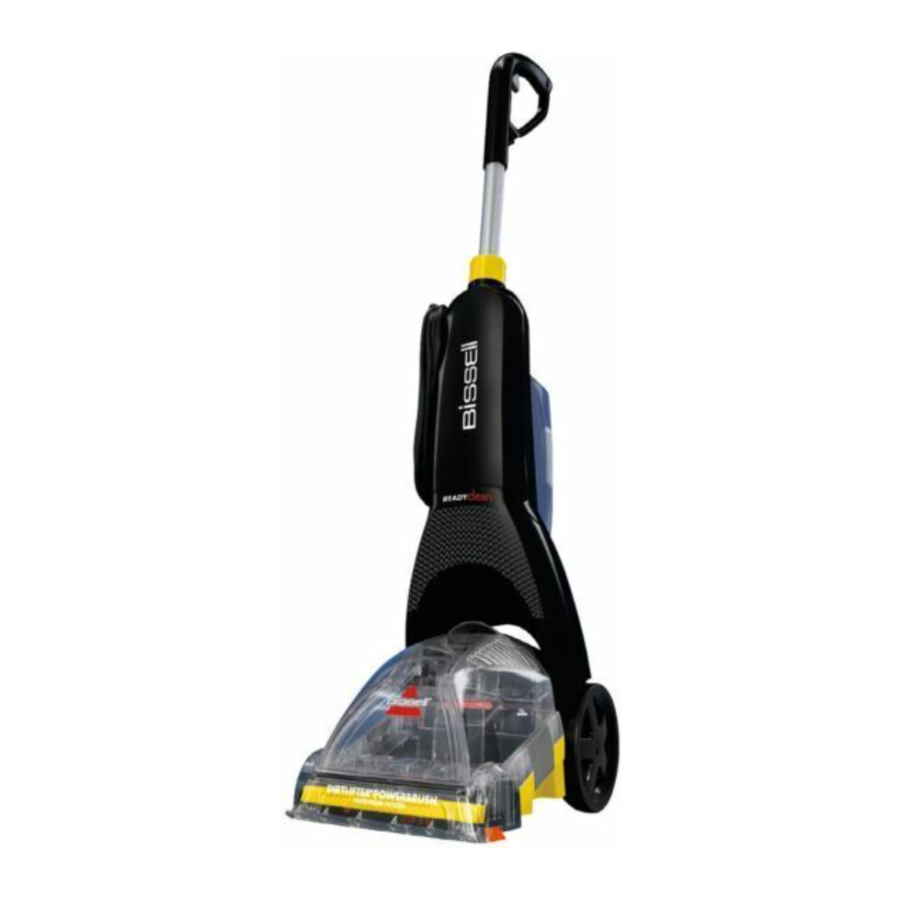
Getting to Know Your Deep Cleaner

Cleaning Formulas

To reduce the risk of fire and electric shock due to internal component damage, use only BISSELL cleaning fluids intended for use with the deep cleaner.
Keep plenty of genuine BISSELL formula on hand so you can clean and protect whenever it fits your schedule.
Always use genuine BISSELL deep cleaning formulas. Non-BISSELL cleaning solutions may harm the machine and may void the warranty.
BOOST
CARPET CLEANING FORMULA ENHANCER
 |  |  |  | ||||||
| Oxy Boost | Renew Boost | Prevent Boost | Pet Oxy Boost | ||||||
| Removes old, set-in stains permanently | Revives carpets to look their best | Repels stains from soaking into carpet fibers | Removes pet stains and odors permanently | ||||||
PRETREAT
PRE TREAT SPOTS AND STAINS TO IMPROVE CARPET CLEANING PERFORMANCE
 |  | ||
| Oxy Stain Destroyer | Pet Stain PreTreat | ||
| Permanent Stain Removal in 30 seconds | Pretreat to help remove tough pet stains and odors |
| GREAT VALUE™ | PROFESSIONAL FORMULAS | 2X* CLEANING FORMULA | HARD FLOOR FORMULA | |||||||||||||
 |  |  |  |  |  |  |  | |||||||||
| Great Value Fresh Scent Carpet & Upholstery Cleaner Oxy | Professional Deep Cleaning | Professional Pet Urine Eliminator+Oxy | Pet Stain & Odor | DeepClean & Protect | DeepClean + Refresh | Deep Clean + Oxy | Hard Floor Solutions | |||||||||
| Removes tough pet odors & stains with the power of Oxy. | Out cleans all other formulas Includes Scotchgard™ Protector | Our best formula for pet urine stains & odors Includes Scotchgard™ Protector | Removes tough pet stains Includes Scotchgard™ Protector | Deep cleans carpets and protects from future stains with Scotchgard™ Protector | Powerful cleaning with a refreshing scent | Removes deep down dirt, pet stains, & pet odor | Safe use for linoleum, vinyl, and ceramic tile; removes tough dirt and grime | |||||||||
ONLY BISSELL Protects from future stains with Scotchgard™ Protector.
Scotchgard™ is a trademark of 3M®.
*2.5 fl. oz. of 2X concentrated formula is equivalent to 5.0 fl. oz. of non-concentrated formula.
NOTICE: Use of cleaning formulas which contain lemon or pine oil may damage this appliance and void the warranty. Chemical spot cleaners or solvent-based soil removers also should not be used. These products may react with the plastic materials used in your cleaner, causing cracking or pitting.
Assembly
Do not plug in your deep cleaner until you are familiar with all instructions and operating procedures.
The only tool you will need to assemble your cleaner is a Phillips screwdriver.

- Slide upper body onto lower body.
![]()
- Secure with screws.
![]()
- Slide upper Handle Post into the body by aligning the pin and sliding the Post down into place.
![]()
- Be sure to secure upper handle before lifting. Rotate lock collar to secure.
![]()
- Place Clean Water Tank on back of unit. The tank will make a "CLICK" noise when seated properly.
![]()
- Wrap power cord.
![]()


Tips Before Carpet Cleaning
- If cleaning an entire room, consider moving your furniture to another area.
- Use a dry vacuum cleaner over area before using your deep cleaner.
- Remove any large, solid debris before wet cleaning.
- Pre-treat stains with BISSELL PreTreat to improve performance on coffee stains and ground-in dirt.
Fill Clean Water Tank
- Remove the clean water tank lifting straight up and away from lower body.

- Unscrew the cap at the bottom of the clean water tank.

- Fill with warm tap water to the WATER line. Fill the rest of the tank with BISSELL Formula to the FORMULA line.

- Replace and tighten the cap, then return the clean water tank to lower body. The tank will make a "CLICK" noise when seated properly.


A few notes about filling the clean water tank:
- Fill with hot (140°F/60°C MAX) tap water and add the appropriate BISSELL solution. DO NOT USE BOILING WATER. DO NOT HEAT WATER OR TANK IN MICROWAVE.
NOTICE: Do not over wet carpet. Be careful not to run over loose objects or edges of area rugs. Stalling the brush may result in premature belt failure.
NOTE: Do not substitute BISSELL 2X Formula cleaning solution with other household cleaning products.
Pour in more power with BISSELL Boosts

- Fill tank with water and 2X formula (Step 3 above).
- Add 1 ounce of any BISSELL Boost per 1/2 gallon of water.
- The 2089 machine series have 1/2 gallon clean water tanks.
Cleaning Your Carpet

Please check manufacturer's tag before cleaning area rugs for any specialized cleaning instructions. We do not recommend deep cleaning delicate, silk, wool, antique or area rugs without a manufacturer's tag.
- Plug into a proper outlet.

- Extend the Collapsible Handle Post by turning the collar counterclockwise and lifting the handle up. Turn the collar clockwise to secure.
![]()


IMPORTANT BEFORE USE: Make sure the handle post is fully extended up and the collar lines up with the lock symbol before you begin cleaning.
- With foot, press the grey recline lever located next to power button.

- With foot, press the red power button, located on the back of the machine.

- Cleaning Pass:


- While pressing the trigger, make one slow forward wet pass and another one back.
- Release the trigger and make one slow forward and backward pass over the same area.
- Repeat steps 1 and 2 until solution being pulled up appears clean.
- Empty the collection tank when dirty water reaches the full line, and fill with fresh warm water and formula when the Clean Water Tank is empty.
Empty Collection Tank
To reduce the risk of fire, electric shock or injury, turn power OFF and disconnect plug from electrical outlet before performing maintenance or troubleshooting.
- With foot, press the red power button, to turn off unit and then unplug.

- Release Collection Tank latches (on each side) by pulling up from the bottom of latch and then out.

- Carefully remove tank by lifting up on the tank carry handle.

- Carry the Collection Tank to a toilet or sink. To empty, pour out contents using opening at back of tank.

- Rinse the Collection Tank thoroughly and replace on unit. Secure latches on both sides of the tank.

- Refill the Clean Water Tank and continue cleaning or if you're done cleaning, wait for the pieces to dry before storing your machine.


Cleaning Machine After Use
To reduce the risk of electric shock, turn power switch OFF and disconnect plug from electrical outlet before performing maintenance or troubleshooting checks.
- Unplug the unit.

- Remove and rinse the Collection Tank thoroughly.

- Remove tank vent & foam filter (located on top of the Collection Tank) and rinse.
![]()
- To remove and clean the nozzle, keep the Collection Tank off of the unit. Gently pull the two tabs that point up near the front of the unit. The nozzle will unhook to remove. Rinse under running water. When finished, slightly tilt the machine so the foot raises up so you can align the nozzle hooks at the floor of the unit. Rotate the nozzle up to clip back into place.
![]()
- Remove lint and hair from red gasket in base of unit. (Do not remove gasket)
![]()
- Once the parts have been rinsed clean and dried, replace the Collection Tank to the base of the machine and secure with both latches. Wrap power cord around Quick Release Cord Wrap™ on side of the machine. Wipe all surfaces with a soft cloth and store cleaner upright in a protected, dry area.
![]()


NOTICE: To reduce the risk of a leaking condition, do not store unit where freezing may occur. Damage to internal components may result.
Replacing Belts & Brush Rolls
To reduce the risk of electric shock, turn power switch OFF and disconnect plug from electrical outlet before performing maintenance or troubleshooting checks.
What you will need: 1 Phillips screwdriver & 1 flathead screwdriver
- Turn the machine off and unplug from wall outlet.

- Remove the Clean Water and Collection Tanks.

- Lay machine down to access the bottom of the machine. With a Phillips head screwdriver, unscrew the belt cover and remove.

- If you want to replace or clean the brush roll, remove the belt by slightly lifting the brush roll to maneuver the belt and remove it. If the belt is broken and needs to be replaced, remove it and replace with a new belt.

- When removing the brush roll, the brush roll cap will come with it. Do not lose this part.

- Clean or replace the brush roll and belt. When finished cleaning these parts, reassemble them to the machine. Insert the brush into the right side end cap. Adjust the right side of the brush into place and tuck the left brush roll cap (separate piece that attaches to brush roll) into place.

- Maneuver the belt to wrap around the pulley. Wrap the belt around the cog of the brush roll. Secure the brush roll into place by sliding the square piece to align the brush roll.

- Reattach belt cover and screw into place.


NOTE: Manually rotate brush to make sure it rotates freely and the belt is aligned.
Hard Floor Cleaning (select models only)
HARD FLOOR TOOL SOLD SEPARATELY
- With foot, press the red power button, to turn off unit and then unplug.

- Remove the clean water tank lifting straight up and away from lower body.
![]()
- Release Collection Tank latches (on each side) by pulling up from the bottom of latch and then out.

- Attach the hard floor tool by hooking it into the front of the nozzle. Rotate down until it snaps into place.

- Return both tanks to the machine and plug into a proper outlet.

- Follow the "Cleaning Pass" instructions on the previous page (step 5).


To reduce the risk of fire and electric shock when cleaning a hard floor, the BISSELL hard floor tool must be used and it must only be used with BISSELL 2X Hard Floor Solutions cleaning fluid intended for use with this appliance.
Troubleshooting
To reduce the risk of electric shock, turn power switch OFF and disconnect plug from electrical outlet before performing maintenance or troubleshooting checks.
| Problem | Possible causes | Remedies |
Reduced spray OR no spray | Clean Water Tank is empty | Refill tank with water and formula |
| Lint screen on Clean Water Tank cap clogged | Soak Clean Water Tank cap in warm water and then rinse under running water | |
| Spray nozzle clogged | Clean spray nozzle by rinsing under water | |
| Upper handle is not in the upright and locked position | Rotate the retractable handle lock, pull handle up and return the handle lock to the locked position | |
Deep cleaner not picking up cleaning solution | Collection Tank is not aligned/ secured | Check tank alignment and secure with side latches |
| Collection Tank is full | Empty tank | |
| Removable nozzle installed improperly | Unplug unit and align two "hooks" into bottom first, then snap into place on top | |
| Removable nozzle full of debris | Unplug unit, remove nozzle and rinse under running water | |
| Red lint screen under Collection Tank is clogged | Remove debris from lint screen |
Service
If your BISSELL product should require service:
Contact BISSELL Consumer Care to locate a BISSELL Authorized Service Center in your area. If you need information about repairs or replacement parts, or if you have questions about your warranty, contact BISSELL Consumer Care.
| Website: www.BISSELL.com E-mail: www.BISSELL.com/email-us | Call: BISSELL Consumer Care 1-800-237-7691 Monday – Friday 8am - 10pm ET Saturday 9am - 8pm ET Sunday 10am - 7pm ET |
Please do not return this product to the store.
Other maintenance or service not included in the manual should be performed by an authorized service representative.
For any questions or concerns, BISSELL is happy to be of service.
Contact us directly at 1-800-237-7691.
Register your product today!
Registering is quick, easy and offers you benefits over the lifetime of your product.
You'll receive:
BISSELL Rewards Points
Automatically earn points for discounts and free shipping on future purchases.
Faster Service
Supplying your information now saves you time should you need to contact us with questions regarding your product.
Product Support Reminders and Alerts
We'll contact you with any important product maintenance reminders and alerts.
Special Promotions
Optional: Register your email to receive notice of offers, contests, cleaning tips and more!
Visit www.BISSELL.com/registration!
Visit the BISSELL website: www.BISSELL.com
When contacting BISSELL, have model number of cleaner available.
Please record your Model Number:
Please record your Purchase Date:
NOTE: Please keep your original sales receipt. It provides proof of purchase date in the event of a warranty claim. See Warranty page for details.
For cleaning tips and more visit www.BISSELL.com or find us at:

BISSELLClean

BISSELLClean

BISSELL

BISSELL

We can't wait to hear from you!
Rate this product and let us (and millions of your closest friends) know what you think!
www.BISSELL.com

More of a video person? Look for this icon and go online for an instructional how-to video at www.BISSELL.com/videos
IMPORTANT SAFETY INSTRUCTIONS
READ ALL INSTRUCTIONS BEFORE USING YOUR DEEP CLEANER.
When using an electrical appliance, basic precautions should be observed, including the following:
TO REDUCE THE RISK OF FIRE, ELECTRIC SHOCK, OR INJURY:
- Connect to a properly grounded outlet only. See grounding instructions. Do not modify the 3-prong grounded plug.
- Do not leave appliance when it is plugged in. Unplug from outlet when not in use and before servicing.
- Use indoors only.
- Do not allow to be used as a toy. Close attention is necessary when used by or near children.
- Do not use for any purpose other than described in this User's Guide. Use only manufacturer's recommended attachments.
- Do not use with damaged cord or plug. If appliance is not working as it should, or has been dropped, damaged, left outdoors, or dropped into water, have it repaired at an authorized service center.
- Do not pull or carry by cord, use cord as a handle, close a door on cord, or pull cord around sharp edges or corners. Do not run appliance over cord. Keep cord away from heated surfaces.
- Do not unplug by pulling on cord. To unplug, grasp the plug, not the cord.
- Do not handle plug or appliance with wet hands.
- Do not put any object into openings. Do not use with any opening blocked; keep openings free of dust, lint, hair, and anything that may reduce air flow.
- Keep hair, loose clothing, fingers, and all parts of body away from openings and moving parts.
- Turn off all controls before plugging or unplugging appliance.
- Use extra care when cleaning on stairs.
- Do not use to pick up flammable or combustible materials (lighter fluid, gasoline, kerosene, etc.) or use in areas where they may be present.
- Do not use appliance in an enclosed space filled with vapors given off by oil base paint, paint thinner, some moth proofing substances, flammable dust, or other explosive or toxic vapors.
- Do not use to pick up toxic material (chlorine bleach, ammonia, drain cleaner, etc.).
- Do not pick up anything that is burning or smoking, such as cigarettes, matches, or hot ashes.
- Use only BISSELL cleaning products intended for use with this appliance to prevent internal component damage. See the Cleaning Fluid section of this guide.
- Do not immerse. Use only on surfaces moistened by the cleaning process.
- Keep appliance on a level surface.
- Do not carry the appliance while in use.
SAVE THESE INSTRUCTIONS FOR FUTURE USE
This model is for household use only. Commercial use of this unit voids the manufacturer's warranty.
Improper connection of the equipment-grounding conductor can result in a risk of electrical shock. Check with a qualified electrician or service person if you aren't sure if the outlet is properly grounded. DO NOT MODIFY THE PLUG. If it will not fit the outlet, have a proper outlet installed by a qualified electrician. This appliance is designed for use on a nominal 120-volt circuit, and has a grounding attachment plug that looks like the plug in the illustration. Make certain that the appliance is connected to an outlet having the same configuration as the plug. No plug adapter should be used with this appliance.
GROUNDING INSTRUCTIONS
This appliance must be connected to a grounded wiring system. If it should malfunction or break down, grounding provides a safe path of least resistance for electrical current, reducing the risk of electrical shock. The cord for this appliance has an equipment-grounding conductor and a grounding plug. It must only be plugged into an outlet that is properly installed and grounded in accordance with all local codes and ordinances.

Documents / Resources
References
Download manual
Here you can download full pdf version of manual, it may contain additional safety instructions, warranty information, FCC rules, etc.
Advertisement


Need help?
Do you have a question about the PowerForce PowerBrush and is the answer not in the manual?
Questions and answers