Bissell Steam Mop Select 80K6 Series Manual
- Limited warranty (1 page) ,
- User manual (13 pages) ,
- Manual (9 pages)
Advertisement
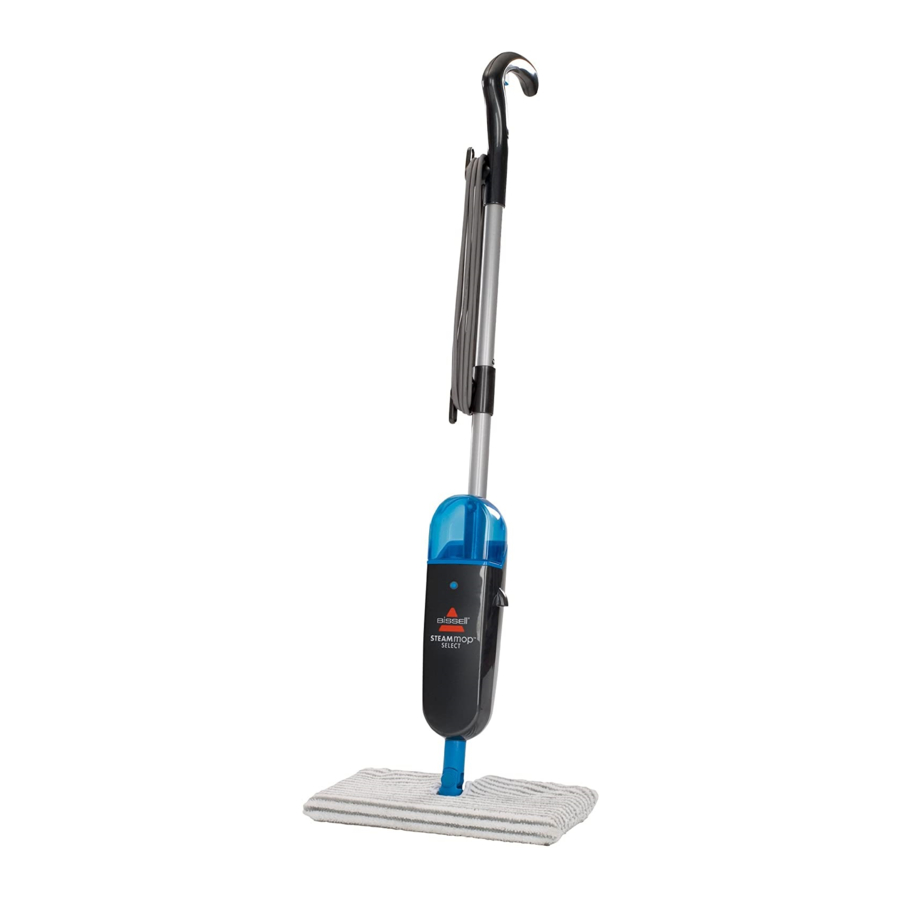
Product view

Optional Accessories:

Assembly
Your Steam Mop Select assembles Handle Assembly quickly and easily. Your Steam Mop Select is packaged with the following items:

Handle Assembly
Lower Body
Two sided flip mop head
Removable Water Tank
2 Steam Mop Select Mop pads
- Attach lower body to two-sided flip mop head by snapping it into place.
![]()
- Slide handle assembly down into lower body until it snaps into place.
- Slide water tank onto lower body and gently push tank into place.
![]()


Steam Mop Select assembly is now complete.
Special features
Removable water tank
The water tank is located on the top of the Steam Mop Select. It can be refilled with water any time during use. Distilled or demineralized water is recommended in place of tap water.
Do not use chemicals with your Steam Mop Select.
Indicator light
The indicator light will glow when the Steam Mop Select is plugged in.
 Tip: Do not attempt to use your Steam Mop Select without water in the tank. Tip: Do not attempt to use your Steam Mop Select without water in the tank. |
Steam on demand trigger
Press to release steam.
Two-sided flip mop head
Allows you to clean in tight spaces and under cabinets. Clean twice as much floor with one pad by flipping the head over. Simply lift the Steam Mop Select off the floor. The flip mop head will spring forward. Place the edge of the mop head on the floor and apply forward or backward pressure depending on which side of the pad you wish to use.
Flip mop pads
Reusable microfiber mop pad is machine washable and safe for all hard floor surfaces. Your Steam Mop select may have come with two different pads. The all-white "soft" pad is best for everyday use on delicate flooring like sealed hardwoods and laminate. The gray and white striped pad can be used for scrubbing heavily soiled floors and tougher messes.
Operations
Getting ready
The mop pad may have already come attached to the flip head, if not follow steps 1A and 1B below.
- Attach mop pad

- Insert the flip head into the open end of the mop pad.
- Secure the Velcro flaps to ensure the pad is on tightly.
- Fill the water tank

- Remove tank by lifting straight up and away from unit.
- Unscrew cap at bottom of water tank.
- Fill water tank with water. For best results, water should be at room temperature.
- Replace the cap, tighten until snug.
- Replace water tank by gently sliding tank into place.


- Twist the quick release cord wrap clockwise to unwrap the power cord completely and plug into a 120-Volt outlet as described on the Important Safety Instructions.
- The indicator light will illuminate when the Steam Mop Select is plugged in.
Tip:
Use of distilled water is recommended to prolong the life of your Steam Mop Select
Before you clean
 Never put descaling, alcoholic, or detergent products into the steam cleaner, as this may damage it or make it unsafe for use. Only use BISSELL authorized aromatic products |
Thoroughly sweep or vacuum floor prior to cleaning with the Steam Mop Select.
Cleaning hard floors
Your Steam Mop Select is designed to clean hard flooring such as ceramic tile, vinyl, laminate, marble, stone and sealed hard wood floors. Use of your Steam Mop Select on waxed or some unwaxed floors may result in a diminished glossiness. The Steam Mop Select is not for use on unsealed wood floors. For best results test in an inconspicuous area and check the care instructions from your flooring manufacturer.
- Plug the unit in and wait 30 seconds for it to heat up. Begin cleaning by slowly passing over surface while pressing the steam on demand trigger to emit steam as needed.
- To sanitize an area of your floor, (attack invisible germs and bacteria) place the Steam Mop Select over the spot for a minimum 15 seconds using continuous steam, but no longer than 20 seconds using continuous steam. For larger areas, overlap swivel head placement.
- When the mop pad becomes soiled, simply flip the mop head over to use the other side by lifting the Steam Mop Select off the floor. Lift the device off the floor so the flip head springs forward. Place the edge of the mop head on the floor and apply forward or backward pressure depending on which side of the pad you wish to use.
![information]() NOTE: When cool, the mop head may not immediately spring forward. While in use, the mop head will spring forward as directed.
NOTE: When cool, the mop head may not immediately spring forward. While in use, the mop head will spring forward as directed. - When the Steam Mop Select stops emitting steam, unplug the unit. Simply remove the water tank, refill, and continue cleaning.
Maintenance and care
 Upright storage of the Steam Mop Select with a wet mop pad may result in the formation of white marks on your floor. To remove the white marks, clean area with vinegar. |
When you're done
- Unplug power cord from outlet.
- Carefully remove mop pad from flip head, as mop pad and lower assembly may be hot.
- Any water remaining in the water tank should be emptied prior to machine storage.
- Mop pad can be machine washed in warm water. Use only liquid detergents. Do not use fabric softeners. For best results, air dry.
- Wrap power cord around quick release cord wrap on side of Steam Mop Select.
- Wipe all surfaces of Steam Mop Select with a soft cloth. Store upright in a protected, dry area.
Troubleshooting
Reduced steam or no steam.
Possible Causes
- Water tank empty
Remedies
- Fill tank
Other maintenance or service not included in the manual should be performed by an authorized service representative. Thank you for selecting a BISSELL product.
Please do not return this product to the store.
For any questions or concerns, BISSELL is happy to be of service. Contact us directly at 1-800-237-7691.
Replacement parts- BISSELL Steam Mop™ Select

| Item | Part No. | Part Name |
| 1 | 203-7738 | Handle Assembly |
| 2 | 203-7734 | Water Tank with Cap and Insert |
| 3 | 203-7735 | Cap and Insert Assembly |
Additional Accessories

| Item | Part No. | Part Name |
| 1 | 29H9-A | Replacement Mop Pads - 2 pack |
| 2 | 3252-1 | Eucalyptus Mint Natural Aroma |
| 3 | 59V4 | Steam Mop Scented Water Eucalyptus Mint 32 FL oz |
| 4 | 203-2168 | Sorage Hook with Screws |
If you need information about repairs or replacement parts, or if you have questions about your warranty, contact BISSELL Consumer Services.
Website or E-mail: www.bissell.com
Or Call:
BISSELL Consumer Services
1-800-237-7691
Monday - Friday 8 a.m. - 10 p.m. ET Saturday 9 a.m. - 8 p.m. ET
Or Write:
BISSELL Homecare, Inc.
PO Box 3606
Grand Rapids, MI 49501
ATTN: Consumer Services
NOTE: please keep your original sales receipt. It provides proof of date of purchase in the event of a warranty claim.
Don't forget to register your product!
Registering is quick, easy and offers you benefits over the lifetime of your product. You'll receive:
BISSEll Rewards points
Automatically earn points for discounts and free shipping on future purchases.
Faster Service
Supplying your information now saves you time should you need to contact us with questions regarding your product.
Product Support Reminders and Alerts
We'll contact you with any important product maintenance reminders and alerts.
Special promotions
Optional: Register your email to receive notice of offers, contests, cleaning tips and more!
Visit www.bissell.com/registration now!
IMPORTANT SAFETY INSTRUCTIONS
When using an electrical appliance, basic precautions should be observed, including the following:
Read all instructions before using your Steam Mop™ Select.
To reduce the risk of fire, electric shock, or injury:
- Do not direct steam at people, animals, or at electrical outlets.
- Do not expose to rain.
- Store indoors.
- Unplug from outlet when not in use and before conducting maintenance or troubleshooting.
- Do not leave steam cleaner unattended.
- Do not expose hair, loose clothing, fingers or body parts to openings or moving parts.
- Do not service steam cleaner when it is plugged in.
- Do not handle steam cleaner with wet hands.
- Do not use steam cleaner if it has been dropped, damaged, left outdoors or dropped into water, return it to a service center.
- Do not pull or carry by cord, use cord as a handle, close door on cord, pull cord around sharp corners or edges, or expose cord to heated surfaces.
- Do not unplug by pulling on cord.
- Do not use appliance in an enclosed space filled with vapor given off by oil-base paint, paint thinner, some moth proofing substances, flammable dust, or other explosive or toxic vapors.
- Do not allow to be used as a toy.
- Do not use on leather, wax polished furniture or floors, synthetic fabrics, velvet or other delicate, steam-sensitive materials.
- Do not immerse.
- Do not use for any purpose other than described in this User's Guide.
- Use only manufacturer's recommended attachments - use of attachments not provided or sold by BISSELL may cause fire, electric shock or injury.
- Never put descaling, aromatic, alcoholic or detergent products into the steam cleaner, as this may damage it or make it unsafe for use.
- Unplug by grasping the plug, not the cord.
- Close attention is necessary when used by or near children.
SAVE THESE INSTRUCTIONS
Commercial use of this unit void the manufacturer's warranty.
THIS APPLlIANCE HAS A POLARIZED PLUG.
To reduce the risk of electric shock, this appliance has a polarized plug (one blade is wider then the other) This plug will fit in a polarized outlet only one way. If the plug does not fit fully into the outlet, reverse the plug. If it still does not fit, contact a qualified electrician to install a proper outlet. Do not change the plug in any way.
This model is for household use only.
Documents / Resources
References
Download manual
Here you can download full pdf version of manual, it may contain additional safety instructions, warranty information, FCC rules, etc.
Advertisement


Need help?
Do you have a question about the Steam Mop Select and is the answer not in the manual?
Questions and answers