Advertisement
- 1 Product Overview
- 2 Package Contents
- 3 Filling with Water
- 4 Depressurizing and Refilling Water During Use
- 5 Steam Cleaning and Sanitizing
- 6 After-Cleaning Care
- 7 Accessories and Tools
- 8 Recommended Usage Areas
- 9 Storing Your Machine
- 10 Troubleshooting
- 11 IMPORTANT SAFETY INSTRUCTIONS
- 12 Documents / Resources
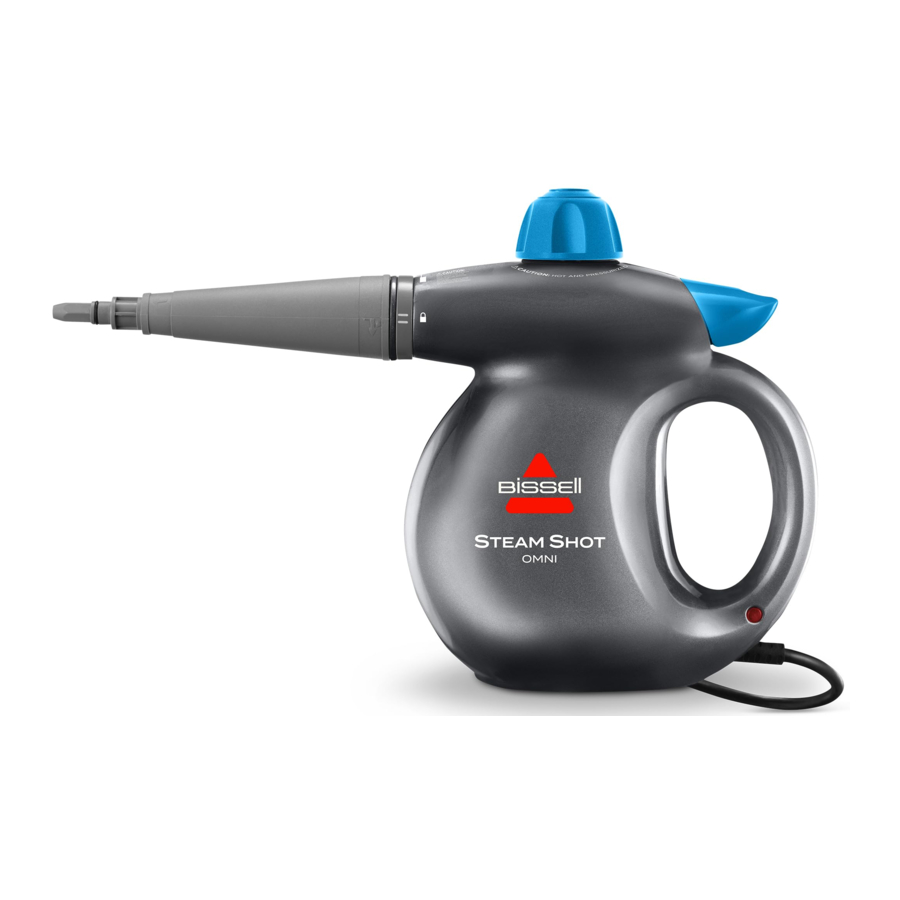
Product Overview

- Safety Cap with Red Pressure Indicator Plunger
- Steam Trigger
- Steam Nozzle
- Indicator Light
Package Contents
TOOLS INCLUDED IN BOX WILL DIFFER BY MODEL
To see what's included with your purchase, check the "Carton Contents" list on the top flap of the box.

Filling with Water

Use of distilled water in place of tap water is recommended for optimal steam performance and to prolong the life of your steamer. Do not use chemicals in the water tank of your machine. Other solutions may harm the machine.
Your handheld steam cleaner features a water tank with a boiler system to create powerful, pressurized steam for cleaning and sanitizing.* To properly heat up and build pressure, the water tank MUST NOT BE OVERFILLLED. DO NOT FILL WITH MORE THAN 300 ML OR 10 OZ OF DISTILLED WATER. DO NOT FILL UNDER SINK, ONLY FILL BY MEASURING CUP.
If overfilled, water replaces the air space in the tank required to heat up and build pressure. If this happens, you will experience the following:
- Hot water will leak out of the vents on the safety cap.
- When the stream trigger is pressed, a stream of water will release out of the steam nozzle.
- Once the water is cleared, it will change to a spitting and sputtering steam/water mixture.
After the above steps have cycled through, proper steam will start to release out of the steam nozzle for optimal steam cleaning.
 |  |  |
|
|
|
 |  |  |
|
|
|
*Kills 99.9% of Staphylococcus aureus, Klebsiella aerogenes, and Aspergillus niger when used as directed. Testing conducted in a thirdparty laboratory under controlled conditions. Results may vary.

Never put descaling, alcoholic, vinegar, or detergent products into the steam cleaner, as this may damage it or make it unsafe for use.
Depressurizing and Refilling Water During Use
Your handheld steam cleaner features a water tank with a boiler system to create powerful, pressurized steam for cleaning and sanitizing.* For safety, the water tank MUST be depressurized before opening the safety cap to refill with water during use. To properly heat up and build pressure, the water tank MUST NOT BE OVERFILLED. DO NOT FILL WITH MORE THAN 300 ML OR 10 OZ. OF DISTILLED WATER. DO NOT FILL UNDER SINK, ONLY FILL BY MEASURING CUP.
 |  |  |
|
|
|
 |  |  |
|
|
|
*Kills 99.9% of Staphylococcus aureus, Klebsiella aerogenes, and Aspergillus niger when used as directed. Testing conducted in a thirdparty laboratory under controlled conditions. Results may vary.
Steam Cleaning and Sanitizing
Your handheld steam cleaner was tested by third-party laboratories under controlled conditions to ensure sanitization and elimination of 99.9% of germs* and bacteria.
*Kills 99.9% of Staphylococcus aureus, Klebsiella aerogenes, and Aspergillus niger when used as directed. Testing conducted in a third-party laboratory under controlled conditions. Results may vary.

Before using your handheld steam cleaner, please note:
- Do not use on porous, hard surfaces.
- Do not use on painted, plastic or vinyl covered surfaces, wax polished furniture or floors, synthetic materials and fabrics, velvet, leather or other delicate, heat or steam sensitive surfaces, materials or fabrics.
- To sanitize, use on non-porous, non-food contact hard surfaces with the accessory nozzle only.
- Test on an inconspicuous area before first use on a surface. If hard surface is effected, do not use the steam cleaner to clean.
- Thermal shock can shatter glass. Before cleaning cold glass surface, carefully warm the surface by directing the steam jet on the glass from a distance of no less than four to six inches.
| |  |  |
|
|
|
 |  |  |
|
|
|
After-Cleaning Care
 |  |  |
|
|
|
 |  |  |
|
|
|
 | ||
| ||


To reduce the risk of fire, electric shock or injury, disconnect plug from electrical outlet before performing maintenance or troubleshooting.
Accessories and Tools

Round Detail Brush
Nylon bristles scrub tough messes. Comes with up to three different colors you can designate for specific messes or rooms.

Flat Scraping Tool
Scrape and remove tough dried- or baked-on messes.

Angle Concentrator Tool
Direct steam at an angle for hard-to-reach areas or surfaces.

Grout Brush
Concentrated nylon bristles scrub grout lines and other tight, narrow spaces.

Fabric Steamer (wide nozzle + cloth)
De-wrinkle and refresh clothing, fabric, upholstery and more. The cloths are washable and reusable.

Steam Squeegee (wide nozzle + window squeegee)
Clean windows, mirrors, shower walls, and any other non-porous, solid, flat surfaces in the home.
Attaching Accessories and Detail Tools
Make sure accessories are securely attached before use. Do not use if damaged.
 |  |
|
|
Attaching Fabric Steamer
 |  |
|
|
Attaching Steam Squeegee
 |  |  |
|
|
|
Recommended Usage Areas
 |  |
| General Dirt, grime, grease, dried on or stuck on messes, golf clubs, wallpaper removal, narrow spaces, tight crevices, old gum, ceiling fans, mattresses, doorknobs, drapes, upholstery, plants, and more. | Kitchens Floor grout, counters, backsplashes, sinks, faucets, ovens, oven hoods, stovetops, microwaves, windows, slider door tracks, and more. |
 |  |
| Bathrooms Floor grout, counters, backsplashes, sinks, faucets, tubs, showers, shower doors, toilet exteriors, and more. | Kids & Pets Kid and pet toys, sports equipment, pet beds, food and water bowls, pet crates, and more. |
 |  |
| Clothes, Fabric & Upholstery Clothing, fabric, upholstered surfaces, drapes, curtains, furniture, pillows, mattresses, bedding, car seats, and more. Note: Do not use steamer on clothes while wearing them to avoid the risk of burns and injury. | Windows, Mirrors, Glass & Smooth Surfaces Windows, mirrors, shower walls and doors, glass cooktops, kitchen countertops, glass and marble tables, and any other nonporous, solid, flat surfaces in the home. |
Storing Your Machine
When finished using the product, store unit indoors in a dry location in an area where the product is not likely to get damaged.
Troubleshooting
| Problem | Possible Cause | Remedies |
Reduced steam or no steam | No water in tank. | Pour 300mL/10oz distilled water into steamer. Do not overfill. Refill only by measuring cup. |
| Did not press stream trigger. | Unlock trigger and press to release steam. | |
| Mineral deposits from hard water caused clog in internal valve. | Contact BISSELL Consumer Care. | |
| Water tank overfilled. | Safely empty water tank following "Depressurizing and Refilling Water During Use" instructions and then refill following "Filling with Water" instructions | |
Leaking | Mineral deposits from hard water caused clog in internal valve. | Contact BISSELL Consumer Care. |
| Water tank overfilled. | Safely empty water tank following "Depressurizing and Refilling Water During Use" instructions and then refill following "Filling with Water" instructions. |
Note: Any other servicing should be performed by an authorized service representative.
IMPORTANT SAFETY INSTRUCTIONS
READ ALL INSTRUCTIONS BEFORE USING YOUR APPLIANCE.
When using an electrical appliance, basic precautions should be observed, including the following:
TO REDUCE THE RISK OF FIRE, ELECTRIC SHOCK OR INJURY:
- Connect to a properly grounded outlet only. See grounding instructions. Do not modify the three-prong grounded plug.
- Do not leave appliance when it is plugged in. Unplug from outlet when not in use and before servicing.
- Use indoors only.
- Do not immerse.
- Do not allow to be used as a toy. Close attention is necessary when used by or near children.
- Do not use for any purpose other than described in this user guide. Use only manufacturer's recommended attachments.
- Do not use with damaged cord or plug. If appliance is not working as it should, has been dropped, damaged, left outdoors, or dropped into water; do not attempt to operate it and have it repaired at an authorized service center.
- Do not pull or carry by cord, use cord as a handle, close door on cord, or pull cord around sharp edges or corners. Do not run appliance over cord. Keep cord away from heated surfaces.
- Do not unplug by pulling on cord. To unplug, grasp the "Name optional" plug, not the cord.
- Do not handle plug or appliance with wet hands.
- Do not put any object into openings. Do not use with any opening blocked; keep openings free of dust, lint, hair, and anything that may reduce air flow.
- Turn OFF all controls before plugging or unplugging appliance.
- Use extra care when cleaning on stairs.
- Unplug from outlet before filling, rinsing, or cleaning. Do not overfill.
- Do not open the water fill cap when using the steam-cleaning attachment.
- Do not turn over the steam-cleaning nozzle, or touch the surface of the nozzle when using the steam-cleaner or its attachments.
- Only use water to refill the reservoir. Do not use any type of chemicals or additives.
- Do not attempt to use without water in the tank.
- Do not touch the steam-cleaning nozzle or adjacent surfaces when steam-cleaning or when the nozzle is heated.
- Do not apply steam directly to any person or animal
- Let cool 5 minutes before refilling.
- Release pressure before removing safety cap.
![burn hazard]()
![shock hazard]()
Use only manufacturer's recommended attachments - use of attachments not provided or sold by BISSELL may cause fire, electric shock or injury.- Do not turn your appliance ON until you are familiar with all instructions and operating procedures.
- Do not leave steam cleaner unattended.
- Steam must not be directed toward people, animals, or equipment containing electrical components, such as interior of ovens.
- Do not use on leather, wax polished furniture or floors, synthetic fabrics, velvet or other delicate, steam-sensitive materials.
- Do not use appliance in an enclosed space filled with vapors given off by oil-based paint, paint thinner, some moth-proofing substances, flammable dust, or other explosive or toxic vapors.
- Plastic film can be dangerous. To avoid danger of suffocation, keep away from children.
SAVE THESE INSTRUCTIONS
THIS MODEL IS FOR HOUSEHOLD USE ONLY.
COMMERCIAL USE OF THIS UNIT VOIDS THE MANUFACTURER'S WARRANTY.
- To reduce the risk of a leaking condition, do not store appliance where freezing may occur. Damage to internal components may result.
- Do not turn ON your appliance until you are familiar with all instructions and operating procedures.
- Do not use on leather, wax polished furniture or floors, synthetic fabrics, velvet, or other delicate, steam-sensitive materials.
Improper connection of the equipment-grounding conductor can result in a risk of electrical shock. Check with a qualified electrician or service person if you aren't sure if the outlet is properly grounded. DO NOT MODIFY THE PLUG. If it will not fit the outlet, have a proper outlet installed by a qualified electrician. This appliance is designed for use on a nominal 120-volt circuit, and has a grounding attachment plug that looks like the plug in the illustration. Make certain that the appliance is connected to an outlet having the same configuration as the plug. No plug adapter should be used with this appliance.
 GROUNDING INSTRUCTIONS
This appliance must be connected to a grounded wiring system. If it should malfunction or break down, grounding provides a safe path of least resistance for electrical current, reducing the risk of electrical shock. The cord for this appliance has an equipment-grounding conductor and a grounding plug. It must only be plugged into an outlet that is properly installed and grounded in accordance with all local codes and ordinances.

Need more support?
Head to support.BISSELL.com to troubleshoot, register your product, order spare parts, view your warranty, and more.
Documents / Resources
References
Download manual
Here you can download full pdf version of manual, it may contain additional safety instructions, warranty information, FCC rules, etc.
Download Bissell Steam Shot OMNI / OMNIREACH, 4171 Series Manual
Advertisement


Need help?
Do you have a question about the Steam Shot OMNI and is the answer not in the manual?
Questions and answers