Table of Contents
Advertisement
Available languages
Available languages
Quick Links
Advertisement
Table of Contents

Related Manuals for Mobiclinic ECG1200G


Summary of Contents for Mobiclinic ECG1200G
- Page 1 MANUAL DE INSTRUCCIONES ELECTROCARDIÓGRAFO ECG1200G Manual de instrucciones Instruction manual Última revisión: 27 de mayo de 2022 Last revision: May 27th 2022 Lea las instrucciones antes de usar el producto.
-
Page 2: Especificaciones Técnicas
Electrocardiógrafo PT NL AVISO Aviso al usuario y/paciente: Cualquier incidente grave que haya ocurrido en relación con el producto debe comunicarse al fabricante y a la autoridad competente del Estado Miembro en el que esté establecido el usuario y/o paciente. INDICACIONES - En cualquier tipo de pacientes para detectar episodios de hipoxemia difícilmente apreciable por clínica. -
Page 3: Normas De Seguridad
Electrocardiógrafo PT NL 2. NORMAS DE SEGURIDAD • Debe conectar el equipo a la red eléctrica con toma tierra. • Si el cable toma tierra no está integrado el equipo se puede usar solamente con la batería interna. • Antes de cambiar el fusible, desenchufe el equipo de la red eléctrica. •... -
Page 4: Descripción De Las Partes
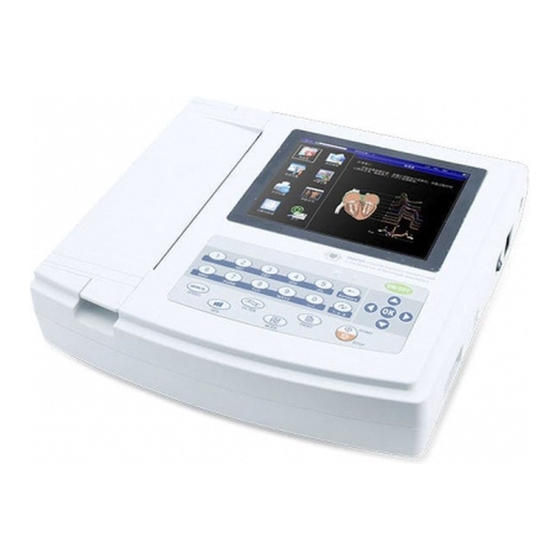
Electrocardiógrafo PT NL • Explicación de símbolos: Fuente de alimentación AC Desconectado/Apagado Conectado/Encendido Potencial de ecualización Advertencia Equipo de tipo CF con protección contra desfibrilador Conector USB Conector de cable de paciente (derivaciones) ◄PATIENT 4. DESCRIPCIÓN DE LAS PARTES 4.1 Elementos y vistas del panel Pantalla Compartimento de papel... -
Page 5: Descripción De Los Botones
Electrocardiógrafo PT NL 4.2. Descripción de los botones Apagar/encender el dispositivo Iniciar/detener registro Seleccionar filtro Confirmar una operación realizada Ajustar velocidad del papel Arriba Ajustar la ganancia Abajo Cambiar modo de impresión Iniciar impresión Izquierda Derecha Retroceder Cambiar método de entrada Número/Mayúscula y Minúscula/Carácter: 0/Espacio/ , Número/Mayúscula y Minúscula/Carácter: 1/ . -
Page 6: Precauciones Durante La Utilización
Electrocardiógrafo PT NL 5. ADVERTENCIAS ANTES DE LA UTILIZACIÓN • Lea este manual de instrucciones cuidadosamente antes de utilizar el equipo para garantizar un uso seguro y efectivo de este. • Para la instalación y el mantenimiento del equipo, tenga en cuenta lo siguiente: - No debe haber ningún cable de alta tensión, instrumento de rayos X, instrumento de ultrasonidos, de electroterapia etc., cerca del equipo. -
Page 7: Colocación De Los Electrodos
Electrocardiógrafo PT NL 9. COLOCACIÓN DE LOS ELECTRODOS Es preferible colocar los electrodos sobre el tórax en primer lugar y a continuación en las extremidades 9.1 Electrodos de tórax Observe la siguiente imagen y coloque los electrodos del tórax según se muestra a continuación: V1: Cuarto espacio intercostal a la derecha del esternón. -
Page 8: Uso De La Batería
Electrocardiógrafo PT NL 10. CONEXIÓN A TOMA DE TIERRA Y LA RED ELÉCTRICA Asegúrese de que el quipo esté apagado y compruebe si está correctamente conectado a la toma de tierra con un conector de 3 pinchos. El cable de alimentación debe estar correctamente insertado en el enchufe del equipo. Una conexión correcta a toma tierra asegurará... - Page 9 Electrocardiógrafo PT NL Nivel de batería: Ver 12.4 Botones: Entrada a la interfaz de muestreo. Se inicia automáticamente, después de encender el equipo. Entrada a la interfaz de gestión de archivos (modificación o eliminación de archivos). La imagen de una colocación correcta de electrodos. Configuración de la hora y fecha.
- Page 10 Electrocardiógrafo PT NL • Detener muestreo: durante el muestreo, puede pulsar en el panel principal para detenerlo y regresar a la pantalla principal. • Cambiar derivación: puede cambiar la onda de la derivación actual y esta será impresa en el registro manual. •...
- Page 11 Electrocardiógrafo PT NL Seleccione cualquier campo. Al pulsar aparecerá un teclado en pantalla como puede ver a continuación. El botón [Caps] sirve para cambiar entre número/mayúscula y número minúscula; el botón [Space] permite introducir un espacio; el botón [Bkspace] sirve para borrar el último carácter introducido; pulse [OK] para confirmar los datos introducidos y salir de la pantalla. Puede existir un límite de caracteres según el contenido introducido.
- Page 12 Electrocardiógrafo PT NL Condiciones de búsqueda Modo de búsqueda Borrar Buscar Cerrar Sugerencia: Se recomienda usar la opción [Cond. and], si hay muchos archivos guardados. De esta manera podrá encontrar rápidamente el archivo que busca. 12.6 Revisión de archivos En la pantalla de gestión de archivos, sitúese sobre el archivo desead y seleccione [Review] para abrir otra ventana con los datos del paciente como puede ver a continuación.
-
Page 13: Configuración De Fecha Y Hora
Electrocardiógrafo PT NL En la pantalla puede cambiar el modo de impresión pulsando . Pulse para iniciar la impresión. 12.7 Configuración de fecha y hora En la interfaz principal, seleccione la tecla para abrir la configuración de fecha y hora, como en la imagen siguiente: En esta pantalla, puede cambiar las opciones con los botones para editar el contenido. - Page 14 Electrocardiógrafo PT NL Nivel bajo de batería Ninguno/Solo una vez/Siempre El sistema emitirá una alarma cuando la batería esté a punto de agotarse. Frecuencia de filtro [50Hz/35Hz]/[50Hz/25Hz]/[60 Ajuste de los parámetros de filtro de CA y EMG. Hz/25Hz]/[60Hz/35Hz] Introducción de datos [Antes]/[Después]/[Ninguna] Configurar cuando se introduce los datos del paciente.
-
Page 15: Configuración De Impresión
Electrocardiógrafo PT NL 12.10 Configuración de impresión Seleccione el botón en la interfaz principal para abrir la ventana de diálogo de la configuración de impresión, como en la imagen siguiente: Seleccione el botón [Default] para volver a la configuración por defecto. La siguiente tabla contiene todos los objetos, las opciones y su explicación correspondiente. -
Page 16: Información Sobre El Fabricante
Electrocardiógrafo PT NL 12.11 Colocación de electrodos Seleccione el botón en la interfaz principal para abrir la imagen de colocación correcta de los electrodos. Presione cualquier tecla para salir de esta interfaz. 12.12 Información sobre el fabricante Seleccione el botón en la interfaz principal para abrir la ventana con la información del fabricante del equipo. - Page 17 Electrocardiógrafo PT NL 13.3 Interferencias EMG A. Compruebe si la habitación en confortable. B. ¿El paciente está nervioso? C. ¿La cama es demasiado estrecha? 13.4 Desviación de la línea basal A. Verifique la adhesión de los electrodos y ele stado del cable del paciente. B.
-
Page 18: Mantenimiento
El electrocardiógrafo modelo ECG1200G (ECG) está indicado para su uso en el entorno electromagnético que se especifica aba- jo. El cliente o el usuario del electrocardiógrafo modelo ECG1200G (ECG) debe asegurarse de que se utilice en dicho entorno. Prueba de inmunidad... - Page 19 El electrocardiógrafo modelo ECG1200G (ECG) está indicado para su uso en el entorno electromagnético que se especifica abajo. El cliente o el usuario del electrocardiógrafo model ECG1200G (ECG) debe asegurarse de que se utilice en dicho entorno. Prueba de inmu-...
- Page 20 Electrocardiograph PT NL INSTRUCTION MANUAL ELECTROCARDIOGRAPH ECG1200G Please read instructions before use.
- Page 21 Electrocardiograph PT NL NOTICE Notice to the user and/or patient; any serious incident that has ocurred in relation to the product must be informed to the manufacturer and to the local authority of the Member State in which the user and/ or patient is established.
-
Page 22: Safety Measures
Electrocardiograph PT NL 2. SAFETY MEASURES • The equipment must be connected to the mains with an earthed mains supply. • If the earthing cable is not integrated, the equipment can only be operated with the internal battery. • Before changing the fuse, unplug the equipment from the mains. •... -
Page 23: Parts Description
Electrocardiograph PT NL •Symbol explanation: AC power supply Disconnected/Off Connected/On Equipotential point Warning Type CF deivce, with defibrillation protection function USB connector Lead connector ◄PATIENT 4. PARTS DESCRIPTION 4.1 Panel elements and views Display Paper compartment Control panel Front View Grounding port Side view Lead... -
Page 24: Buttons Description
Electrocardiograph PT NL 4.2. Buttons description Turn the device on/off Start/Stop sampling Select filter Confirm operation Adjust paper speed Adjust gain Down Change printing mode Start printing Left Right Backspace Switch input method Number/Uppercase and lowercase/Character: 0/Space/ , Number/Uppercase and lowercase/Character: 1/ . Number/Uppercase and lowercase/Character: 2/abc/ABC/ : Number/Uppercase and lowercase/Character: 3/def/DEF/;... -
Page 25: Precautions Before Use
Electrocardiograph PT NL 5. PRECAUTIONS BEFORE USE • Read this instruction manual carefully before use to ensure safe and effective use of the equipment. • For the installation and maintenance of the equipment, please note the following: - There must not be any high voltage cables, X-ray instruments, ultrasound instruments, electrotherapy instruments etc. near the equipment. - Page 26 Electrocardiograph PT NL 9. PLACEMENT OF THE ELECTRODES It is recommended to place the electrodes on the thorax first and then on the extremities. 9.1 Chest electrodes Observe the following picture and place the chest electrodes as shown below: V1: Fourth intercostal space to the right of the sternum. V2: Fourth intercostal space to the left of the sternum.
-
Page 27: Use Of The Battery
Electrocardiograph PT NL 10. GROUNDING AND MAINS CONNECTION Make sure that the equipment is switched off and check that it is correctly connected to the earthed socket with a 3-pin connector. The power cable must be correctly inserted into the socket on the equipment. Proper grounding will ensure proper operation and performance of the equipment and prevent AC and electromagnetic wave interference. -
Page 28: Sampling Interface
Electrocardiograph PT NL Battery level: See 12.4 Buttons: Input to the sampling interface. Starts automatically, after switching on the equipment. Entry to the file management interface (modification or deletion of files). The image of a correct electrode placement. Time and date settings. System settings. -
Page 29: Entering Patient Data
Electrocardiograph PT NL • Stop Sampling: during sampling, you can press on the main panel to stop it and return to the main screen. • Change lead: You can change the current lead waveform and it will be printed in the manual recording. •... -
Page 30: Data Management
Electrocardiograph PT NL PT NL Select any field. When pressing an on-screen keyboard will appear as shown below. The [Caps] button is used to switch between number/uppercase and lowercase number; the [Space] button is used to enter a space; the [Bkspace] button is used to delete the last character entered;... - Page 31 Electrocardiograph PT NL PT NL Search conditions Search mode Delete Search Close Tip: It is recommended to use the [Cond. and] option, if there are many files saved. This way you can quickly find the file you are looking for. 12.6 Review of files In the file management screen, hover over the desired file and select [Review] to open another window with the patient data as shown below.
-
Page 32: Date And Time Settings
Electrocardiograph PT NL PT NL On the screen you can change the print mode by pressing . Press to start printing. 12.7 Date and time settings In the main interface, select the button to open the date and time settings, as the following picture: In this screen, you can change the options with the buttons to edit the content. - Page 33 Electrocardiograph PT NL PT NL Filter frequency [50Hz/35Hz]/[50Hz/25Hz]/[60 Setting the AC and EMG filter parameters. Hz/25Hz]/[60Hz/35Hz] Data input Before]/[After]/[None] [Before]/[After]/ Set when patient data is entered. [None] [English][/Chinese Language [English][/Chinese], etc. Setting the system language. K-B sound On/Off If you select "on", when you press the keys on the keyboard, the equipment will beep.
-
Page 34: Print Settings
Electrocardiograph PT NL PT NL 12.10 Print settings Select the button on the main interface to open the print settings dialog box, as shown in the following figure: Select the [Default] button to return to the default settings. The following table contains all objects, options and their explanation. Option Function Description... -
Page 35: Troubleshooting
Electrocardiograph PT NL PT NL 12.12 Manufacturer information Select the button on the main interface to open the window with the equipment manufacturer information. This interface shows the name of the equipment, the version, the name of the manufacturer, copying rights and contact details of the manufacturer. 13. -
Page 36: Troubleshooting Table
Electrocardiograph PT NL PT NL 13.4 Deviation from baseline A. Verify electrode adhesion and patient cable placement. B. Check the connection between the patient cable and the electrodes. C. Check the cleanliness of the electrodes and the patient's skin. Are the electrodes and gel covered with sufficient gel? D. - Page 37 Guidance and manufacturer's declaration. Electromagnetic immunity The electrocardiograph model ECG1200G (ECG) is intended for use in the electromagnetic environment specified below. The customer or the user of the electrocardiograph model ECG1200G (ECG) should ensure that it is used in such an environment. Immunity Test...
- Page 38 Recommended separation distances between portable and mobile RF communications equipment and Model ECG1200G (ECG)) The Model ECG1200G (ECG) electrocardiograph is intended for use in an electromagnetic environment in which radio frequency interference is controlled. The customer or the user of the unit can help prevent electromagnetic interference by maintaining a minimum distance between portable and mobile radio frequency communications equipment (transmitters) and the unit recommended below, depending on the maximum output power of the communications equipment.
- Page 39 Electrocardiograph PT NL...
Need help?
Do you have a question about the ECG1200G and is the answer not in the manual?
Questions and answers