Table of Contents
Advertisement
Quick Links
Advertisement
Table of Contents

Related Manuals for CanyCom S100B


Summary of Contents for CanyCom S100B
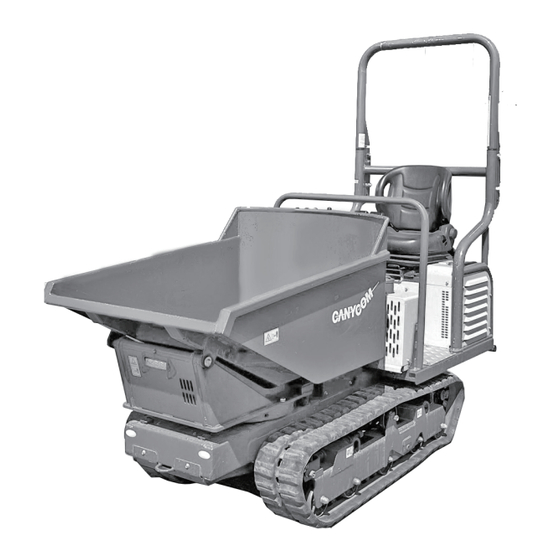
- Page 1 Off-road Rubber Track Dumper S100B Operator's Manual 36A9 5102 000...
- Page 2 Warning Terms Used in this Manual Thank you for purchasing this product. In this manual, the following four warning terms are used to signal the four levels of hazard (or seriousness of possible accidents). Read and understand what they mean and always follow the instructions in this manual.
- Page 3 Notice to Users and Maintenance Personnel This manual provides information needed for safe and effective use of this product to those who operate or maintain this product. Make sure to read and understand the manual thoroughly before operating this product. Also make sure to read the separate operator's manual for the engine.
-
Page 4: Warranty And After-Sales Service
Warranty and After-Sales Service Warranty CHIKUSUI CANYCOM, INC. guarantees this product, based on the terms of warranty. After-Sales Service Consult your local CANYCOM dealer or our company’s sales department regarding service orders or any questions or problems that may arise when using this product. Please make sure to have the product name, serial number, and the make and type of the engine handy at the time of contact. -
Page 5: Table Of Contents
Contents 1. Safety Safety Labels ........1 Safety Precautions . - Page 6 Working ........28 Dumping .
- Page 7 Drive Train ........55 Tracks.
- Page 8 6. Troubleshooting Troubleshooting ....... . 71 7. Transporting Hauling ........78 Loading and Unloading .
-
Page 9: Safety
• Keep the labels clean and legible. Do not use solvents or gasoline to clean the labels. • Replace these labels immediately if they have been removed, have fallen off or become illegible. Use the part number, on the label or shown in this manual, to order a replacement label from your CANYCOM representative. 36A9M-5102-0101-010... - Page 10 Safety 1 36A4 5013 000 2 3677 5046 001 DANGER! Crush hazard. To prevent death or serious injury, do N O T p l a c e a n y part of your body under the loading deck. 3677 5046 001 3 36A4 5014 100 6 3677 5055 000 DANGER!
- Page 11 Safety 7 3677 5056 000 8 3677 5045 001 9 36A4 5018 000 W ARNING! WARNING! The protection offered by this ROPS will be impaired if it has been altered, damaged, or has been involved in an overturn. Inspect ROPS, seatbelts, and their attaching components daily Hot liquids.
-
Page 12: Safety Precautions
Safety Safety Precautions This section contains safety precautions to follow when operating and maintaining the machine. Read and understand the precautions in this section as well as throughout this manual and follow them when operating or maintaining the machine. Failure to follow safety precautions could result in property damage, serious injury or death to the operator or bystanders. -
Page 13: Preparation
Safety Preparation • Fuel is highly flammable. See Checking and Filling Fuel, page 16, for important safety information on handling fuel. • Always wear protective footwear, long trousers, hardhat, safety glasses and ear protection when operating or servicing the machine. Proper clothing will minimize the chance of injury. - Page 14 Safety • Do not operate the machine under the influence of alcohol or drugs. Do not operate the machine when you are tired, ill, or not feeling well. • Always check for obstacles before operating on new terrain. • Before starting the engine and moving the machine, scan around your surroundings and make sure all persons and other vehicles are a safe distance away from the machine.
- Page 15 Safety • Drive at a safe speed, taking into account the surface gradient, surface conditions and load. • Use an observer to help direct the machine when the visibility is poor, terrain is rugged or hilly, or maneuvering room is limited. The observer should be able to see the machine and its immediate surroundings, and should give pre-arranged signals to direct the operator.
- Page 16 Safety • Avoid driving the machine across a slope. • Without a load, drive the machine backwards up a slope (operator's seat toward the top) when climbing, and drive it forward when going down a slope. • With a load, drive the machine forward up a slope (operator's seat away from the top) when climbing, and drive it backwards when going down a slope.
- Page 17 Safety Dumping/Turning When swiveling the bucket and dumping material from the bucket, take the following precautions. • Always follow the proper procedures for dumping or swiveling as described in this manual. • Only operate the bucket with the engine running. •...
-
Page 18: Servicing
Safety • Whenever you park the machine, apply the parking brake and stop the engine. Remove the key whenever you leave the machine unattended to prevent unauthorized use or accidental starting. • Diesel fuel is flammable and can be explosive. When parking the machine indoors, make certain that the building is well ventilated and that the machine is not close to any source of flame or spark, including appliances with pilot lights. -
Page 19: Controls And Components
Controls and Components Name and Function of Controls 36A9M-5101-0201-010 -11-... - Page 20 Controls and Components Charge Warning ..This shows if the battery is being charged. It turns on when the main switch is turned on, and under normal condition, it goes off once the engine starts. Overheat Warning .
- Page 21 Controls and Components 13. Swivel Lever ... . This lever is used to swivel the dump body. 14. Lock Plate ....This is used to lock the dump and swivel lever. 15.
-
Page 22: Specifications
Specifications Product Specifications · Use this product properly after understanding its specifications thoroughly. S100B Model and Type Swivel Dump (scoop bucket) Machine Mass kg (lbs) 1100 (2447) Maximum Payload kN (lbs) 11.8 (2646) Overall Length mm (in) 2670 (105.1) Overall Width mm (in) 990 (39.0) -
Page 23: Contents Of Tool Bag
Specifications S100B Model and Type Swivel Dump (Scoop Bucket) HST Oil Capacity L (US gal) 20 (5.3) Main Transmission Twin HST Steering System Twin HST - 2 Lever Brakes Internally Expanding Dump System Swivel Dump Type Gear Pump Hydraulic Max. Speed... -
Page 24: Operation
Operation Preparation Pre-start up Inspection Always perform an inspection before use. Refer to Maintenance Schedule (page 32) for the inspection schedule and procedure. Checking and Filling Fuel • Keep fire and spark away when handling fuel. • Always stop the engine before refueling. •... -
Page 25: Adjusting Seat
Operation Adjusting Seat • When adjusting the seat, make certain the seat is securely locked. • On the machine equipped with the ROPS, Always wear the seat belt. Adjusting seat Seat Back Seat Belt Pull the seat slide lever up to slide the seat Adjust Lever Seat Suspension to a desired position. -
Page 26: Driving
Operation Driving Starting • Always start and run the engine in a well ventilated place. • Always make certain of the safety of your surroundings and stay on the seat when starting the engine. • Never attempt to start the engine away from the machine. Run over accident can result. - Page 27 If you need to use this machine above that altitude, contact your CANYCOM representative. NOTE • Preheat the grow plug for about 5 seconds when starting in normal temperature and for 10 to 20 seconds when starting in cold weather (ambient temperature below 0°C).
- Page 28 Operation Make sure the dump and swivel levers are in the neutral position and locked with the lock Swivel Lever Dump Lever plate. Lock Plate 36A4M-0402-030E Starting Clutch Lever Move the clutch lever to [ (engaged)] position. 36A4M-0402-040E Press down the parking brake pedal fully. Parking Brake Pedal 36A4M-0402-050E Move the throttle lever half way toward the...
- Page 29 Operation Insert the key into the main switch and Turn it to the [ (preheat)] position to heat up the grow plug for 5 seconds. 36A4M-0402-070E Turn the main switch to the [ (start)] position to start the engine. Once the engine starts, release the key immediately;...
- Page 30 Operation Starting in Cold Weather When the machine is difficult to start under cold wearther, follow the procedure below. Move the clutch lever to [ (disengaged)] Clutch Lever position. Press down the parking brake pedal fully. Move the throttle lever half way toward the (fast)] position.
-
Page 31: Driving
Operation Driving • Do not allow bystanders to come near the machine when driving. • Always stay seated in the operator's seat when driving the machine. Never operate the drive lever off of the machine. This can cause the machine to run over or crush the operator. -
Page 32: Moving Forward
Operation • Hold the grips when operating the drive levers. Fingers or hands can get caught if holding other parts to operate. • Do not operate the drive levers with brake pedal depressed or locked. Doing so will sound the horn to warn the operator. Preparation M a k e c e r t a i n o f t h e s a f e t y o f y o u r surroundings. -
Page 33: Moving Backward
Operation Moving Backward Move both of the drive levers gradually backward together to move the machine Backward backward. The angle of the drive levers controls the machine speed. Drive Levers 36A4M-0402-120E Normal Right Turn To turn right when traveling forward, push left Drive Levers drive lever slowly forward. -
Page 34: Stopping And Parking
Operation Spin Turn Move drive levers in opposite directions to make a turn on spot (spin-turn). Drive Levers Spin-turning Spin-turning to the Right to the Left 36A4M-0402-140E Stopping and Parking • Do not make a sudden stop. The machine can skid or tip over. •... - Page 35 Operation Push the throttle lever to [ (slow)] Throttle Lever position to lower engine speed. 36A4M-0402-150E With the parking brake pedal depressed, pull out the parking brake lock lever to lock the Parking Brake Lock Lever parking brake. Parking Brake Pedal 36A4M-0402-160E Turn the main switch to [ (off)] position and...
-
Page 36: Working
Operation Working • Always make certain of the safety of your surroundings when dumping or swiveling bucket. • Never drive the machine with the bucket in the raised or swiveled position. Tipover can result as the center-of-gravity shifts. Also, doing so can increase the possibility of hitting objects with the raised or swiveled bucket. -
Page 37: Lowering The Bucket
Operation Lowering the Bucket Flip the lock plate to the side so that the dump lever can be operated. Move the dump lever gradually toward the [ (down)] position to lower the bucket. When the bucket reaches its lower limit, a hissing noise is heard;... -
Page 38: Using Safety Prop
Operation When the bucket reaches its limit, a hissing noise is heard; move the swivel lever back to the [ (neutral)] position. W h e n k e e p i n g t h e b u c k e t a t t h e swivelled position, flip the lock plate over the swivel lever. - Page 39 Operation Place the safety prop over the piston rod of Safety Prop the dump cylinder. Turn the latch on the safety prop to secure it Latch onto the piston rod. 36A4M-0403-050E -31-...
-
Page 40: Maintenance
• Perform a pre-startup inspection (PSI) before each use, a monthly inspection once a month, and a yearly inspection once a year. • Some maintenance procedures described below may require special knowledge or tools and instruments. Contact your CANYCOM representative to perform such procedures. Schedule... - Page 41 Maintenance Schedule Item Description Note Compression shall be normal Contact your CANYCOM * this may be skipped if running and exhaust representative for Compression √ condition is normal at idle and under inspection. acceleration. Engine base shall be free of cracks or √...
- Page 42 √ cracks, damage, or deformation. Mounting bolts and nuts on cooling fan, duct, √ and covers shall not be loose or missing. Charge system shall work properly. Contact your CANYCOM Charge representative for √ System inspection. Battery electrolyte level shall be within the Inspecting/Filling: Page √...
- Page 43 Maintenance Schedule Item Description Note Steel cord of the track shall not be cut or √ √ √ severely damaged. Track shall not be excessively worn, or deteriorated. There shall not be a big chunk √ √ √ Tracks of rubber missing. Steel core inside the track shall not be √...
- Page 44 Maintenance Schedule Item Description Note Shall work smoothly. √ √ √ There shall be no leaks when extending and √ √ contracting cylinder a few times. Extend dump cylinder fully under load and Hydraulic hold. Drop shall be within the range specified √...
- Page 45 Maintenance Schedule Item Description Note Instruments Instruments shall work properly once engine √ √ √ Meters starts. Horn shall work normally. Horn √ √ √ Lights shall work normally. Lights √ √ √ ROPS shall be free of deformation or √...
-
Page 46: List Of Fluids And Lubricants
Maintenance List of Fluids and Lubricants • Follow the maintenance schedule to lubricate or grease the machine. Lack of lubrication can result in rust, excessive wear or seizure. List of Fluids and Lubricants Item Schedule Grade Cap. Fuel As needed. Diesel Fuel (4.0 US gal) Engine Oil... -
Page 47: Greasing
Maintenance Greasing NOTE • When using a manual grease pump, push handle five to six times. When handle becomes heavy, stop pushing. • When using a pneumatic grease pump, charge for two to three seconds. Location Schedule No. of Points Grade Parking Brake Pedal Link Every 6 Months... -
Page 48: Consumables And Spares
Open this file to look up your model in the list. For other parts, refer to the parts catalog above. • In case you cannot see the above parts manual, contact your CANYCOM representative. • Order replacement parts through your local CANYCOM representative. -
Page 49: Engine
Maintenance Engine • Always stop the engine and remove the key before servicing. • An engine that has been running is very hot. Allow the engine to cool before servicing, or severe burns may result. • Keep fire and spark away when servicing the engine or handling fuel. •... - Page 50 Maintenance Inspecting Dip Stick Park the machine on a level surface. Unlock the seat lock lever, lift up the seat, Stay Bar and hold it with the seat stay bar. Pull out the dip stick and wipe it clean. Insert the dip stick fully and pull it out again.
-
Page 51: Oil Filter Cartridge
• Refer to the Operator's Manual for the Engine for other engine service items. Oil Filter Cartridge • Use only the genuine CANYCOM oil filter cartridge. Use of non-genuine part can result in damages. Unlatch the latches and open the engine cover. -
Page 52: Air Cleaner
Maintenance Apply a thin coat of clean oil evenly on the oil seal on a new filter cartridge. Oil Seal Install the new cartridge. Tighten it fully by hand. Do not use oil a filter wrench when installing. Check oil level. Start engine to make sure there is no leak on the base of the oil filter cartridge. - Page 53 Maintenance Primary Element – Cleaning 1. Open the right-hand side engine cover. 2. Undo the spring hooks that secure the air cleaner lid. Blow air from inside to clean the primary element. Air pressure must not exceed 205kPa (2.1kgf/cm ). Allow enough space between the element and the nozzle and 36A9M-5101-0504-120 blow carefully so as not to damage the...
-
Page 54: Coolant
Maintenance Coolant • Do not open the radiator cap when the engine or radiator is hot. Opening cap when they are still hot may release boiling coolant and cause severe burns. Wait for the engine to cool after operation (about 30 minutes) before opening. •... -
Page 55: Fan Belt
Maintenance Changing Coolant Drain Plug Have an appropriate drain pan big enough to hold all the coolant. Open the coolant drain cock at the bottom of the radiator to drain coolant. Unlatch the latches and open the engine cover. Remove the radiator cap and wash inside the 36A9M-5101-0504-090 radiator with running water. -
Page 56: Fuel System
Maintenance Fuel System • Always stop the engine when servicing the fuel system. • Fuel is highly flammable. Keep fire and spark away when servicing the fuel system or handling fuel. If fuel is spilt, wipe immediately. • Dispose residual fuel in fuel filter or drained fuel or water properly. Check the national and local regulation for discarding such fluids. -
Page 57: Draining Water Separator
Maintenance Draining Water Separator NOTE • Water separator collects water and impurities in the fuel. When the red float in the water separator cup goes up, drain the water separator as described below. Open the right-hand side engine cover. Water Separator Turn the water separator handle to [CLOSE] Handle position. -
Page 58: Fuel Filter
Maintenance Fuel Filter • Dust or foreign objects can damage the fuel system. Clean fuel filter and filter cup regularly. When disconnecting the fuel hose, cap the hose and hose fitting with clean caps. Open the right-hand side engine cover. O-Ring Turn the fuel filter cock to [CLOSE] position. -
Page 59: Hydraulic System
Maintenance Hydraulic System • Always stop the engine when servicing. • A machine that has been running is very hot. Allow the machine and oil to cool before servicing, or severe burns may result. • When hydraulic oil level gets low, air can enter the hydraulic system and impairs its performance. - Page 60 Maintenance Visually inspect the oil level window for oil Oil Level Window level and condition. If the level is low, fill oil. HIGH If oil is dirty, change oil. Standard Level 36A3M-0506-070E Filling Remove four (4) M8 bolts to remove the oil Filler Cap tank cover.
-
Page 61: Suction Filter
Maintenance Suction Filter NOTE • Change suction filter when changing hydraulic oil. Drain oil. Loosen hose bands and remove the hoses. Remove bolts on the flange to remove the suction filter mount. Remove the suction filter element from the filter mount. Install a new suction filter element. -
Page 62: Oil Line Filter Cartridge
Lock Nut Visually inspect the drive belt. If it is Spring damaged, replace. NOTE Tension Arm • Contact your CANYCOM representative 36A4M-0506-060E when belt needs to be replaced. Close the engine cover and lock it with the latches. -54-... -
Page 63: Drive Train
Maintenance Adjusting Unlatch the latches and open the engine cover. Loosen the lock nuts. Adjust the turnbuckle so that the inside dimension between the spring hooks is between 65 and 68 mm(2.56 and 2.68 in). Spring Tighten the lock nuts. 36A9M-5101-0506-070 Close the engine cover and lock it with latches. - Page 64 Maintenance • Track is very heavy. Handle it with care. NOTE • During the initial hours of use, track tends to get broken in and stretch more than usual. Inspect often and adjust as necessary. • Track tension gets loose during its use-life for wear or bedding of the sprocket and track.
-
Page 65: Drive Lever
Maintenance Drive Lever NOTE • Steering levers are properly adjusted at the time of shipment. Adjustment is needed only when transmission, steering levers, or their linkage is replaced or dismantled. Inspecting Start the engine and increase engine speed by moving the throttle lever to [ (fast)] position. - Page 66 Maintenance Adjusting - When Right Track Moves Right Left Loosen the two lock nuts (A). Rotate the rod (B) until the right track does Steering lever (Right) Steering lever (Left) not move. - When the track moves forward, turn the rod so that the distance [L1] between the rod ends (C) becomes shorter.
-
Page 67: Transmission Oil
Maintenance Transmission Oil • Dispose of the drained oil properly, according to the national and local regula- tions. Checking/Filling Park the machine on a level ground and Center Floor remove the center floor. 36A4M-0507-040E Remove the oil level check port plug and inspect the oil level to be at the check port. -
Page 68: Drive Belt
Tension Arm damaged, replace. Spring Reinstall the safety cover. Turnbuckle 36A4M-0507-070E NOTE • Contact your CANYCOM representative when belt needs to be replaced. Adjusting Remove safety cover. 114-116mm Loosen the lock nut. Adjust the turnbuckle so that the inside dimension between the spring hooks is between 114 and 116 mm (4.49 and 4.57 in). -
Page 69: Parking Brake
Maintenance Parking Brake • Always keep brake adjusted for maximum performance. Improperly adjusted brakes may result in property damage, serious injury, or death. • Use the parking brake with the drive levers in the neutral position. Remove the center floor. Depress the parking brake pedal and lock it Center Floor securely with the lock lever. -
Page 70: Electrical System
Maintenance Electrical System • Always stop the engine and turn the main switch to [ (off)] position, and disconnect the negative (-) terminal of battery when servicing the electrical system. • Do not work on the electrical system with wet hands. Electric shock can result. Battery •... - Page 71 Maintenance • Never fill battery fluid beyond the [UPPER LEVEL] line. Battery fluid can spill and cause damage to the machine or personal injury. • Always remove the battery from the machine before charging. Failure to do so can cause damage to the electrical components and wiring. •...
-
Page 72: Fuses
Maintenance Undo four (4) M8 bolts and one M8 nut to remove the lowar part of the front panels. Panels Remove the battery from the machine. 36A9M-5101-0507-020 Follow the instructions in the battery charger user's manual to charge the battery. When the battery is fully charged, relace the filler plugs and reinstall the battery. - Page 73 Maintenance Fuses Unlatch the latch and open the access cover Fuse Box under the control panel. Open the fuse box lid. Locate the blown fuse and replace it with a new one of the correct rating. Replace the lid. Close the access cover and lock the latch. 36A9M-5101-0508-040 NOTE •...
-
Page 74: Relays
Maintenance Relays • If a fuse blows, investigate the cause and repair it before replacing the fuse. • Always replace a fuse with the one of the correct rating. Undo four (4) M8 bolts to remove the drive Drive Lever Panel lever panel. -
Page 75: After Use Care
Maintenance After Use Care • Do not wash the engine, control panel, electrical parts, or tank caps with air breather with running water; water may enter inside and cause rust or damage. • Clean the machine after use; leaving dirt or foreign objects may cause damage. •... -
Page 76: Washing
Maintenance Washing • High-pressure washer can be dangerous. Never point it to a person. Make sure no one is behind the machine when washing the machine with a high-pressure washer. Also, it can damage the machine. Follow the instruction manual of the high-pressure washer as well as the description below and familialize with its use. -
Page 77: Storage
Maintenance Storage • Fire hazard; do not store the machine where there is a possiblity of ignition. • Do not wash the engine or control panel with running water; water may enter inside and cause rust or damage. • Clean the machine before storage; leaving dirt or foreign objects may cause rust or damage. - Page 78 Maintenance NOTE • Battery dischages even when it is not in use. A battery may hold charge for a few months, but it is a good practice to charge battery before it goes flat; it will extend the battery life. •...
-
Page 79: Troubleshooting
Troubleshooting chart below. If the malfunction or abnormal condition is not listed in the chart, or the suggested measure does not solve the problem, consult with your CANYCOM representative. • Some corrective measures listed below require special knowledge and/or equipment. - Page 80 Insufficient or →Fill or change oil. Page 41 Engine does not wrong oil. start, or is difficult →Please contact Other (other than your CANYCOM to start the above). representative. Out of fuel. →Fill fuel. Page 16 Air in fuel system.
- Page 81 Malfunction Possible Cause Corrective Measure Ref. Excessive load →Reduce load. Poor power or →Please contact Other (other than your CANYCOM acceleration the above). representative. Loose engine mount. →Tighten. Irregular noise or →Please contact vibration from or Other (other than your CANYCOM the above).
- Page 82 Troubleshooting Area Malfunction Possible Cause Corrective Measure Ref. →Please contact your CANYCOM Poor compression. representative. Bad fuel. →Change fuel. Black smoke comes →Clean or replace out of exhaust Clogged air cleaner. Page 44 air cleaner. →Please contact Other (other than your CANYCOM the above).
- Page 83 →Refer to the Other malfunction in "Hydraulics" the hydraulic drive section system. →Please contact Other (other than your CANYCOM the above). representative. Adjust nut is loose. →Adjust. Page 61 →Please contact your CANYCOM Brake lining is representative to worn.
- Page 84 Troubleshooting Area Malfunction Possible Cause Corrective Measure Ref. →Please contact your CANYCOM Track roller bearing representative to is damaged. replace.. Intermittent noise is heard. →Please contact Other (other than your CANYCOM the above). representative. →Please contact Roller, upper roller, your CANYCOM...
- Page 85 Ref. Damaged wiring. →Repair. Blown fuse. →Replace. Page 64 Light does not turn →Please contact Other (other than your CANYCOM the above). representative. Low oil level. →Fill. Page 41 warning stays on →Please contact after the engine Other (other than your CANYCOM starts.
-
Page 86: Transporting
Transporting Hauling Loading and Unloading •Park the transporter (truck) on a level ground and apply parking brake. Always use chocks to secure wheels. •Do not allow bystandars to come close to the machine or the transporter when loading or unloading the machine. •Use only the loading ramps with suffient strength(to withstand the combined weight of the machine and the operator), width (more than 1.2 times the width of the track), and length (more than 4 times the height of the bed of the... - Page 87 Transporting Height 36A4M-0701-010E 1. Park the transporter and apply parking brake. Secure the wheels with chocks. 2 . Place the loading ramps. Secure the hooks of the ramps firmly and flush with the bed of the transporter. 3. Drive the machine slowly forward onto the bed of the truck. 4. Park the machine according to the instructions in "Stopping"...
-
Page 88: Hoisting
Transporting Hoisting • Hoisting requires qualifications. Check with your local authority for necessary qualifications and licenses for hoisting. • Use hoisting slings and shackles of sufficient strength. Always use the slings of the same length when more than one is used. •... -
Page 89: Folding Rops (For Transportation And Storage)
Transporting Folding ROPS (for transportation and storage) • Do not ride the machine with the ROPS in folded position. The operator can be killed in the event of a rollover accident. • Do not loosen the bolts or nuts other than the ones specified in the procedure. •... - Page 90 NOISE LEVEL Model Engine Type Type Speed rpm S100B Kubota D902 2800 rpm 89 dB (A) 101 dB (A) NOISE LEVEL evaluated based on factory standard. VIBRATION Vibration Model Engine Speed Drive lever Seat 2.2 m/s 0.69 m/s S100B 2800 rpm (Uncertainty K=0.5m/s...
- Page 91 90-1 Fukumasu, Yoshii-machi, Ukiha-shi, Fukuoka, Japan 839-1396 Sales Headquarters TEL +81-(0)943-75-2195 FAX +81-(0)943-75-4396 Authorized Dealer All rights reserved. Unauthorized use or reproduction of this material is prohibited.
Need help?
Do you have a question about the S100B and is the answer not in the manual?
Questions and answers