Table of Contents
Advertisement
Quick Links
Centrometal d.o.o. - Glavna 12, 40306 Macinec, Croatia, tel: +385 40 372 600, fax: +385 40 372 611
ENG
using of CONTROLLER
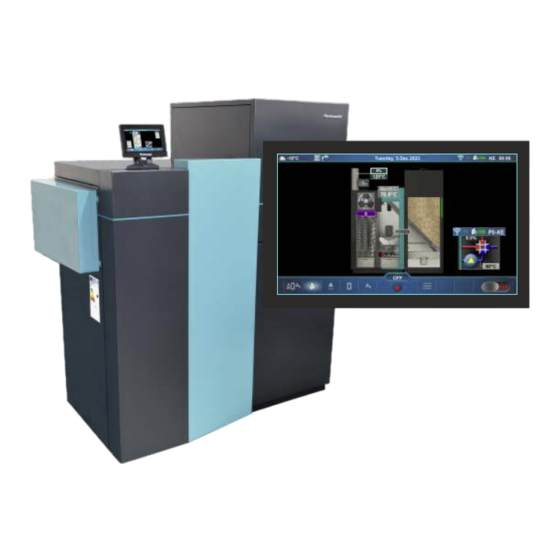
hot water boiler PelTec II Lambda
THE FIRST START-UP MUST BE DONE BY AUTHORIZED
PERSON, OTHERWISE PRODUCT WARRANTY IS NOT
VALID.
TU-R-PLTII-12-48-7-2024-v3.02n-ENG
H E A T I N G T E C H N I Q U E
H E A T I N G T E C H N I Q U E
TECHNICAL INSTRUCTIONS
You can find the latest technical instructions
for PelTec II Lambda by scanning the
QR code or at the web address:
https://www.centrometal.hr/en/portfolio/peltec-ii-lambda-eng/
PelTec II Lambda 12-48
9%
BOOK 2/2
Advertisement
Table of Contents

Related Manuals for Centrometal PelTec II Lambda 12-48


Summary of Contents for Centrometal PelTec II Lambda 12-48
- Page 1 H E A T I N G T E C H N I Q U E H E A T I N G T E C H N I Q U E Centrometal d.o.o. - Glavna 12, 40306 Macinec, Croatia, tel: +385 40 372 600, fax: +385 40 372 611 TECHNICAL INSTRUCTIONS...
-
Page 2: Table Of Contents
Content SWITCHING ON THE CONTROLLER ..............................04 INITIAL MESSAGE ....................................04 MAIN SCREEN (PII-OE) AND MAIN MENU ............................05 SHORTCUTS FOR DIFFERENT SCREENS ............................07 SYMBOLS ON THE BOILER SCREEN (PII-KE) ...........................09 CONFIGURATION SYMBOLS ................................11 CHANGING/ENTERING PARAMETERS .............................12 1.0. MAINTENANCE .....................................13 1.1. MANUAL BOILER CLEANING ..............................13 1.2. - Page 3 Content 5.8.3. ADVANCED FUNCTIONS ................................69 5.8.3.1. Wi-Fi NETWORK NAME ................................69 5.8.3.2. Wi-Fi PASSWORD ...................................69 5.8.3.3. TIME SYNCHRONIZATION ..............................70 5.8.3.4. TIME ZONE ....................................70 5.8.3.5. CONNECTION RESET ................................70 5.X. ALARMS (CAL) .....................................71 5.X.1. OUTPUT 1 ....................................71 5.X.1.1. ERRORS ....................................72 5.X.1.2. FUEL LEVEL ...................................72 5.X.1.3.
-
Page 4: Switching On The Controller
Switching on the controller SWITCHING ON THE CONTROLLER After switching on "Main switch (0/1)", the screen will show the first initial message screen and then the language selection menu. To choose the language, you must press the flag displayed on the screen indicating the desired language, then confirm the selection with Button to confirm the selection and access the "Main screen (PII-OE)". -
Page 5: Main Screen (Pii-Oe) And Main Menu
Main screen (PII-OE) and main menu MAIN SCREEN AND MAIN MENU MAIN SCREEN (PII-OE) AND MAIN MENU After confirmation of the language selection, the "Main screen (PII-OE)" is displayed. Outdoor temperature Freeze guard Operating mode Boiler temperature Day and date External control Pellet level in the tank Chimney sweeper... - Page 6 Main screen (PII-OE) and main menu The main menu allows you to select the desired submenu. To select a specific submenu, the appropriate icon on the screen must be pressed. To return to "Main Screen (PII-OE)", press the "Menu button" or "BACK button". Returning to the previous menu is possible with the "BACK button"...
-
Page 7: Shortcuts For Different Screens
Shortcuts for different screens SHORTCUTS FOR DIFFERENT SCREENS Swipe left or right Main screen (PII-OE) / Main screen - to the next screen "Main screen - Schematic view (PII-OE)" Schematic view (PII-OE) / button "Main screen (PII-OE)" button Main screen (PII-OE) Main screen - Schematic view (PII-OE) Boiler screen (PII-KE) Suction system screen (PII-VE) - Page 8 Shortcuts for different screens +3.5°C +5.0°C 20.5°C 20,0°C 20.5°C 23,3 23.5°C 25.0°C 20.0°C +1.0°C 20.0°C 21.0°C Heating screen (PII-GE) 1a - Boiler heating circuit K1 (Radiators - Heating type is selected) 1b - CM2K Heating circuit C1 (Floor - Heating type is selected) 1c - CM2K Heating circuit C2 (Constant temperature - Heating type is selected) 2 - Room temperature corrected with room corrector (3 wires) (CSK) (additional equipment) (instead of label 2 can be label 5)
-
Page 9: Symbols On The Boiler Screen (Pii-Ke)
Symbols on the boiler screen (PII-KE) SYMBOLS ON THE BOILER SCREEN (PII-KE) 1 - Boiler 2 - Measured O (with lambda probe) 3 - Flue gas temperature 4 - Maximum (set) boiler temperature 5 - Measured boiler temperature 6 - Pellet tank 7 - Percentage of fuel level (if FUEL LEVEL is ON) 8 - Fuel level percentage reset button(if FUEL LEVEL is ON) 9 - Screw refill (additional equipment) - Page 10 Symbols on the boiler screen (PII-KE) 4-way mixing valve with actuator 60°C 60°C Actuator does Actuator is opening Actuator is closing not work the valve the valve Flame symbol >1000k There is no flame There is a flame in the boiler in the boiler Position of burner grate grate is open (Open - cleaning)
-
Page 11: Configuration Symbols
Configuration symbols CONFIGURATION SYMBOLS The following symbols are displayed on the controller screen Pump (when the pump is operating, the symbol rotates, otherwise idle) The pump has a work request (in the middle of / next to the pump is the yellow square symbol when there is a operating request of the pump. -
Page 12: Changing/Entering Parameters
Changing/entering parameters CHANGING/ENTERING PARAMETERS Drag the slider button / press the button to increase/decrease the value Keyboard: Value entry Button for multiplication change (left / right) x1, x10, x100 Technical instructions Controller PelTec II Lambda... -
Page 13: Maintenance
Maintenance, Manual boiler cleaning NOTE: The number of menu depends on the selected heating system configuration. 1.0. MAINTENANCE Remplissage Vis alimentation 1.1. MANUAL BOILER CLEANING Manual boiler cleaning - by entering this submenu, the burner grate (3) will move to the open position (100 %). -
Page 14: Filling Feeder Screw
Filling feeder screw, Airvent 1.2. FILLING FEEDER SCREW Filling feeder screw - by pressing the ''PLAY'' button (1) feeder screw (2) starts to operate (operates 25 min), and the burner grate (3) will move to the open position (100 %) leaving the pellets fall into the ash box. -
Page 15: Boiler
Boiler, Temperature 2.0. BOILER 2.1. TEMPERATURE Temperature choice depends on the configuration of the heating system. Below are shown examples of two configurations (Main screen - Schematic view (PII-OE)). 23°C 1 - Boiler temperature sensor 7 - Temperature sensor (UP) - accumulation 2 - Return flow temperature sensor (buffer) tank 3 - Hydraulic crossover temperature sensor... - Page 16 Temperature Configuration: 1, 2, 3, 6, 7, 9, 10, 45. Temperature values (factory, minimum/maximum): Factory: Min/Max Unit 70 / 90 1.Maximum boiler temperature °C 5 / 10 °C 2.Boiler difference 70 / 85 °C 3.Hydraulic crossover temperature *By turning on the "Chimney sweeper" option, the "Maximum boiler temperature" is automatically set to 90 °C. By turning off...
- Page 17 Temperature Configuration: 4, 5. Temperature values (factory, minimum/maximum): Factory: Configuration: 4 Min/Max Unit Maximum boiler temperature (manual entry)= 1.Maximum boiler temperature Manually selected maximum boiler temperature 70 / 90 °C (manual entry) (see **Example of maximum boiler temperature 2.Boiler difference 5 / 10 °C setting: Configuration 4)
- Page 18 Temperature **Example of maximum boiler temperature setting: Configuration 5. 1. (Temperature DHW + 5 °C) </= Maximum boiler temperature (manual entry): 2. (Temperature DHW + 5 °C) > Maximum boiler temperature (manual entry): Technical instructions Controller PelTec II Lambda...
- Page 19 Temperature Configuration: 8. Temperature values (factory, minimum/maximum): Factory: Min/Max Unit 1.Maximum boiler temperature 70 / 90 °C 2.Boiler difference 5 / 10 °C *By turning on the "Chimney sweeper" option, the "Maximum boiler temperature" is automatically set to 90 °C. By turning off...
- Page 20 Temperature 2. Temperature DHW >/= 65 °C Technical instructions Controller PelTec II Lambda...
- Page 21 Temperature Configuration: 11, 12, 33, 34, 35, 36, 37, 38, 39, 40, 41, 42, 43, 44. Temperature values (factory, minimum/maximum): Factory: Unit Min/Max 1.Maximum boiler temperature 70 / 90 °C 2.Boiler difference 5 / 10 °C 3.Buffer tank temperature 40 / 85 °C 4.Buffer tank temperature difference 5 / 40...
- Page 22 Temperature 2. Buffer tank temperature set to <65 °C: Technical instructions Controller PelTec II Lambda...
- Page 23 Temperature Configuration: 13, 14, 15, 16. Temperature values (factory, minimum/maximum): Factory: Min/Max Unit 1.Maximum boiler temperature 70 / 90 °C 2.Boiler difference 5 / 10 °C 3.Buffer tank temperature 40 / 85 °C 4.Buffer tank temperature difference 5 / 40 °C 5.Stop buffer tank difference 3 / 30...
- Page 24 Temperature 1b. Buffer tank temperature set to < DHW set temperature 2. Buffer tank temperature set to <65 °C: 2a. Buffer tank temperature set to >/= DHW set temperature Technical instructions Controller PelTec II Lambda...
- Page 25 Temperature 2b. Buffer tank temperature set to < DHW set temperature 2c. DHW set temperature > Buffer tank temperature set and DHW set temperature >/= 65 °C Technical instructions Controller PelTec II Lambda...
- Page 26 Temperature Configuration: 17, 18, 19, 20, 21, 22, 23, 24, 25, 26, 27, 28, 29, 30, 31, 32. Temperature values (factory, minimum/maximum): Factory: Min/Max Unit 1.Maximum boiler temperature 70 / 90 °C 2.Boiler difference 5 / 10 °C 3.Hydraulic crossover temperature 70 / 85 °C 4.Buffer tank temperature...
- Page 27 Temperature 2. Hydraulic crossover temperature < Buffer tank temperature Technical instructions Controller PelTec II Lambda...
- Page 28 Temperature The way of changing the set temperature: - example of changing the default Hydraulic crossover temperature: Possible min/max values, factory value and the reasons (descriptions) for some restrictions: Example: Configuration 20, Example: Configuration 20, Buffer tank temperature DHW temperature Technical instructions Controller PelTec II Lambda...
-
Page 29: Dhw / Heating
DHW / Heating 2.1.X. DHW / HEATING Configuration: 2, 5, 6, 9, 10, 13, 14, 15, 16, 17, 18, 19, 20, 25, 32, 35, 40, 43, 44. This menu will only appear if "Auto" is selected (automatic switching between DHW / Heating ), see point 5.1. of this Technical Instructions. -
Page 30: Boiler Schedule
Boiler schedule 2.2. BOILER SCHEDULE 2.2.1. BOILER SCHEDULE The possibility of adjusting the operating times is carried out using tables. Three operating time tables can be preset (Table 1, Table 2, Table 3), but only one can be active. Factory: OFF Possible selection: OFF - operating times are disabled Table 1 - Table 1 is activated and boiler works according to the settings in Table 1... -
Page 31: 2.2.4. Table 1, Table 2, Table 3
Table 1, Table 2, Table 3 2.2.2. - 2.2.4. TABLE 1, TABLE 2, TABLE 3 (green) Boiler operates Boiler does not operate It is possible to set 5 activations and 5 deactivations of the boiler (T1-T5) for each day of the week. In the table, the time when the boiler is operating is marked in green and the time when the boiler is not operating is marked in red. -
Page 32: Forced Shutdown
Forced shutdown, Flue passage cleaner 2.3. FORCED SHUTDOWN ''Forced shutdown'' option is used for forced shutdown of all processes. First press the ON/OFF button to put the boiler into the shutdown process, then press the ''Forced shutdown'' button. All processes are stopped. -
Page 33: Not Working Schedule
Not working schedule 2.4.1. NOT WORKING SCHEDULE ''Not working schedule'' option allows activation or deactivation of the boiler operating schedule. Factory: ON Possible selection: ON, OFF Technical instructions Controller PelTec II Lambda... -
Page 34: Table
Table 2.4.2. TABLE (yellow) Cleaning of flue passages is not allowed Cleaning of flue passages is allowed In the table it is possible to set 5 activations and 5 deactivations for cleaning the flue passages (T1-T5) for each day of the week. In the table, the time when cleaning of flue passages will not be carried out is marked in yellow, and the time when cleaning of flue passages is carried out is marked in green. -
Page 35: Fuel Level
Fuel level 2.5. FUEL LEVEL "Fuel level" option indicates the approximate quantity of pellets in the pellet tank in "%" depending on the total volume of the pellet tank. The use of this option only makes sense if the user, after COMPLETELY FILLING the pellet tank, presses the button (Reset) located on "Boiler screen (PII- KE)"... -
Page 36: Boiler Components
Boiler components, Cleaning, Flue passage cleaner, Grate cleaner 2.6. COMPOSANTS DE CHAUDIÈRE 2.6. COMPOSANTS DE CHAUDIÈRE 2.6. COMPOSANTS DE CHAUDIÈRE 2.6. BOILER COMPONENTS This submenu allows only an overview. 2.6.1. CLEANING 2.6.1.1. FLUE PASSAGE CLEANER 2.6.1.2. GRATE CLEANER Technical instructions Controller PelTec II Lambda... -
Page 37: Heating Circuit
Heating circuit NOTE: All displayed menus are based on configuration 18. 3.0. HEATING CIRCUIT In certain configurations, the menus will be different (with or without the Heating circuit/Domestic hot water menu). Technical instructions Controller PelTec II Lambda... -
Page 38: Pump Off
Pump OFF, Temperatures 3.2. PUMP OFF Configuration: 1, 2, 3, 4, 5, 6, 7, 14, 15, 18, 19, 21, 22, 23, 24, 25, 26, 27, 28, 29, 30, 31, 32, 33, 34, 35, 36, 37, 38, 39, 40, 41, 42 - if the measured outdoor temperature is higher than the set outdoor temperature + set outdoor temperature difference for the duration of the set time the heating circuit pump is turned off. - Page 39 Temperatures Values for configuration: 3. (K1) Circ 1 - Heating circuit 1 (with mixing valve 1) Factory: Possible selection: (K2) Circ 2 - Heating circuit 2 (direct circuit) ON / OFF 1.(K1) Circ 1 Day room temperature - Setting the day room ON / OFF 2.(K2) Circ 2 temperature...
- Page 40 Temperatures Values for configuration: 14, 18, 33, 34, 35. (K1) Circ 1 - Heating circuit 1 (with mixing valve 1) Factory: Possible selection: Day room temperature - Setting the day room (K1) Circ 1 ON / OFF temperature Night room temperature - Setting the night room Factory: Min/Max Unit...
- Page 41 Temperatures Values for configuration: 23, 24. (K1) Circ 1 - Heating circuit 1 (with mixing valve 1) Factory: Possible selection: (K2) Circ 2 - Heating circuit 2 (direct circuit) ON / OFF 1.(K1) Circ 1 Day room temperature - Setting the day room ON / OFF 2.(K2) Circ 2 temperature...
- Page 42 Temperatures Values for configuration: 28, 29. (K1) Circ 1 - Heating circuit 1 (with mixing valve 1) Factory: Possible selection: (K2) Circ 2 - Heating circuit 2 (direct circuit) ON / OFF 1.(K1) Circ 1 Day room temperature - Setting the day room 2.(K2) Circ 2 ON / OFF temperature...
-
Page 43: Day / Night Temperature
Temperatures, Day / Night Temperature Values for configuration: 36, 37. (K1) Circ 1 - Heating circuit 1 (with mixing valve 1) Factory: Possible selection: (K2) Circ 2 - Heating circuit 2 (direct circuit) ON / OFF 1.(K1) Circ 1 Day room temperature - Setting the day room ON / OFF 2.(K2) Circ 2 temperature... -
Page 44: 3.7. Table 1, Table 2
Table 1, Table 2 3.6.-3.7. TABLE 1, TABLE 2 (yellow) Night room temperature set Day room temperature set Setting the schedule tables with change of heating circuit mode between day and night temperature. For each day it is possible to set 5 mode changes (T1-T5). In the table Day room temperatures are marked in yellow and night room temperatures in black. -
Page 45: Heating Curve
Heating curve 3.8. HEATING CURVE Setting of the heating curve. Heating curve is one of the parameters for main flow temperature calculation. Coeffiicent Outdoor temperature Technical instructions Controller PelTec II Lambda... -
Page 46: Domestic Hot Water (Dhw)
Domestic hot water (DHW) 4.0. DOMESTIC HOT WATER (DHW) The Domestic hot water menu is available only if the selected configuration has a domestic hot water tank (DHW). Below are types of installation and configuration, which have a domestic hot water tank (DHW). Selection and possible values for configuration: 2, 6, 19, 25, 32, 35, 40. - Page 47 Domestic hot water (DHW) Selection and possible values for configuration: 5, 14, 15, 18. (K2) Circ 2 - Heating circuit 2 (DHW) Factory: Possible selection: Domestic hot water schedule (DHW) - Domestic hot ON / OFF (K2) Circ 2 water schedule OFF/Table 1 Domestic hot water schedule (DHW) Recirculation - Hot water circulation option from the...
- Page 48 Domestic hot water (DHW) Selection and possible values for configuration: 12, 22, 24, 27, 29, 31, 34, 37, 39, 42. Recirculation - Hot water circulation option from the Factory: Possible selection: domestic hot water (DHW) tank to the domestic hot ON / OFF Recirculation water (DHW) outlet (DHW consumption)
-
Page 49: Operation
Operation, DHW / Heating 5.0. OPERATION NOTE: Some submenus of the Operation menu are displayed or hidden depending on the items enabled in the menu Installation. 5.1. DHW / HEATING Submenu 5.1. DHW/Heating is only displayed if the configuration with Domestic hot water (DHW) is selected. - Page 50 DHW/Heating DHW only - boiler operates only when there is demand for domestic hot water (DHW). Heating only - boiler operates only when there is demand for heating. Auto - boiler switches automatically between DHW+Heating and DHW only operating mode. Example: factory setting of Outdoor temperature, Outdoor temperature difference,...
- Page 51 DHW/Heating If the outdoor temperature is >/= 20 °C for more than 30 minutes. If the outdoor temperature is <(20-3) °C for more than 30 minutes. Technical instructions Controller PelTec II Lambda...
-
Page 52: Dhw Priority
DHW priority 5.2. DHW PRIORITY If the option DHW priority is active: " " - every time the pump of the domestic hot water tank (DHW) / domestic hot water tank (DHW) 1. heating circuit is in operation, the other pumps of the heating circuit are at rest (except the pump of the boiler circuit). -
Page 53: Control Unit Settings
Control unit settings, Boiler control 5.3. PARAMÈTRES DE REGULATION 5.3. CONTROL UNIT SETTINGS This submenu allows only an overview. 5.3.1. BOILER CONTROL Boiler control (this information appears only if the authorized technician has activated "And another heating controller") And another heating controller - this option can be activated by an authorized technician in certain configurations when part of the heating circuits or the preparation of the DHW connected to hydraulic crossover (CRO) is managed by another regulation independent of the boiler regulation. -
Page 54: Boiler Temperature Maintenance
Boiler temperature maintenance 5.3.2. BOILER TEMPERATURE MAINTENANCE Boiler temperature maintenance (the selected one by the authorized technician is marked) Installation - maintaining the temperature according to installation requirements. The boiler does not operate if there is NO heating request from installation component (heating, DHW). If there is a demand from the installation, the boiler starts when the temperature in the boiler drops below (Maximum boiler temperature - Boiler difference) and operates up to the set (calculated) maximum temperature of the boiler or until all installation requirements disappear and it shuts down. -
Page 55: Manual Test
Manual test 5.4. MANUAL TEST "Manual test" is option that allows turning on an individual relay and thus testing the operation of the equipment connected to the individual relay. NOTE: Submenus in the "Manual test" depend on the selected configuration. MANUAL TEST IS POSSIBLE ONLY WHEN THE BOILER IS SWITCHED OFF. -
Page 56: Fan
Manual test, Fan Below are shown two "Main screen - Schematic view (PII-OE)" with pumps and valves, which can be manually tested. Left "Main Screen - Schematic View (PII-OE)": Right "Main Screen - Schematic View (PII-OE)": 1 - P(PWM) pump - boiler circuit + 4-way 1 - P(PWM) pump - boiler circuit + 4-way mixing mixing valve valve... -
Page 57: Electric Heater
Electric heater, Cleaning 5.4.2. ELECTRIC HEATER This option allows you to check if the electric heater is operating. It is necessary to press the "ON" button next to the "Electric heater" and check if the electric heater is operating. Every time you press the "ON" button, it lights up green. The screen will display an animation of the electric heater when the option is active. -
Page 58: P(Pwm) + 4-Way Mixing Valve
P(PWM)+4-way mixing valve, Grate cleaner 5.4.4. P(PWM) + 4-WAY MIXING VALVE This option allows you to check the operation of the P(PWM) pump and the 4-way mixing valve. Press the "ON" button next to the corresponding symbol and check whether the valve is open/closed or whether the pump is running. -
Page 59: Feeder Screw
Feeder screw, Pumps (Px) 5.4.6. FEEDER SCREW This option allows you to check the operation of the pellet feeder screw. Press the ''ON'' button next to ''Feeder screw'' and check if the feeder screw motor operates. Every time you press the ''ON'' button, it lights up green. When the option is active, the feeder screw symbol will move and the pellets will fall from the tube. -
Page 60: K1 3-Way Valve (If Exists In Configuration)
K1 3-way valve, Additional equipment, Rotary valve 5.4.8. K1 3-WAY VALVE (If exists in configuration) This option allows you to check the operation of the 3-way valve and the pump of circuit 1. Press the "ON" button next to the corresponding symbol and check if the valve is open/closed or if the pump is operating. -
Page 61: Screw Refill
Screw refill 5.4.9.2. SCREW REFILL This option allows you to check the operation of screw refill (additiona equipment). Press the ''ON'' button next to the ''Screw refill'' and check if the symbol of the selected equipment moves (if the motor of the selected equipment is operating). Every time you press the "ON" button, it lights up green. -
Page 62: Weighing Check
Weighing check 5.5. WEIGHING CHECK This option allows you to check the quantity of supplied pellets. It is possible to adjust the operating time (1) (according to the weighing scale capacity and capacity of bucket) of the feeder screw after which you want to weigh the pellets. -
Page 63: Pumps & Mixing Valve Protection
Pumps & mixing valve protection, Time 5.6. PUMPS & MIXING VALVE PROTECTION This option allows to protect the pumps/valves to not get jammed during a long period of standstill (usually during the summer season when the heating is turned off). Factory is this option enabled and the maximum standstill time of outputs is set to 48 hours. -
Page 64: Freeze Guard
Freeze guard 5.7. FREEZE GUARD This option enables activation/deactivation of the ''Freeze guard'' option and defining its options. The ''Freeze guard'' option can work with or without outdoor temperature sensor. 5.7.1. FREEZE GUARD Possibility of activating or deactivating of the ''Freeze guard'' option. When this option is activated, a snowflake icon appears on the top bar of the screen. -
Page 65: Outdoor Temperature
Outdoor temperature, Option, Temperature 5.7.2. OUTDOOR TEMPERATURE Outdoor temperature option shows if the sensor for freeze guard function is ON or OFF. 5.7.3. OPTION ''Option'' enables the monitoring of sensor temperatures of certain system elements. Possible selection depends on the set configuration and installed additional equipment. If conditions which are set in Freeze guard/Temperature submenu are met, Freeze guard option will be activated for selected elements. -
Page 66: Minimal Sensor Temperature
Temperature 5.7.4.1. MINIMAL SENSOR TEMPERATURE This submenu allows only an overview. Setting the sensor temperature for selected ''Option(s)'' at which ''Freeze guard'' option will be activated. Factory: 5 °C Possible selection: 3 - 10 °C (set by an authorized technician) 5.7.4.2. -
Page 67: Wi-Fi Network & Internet Supervision
Wi-Fi network & Internet supervision 5.8. Wi-Fi NETWORK & INTERNET SUPERVISION IMPORTANT NOTES: Boiler controller requires an active DHCP server at the access point (e.g. router) because manual adjustment of network parameters is not possible. For more information, contact your home network administrator. This submenu allows configuration of the controller for boiler connection to the Internet via the local Wi- Fi network. -
Page 68: Choose Wi-Fi Network
Choose Wi-Fi network, Internet supervision 5.8.1. CHOOSE Wi-Fi NETWORK Boiler controller finds all available Wi-Fi networks. Select the Wi-Fi network you have access to. Press the button "JOIN", enter the password if necessary and confirm with the "OK" button. If you want to disconnect from a Wi-Fi network, press the button "DISCONNECT". -
Page 69: Advanced Functions
Advanced functions 5.8.3. ADVANCED FUNCTIONS 5.8.3.1. Wi-Fi NETWORK NAME This option allows entering the name of the Wi-Fi home network to which you want to connect the controller and boiler. The correct Wi-Fi network name must be entered, otherwise the boiler will not be able to connect to the Wi-Fi network. -
Page 70: Time Synchronization
Advanced functions 5.8.3.3. TIME SYNCHRONIZATION Currently not active. 5.8.3.4. TIME ZONE Currently not active. 5.8.3.5. CONNECTION RESET This option allows resetting of the controller connection with the local network. Technical instructions Controller PelTec II Lambda... -
Page 71: Alarms (Cal)
Alarms (CAL), Output 1 NOTE: The number of submenu 5.X. depends on the additional equipment that has been activated (it is activated by an authorized technician in the Installation -> PIN menu). 5.X. ALARMS (CAL) This option is used to configure the visual or audible alarm (speaker and indicator light are optional and must be installed by an authorized technician) to alert the user when he is not near the boiler. -
Page 72: Errors
Output 1 5.X.1.1. ERRORS This option determines whether "Output 1" will notify errors. By choosing a particular type of signal, error notification will be activated in the form of the chosen signal. Factory: OFF Possible selection: 1. OFF, 2. Continuous, 3. Fast 1 time, 4. Fast 3 times, 5. Slow 1 time, 6. Slow 3 Times, 7. -
Page 73: Buffer Tank
Output 1, Output 2 5.X.1.3.1. BUFFER TANK This option determines whether "Output 1" will notify a low temperature in the buffer tank. Factory: OFF Possible selection: 1. OFF, 2. Continuous, 3. Fast 1 time, 4. Fast 3 times, 5. Slow 1 time, 6. Slow 3 Times 5.X.1.4. -
Page 74: Table
Table, Reserve sound, Suction system 5.X.3. TABLE This option allows table selection according to which alarm outputs will operate. The change or automatic deactivation of the signal within a specified period of time. Factory: Table 1 Possible selection: Table 1, Table 2 5.X.7. -
Page 75: Chimney Sweeper
Chimney sweeper 5.X. CHIMNEY SWEEPER This submenu enables measurement of combustion flue gases at nominal power (D6) and minimum power (D2) of the boiler. 5.X.1. CHIMNEY SWEEPER Activating this option will display a chimney sweeper icon on the top bar of the screen. By selecting the "Boiler screen (PII-KE)", a table with counter and table with message will appear. -
Page 76: Minimal Boiler Temperature
Chimney sweeper, Minimal boiler temperature Counter table Table with message POWER MODULATION PRINCIPLE IN "CHIMNEY SWEEPER" OPTION: Modulation - power decrease: D6==>D5 (Tk=Tkmax – 3,0°C), D5==>D4 (Tk=Tkmax – 2,5°C), D4==>D3 (Tk=Tkmax – 2,0°C), D3==>D2 (Tk=Tkmax – 1,5°C), D2==>D1 (Tk=Tkmax – 1,0°C), Legend: D1==>D0 (Tk=Tkmax –... -
Page 77: Time
Time 5.X.3. TIME Period of time during which the boiler operates at the chosen power (D6/D2), after the "Minimal boiler temperature" is reached (so that the flame stabilizes). After this time, the text on the counter turns green and only then you can start measuring flue gases. Factory: 600s Possible selection: 600-3600s Technical instructions Controller PelTec II Lambda... -
Page 78: Power
Power 5.X.4. POWER This option enables the boiler to operate at the selected power (D6 or D2) so that the combustion flue gases can be measured. The boiler operates at selected power until this option is deactivated or the temperature in the boiler rises 3 °C less than the maximum boiler temperature (in this case, the boiler reduces the power). -
Page 79: History
History 6.0. HISTORY The list of errors/warnings/info provides an overview of the errors/warnings/info that have occurred. On the screen is displayed: label, name, time and date when the error/warning/info occurred. E - conditions that cause the shutdown of the boiler. The error must be rectified before boiler is started again. - Page 80 History Boiler status: Boiler goes to phases S7, C0 and OFF (it appears after I8 and defined number of repeated attempts TOO HIGH to start the boiler). TEMPERATURE OF E8.1 Possible cause: Temperature of the pellet supply tube PELLET SUPPLY PIPE above 80˘C, disconnection in the electrical cables between the bimetallic sensor and the boiler, connection to the boiler, cold connection or defective bimetallic sensor.
- Page 81 History Boiler status: Boiler immediately goes to phase OFF. NO FLAME IN Possible cause: There is not enough pellets, problem with IGNITION STAGE el. heater, problem with photocell. Boiler status: Boiler immediately goes to phase OFF. FLAME DISAPPEARED Possible cause: There is not enough pellets, problem with IN WORKING PHASE photocell.
- Page 82 History Boiler status: Feeder screw and flue gas fan currently stop working, the boiler is currently in the OFF phase. Fan and feeder screw lose electricity, manual tests do not work. Possible cause: The water temperature in the boiler is too SAFETY THERMOSTAT high (above 104 °C).
- Page 83 History Errors of additional equipment: Pellet suction system Boiler status: Boiler works normally. The problem (stoppage) occurs in the operation of the additonal equipment for Vacuum supply of pellets (Pellet suction system). ERROR FLAP Troubleshooting: Check if: the flap is not blocked by NOT CLOSED pellets, the sensor is not soiled with dust, the sensor is placed at a distance of 1 mm from the flap, and if the LED...
- Page 84 History INFORMATION / WARNING W- Information about the state of the boiler, which does not stop the boiler operation WARNING Boiler status: Boiler will operate for a while, if the pellet tank is not refilled with pellets, "E22 Fuel level" will be displayed, which means that there is not enough pellets to FUEL LEVEL continue boiler operation.
- Page 85 History INFO - IW Power outage IW1-1 POWER DOWN Power cut Return of electricity IW1-2 POWER UP INFO - I After a failed ignition (flame did not appear), the pellet is automatically replenished for 30 % of the initial charging REFILL time and goes to phase S3.
-
Page 86: Statistics
Statistics, Info, Software info 7.0. STATISTICS Statistics of boiler operation and certain parts: - Work and pause (S7-3) time - Flame (min) - D6 (min) - D1 (min) of boiler (min) - Fan (min) - D5 (min) - D0 (min) - Work time of boiler (min) - Heater (min) - D4 (min) -
Page 87: Service Man Information
Service man information, File, Open service file 8.2. SERVICE MAN INFORMATION Information about the service technician (Company, Service technician, Telephone, Email). If the authorized service technician enters his data, a screen as below is displayed. If nothing is entered, only hyphens (-) are displayed. 8.2. -
Page 88: Save User File
Save user file 9.2. SAVE USER FILE This option enables to save the changed user parameters in memory under the user file (it can be loaded later). The "Save As" option (1a, 1b) saves the current file as a new file and under a new name, while the "Save"... -
Page 89: Open User File
Save user file, Open user file 2 - Example of saving changes to an existing (active) file. 9.3. OPEN USER FILE This option can be used to load saved settings from the user file. Appears only if "Save user file" has been done at least once. -
Page 90: Delete User File
Delete user file, Display, Date & time, Screensaver 9.4. DELETE USER FILE After pressing ''Delete user file'' it is possible to choose and delete user file (press the ''Delete'' button). Press the ''Cancel'' button to return to the submenu. 10.0. DISPLAY 10.1. -
Page 91: Language Selection
Language selection, Sound volume, Sound type 10.3. LANGUAGE SELECTION This option enables or disables the display of the initial screen with the languages selection for controller when the ''Main switch (0/1)'' is activated. If option is disabled, after activating ''Main switch (0/1)'', the setting will appear in the predefined language and after a certain time the ''Main screen (PII- OE)'' will appear. -
Page 92: Sound
Sound, Installation 10.6. SOUND This option is used to enable/disable the controller sound for display, warnings, errors. Factory: DISPLAY, WARNINGS, ERRORS Possible selection: DISPLAY, WARNINGS, ERRORS 11.0. INSTALLATION MENU FOR AUTHORIZED SERVICE TECHNICIANS ONLY. Technical instructions Controller PelTec II Lambda... -
Page 93: Malfunction / Improper Boiler Operation
Malfunction / improper boiler operation 12.0. MALFUNCTION / IMPROPER BOILER OPERATION 12.1. SAFETY THERMOSTAT - boiler malfunction The following error (E40 SAFETY THERMOSTAT) appears on the boiler controller screen the boiler behaves according to the description of the error E40. The cause of this error is too high water temperature in the boiler (above 104 °C) because the safety thermostat interrupts operation of the flue gas fan and pellet feeder screw if the boiler temperature exceeds the maximum permitted temperature (110 - 6 °C). - Page 94 Table of sensors resistances TABLE OF RESISTANCES OF TABLE OF RESISTANCES OF PT1000 SENSOR Measuring range from -30 to +400 °C NTC 5K/25°C SENSOR Used as: Measuring range from -20 to +130 °C Flue gas temperature sensor Used as: Temp. (°C) Resistance (W) Temp (°C) Resistance (W) Boiler temperature sensor,...
-
Page 95: Operation Stages (Shown On The Screen)
Operation stages OPERATION STAGES (SHOWN ON THE SCREEN) IMPORTANT! Automatic resumption of boiler operation after power failure (PF phases) is not possible if Operating language selection option is turned ON. phase To disable option ''Language selection'' see label point ''Language selection''. Stage Description Boiler is switched off. -
Page 96: Power Modulation Principle
Power modulation principle, Marks on the screen POWER MODULATION PRINCIPLE Modulation - power decrease: D6==>D5 (Tk=Tkmax – 6,0°C), D5==>D4 (Tk=Tkmax – 5,0°C), D4==>D3 (Tk=Tkmax – 4,0°C), D3==>D2 (Tk=Tkmax – 3,0°C), Legend: D2==>D1 (Tk=Tkmax – 2,0°C), Tkmax - set boiler temperature D1==>D0 (Tk=Tkmax –... - Page 97 Marks on the screen "T" - shutdown the boiler due to the need the turbulator operation; boiler going into phases S7-1, S7-2, C0, (S7-3), (S0) (if there is a need for boiler operation)... "T" - shutdown the boiler due to the need the turbulator operation;...
- Page 98 Company assumes no responsibility for possible inaccuracies in this book originated typographical errors or rewriting, all figures and diagrams are principal and it is necessary to adjust each actual situation on the field, in any case the company reserves the right to enter their own products such modifications as considered necessary. Centrometal d.o.o. Glavna 12, 40306 Macinec, Croatia www.centrometal.hr central tel: +385 40 372 600, fax: +385 40 372 611 e-mail: servis@centrometal.hr...
Need help?
Do you have a question about the PelTec II Lambda 12-48 and is the answer not in the manual?
Questions and answers