Table of Contents
Advertisement
Quick Links
OPERATOR'S MANUAL
MIG 300-1 INVERTER
Part No. 9136H
IMPORTANT
Read this Operator's Manual completely before attempting to use this equipment.
Save this manual and keep it handy for quick reference.
Pay particular attention to the safety instructions we have provided for your protection.
Contact your distributor if you do not fully understand this manual.
Advertisement
Table of Contents
Troubleshooting

Related Manuals for SWP 9136H


Summary of Contents for SWP 9136H
- Page 1 OPERATOR’S MANUAL MIG 300-1 INVERTER Part No. 9136H IMPORTANT Read this Operator’s Manual completely before attempting to use this equipment. Save this manual and keep it handy for quick reference. Pay particular attention to the safety instructions we have provided for your protection.
-
Page 2: Table Of Contents
CONTENT CONTENT §1 Safety ······························································································································ 1 §2 Overview ························································································································ 9 §2.1 Features ······························································································································· 9 §2.2 Technical Data ····················································································································· 9 §2.3 Duty cycle and Over-heat··································································································10 §2.4 Working Principle ·············································································································10 §2.5 Volt-Ampere Characteristic ······························································································11 §3 Panel Functions & Descriptions ·················································································· 12 §3.1 Machine Layout Description ····························································································12 §3.2 Front Panel Functions and Descriptions ·········································································13 §4 Installation &... -
Page 3: Safety
SAFETY §1 Safety Notice: The instructions are for reference only. The manufacturer reserves the right to explain the differences between the description and the product due to product changes and upgrades! The device is manufactured using state-of-the-art technology and according to recognised safety standards. If used incorrectly or misused, however, it can cause: ... - Page 4 SAFETY Excessive ambient temperature will cause the machine heat dissipation is not smooth, so that the internal components of the machine heat seriously. Usually the maximum operating temperature is 104°F (40°C). Low temperature may lead to performance degradation or damage of components inside the product, resulting in ice inside the water tank.
- Page 5 SAFETY Many harmful phenomena, such as noise, bright light and harmful gas, will inevitably occur in the welding process. In order to avoid harmful By product phenomena causing harm to the human body, it is necessary to make corresponding preparations in advance. Arc rays from the welding process produce intense visible and invisible ultraviolet and infrared rays that can burn eyes and skin.
- Page 6 SAFETY Welding may produce fumes and gases hazardous to health. Avoid breathing these fumes and gases. Do not breathe the smoke and gas generated whilst welding or cutting, keep your head out of the fumes. Use enough ventilation and/or exhaust at the arc to keep fumes and gases away from the breathing zone.
- Page 7 SAFETY Flying sparks from the welding arc, hot work piece, and hot equipment can cause fires and burns. Accidental contact of electrode to metal objects can cause sparks, explosion, overheating or fire. Welding sparks and hot materials from welding can easily go through small cracks and openings to adjacent areas.
- Page 8 SAFETY SAFETY cylinder outlet valve and gas regulator. cylinder outlet valve and gas regulator. Use only compressed gas cylinders containing the correct shielding gas Use only compressed gas cylinders containing the correct shielding gas for the process used and properly operating regulators designed for the for the process used and properly operating regulators designed for the gas and pressure used.
- Page 9 SAFETY maintenance. Don’t sling cables or leads around either the body or parts of the body. The electrode (rod electrode, tungsten electrode, welding wire, etc) must Never be immersed. Never be touched when current is flowing. When the machine is connected to the power supply, there is electricity inside the machine.
- Page 10 SAFETY Shield off entire welding installation. Radiation Class A Device. Only can be used in the industrial area. If it is used in other area, it may cause connection and radiation problems of circuit. Radiation Class B device. ...
-
Page 11: Overview
OVERVIEW §2 Overview §2.1 Features New technology IGBT inverter technology. MIG/MAG with Manual. MIG waveform (inductance) control for great arc control and smoother welding results. 2T /4T trigger operation with crater control setting. Adjustable pre flow, post flow, burn back and soft start setting ... -
Page 12: Duty Cycle And Over-Heat
OVERVIEW Fe: 0.6/0.9/1.0/1.2 Diameter (mm) SS: 0.8/0.9/1.0/1.2 Flux-Cored: 0.6/0.8/0.9/1.0/1.2 Circuit Breaker Standard LW31-63B-4AB-02/1 Protection class IP21S Dimensions (mm) 960*460*890 Weight (Kg) 43.5 Power Factor 0.66 Efficient (%) 86.5 Note: The above parameters are subject to change with future machine improvement! §2.3 Duty cycle and Over-heat The letter “X”... -
Page 13: Volt-Ampere Characteristic
OVERVIEW control technology to insure voltage output stably when MIG. Meanwhile, the welding current parameter can be adjusted continuously and infinitely to meet with the requirements of welding craft. §2.5 Volt-Ampere Characteristic MIG series of welding machines has an excellent volt-ampere characteristic, whose graph is shown as the following figure. -
Page 14: Panel Functions & Descriptions
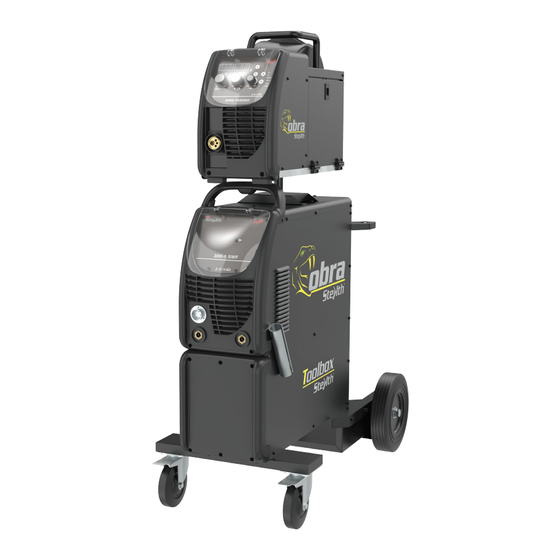
PANEL FUNCTIONS & DESCRIPTIONS §3 Panel Functions & Descriptions §3.1 Machine Layout Description 1. Aviation plug: Used to connect to the control cable of wire feeder. 2. Negative (-) welding power output connection socket. 3. Power indicator: When machine is powered on, it light on. -
Page 15: Front Panel Functions And Descriptions
PANEL FUNCTIONS & DESCRIPTIONS §3.2 Front Panel Functions and Descriptions 1. Welding Voltage Indicator. 2. Lh Digital Display.* * 3. Crater Voltage Indicator: Crater voltage is used to control the melting speed of the welding wire before the end of welding (only MIG 4T). * * 4. -
Page 16: Alarm Indicator
PANEL FUNCTIONS & DESCRIPTIONS Further Controls Explained Lh Digital Display (2) Before welding, displays welding voltage (V), crater voltage or time (S), depending on the parameter being adjusted. During welding, displays welding voltage. The parameter displayed is indicated by the LED below the display. If left inactive for several seconds, display will revert back to main welding voltage setting. - Page 17 PANEL FUNCTIONS & DESCRIPTIONS 2T /4T selector button (12) 2T mode the trigger is pulled and held on to activate the welding circuit, when the trigger is released, the welding circuit stops. 4T is known as 'latching' mode. The trigger is pulled once and released to activate the welding circuit, pulled and released again to stops the welding circuit.
- Page 18 PANEL FUNCTIONS & DESCRIPTIONS welding circuit. Inductance controls the rate of the current rise and fall as the welding wire contacts the workpiece (known as a short circuit). More inductance increases the short circuit time and decreases the short circuit frequency rate. This causes a wider and more penetrating arc, useful for thicker weld joints.
-
Page 19: Installation & Operation
INSTALLATION & OPERATION §4 Installation & Operation §4.1 Installation & Operation for MIG Welding §4.1.1 Set up installation for MIG Welding (1) Insert the earth cable plug into the negative socket on the front of the machine and tighten it. (2) Plug the welding torch into the MIG torch connection socket on the front panel of the wire feeder, and tighten it. - Page 20 INSTALLATION & OPERATION (8) Place wire onto spool holder - (spool retaining nut is left hand thread) Feed wire through the inlet guide tube on to the drive roller. (9) Feed wire over the drive roller into the outlet guide tube, Push the wire through approx 150mm.
-
Page 21: Wire Feed Roller Selection
INSTALLATION & OPERATION (12) Press and hold the manual wire key to feed the wire down the torch cable through to the torch head. (13) Fit the correct size contact tip over the wire and fasten tightly into the tip holder. - Page 22 INSTALLATION & OPERATION types of wire. The wire is held in the groove by the top roller of the wire drive unit and is referred to as the pressure roller, pressure is applied by a tension arm that can be adjusted to increase or decrease the pressure as required.
-
Page 23: Wire Installation And Set Up Guide
INSTALLATION & OPERATION §4.1.3 Wire Installation and Set Up Guide Again the importance of smooth consistent wire feeding during MIG welding cannot be emphasized enough. The correct installation of the wire spool and the wire into the wire feed unit is critical to achieving an even and consistent wire feed. A high percentage of faults with MIG welders emanate from poor set up of the wire into the wire feeder. - Page 24 INSTALLATION & OPERATION (5) Feed the wire through the drive roller (6) Lock down the top pressure roller and into the outlet guide tube of the wire and apply a medium amount of pressure feeder. Using the tension adjustment knob. (7) Check that the wire passes through the centre of the outlet guide tube without touching the sides.
-
Page 25: Mig Torch Liner Types And Information
INSTALLATION & OPERATION (9) The weight and speed of the wire spool turning creates an inertia that can cause the spool to run on and the wire loop over the side of the spool and tangle. if this happens increase the pressure on the tension spring inside the spool holder assembly using the tension adjustment screw. - Page 26 INSTALLATION & OPERATION internal diameter clearance. Most manufacturers will produce liners sized to match wire diameters and length of welding torch cable and most are color coded to suit. Steel Liners Blue-0.6mm-0.8mm Red - 0.9mm - 1.2mm Yellow - 1.6mm Green - 2.0mm - 2.4mm Teflon and Polyamide (PA) Liners Teflon liners are well suited for feeding soft wires with poor column strength like...
-
Page 27: Mig Welding
INSTALLATION & OPERATION §4.1.5 MIG Welding Definition of MIG Welding MIG (metal inert gas) welding also known as GMAW (gas metal arc welding) or MAG (metal active gas welding), is a semi-automatic or automatic arc welding process in which a continuous and consumable wire electrode and a shielding gas are fed through a welding gun. - Page 28 INSTALLATION & OPERATION The pinch causes the forming An arc is created at the wire feed speed droplet to separate and fall separation of the droplet and overcomes the heat of the towards the now creating weld the heat and force of the arc arc and the wire again pool.
- Page 29 INSTALLATION & OPERATION Narrow higher Flat even weld profile Narrower weld profile weld profile more light penetration even penetration penetration Travel Angle - Travel angle is the right to left angle relative to the direction of welding. A travel angle of 5°- 15° is ideal and produces a good level of control over the weld pool. A travel angle greater than 20°...
- Page 30 INSTALLATION & OPERATION Angle to Work - The work angle is the forward back angle of the gun relative to the work piece. The correct work angle provides good bead shape, prevents undercut, uneven penetration, poor gas shield and poor quality finished weld. Correct angle Not enough angle Too much angle...
- Page 31 INSTALLATION & OPERATION slower speed. Travel speed needs to match the amperage and will decrease as the material thickness and amperage increase. Too Fast Travel Speed - A too fast travel speed produces too little heat per mm of travel resulting in less penetration and reduced weld fusion, the weld bead solidifies very quickly trapping gases inside the weld metal causing porosity.
- Page 32 INSTALLATION & OPERATION Correct Travel Speed even shaped bead good toe fusion good penetration good side wall fusion Wire types and sizes - Use the correct wire type for the base metal being welded. Use stainless steel wire for stainless steel, Aluminum wires for Aluminum and steel wires for steel.
-
Page 33: Operation Environment
INSTALLATION & OPERATION helps the current flow smoothly. The correct gas flow is also very important in protecting the welding zone from the atmosphere. Too low flow will give inadequate coverage and result in weld defects and unstable arc conditions. Too high flow can cause air to be drawn into the gas column and contaminate the weld zone. -
Page 34: Operation Notices
INSTALLATION & OPERATION §4.3 Operation Notices Read Section §1 carefully before starting to use this equipment. Connect the ground wire with the machine directly. Ensure that the input is single-phase: 50/60Hz, 230V ±10%. Before operation, none concerned people should not be around the working area and especially children. -
Page 35: Welding Trouble Shooting
WELDING TROUBLE SHOOTING §5 Welding trouble shooting §5.1 MIG welding trouble shooting The following chart addresses some of the common problems of MIG welding. In all cases of equipment malfunction, the manufacturer’s recommendations should be strictly adhered to and followed. Trouble Possible Reason Suggested Remedy... -
Page 36: Mig Wire Feed Trouble Shooting
WELDING TROUBLE SHOOTING Remove materials like paint, grease, Contaminated base metal oil, and dirt, including mill scale from base metal Lack of Fusion − Select a higher voltage range and/or Not enough heat input failure of weld adjust the wire speed to suit metal to fuse completely with Keep the arc at the leading edge of the... - Page 37 WELDING TROUBLE SHOOTING Be sure to adjust the wire feed and voltage dials for MIG welding. The Adjusting wrong dial amperage dial is for MMA and TIG welding mode Select the correct polarity for the wire Wrong polarity selected being used - see machine setup guide Incorrect wire speed setting Adjust the wire feed speed Voltage setting incorrect...
-
Page 38: Maintenance & Troubleshooting
MAINTENANCE & TROUBLESHOOTING §6 Maintenance & Troubleshooting §6.1 Maintenance In order to guarantee safe and proper operation of welding machines, they must be maintained regularly. Let customers understand the maintenance procedure of welding machines. Enable customers to carry on simple examination and inspections. Do your best to reduce the fault rate and repair times of welding machines to lengthen service life of arc welding machine. -
Page 39: Troubleshooting
MAINTENANCE & TROUBLESHOOTING §6.2 Troubleshooting Before the welding machines are dispatched from the factory, they have already been tested and calibrated accurately. It is forbidden for anyone who is not authorized by our company to do any change to the equipment! ... -
Page 40: List Of Error Code
MAINTENANCE & TROUBLESHOOTING Output cable is connected Screw it down or change it No striking arc and no incorrectly or loosen output voltage Control circuit damaged Check the circuit Check over-voltage, over-current, Welding stops, and alarm Machine has self-protection over-temperature, lower-voltage light is on and over-temperature, and solve it The potentiometer damaged...
Need help?
Do you have a question about the 9136H and is the answer not in the manual?
Questions and answers