Table of Contents
Advertisement
Advertisement
Table of Contents

Related Manuals for SWP Digi-Cut 100 CNC


Summary of Contents for SWP Digi-Cut 100 CNC
- Page 1 DIGI-CUT 100 CNC Part No. 9032H OPERATOR’S MANUAL...
- Page 2 STEALTH DIGI-CUT 100 CNC IMPORTANT Read this Owner’s Manual completely before attempting to use this equipment. Save this manual and keep it handy for quick reference. Pay particular attention to the safety instructions provided for your protection. Contact your distributor if...
-
Page 3: Table Of Contents
STEALTH DIGI-CUT 100 CNC CONTENTS SAFETY TECHNICAL INFORMATION 2.1 MAIN CIRCUIT FUNCTIONS 2.2 FEATURES INSTALLATION 3.1 UNPACKING 3.2 INPUT POWER CONNECTIONS 3.3 GAS CONNECTIONS OPERATION CONTROL AND CONNECTORS 4.1 CUTTING PREPARATION 4.2 CUTTING OPERATION 4.3 ALARM INDICATOR 4.4 ABOUT THE CUT VOLTAGE DIVIDER MAINTENANCE AND TROUBLESHOOTING 5.1 BASIC PROBLEMS... -
Page 4: Safety
OPERATION AND MAINTENANCE OF PLASMA ARC EQUIPMENT C To prevent possible injury, read, understand and follow all warnings, safety precau l YOUR HEALTH. before using the equipment. STEALTH DIGI-CUT 100 CNC Plasma arc cutting produces intense electric and magnetic emissions that m l SAFETY GASES AND FUMES... - Page 5 • Extra care must be taken when the workplace is moist or damp. STEALTH DIGI-CUT 100 CNC • Ventilate all flammable or explosive vapors from the workplace. • Disconnect power source before performing any service or repairs.
-
Page 6: Technical Information
Three-phase 380V work frequency AC is rectified into DC (about 530V), then it is converted to medium Main circuit functions The working principle of DIGI-CUT 100 CNC Air Plasma Cutting Machine is shown frequency AC (about 20 KHz) by inverter device (discrete IGBT), after reducing voltage by medium as the following figure. -
Page 7: Features
STEALTH DIGI-CUT 100 CNC DIGI-CUT 100 CNC Power Supply Voltage (V) 3~400±10% Frequency Hz 50/60 Rated input current (A) Rated input power (Kw) 14.5 Adjustment range of current (A) 20~100 Max no-load voltage (V) Duty cycle (40ºC / 10 minutes) -
Page 8: Installation
STEALTH DIGI-CUT 100 CNC §3 Installation INSTALLATION 3. 1 Unpacking Unpacking Use the packing lists to identify and account for each item. Use the packing lists to identify and account for each item. Inspect each item for possible shipping damage. If damage is evident, contact your distributor and / or 3.1.1 Inspect each item for possible shipping damage. -
Page 9: Operation Control And Connectors
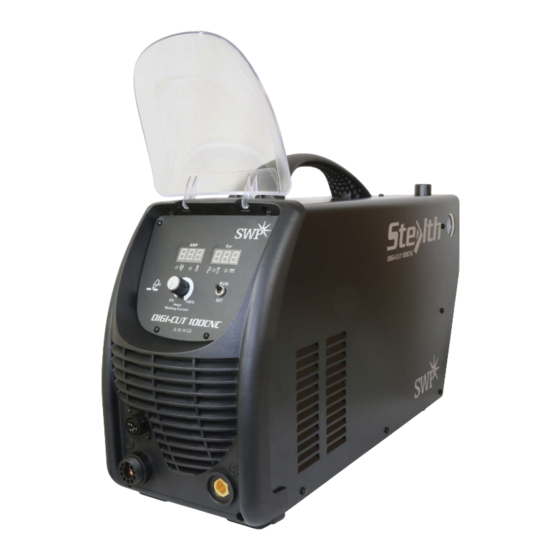
STEALTH DIGI-CUT 100 CNC 4.1 Layout Of The Front And Rear Panel: OPERATION CONTROL AND CONNECTORS Fig 4.1 schematic drawing of the front panel and rear panel Cutting current regulator – used to regulate the current when cutting. Power pilot lamp 1.Cutting current regulator: it is used to regulate the current when cutting. -
Page 10: Cutting Preparation
STEALTH DIGI-CUT 100 CNC Cutting Preparation 4.2.1 Tightly connect the power cable to an electrical socket outlet ( refer to the Input Voltage in section 2 Technology Parameters). 4.2.2 Connect the air pipe to the air supply equipment and the earth cable to the 4.2 Cutting Preparation... -
Page 11: Alarm Indicator
STEALTH DIGI-CUT 100 CNC Alarm Indicator 4.3.1 When the machine appears to over-heat or over-current, the yellow indicator (lamp 2) on the front panel remain on. • Over-heat – the alarm will release after the fan cooling period. You can then restart the machine. - Page 12 The voltage divider is not fault tolerant and ELV outputs do not comply withsafety extra low voltage (SELV) requirements for direct connection to computerproducts. STEALTH DIGI-CUT 100 CNC Note : NOTE The cover on the machine interface receptacle prevents dust and moisture from damage when not in use.
- Page 13 STEALTH DIGI-CUT 100 CNC Setting the five-position CUT voltage divider The factory presets the voltage divider to 20:1. To change the voltage divider to a different setting: 1. Turn OFF the power supply and disconnect the power cord. 2. Remove the power supply cover.
-
Page 14: Maintenance And Troubleshooting
STEALTH DIGI-CUT 100 CNC MAINTENANCE AND TROUBLESHOOTING WARNING There are extremely dangerous voltage and power levels present inside this unit. Do not attempt to diagnose or repair unless you have had training in power electronics measurement and troubleshooting techniques. BASIC PROBLEMS 5.1.1 When the machine is turned on, the power indicator lights up but both the fan... -
Page 15: Cutting Problems
STEALTH DIGI-CUT 100 CNC 5.2.2 Difficulty igniting 5.2.2.1 The gas distributor is not installed correctly. 5.2.2.2 Worn torch parts (consumables). Shut off input power. Remove and inspect torch shield cup, tip, starter cartridge, and electrode. Replace electrode or tip if worn. Replace starter cartridge if end piece does not move freely. - Page 16 STEALTH DIGI-CUT 100 CNC 5.3.3 Torch cuts but the cutting quality is poor. 5.3.3.1 Current (A) control set too low. Increase current setting. 5.3.3.2 Torch moves too fast across the workpiece. Reduce cutting speed. 5.3.3.3 Excessive oil or moisture in torch. Hold torch (3 mm) from clean surface while purging and observe oil or moisture build-up (do not activate torch).
-
Page 17: Main Electrical Diagram
STEALTH DIGI-CUT 100 CNC Appendix 1: Electrical principle drawing MAIN ELECTRICAL DIAGRAM ... -
Page 18: Parts List
STEALTH DIGI-CUT 100 CNC PARTS LIST 9032H-02 COVER 9032H-04 9032H-04 ON/OFF SWITCH 9032H-06 AIR FILTER – USE 9030H 9032H-09 REAR PANEL 9032H-13 BASE 9032H-22 FRONT PANEL 9032H-25 CENTRAL SOCKET – USE 9030H-17 9032H-27 KNOB – USE 9000H-33 9032H-29 FRONT PCB... - Page 19 STEALTH DIGI-CUT 100 CNC...
- Page 20 STEALTH DIGI-CUT 100 CNC Specialised Welding Products Ltd Unit 1, Farringdon Industrial Centre, Farringdon, Nr Alton, Hampshire GU34 3DD, UK tel: +44 (0)1420 588180 • fax: +44 (0)1420 588184 • email: sales@swp.uk.net...
Need help?
Do you have a question about the Digi-Cut 100 CNC and is the answer not in the manual?
Questions and answers