Advertisement
Quick Links
Advertisement

Related Manuals for Growatt MAX 150KTL3-X Series


Summary of Contents for Growatt MAX 150KTL3-X Series
- Page 1 Installation & Operation Manual...
- Page 2 Contents 1 Introduction ................1 1.1 Product Overview ....................1 1.2 Target Group......................1 2 Safety Precautions..............1 2.1 General Safety ...................... 1 2.2 Symbol Conventions .................... 3 2.3 Lable Description....................4 3 Product Introduction..............5 3.1 Appearance ......................5 3.2 Basic Data......................
- Page 3 6.3.2 USB port......................23 6.4 Inverter demand response modes (DRMS) ............25 6.4.1 Using the Power Control Interface for EU ............25 6.5 Connect the PE cable ..................27 7 Commissioning ............... 29 7.1 Commission the Inverter ..................29 7.1.1 Set the communication address..............29 7.1.2 Set the time and date..................
- Page 4 10 Specifications ............... 70 11 Decommissioning ..............73 11.1 Disposing of the inverter ................. 73 12 Warranty ................73 13 Contact...................74...
- Page 5 This manual is intended to provide product information and installation instructions for users of the MAX 150-180KTL3-X Inverter purchased from Shenzhen Growatt New Energy Co., Ltd. (hereinafter referred to as Growatt). Please read this manual carefully before using the product. This manual and other documents must be stored in a convenient place and be available at all times for installation, operation and maintenance personnel.
- Page 6 Installation: Please read this manual carefully before installation. Ÿ Damages caused by failure to follow instructions specified in the manual are beyond the warranty scope. NOTICE Ÿ Ensure that the inverter is not connected to a power supply and is not powered on before installation. DANGER Please observe the installation instructions specified in this Ÿ...
- Page 7 Maintenance and Replacement Ÿ All operations must be performed by trained and professional electricians, and all instructions specified in this manual should be observed. Wait at least 5 minutes after turning off the DC switch and AC Ÿ breaker to avoid dangers. Do not perform any operation with power on.
- Page 8 Symbol Description NOTICE indicates a situation which, if not avoided, can result in property damage. NOTICE Information that you must read and know to ensure optimal system operation. 2.3 Lable Description Symbol Designation Meaning High voltages are present in a running High Voltage inverter.
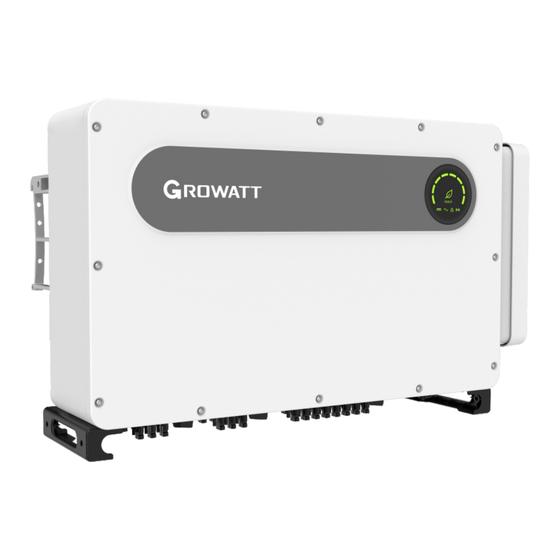
- Page 9 3 Product Introduction 3.1 Appearance Front view: Fig 3.1 Bottom view (connection area): F G H Fig 3.2 Side view: Fig 3.3 Mark Description Mark Description Front panel COM interface Corner guard PV terminal Waterproof silicone pad Ventilation valve Heat sink DC switch Ground screw hole External fans...
- Page 10 3.2 Basic Data Size(mm) Weight Model (kg) Width Height Thickness MAX 150-180KTL3-X Series Inverter 1075 MAX 150-180KTL3-X Series Inverter 1245 110.6 with package 3.3 Nameplate Note: The figure above shows the nameplate of MAX 150KTL3-X LV as an example. The nameplate figure is for reference only. The actual nameplate prevails. For detailed specifications, please refer to Section 10 Product Specifications...
- Page 11 3.4 Working Principle Working principle of the MAX 150-180KTL3-X series inverter: 1> The PV strings generate DC power with solar irradiance and send the DC power to the inverter. 2> Monitor the operating status of all PV modules via the input current sensor circuit and track the maximum power point with the MPPT (Maximum Power Point Tracker).
- Page 12 3.6 Grid Types For the MAX 150-180KTL3-X series inverter, Fig 3.5 shows the grid connection mode of the MAX 150KTL3-X LV model, and Fig 3.6 shows the grid connection mode of the MAX 180KTL3-X MV model. 400V 400V 480V 480V 230V 230V 230V...
- Page 13 4 Unpacking Inspection upon delivery 1> Before unpacking the inverter, check the shipping box for any externally visible damage. 2> After unpacking the inverter, check for any cosmetic damage or missing component. If any damage is found or any component is missing, please contact your distributor.
- Page 14 Installation 5 To prevent device damage and personal injury, keep balance Ÿ when moving the inverter because it is heavy. Do not place the inverter with its wiring and signal terminals at Ÿ the bottom contacting with floor or any other object because the CAUTION terminals are not designed to support the weight of inverter.
- Page 15 I. Reserve enough space around the inverter to ensure sufficient space for heat dissipation and operation, as shown below: ≥800mm ≥800mm Fig 5.2 J. Keep the inverter away from strong interference sources. K. Ensure that the inverter is not accessible to children. 5.2 Installation Environment Requirements A.
- Page 16 B. To reduce the de-rate performance of the inverter and extend inverter's lifespan, we strongly recommend you install an awning. For the distance between an awning and the inverter, please refer to following drawing. >1600mm 420mm 500mm Fig 5.4 C. If multiple inverters are installed on the same surface, the clearance requirements between inverters are shown below.
- Page 17 Roof ≥800 ≥800 unit: mm Ground Fig 5.6 D. Do not operate the inverter in a closed or narrow space. Fig 5.7 5.3 Move the inverter To prevent personal injury caused by a falling inverter, keep Ÿ balance and be careful when moving the inverter as it is heavy. Ÿ...
- Page 18 Fig 5.8 5.4 Install the wall mount bracket Before mounting the inverter, you need to installed wall mount bracket delivered with the inverter first to ensure that the inverter can be securely mounted on the wall. Mounting bracket diagram: 939mm Fig 5.9 1>...
- Page 19 2> Secure the bracket onto the wall using screws as shown below. Fig 5.11 Note: Do not mount the inverter onto the bracket until you make sure that the bracket has been secured in place. 5.5 Install the inverter Mount the inverter onto the bracket after confirming that the bracket has been secured in place.
- Page 20 Fig 5.14...
- Page 21 6 Electrical Connections Decisive Voltage Class (DVC) indicated for ports Port Name Class DRMS RS485&USB 6.1 Connection on AC side Before electrical connections, make sure that the DC switch of the Ÿ inverter is in the "OFF" position and that the AC breaker is disconnected, otherwise high voltages may cause lethal injuries.
- Page 22 Cable specification: Copper wire Aluminum wire Cross-sectional Inverter Model recommendation recommendation area (mm2) (mm²) (mm²) MAX 150KTL3-X LV 95-300 MAX 180KTL3-X MV Note: The wires should be tinned. Do not use frayed or cracked wires. If an aluminum alloy cable is used, please use the copper-aluminum connecting terminal.
- Page 23 The device damage caused by failure to seal the output terminal Ÿ gaps as instructed is beyond the scope of warranty and Growatt New Energy shall not be liable for the damage. WARNING...
- Page 24 6.2 Connection on DC Side Before electrical connections, make sure that the DC switch of the Ÿ inverter is in the "OFF" position and that the AC breaker is disconnected, otherwise high voltages may cause lethal injuries. Only qualified and trained electrical technicians are allowed to Ÿ...
- Page 25 10> Determine the stripping length according to the specification of the crimp terminal. Crimp the cable and the terminal using a crimping plier, then connect them to the corresponding connector housings until you hear the “Click” sound to ensure the secure connection. After snapping the positive and negative connectors into place, pull the cables slightly to ensure that they are securely in place.
- Page 26 Note: 1. Under any circumstance, the total current of all strings cannot exceed the inverter's maximum current. 2. Do not touch any solar panel in operation. 3. The wires should be tinned. Do not use cracked or frayed wires. 6.3 Connection of Communication Cables 6.3.1 RS485 port Long-distance and high-speed communication of a single inverter or multiple inverters connected in parallel (up to 32 units) can be established via RS485.
- Page 27 Note: 1. When multiple inverters communicate in parallel, a matching resistor should be added to the last inverter by connecting Pin 15/16 together with a cable. 2. COM Port Type 1 or Type 2 is pre-installed on the inverter and delivered randomly.
- Page 28 Fig 6.8A Remove Install The Inverter Side The Inverter Side The Inverter Side The Inverter Side Fig 6.8B...
- Page 29 6.4 Inverter demand response modes (DRMS) The MAX 150-180KTL3-X inverter supports the demand response modes and it is equipped with a 16-pin socket for the DRMs connection. DRMS application description Ø Applicable to Commission Regulation (EU) 2016/631. DRM0, DRM5, DRM6, DRM7, DRM8 are available. Ø...
- Page 30 6.4.1.1 The following table describes the connector pin assignment and function: DRM Socket Pin NO. Description Connect to RRCR Relay contact 1 input K1 – Relay 1 output Relay contact 2 input K2 – Relay 2 output Relay contact 3 input K3 –...
- Page 31 IEC standards. Otherwise, photovoltaic devices such as components, inverters and power distribution facilities may be damaged by lightning. WARNING In this case, any consequential damage is beyond the warranty scope and Growatt is not liable for it.
- Page 32 Lightning protection device Distribution Inverter Photovoltaic panel Cabinet Safety Safety distance (S) interval S Power grid Grounding bar Lightning down the line Equipment ground wire Total grounding point Fig 6.11 1) It is generally recommended to install the SPD (Surge Protection Devices), such as the lightning rod, lightning belt or the down conductor, to prevent the PV array from lightning.
- Page 33 2> Enter the Control Password. (Upon initial login, you need to set the Control Password first. On the login page, enter your OSS username and password. The distributor and installer can apply for the OSS account from Growatt. Click "Sign in" to set the Control Password. After that, you can start parameter settings.
- Page 34 Fig 7.1...
- Page 35 7.1.2 Set the time and date Method 1: Refer to Section 8.2.1 to log into ShinePhone and establish communication between the APP and inverter. Then tap “Parameters” > “System time (45~50)” , to set the time and date of the inverter. Fig 7.2 7.2 Operation mode 7.2.1 Waiting mode...
- Page 36 7.2.3 Fault mode The inverter’s intelligent control system will continuously monitor and adjust system status. If any fault is detected, the Alarm/Fault indicator will turn red or flashes red, and the Power/Fault Code indicator will indicate the fault message. Note: Please refer to Section 9.2 Troubleshooting for details. 7.2.4 Shutdown mode When the solar power is insufficient or the PV panels are not generating power, the inverter will stop operating.
- Page 37 Description of LED status LED indicator indicator Inverter Status LED indicator status type position With AC voltage, Flashes green slowly, and AC voltage the inverter is the alarm/fault indicator is indicator reporting a fault steady red Inverter works normally Alarm/fault Inverter is in Alarm Flashes red slowly indicator...
- Page 38 Fig 8.1 Note: 1.Make you it's the latest version. 2.Please find more details on http://server.growatt.com. 2> Users can register their mobile APP account by following the steps below: Run ShinePhone, go to login page, click "register”.Registration is required to fill in...
- Page 39 Device page: 1>Main page top middle is the name of current plant, user can click the "∨" button to switch to other plants under this account. 2>User can add datalogger,check datalogger and add plant by click“+”button at the top right corner. 3>Top half shows current plant power, revenue today and total production.
- Page 40 2>User can add datalogger at the datalogger list page to add a datalogger, edit, delete, configure etc. 3>User can add more plants with the add Plant function. Device page and function: 1>Device page: User can click the device to see more details, the device page show current power and Energy today and daily power chart, user can find more with control,parameter, data and Events page.
- Page 41 Fig 8.11 8.1.2 GPRS /4G 8.1.2.1 Register account 1>Register account Open browser, input "server.growatt.com”, click “New User” at login page, input the necessary information then go back to login page, input the registered username and password, click “Sign In”. Fig 8.13...
- Page 42 Fig 8.14 2>Add datalogger At Plant page, click device manage, then click add datalogger, input the SN and valid code then save, after device is powered on, datalogger will show after 5mins, also the device will come online(our device is monitored by datalogger, so need to add the datalogger here first).
- Page 43 Fig 8.16 Fig 8.17 Fig 8.18 3> Data reading A.Basic production reading, Energy today, total production, revenue today and accumulative revenue are showing on this page.
- Page 44 Fig 8.19 B. Plant data page can check device power, voltage curve by time, day, month or year. Fig 8.20...
- Page 45 4>Set up the equipment The device management page selects MAX. The serial number of the device to be set can be found in the list. Notice: The following operations are requested by professionals. Fig 8.21 Fig 8.22 5>Check detailed data Double-click the device serial number in the device list.
- Page 46 2> Flexible parameter setting, system information management, error prompting and recording, high-capacity storage. 3> Collect data and upload data to Growatt in real time over the network. Note: The smart meter and environmental monitor must be Growatt's designated manufacturer, otherwise monitoring will not be possible. When RS485 of multiple machines is used in parallel, please connect the ground wire according to section 6.3.1.
- Page 47 The system framework of communication monitoring is shown in the figure below. Users can choose the most suitable monitoring method according to the actual situation. Multiple inverters RS 485 ShineMaster GPRS/4G Computer Connecting communication cable router Connecting communication cable Connecting Internet communication cable...
- Page 48 Fig 8.25 B. Enter user name and password, default login username: admin password: admin. click login after filling in, enter growatt shinemaster system page. 3> ShineMaster Data collector status view Click on the status of the shinemaster data collector to view shinemaster"system state information", "serial number,"...
- Page 49 Fig 8.26 4> ShineMaster Data collector add or delete device ShineMaster Before monitoring photovoltaic devices, we need to enter the page of the built-in shinemaster data collector settings to add devices. A. Add device 1) Select the monitoring mode for monitoring photovoltaic devices in the first drop-down list of add or remove devices.
- Page 50 2) Select the type of photovoltaic device monitored in the second drop down list. Fig 8.28 3) Fill in the third drop-down list with the photovoltaic device correspondence address. Fig 8.29 4) Select “Add” and then click “Save”. 5) Go to the device status page after saving success to confirm that the device was added successfully.
- Page 51 Enter the domain name access page, as shown in figure 8.32 below. Chinese user server domain name:http://server-cn.growatt.com. The domain name of the international user server is:http://server.growatt.com. Fig 8.31 2) Register user name, input user information according to prompt, after information is completed, click "register".
- Page 52 Fig 8.32 B. View monitoring data 1) After registration is complete, jump to the shineserver main interface automatically. Click on "power station" and "work information" to display the information for the power station's total power flow chart on the same day. The drop-down list "Select collector"...
- Page 53 2) By clicking on "power station" and "equipment management" in turn, the real- time data of "data collector", "inverter", "environment monitor", "intelligent meter" and "confluence box" MAX "can be viewed. 8.2 Local Data Monitoring MAX 150-180KTL3-X series Inverter local data monitoring mode has a mobile phone app phone) and PC direct connection, udisk, details are as follows.
- Page 54 Fig 8.35 8.2.1.2 Use of local monitoring and debugging When viewing local monitoring, you must keep the phone's wifi connected to the collector's wifi to view local monitoring (to enter the local monitoring page, first click auto refresh to get the latest data information). Electricity generation: the option to view the latest generation, daily generation, monthly and annual generation of detailed information;...
- Page 55 Fig 8.36 C. Parameter configuration The parameter data of the equipment can be modified according to the usage (Fig 8.37). D. Intelligent detection Detailed and accurate view of the device's detailed data and status (Fig 8.38). Fig 8.37...
- Page 56 Fig 8.38 E. Intelligent I-V curve scanning Can remotely scan each mppt (Fig 8.39). Fig 8.39...
- Page 57 F. Fault recording detection Remote, fast and accurate fault location (Fig 8.40). Fig 8.40 G. Real-time recording detection Inverter voltage and current quality can be observed in real time (Fig 8.41). Fig 8.41...
- Page 58 H. One click diagnosis I-V curve diagnosis, grid waveform, THDV and cable impedance detection all at one click(Fig 8.42). I. High level setting According to the register address set parameters (professionals). J. Device information Check PV voltage/current, string voltage/current, AC voltage/current/power/ frequency, PID voltage/current, internal parameters and device detail information and parameters ( Fig 8.43).
- Page 59 Fig 8.43 8.2.2 U Disk Monitoring Refer to 6.3.2 USB to WIFI/ U disk communicate connection, the local monitoring of U disk can realize the functions of software burning, fault recording, curve analysis and realtime recording. Details are as follows: 1>...
- Page 60 2> Fault Recording Create the bconfig.txt file under the root of the U disk, write the following content, then insert the U disk that can be read fault information, then generates a form under the files in the root directory, A total of 60 fault recording information is stored, the latest Numbers is 0.
- Page 61 4> Real Time Recording Create the bconfig. txt file under the root of the U disk, write the following content, then insert U disk to read real time recording information, then generates a form under the files in the root directory, the form record's waveform is consistent with the ID of the command setting.
- Page 62 System Maintenance 9 9.1 Routine Maintenance 9.1.1 Clean the Inverter Before performing any work, wait at least 5 minutes after turning Ÿ off the DC switch and AC breaker to let the capacitors discharge. DANGER 1> Check the humidity and dust in the environment around the inverter and clean the inverter if necessary;...
- Page 63 Fig 9.1 External fan view Fig 9.2 Internal fan view 3> Disconnect the wire connector of the fan with a flat-head screwdriver, then remove the fan after unscrewing the fan fixing plate with a screwdriver, as shown below: Fig 9.3...
- Page 64 Fig 9.4 External fan view Fig 9.5 Internal fan view Note: The MAX 150-180KTL3-X series inverter has 7 fans (2 internal fans and 5 external fans). 4> Clean the fan, fan guard and heat sink, or replace the fan 1) Clean the heat sink with an air pump; clean the fan and fan guard with a brush or cloth moistened with water.
- Page 65 Growatt support. 1. Turn off the DC switch immediately and check the DC voltage. DC input voltage exceeds 2. If the DC voltage is within the Warning209 the upper threshold specified range and the error message persists, contact Growatt support.
- Page 66 Suggestion 1. Check the polarity of the PV terminals. Warning210 PV wiring abnormal 2. If the error message persists, contact Growatt support. 1. Restart the inverter. Warning 219 PID function abnormal 2. If the error message persists, contact Growatt support.
- Page 67 1. Check if the L line and the N line of the meter are reversely connected. Warning309 Meter wiring abnormal 2. If the error message persists, contact Growatt support. 1. Check if the PE cable is reliably The voltage difference connected after shutdown. Warning310 between the N line and the 2.
- Page 68 Warning412 grid connection are not 2. Check if the PV voltage is within the specified range. 3. Restart the inverter. If the error message persists, contact Growatt support. Note: If the problem persists, please contact Growatt support.
- Page 69 Any or all attempts to correct or clear a fault must be performed by qualified personnel. Typically, the error code can be cleared once the cause or fault is removed. For irreparable errors, please contact Growatt support. Error Description Suggestion 1.
- Page 70 1. After shutdown, check the AC wiring. No utility grid connected or Error 302 2. If the error message persists, please utility grid power failure contact Growatt support. 1. After shutdown, check if the ground The voltage difference cable is reliably connected. Error 303 between the N line and the 2.
- Page 71 1. After shutdown, check the connection of the CT and the meter. Error 311 Export limitation fail-safe 2. If the error message persists, please contact Growatt support. 1. Restart the inverter. Error 400 DCI bias abnormal 2. If the error message persists, contact Growatt support.
- Page 72 Suggestion 1. Restart the inverter. Abnormal voltage across the Error 410 2. If the error message persists, please flying capacitor contact Growatt support. 1. Check the wiring of the Internal communication communication board after shutdown. Error 411 failure 2. If the error message persists, please contact Growatt support.
- Page 73 2. If the error message persists, please contact Growatt support. 1. Restart the inverter. Monitoring chip BOOT Error 431 2. If the error message persists, please verification failed contact Growatt support. Note: If the problem persists, please contact Growatt support.
- Page 74 Specifications 10 Model MAX 150KTL3-X LV MAX 180KTL3-X MV Specifications Input Data(DC) Max.recommended PV 225kW 270kW power(for module STC) Max.DC voltage 1100V Start voltage 195V Nominal voltage 600V 720V MPP voltage range 180V-1000V Full-load MPPT voltage 600V-850V range No.of MPP trackers No.of PV strings per MPPT 6*2+4*3 Max.input current per MPPT...
- Page 75 Model MAX 150KTL3-X LV MAX 180KTL3-X MV Specifications Efficiency Max.efficiency 98.80% 99.00% Euro-eta 98.40% 98.50% Protection devices DC reverse-polarity protection DC switch DC Surge protection Type II Insulation resistance monitoring AC surge protection Grid monitoring Anti-islanding protection Residual-current monitoring unit String monitoring Anti-PID function Optional...
- Page 76 Model MAX 150KTL3-X LV MAX180KTL3-X MV Specifications Relative humidity 0~100% DC connection H4/MC4(Optional) AC connection OT/DT terminal Interfaces Display LED/WIFI+APP RS485/USB PLC/GPRS/4G Optional Warrant:5 /10 years Optional Certificates and approvals AS/NZS 4777.2,CEI 0-21,CEI 0-16,VDE-AR-N 4105, DIN V VDE V 0126-1-1,UTE C 15-712-1,EN 50438, Grid regulation IEC 60068,IEC 61683,IEC 62116,IEC 61727, MEA,PEA,DRRG/DEWA:2016,BDEW,G59/3...
- Page 77 11 Decommissioning Please handle the inverters that will not be put into operation properly, following the steps below: 1> Disconnect the external AC circuit breaker and prevent accidental reconnection. 2> Turn the DC switch to the "OFF" position. 3> Wait at least 5 minutes until the internal capacitor is fully discharged. 4>...
- Page 78 Contact 13 If you have technical problems concerning our products, contact your installer or Growatt.To provide you with the necessary support, please have the following information ready: 1> Inverter model 2> Serial number of inverter 3> Error code of inverter 4>...
- Page 79 Download Manual Shenzhen Growatt New Energy Co., Ltd. 4-13/F, Building A, Sino-German (Europe) Industrial Park, Hangcheng Blvd, Bao'an District, Shenzhen, China +86 755 2747 1942 service@ginverter.com www.ginverter.com GR-UM-310-A-00 (PN:044.0127500)
Need help?
Do you have a question about the MAX 150KTL3-X Series and is the answer not in the manual?
Questions and answers