Advertisement
Quick Links
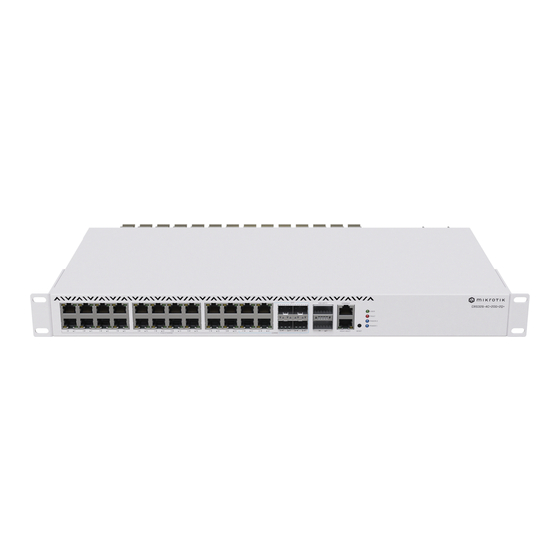
CRS326-4C+20G+2Q+RM
CRS326-4C+20G+2Q+RM
The CRS326-4C+20G+2Q+RM is a network switch with twenty 2.5G Ethernet ports, four 2.5/10G SFP+ ports and one 100M and two 40G QSFP+ ports.
The device is ready to use as a switch.
Safety Warnings
Before you work on any MikroTik equipment, be aware of the hazards involved with electrical circuitry, and be familiar with standard practices for
preventing accidents. The installer should be familiar with network structures, terms, and concepts.
Use only the power supply and accessories approved by the manufacturer, which can be found in the original packaging of this product.
This equipment is to be installed by trained and qualified personnel, as per these installation instructions. The installer is responsible for making sure, that
the Installation of the equipment is compliant with local and national electrical codes. Do not attempt to disassemble, repair, or modify the device.
This unit is intended to be installed in the rackmount. Please read the mounting instructions carefully before beginning installation. Failure to use the
correct hardware or to follow the correct procedures could result in a hazardous situation to people and damage to the system.
This product is intended to be installed indoors. Keep this product away from water, fire, humidity, or hot environments.
We cannot guarantee that no accidents or damage will occur due to the improper use of the device. Please use this product with care and operate at your
own risk!
The socket-outlet shall be installed near the equipment and shall be easily accessible.
In the case of device failure, please disconnect it from power. The fastest way to do so is by unplugging the power adapter from the power outlet.
To avoid contamination of the environment, separate the device from household waste and dispose of it in a safe manner, for example, in designated
areas. Become familiar with procedures for properly transporting the equipment to designated collection points in your area.
Electric shock hazard. This equipment is to be serviced by trained personnel only
Quick start
Mount unit or place on the flat surface, please see
Choose your powering solution, please see the
Connect with your PC to any Ethernet port;
Connect the device to a power source;
Set your IP for PC to 192.168.88.2/24;
Open your web browser, the default IP management address is 192.168.88.1, with username:
check user and wireless passwords on the
In case IP is not available then use WinBox and connect with MAC address;
Update the device by clicking the "Check for updates" button to the latest RouterOS software for this to work the device needs to have an active
Internet connection;
For a manual update of the device, visit the products page at
accessible under the "Support&Downloads" menu;
Open WinBox and upload packages in the (Files) menu;
Mounting
paragraph for instructions.
Powering
section for possibilities.
sticker);
https://mikrotik.com/products
admin
and no password
(or, for some models,
to find your product. The required packages are
Advertisement

Related Manuals for MikroTik CRS326-4C+20G+2Q+RM


Summary of Contents for MikroTik CRS326-4C+20G+2Q+RM
- Page 1 CRS326-4C+20G+2Q+RM CRS326-4C+20G+2Q+RM The CRS326-4C+20G+2Q+RM is a network switch with twenty 2.5G Ethernet ports, four 2.5/10G SFP+ ports and one 100M and two 40G QSFP+ ports. The device is ready to use as a switch. Safety Warnings Before you work on any MikroTik equipment, be aware of the hazards involved with electrical circuitry, and be familiar with standard practices for preventing accidents.
- Page 2 Reboot the device; Set up your password to secure the device. Mounting The device is designed to use indoors and it can be mounted in a rackmount enclosure using provided rack mounts, or it can be placed on the desktop. Please attach rubber pegs on the bottom of the router if the desired placement is on the flat surface or use a Phillips screwdriver to attach rackmount ears on both sides of the device if designated use is for rackmount enclosure: Attach rack ears to both sides of the device and tighten four screws to secure them in place, as shown in the picture.
- Page 3 1x 10/100Mbit Ethernet port for management access. Three cooling fans with automatic speed control. Two integrated power supply units with AC inputs for redundancy. Please visit wiki pages for MikroTik SFP module compatibility and configuration table: https://help.mikrotik.com/docs/display/ROS /MikroTik+wired+interface+compatibility Reset button The RouterBOOT reset button has the following functions.
Need help?
Do you have a question about the CRS326-4C+20G+2Q+RM and is the answer not in the manual?
Questions and answers