Advertisement
Quick Links
Advertisement

Related Manuals for attika RAIS Q-Tee II


Summary of Contents for attika RAIS Q-Tee II
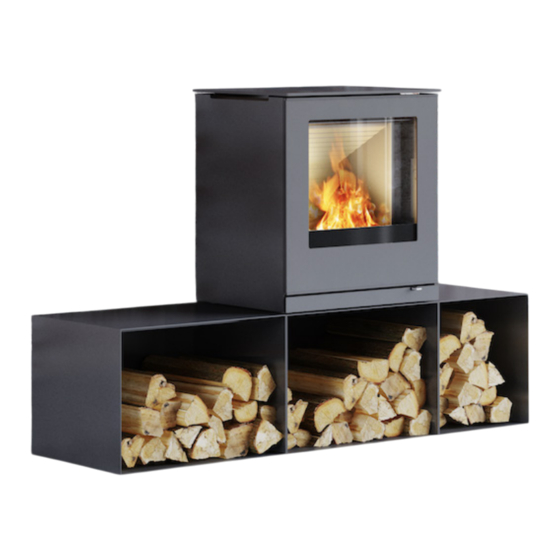
- Page 1 Q-Tee II Q-Tee II C Q-Tee II C SST USER MANUAL...
- Page 2 PRODUCTION NUMBER PRODUCTION NUMBER The production number can be found on the back of the stove. This manual applies to the following models: Q-Tee II Glass Q-Tee II Classic Q-Tee II C Glass Q-Tee II C Classic Q-Tee II C Glass SST Q-Tee II C Classic SST Revision: Date:...
- Page 3 LIST OF CONTENT INSTALLATION MANUAL In general ............General installation requirements .
- Page 4 INSTALLATION MANUAL Thank you for choosing your new RAIS or ATTIKA product! This installation manual will ensure that your wood stove is installed correctly and that it will provide you with com- fort and pleasure for many years to come.
- Page 5 When de- ciding where to install your RAIS/ATTIKA wood stove, you should think about being able to heat other rooms in the home, so you get the most out of your new wood stove.
- Page 6 TECHNICAL DATA The technical data given below includes specifications, dimensional drawings and the information plate. SPECIFICATIONS Danish Technological Institute ref.: 300-ELAB-1882-EN / 300-ELAB-1882-NS Q-Tee II Nominal output (kW) Min./Max. Output (kW): 3-8 * Heating area (m 45 - 120 Width/depth/height (mm) 582 / 410 / 598 Combustion chamber W x D x H (mm) 446 / 277 /...
- Page 7 TECHNICAL DATA SPECIFICATIONS Danish Technological Institute ref.: 300-ELAB-1882-EN / 300-ELAB-1882-NS Q-Tee II C Nominal output (kW) Min./Max. Output (kW): 3-8 * Heating area (m 45 - 120 Width/depth/height (mm) 660 / 479 / 598 Combustion chamber W x D x H (mm) 446 / 277 / 167** Min.
- Page 8 TECHNICAL DATA SPECIFICATIONS Danish Technological Institute ref.: 300-ELAB-1882-EN / 300-ELAB-1882-NS Q-Tee II C SST Nominal output (kW) Min./Max. Output (kW): 3-8 * Heating area (m 45 - 120 Width/depth/height (mm) 696 / 507 / 1038 Combustion chamber W x D x H (mm) 446 / 277 / 167** Min.
- Page 9 DIMENSIONAL SKETCHES...
- Page 10 DIMENSIONAL SKETCHES...
- Page 11 DIMENSIONAL SKETCHES...
- Page 12 DIMENSIONAL SKETCHES...
- Page 13 DIMENSIONAL SKETCHES...
- Page 14 DIMENSIONAL SKETCHES...
- Page 15 INFORMATION PLATE All RAIS/ATTIKA wood-burning stoves have an information plate which states the stove’s distance from flammable materials, efficiency, etc. The information plate is laid loose with the stove on delivery. We recommend that you fit the information plate on the rear of the wood-burning stove.
- Page 16 (Not to be used in a shared flue in UK) Appliance fired by wood Poêle pour combustibles solides Produced for: ATTIKA FEUER AG, Brunnmatt 16, CH-6330 Cham / RAIS A/S, Industrivej 20, DK-9900 Frederikshavn UKCA/CE Label for: Q-Tee II, Q-Tee II C, Q-Tee II C SST - 28-02-2024...
- Page 17 INSTALLATION INSTALLATION The following section explains how to install the wood stove and includes information about the packaging, installation distances etc. DELIVERY PACKAGING Upon delivery, the stove is secured to a transport pallet using four transport safety fittings, one in each corner (A). The safety fittings are secured with screws, which must be unscrewed.
- Page 18 INSTALLATION INSTALLATION INSTRUCTIONS The following pages give instructions for the safe and proper installation of this heat- ing appliance in the UK. These instructions cover the basic principles of installation, although detail may need slight modification to suit particular local site conditions. In all cases the installation must comply with current UK Building Regulations, Local Authority Byelaws and other specifications or regulations as they affect the installa- tion of the stove.
- Page 19 INSTALLATION METAL PARTS When installing or servicing this stove care should be taken to avoid the possibility of personal injury. Important Warning –Preparatory Work and Safety Checks: This stove must not be installed into a chimney that serves any other heating appli- ance.
- Page 20 INSTALLATION If there is no existing chimney then either a prefabricated block chimney in accordance with Building Regulations Approved Document J or a twin walled insulated stainless steel flue to BS 1856-1 can be used. These chimneys must be fitted in accordance with the manufacturer’s instructions and Building Regulations.
- Page 21 INSTALLATION INSTALLATION The stove is a free standing stove and it must be placed on a constructional hearth of at least 125mm in thickness unless the stove is elevated minimum 100mm above the hearth with a socket or legs. Stoves that have been elevated a minimum of 100mm, can be placed on a superim- posed hearth of non-combustible material at least 12 mm thick, in accordance with UK Building Regulations Approved Document J.
- Page 22 The weight of the stove is indicated in the brochure. If the Q-Tee 2 is installed with the RAIS/attika log store, the distance in front of the stove must meet the UK Building Regulations of 300mm.
- Page 23 The installation distances applicable to the wood-burning stove are shown below. Bear in mind that the final choice of chimney may have a different safety distance. All dimensions are in mm. Uninsulated flue EE II Rais Q-TEE II Right-angle installation Flammable ceiling brændbart 8426401 EE II grør...
- Page 24 INSTALLATION DISTANCES Q-TEE II INSTALLATION DISTANCE TO FLAMMABLE MATERIAL WITH REFLECTOR: The installation distances applicable to the wood-burning stove with reflector are shown below. Bear in mind that the final choice of chimney may have a different safety distance. All dimensions are in mm. Uninsulated flue EE II Right-angle installation...
- Page 25 The installation distances applicable to the wood-burning stove are shown below. Bear in mind that the final choice of chimney may have a different safety distance. All dimensions are in mm. Insulated flue EE II brændbart Right-angle installation Rais Q-TEE II Flammable ceiling EE II rør 8426406 Afstand til brændbart ændbart Isoleret røgrør...
- Page 26 The installation distances applicable to the wood-burning stove are shown below. Bear in mind that the final choice of chimney may have a different safety distance. All dimensions are in mm. Uninsulated flue EE II C Rais Q-TEE II C brændbart 8346401 Right-angle installation Flammable ceiling EE II C grør...
- Page 27 All dimensions are in mm. Insulated flue EE II C brændbart Right-angle installation Flammable ceiling Rais Q-TEE II C EE II C rør 8346406 Afstand til brændbart ændbart Isoleret røgrør ør...
- Page 28 The installation distances applicable to the wood-burning stove are shown below. Bear in mind that the final choice of chimney may have a different safety distance. All dimensions are in mm. Uninsulated flue EE II C SST Rais Q-TEE II C SST rændbart 8336401 Right-angle installation Flammable ceiling...
- Page 29 All dimensions are in mm. Insulated flue EE II C SST rændbart Right-angle installation Flammable ceiling Rais Q-TEE II C SST E II C SST sten 8336406 Afstand til brændbart ændbart Isoleret skorsten Corner installation Safety distances to the flammable ceiling are measured from above the door.
- Page 30 Q-Tee II Adjustable feet HEIGHT ADJUSTMENT 8426504 HEIGHT ADJUSTMENT The stove is equipped with four adjustment screws (1) under the stove. Use the adjustment screws to ensure the wood-burning stove stands level.
- Page 31 Q-Tee II Mounting of the door handle FITTING THE HANDLE 8426505 FITTING/CHANGING THE HANDLE The wood-burning stove comes with a tem- porary handle (1). To remove it, undo the nuts (2). The new handle (3) can now be fit- ted to the stove using the nuts (2).
- Page 32 REMOVING THE COMBUSTION CHAMBER LINING Q-Tee II Demounting the vermiculite 8426506 REMOVING THE COMBUSTION CHAMBER LINING The combustion chamber lining protects the body of the fireplace insert from the heat of the fire. The large differences in temperature can lead to cracks in the combustion chamber lining.
- Page 33 LUBRICATING THE HINGES Q-Tee II Lubricating the moving parts. 8426507 LUBRICATING THE HINGES & LOCK The fireplace must be lubricated regularly using the three moving parts on the lock and hinges (see image). Use heat-resistant oil.
- Page 34 SMOKE OUTLET TO REAR OUTLET INSTALLATION OF SMOKE OUTLET FOR REAR OUTLET. -Tee II øgstuds ved bagafgang The stove is ready for top exit on delivery, but can be changed to rear exit in the following way. 426509 Q-Tee II Røgstuds ved bagafgang 1.
- Page 36 POSITIV OUTLINE NEGATIV RAIS A/S ATTIKA FEUER AG Industrivej 20 Brunnmatt 16 DK-9900 Frederikshavn CH-6330 Cham Denmark Switzerland www.rais.com www.attika.ch...
Need help?
Do you have a question about the RAIS Q-Tee II and is the answer not in the manual?
Questions and answers