Advertisement
Available languages
Available languages
Quick Links
Cabinet Refrigerators/
EN
Freezers
Instruction manual
Koelkasten/vrieskasten
NL
Handleiding
Armoires réfrigérantes/
FR
congélateurs
Mode d'emploi
Model • Model • Modèle • Modell • Modello • Modelo:
G590-G591_GD879-GD880_ML_A5_v18_20240927.indb 1
G590-G591_GD879-GD880_ML_A5_v18_20240927.indb 1
2
DE
10
IT
18
ES
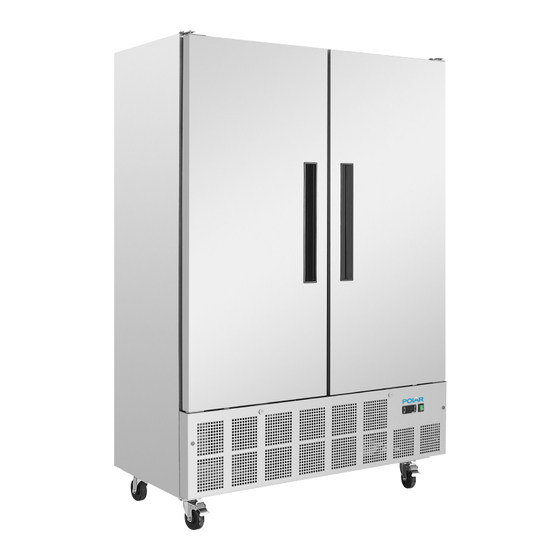
G590/G591/GD879/GD880
Cabinet Refrigerators/
Freezers
Instruction manual
Koelkast/Vriezer
Bedienungsanleitung
Armadi frigoriferi/congelatori
Manuale di istruzioni
Frigoríficos / Congeladores de
cabina
Manual de instrucciones
26
34
42
2024/9/27 08:49
2024/9/27 08:49
Advertisement

Subscribe to Our Youtube Channel
Related Manuals for Polar Electro G590


Summary of Contents for Polar Electro G590
- Page 1 Koelkasten/vrieskasten Armadi frigoriferi/congelatori Handleiding Manuale di istruzioni Armoires réfrigérantes/ Frigoríficos / Congeladores de congélateurs cabina Mode d'emploi Manual de instrucciones Model • Model • Modèle • Modell • Modello • Modelo: G590/G591/GD879/GD880 G590-G591_GD879-GD880_ML_A5_v18_20240927.indb 1 G590-G591_GD879-GD880_ML_A5_v18_20240927.indb 1 2024/9/27 08:49 2024/9/27 08:49...
- Page 2 • If the power cord is damaged, it must be replaced by a POLAR agent or a recommended qualified technician in order to avoid a hazard. G590-G591_GD879-GD880_ML_A5_v18_20240927.indb 2 G590-G591_GD879-GD880_ML_A5_v18_20240927.indb 2 2024/9/27 08:49 2024/9/27 08:49...
- Page 3 POLAR prides itself on quality and service, ensuring that at the time of unpacking the contents are supplied fully functional and free of damage. Should you find any damage as a result of transit, please contact your POLAR dealer immediately. G590-G591_GD879-GD880_ML_A5_v18_20240927.indb 3 G590-G591_GD879-GD880_ML_A5_v18_20240927.indb 3 2024/9/27 08:49...
- Page 4 3. Set the brakes on the castors to keep the appliance in position. Reversing the door (G590/G591 only) Depending on the location of the appliance, it may be necessary to change the direction the door opens by changing the side of the door handle.
- Page 5 3. Disassemble the upper hinge then install it on the left side. 4. Reverse the door and install the left upper hinge. 5. Install the left lower hinge. 6. Now the door handle is installed on the right side. G590-G591_GD879-GD880_ML_A5_v18_20240927.indb 5 G590-G591_GD879-GD880_ML_A5_v18_20240927.indb 5 2024/9/27 08:49 2024/9/27 08:49...
- Page 6 3. Press the SET button to store the temperature. Manual Defrost Press and hold the defrost button “aux” for 2 seconds to begin a manual defrost. The defrost light illuminates. The defrost cycle will end automatically. G590-G591_GD879-GD880_ML_A5_v18_20240927.indb 6 G590-G591_GD879-GD880_ML_A5_v18_20240927.indb 6 2024/9/27 08:49 2024/9/27 08:49...
- Page 7 Polar unit, and thus may invalidate your warranty. • The condenser is located below the refrigeration cabinet. These models have a removable filter which can be cleaned with a vacuum cleaner. G590-G591_GD879-GD880_ML_A5_v18_20240927.indb 7 G590-G591_GD879-GD880_ML_A5_v18_20240927.indb 7 2024/9/27 08:49 2024/9/27 08:49...
- Page 8 The appliance is Loose nut/screw Check and tighten all nuts and screws unusually loud The appliance has not been Check installation position and change if installed in a level or stable necessary position G590-G591_GD879-GD880_ML_A5_v18_20240927.indb 8 G590-G591_GD879-GD880_ML_A5_v18_20240927.indb 8 2024/9/27 08:49 2024/9/27 08:49...
- Page 9 POLAR. Every effort is made to ensure all details are correct at the time of going to press, however, POLAR reserve the right to change specifications without notice. G590-G591_GD879-GD880_ML_A5_v18_20240927.indb 9 G590-G591_GD879-GD880_ML_A5_v18_20240927.indb 9 2024/9/27 08:49...
- Page 10 • Alvorens dit product te reinigen dient men altijd de stroomvoorziening uit te schakelen. • Laat verpakkingsmateriaal niet binnen handbereik van kinderen. Verpakkingsmateriaal in overeenstemming met de regelgeving van de plaatselijke overheden als afval laten verwerken. G590-G591_GD879-GD880_ML_A5_v18_20240927.indb 10 G590-G591_GD879-GD880_ML_A5_v18_20240927.indb 10 2024/9/27 08:49 2024/9/27 08:49...
- Page 11 POLAR is trots op de haar productkwaliteit en dienstverlening en controleer de inhoud van de verpakkingen, tijdens de verpakkingsfase, op functionaliteit en schade. Mocht u product door transport zijn beschadigd, neem dan onmiddellijk contact op met uw POLAR dealer. G590-G591_GD879-GD880_ML_A5_v18_20240927.indb 11 G590-G591_GD879-GD880_ML_A5_v18_20240927.indb 11 2024/9/27 08:49...
- Page 12 3. Zet de remmen van de wielen vast om het product op zijn plaats vast te zetten. Omkeren van de deur (Alleen G590/G591) Afhankelijk van de locatie van het toestel kan het nodig zijn de richting, waarop de deur opent, te wijzigen door de kant van het deurhandvat te wijzigen.
- Page 13 3. Demonteer het bovenste scharnier, installer het dan aan de linkerkant. 4. Keer de deur om en installeer linker bovenste 5. Installeer linker onderste scharnier. scharnier. 6. Nu is het deurhandvat geïnstalleerd aan de rechterzijde. G590-G591_GD879-GD880_ML_A5_v18_20240927.indb 13 G590-G591_GD879-GD880_ML_A5_v18_20240927.indb 13 2024/9/27 08:49 2024/9/27 08:49...
- Page 14 3. Druk op de SET knop om de temperatuurwaarde op te slaan. Handmatig ontdooien De knop “aux” indrukken en gedurende 2 seconden ingedrukt houden om ontdooiing te starten. Het ontdooiingslampje gaat aan. De ontdooicyclus eindigt automatisch. G590-G591_GD879-GD880_ML_A5_v18_20240927.indb 14 G590-G591_GD879-GD880_ML_A5_v18_20240927.indb 14 2024/9/27 08:49 2024/9/27 08:49...
- Page 15 Polar-eenheid, beperken en hierdoor uw garantie ongeldig zal maken. • De condensor zit onder de koelkast. Deze modellen hebben een uitneembaar filter dat met een stofzuiger kan worden schoongemaakt. G590-G591_GD879-GD880_ML_A5_v18_20240927.indb 15 G590-G591_GD879-GD880_ML_A5_v18_20240927.indb 15 2024/9/27 08:49 2024/9/27 08:49...
- Page 16 Het product Moer/schroef los Alle moeren en schroeven controleren en maakt aantrekken ongebruikelijk Het product is niet op een effen of Installatielocatie controleren en indien nodig veel lawaai stabiele ondergrond geplaatst veranderen G590-G591_GD879-GD880_ML_A5_v18_20240927.indb 16 G590-G591_GD879-GD880_ML_A5_v18_20240927.indb 16 2024/9/27 08:49 2024/9/27 08:49...
- Page 17 Wij hebben er alles aan gedaan om er zeker van te zijn dat op publicatiedatum van de handleiding alle details correct zijn, desondanks, behoudt Polar het recht voor om specificaties zonder aankondiging te wijzigen. G590-G591_GD879-GD880_ML_A5_v18_20240927.indb 17 G590-G591_GD879-GD880_ML_A5_v18_20240927.indb 17 2024/9/27 08:49...
- Page 18 • N’oubliez jamais d’éteindre et de débrancher l’appareil avant de procéder à son ettoyage. • Gardez les emballages hors de portée des enfants. Débarrassez-vous des emballages onformément aux règlements des autorités locales. G590-G591_GD879-GD880_ML_A5_v18_20240927.indb 18 G590-G591_GD879-GD880_ML_A5_v18_20240927.indb 18 2024/9/27 08:49 2024/9/27 08:49...
- Page 19 POLAR attache une grande importance à la qualité et au service et veille à fournir des produits en parfait état opérationnel, parfaitement intacts au moment de l’emballage. Nous vous prions de contacter votre revendeur POLAR immédiatement si vous constatez un dommage quelconque survenu pendant le transport du produit. G590-G591_GD879-GD880_ML_A5_v18_20240927.indb 19 G590-G591_GD879-GD880_ML_A5_v18_20240927.indb 19 2024/9/27 08:49 2024/9/27 08:49...
- Page 20 à l’eau savonneuse puis séchez-les bien. 3. Bloquez les freins des roulettes de l’appareil, pour l’empêcher de bouger. Inversion de la porte (G590/G591 uniquement) Selon l’emplacement de l’appareil, il peut être nécessaire de modifier le sens d’ouverture de la porte en changeant le côté...
- Page 21 3. Démonter la charnière supérieure et l’installer sur le côté gauche. 4. Inverser la porte et installer la charnière 5. Installer la charnière inférieure gauche. supérieure gauche. 6. La poignée de la porte est présentement installée sur le côté droit. G590-G591_GD879-GD880_ML_A5_v18_20240927.indb 21 G590-G591_GD879-GD880_ML_A5_v18_20240927.indb 21 2024/9/27 08:49 2024/9/27 08:49...
- Page 22 3. Appuyez sur le bouton SET pour mémoriser la température. Degivrage manual Appuyez sur les bouton «aux» et maintenez-le enfonce pendant 2 secondes pour demarrer le degivrage automatique. Le voyant de degivrage s’allume. Le cycle de dégivrage se termine automatiquement. G590-G591_GD879-GD880_ML_A5_v18_20240927.indb 22 G590-G591_GD879-GD880_ML_A5_v18_20240927.indb 22 2024/9/27 08:49 2024/9/27 08:49...
- Page 23 Polar seront réduites et votre garantie pourrait être annulée. • Le condensateur se trouve dans l’armoire de réfrigération. Ces modèles sont équipés d’un filtre amovible qui peut être nettoyé à l’aide d’un aspirateur. G590-G591_GD879-GD880_ML_A5_v18_20240927.indb 23 G590-G591_GD879-GD880_ML_A5_v18_20240927.indb 23 2024/9/27 08:49 2024/9/27 08:49...
- Page 24 Vérifier et resserrer les écrous et vis de bruit La surface sur laquelle l'appareil Vérifier la position d'installation et la a été posé n'est pas de niveau ou changer si nécessaire l'appareil n'est pas stable G590-G591_GD879-GD880_ML_A5_v18_20240927.indb 24 G590-G591_GD879-GD880_ML_A5_v18_20240927.indb 24 2024/9/27 08:49 2024/9/27 08:49...
- Page 25 Nous nous efforçons, par tous les moyens dont nous disposons, de faire en sorte que les détails contenus dans le présent mode d’emploi soient corrects en date d’impression. Toutefois, POLAR se réserve le droit de changer les spécifications de ses produits sans préavis. G590-G591_GD879-GD880_ML_A5_v18_20240927.indb 25 G590-G591_GD879-GD880_ML_A5_v18_20240927.indb 25 2024/9/27 08:49...
- Page 26 Zum Transport den Schrank an der Unterseite anfassen. • Vor Reinigungsarbeiten stets zunächst das Gerät abschalten und den Netzstecker ziehen. • Aus Sicherheitsgründen muss ein beschädigtes Stromkabel von einem POLAR-Mitarbeiter oder empfohlenen qualifizierten Elektriker erneuert werden. G590-G591_GD879-GD880_ML_A5_v18_20240927.indb 26 G590-G591_GD879-GD880_ML_A5_v18_20240927.indb 26 2024/9/27 08:49 2024/9/27 08:49...
- Page 27 POLAR ist stolz auf die hochwertige Qualität seiner Produkte und seinen erstklassigen Service. Wir stellen sicher, dass alle gelieferten Produkte zum Zeitpunkt der Verpackung voll funktionsfähig sind und sich in einwandfreiem Zustand befinden. Sollten Sie Transportschäden feststellen, wenden Sie sich bitte unverzüglich an Ihren POLAR-Händler. G590-G591_GD879-GD880_ML_A5_v18_20240927.indb 27 G590-G591_GD879-GD880_ML_A5_v18_20240927.indb 27 2024/9/27 08:49 2024/9/27 08:49...
- Page 28 3. Die Bremsen an den Laufrollen feststellen, damit sich der Schrank nicht bewegen kann. ODER Das Gerät durch Einstellen der Schraubfüße ausgleichen. Die Tür umdrehen (nur G590/G591) Abhängig vom Standort des Geräts kann es erforderlich sein, die Öffnungsrichtung der Tür zu ändern, indem Sie die Seite des Türgriffs wechseln.
- Page 29 3. Demontieren Sie das obere Scharnier und installieren Sie es auf der linken Seite. 4. Drehen Sie die Tür um und installieren Sie das 5. Installieren Sie das linke untere Scharnier. linke obere Scharnier. 6. Jetzt ist der Türgriff auf der rechten Seite installiert. G590-G591_GD879-GD880_ML_A5_v18_20240927.indb 29 G590-G591_GD879-GD880_ML_A5_v18_20240927.indb 29 2024/9/27 08:49 2024/9/27 08:49...
- Page 30 3. Zum Speichern der Temperatur drücken Sie die Taste SET. Manuelles Abtauen Um den Abatauvorgang zu starten, die taste „aux“ 2 Sekunden lang gedruct halten. Die Abtaulampe leuchtet auf. Der Abtauzyklus wird automatisch beendet. G590-G591_GD879-GD880_ML_A5_v18_20240927.indb 30 G590-G591_GD879-GD880_ML_A5_v18_20240927.indb 30 2024/9/27 08:49 2024/9/27 08:49...
- Page 31 Reduzierung der Leistung und Lebensdauer Ihres Polar-Gerätes und möglicherweise zum Erlöschen Ihrer Garantie. • Der Verflüssiger befindet sich unter dem Kühlschrank. Diese Modelle sind mit einem herausnehmbaren Filter ausgestattet, der mit einem Staubsauger gereinigt werden kann. G590-G591_GD879-GD880_ML_A5_v18_20240927.indb 31 G590-G591_GD879-GD880_ML_A5_v18_20240927.indb 31 2024/9/27 08:49 2024/9/27 08:49...
- Page 32 Das Gerät ist Alle Muttern und Schrauben Alle Muttern und Schrauben überprüfen ungewöhnlich laut überprüfen und anziehen und anziehen Das Gerät steht nicht eben oder Position überprüfen und bei Bedarf ändern stabil G590-G591_GD879-GD880_ML_A5_v18_20240927.indb 32 G590-G591_GD879-GD880_ML_A5_v18_20240927.indb 32 2024/9/27 08:49 2024/9/27 08:49...
- Page 33 Fotokopieren, Aufnahme oder andere Verfahren - vervielfältigt oder übertragen werden. Es werden alle Anstrengungen unternommen um sicherzustellen, dass alle Angaben bei der Drucklegung korrekt sind. POLAR behält sich jedoch das Recht vor, Spezifikationen ohne Vorankündigung zu ändern. G590-G591_GD879-GD880_ML_A5_v18_20240927.indb 33 G590-G591_GD879-GD880_ML_A5_v18_20240927.indb 33 2024/9/27 08:49...
- Page 34 • Spegnere e disconnettere l’alimentazione dell’unità prima di pulirla. • Tenere lontano l’imballaggio dalla portata dei bambini. Smaltire l’imballaggio in conformità alle normative locali. G590-G591_GD879-GD880_ML_A5_v18_20240927.indb 34 G590-G591_GD879-GD880_ML_A5_v18_20240927.indb 34 2024/9/27 08:49 2024/9/27 08:49...
- Page 35 POLAR garantisce una qualità e un servizio impeccabili e assicura che al momento dell’imballaggio tutti i componenti forniti sono integralmente funzionanti e privi di difetti. Nel caso siano rilevati danni risultanti dal trasporto del prodotto, rivolgersi immediatamente al rivenditore POLAR locale. G590-G591_GD879-GD880_ML_A5_v18_20240927.indb 35 G590-G591_GD879-GD880_ML_A5_v18_20240927.indb 35 2024/9/27 08:49 2024/9/27 08:49...
- Page 36 3. Innestare i freni delle ruote a sfera per mantenere l’apparecchio in posizione OPPURE Mettere in piano l’apparecchio regolando i piedi. Inversione della porta (solo G590/G591) In funzione della posizione dell’elettrodomestico, potrebbe essere necessario modificare la direzione di apertura della porta cambiando il lato della maniglia.
- Page 37 3. Smontare la cerniera superiore quindi installarla sul lato sinistro. 4. Invertire la porta e installare la cerniera 5. Installare la cerniera inferiore sinistra. superiore sinistra. 6. Ora la maniglia della porta si trova sul lato destro. G590-G591_GD879-GD880_ML_A5_v18_20240927.indb 37 G590-G591_GD879-GD880_ML_A5_v18_20240927.indb 37 2024/9/27 08:49 2024/9/27 08:49...
- Page 38 3. Premere il pulsante SET per memorizzare la temperatura. Sbrinamento manuale Premere senza rilasciare il pulsante “aux” per 2 secondi per avviare lo sbrinamento. La spia di sbrinamento si accende. Il ciclo di sbrinamento si conclude automaticamente. G590-G591_GD879-GD880_ML_A5_v18_20240927.indb 38 G590-G591_GD879-GD880_ML_A5_v18_20240927.indb 38 2024/9/27 08:49 2024/9/27 08:49...
- Page 39 Polar e può quindi invalidare la garanzia. • Il condensatore è posizionato al di sotto dell’armadio refrigerante. I modelli sono dotati di un filtro rimovibile che è possibile pulire con un aspirapolvere. G590-G591_GD879-GD880_ML_A5_v18_20240927.indb 39 G590-G591_GD879-GD880_ML_A5_v18_20240927.indb 39 2024/9/27 08:49 2024/9/27 08:49...
- Page 40 Controllare e serrare tutti i dadi e le viti presenta una L'apparecchio non è stato installato in Controllare la posizione di installazione e rumorosità eccessiva una posizione in piano o stabile modificarla se necessario G590-G591_GD879-GD880_ML_A5_v18_20240927.indb 40 G590-G591_GD879-GD880_ML_A5_v18_20240927.indb 40 2024/9/27 08:49 2024/9/27 08:49...
- Page 41 POLAR. Le informazioni contenute sono corrette e accurate al momento della stampa, tuttavia POLAR si riserva il diritto di modificare le specifiche senza preavviso. G590-G591_GD879-GD880_ML_A5_v18_20240927.indb 41 G590-G591_GD879-GD880_ML_A5_v18_20240927.indb 41 2024/9/27 08:49 2024/9/27 08:49...
- Page 42 Deshágase del embalaje de acuerdo con las normativas de las autoridades locales. • Si el cable eléctrico está dañado, debe ser reemplazado por un agente de POLAR o un técnico cualificado recomendado para evitar cualquier riesgo. G590-G591_GD879-GD880_ML_A5_v18_20240927.indb 42 G590-G591_GD879-GD880_ML_A5_v18_20240927.indb 42 2024/9/27 08:49 2024/9/27 08:49...
- Page 43 POLAR se enorgullece de su calidad y servicio y asegura que en el momento del embalaje, el contenido se suministró con plena funcionalidad y sin ningún defecto. Si encontrara algún daño resultante del transporte, póngase en contacto inmediatamente con su distribuidor POLAR. G590-G591_GD879-GD880_ML_A5_v18_20240927.indb 43 G590-G591_GD879-GD880_ML_A5_v18_20240927.indb 43 2024/9/27 08:49 2024/9/27 08:49...
- Page 44 3. Coloque los frenos en las ruedecillas para mantener el aparato en su posición O Nivele el aparato ajustando la pata enroscada. Invirtiendo la puerta (sólo en los modelos G590/G591) Dependiendo de la ubicación del electrodoméstico, puede ser necesario cambiar la dirección en que se abre la puerta cambiando el lado de la manija de la puerta.
- Page 45 3. Desmonte la bisagra superior y luego instálela en el lado izquierdo. 4. Invierta la puerta e instale la bisagra superior 5. Instale la bisagra inferior izquierda. izquierda. 6. Ahora la manija de la puerta está instalada en el lado derecho. G590-G591_GD879-GD880_ML_A5_v18_20240927.indb 45 G590-G591_GD879-GD880_ML_A5_v18_20240927.indb 45 2024/9/27 08:49 2024/9/27 08:49...
- Page 46 3. Pulse el botón SET para fijar la temperatura. Descongelacion manual Pulse y mantenga pulsado el boton “aux” durante 2 segundos para que empiece la descongelacion . La luz de descongelacion se iluminare. El ciclo de descongelación finalizará automáticamente. G590-G591_GD879-GD880_ML_A5_v18_20240927.indb 46 G590-G591_GD879-GD880_ML_A5_v18_20240927.indb 46 2024/9/27 08:49 2024/9/27 08:49...
- Page 47 Polar y, por lo tanto, invalidará la garantía. • El condensador está ubicado por debajo del gabinete de refrigeración. Estos modelos tienen un filtro extraíble que puede limpiarse con una aspiradora. G590-G591_GD879-GD880_ML_A5_v18_20240927.indb 47 G590-G591_GD879-GD880_ML_A5_v18_20240927.indb 47 2024/9/27 08:49 2024/9/27 08:49...
- Page 48 Compruebe y apriete todos los tornillos y las inusualmente tuercas ruidoso El aparato no se ha instalado en una Compruebe la posición de la instalación y posición estable o nivelada cámbiela si es necesario G590-G591_GD879-GD880_ML_A5_v18_20240927.indb 48 G590-G591_GD879-GD880_ML_A5_v18_20240927.indb 48 2024/9/27 08:49 2024/9/27 08:49...
- Page 49 Se ha hecho todo lo posible para garantizar que todos los datos son correctos en el momento de su publicación; sin embargo,POLAR se reserva el derecho a modificar las especificaciones sin que medie notificación previa. G590-G591_GD879-GD880_ML_A5_v18_20240927.indb 49 G590-G591_GD879-GD880_ML_A5_v18_20240927.indb 49 2024/9/27 08:49...
- Page 50 Nota: per ottenere prestazioni ed efficienza ottimali del prodotto, durante il rifornimento tenere presente la capacità utile netta (limite di carico). Nota: Para un rendimiento y una eficiencia óptimos del producto, asegúrese de tener en cuenta la capacidad neta utilizable (límite de carga) al llenarlo. G590-G591_GD879-GD880_ML_A5_v18_20240927.indb 50 G590-G591_GD879-GD880_ML_A5_v18_20240927.indb 50 2024/9/27 08:49...
- Page 51 Kältemittelfüllung Koelmiddelvulling Carga de refrigerante Carica refrigerante EN Power / Current 250W/ 250W/ 250W/ 1.1A 1.1A 1.1A Puissance / Courant Leistung / Stromstärke Vermogen / Stroom Potencia / Potencia Alimentazio / Corrente G590-G591_GD879-GD880_ML_A5_v18_20240927.indb 51 G590-G591_GD879-GD880_ML_A5_v18_20240927.indb 51 2024/9/27 08:49 2024/9/27 08:49...
- Page 52 Nota: per ottenere prestazioni ed efficienza ottimali del prodotto, durante il rifornimento tenere presente la capacità utile netta (limite di carico). Nota: Para un rendimiento y una eficiencia óptimos del producto, asegúrese de tener en cuenta la capacidad neta utilizable (límite de carga) al llenarlo. G590-G591_GD879-GD880_ML_A5_v18_20240927.indb 52 G590-G591_GD879-GD880_ML_A5_v18_20240927.indb 52 2024/9/27 08:49...
- Page 53 Kältemittelfüllung Koelmiddelvulling Carga de refrigerante Carica refrigerante EN Power / Current 550W/ 550W/ 550W/ 1.1A 1.1A 1.1A Puissance / Courant Leistung / Stromstärke Vermogen / Stroom Potencia / Potencia Alimentazio / Corrente G590-G591_GD879-GD880_ML_A5_v18_20240927.indb 53 G590-G591_GD879-GD880_ML_A5_v18_20240927.indb 53 2024/9/27 08:49 2024/9/27 08:49...
- Page 54 Nota: per ottenere prestazioni ed efficienza ottimali del prodotto, durante il rifornimento tenere presente la capacità utile netta (limite di carico). Nota: Para un rendimiento y una eficiencia óptimos del producto, asegúrese de tener en cuenta la capacidad neta utilizable (límite de carga) al llenarlo. G590-G591_GD879-GD880_ML_A5_v18_20240927.indb 54 G590-G591_GD879-GD880_ML_A5_v18_20240927.indb 54 2024/9/27 08:49...
- Page 55 Charge de fluide frigorigène Kältemittelfüllung Koelmiddelvulling Carga de refrigerante Carica refrigerante EN Power / Current 800W/ 800W/ 800W/ 800W/ Puissance / Courant Leistung / Stromstärke Vermogen / Stroom Potencia / Potencia Alimentazio / Corrente G590-G591_GD879-GD880_ML_A5_v18_20240927.indb 55 G590-G591_GD879-GD880_ML_A5_v18_20240927.indb 55 2024/9/27 08:49 2024/9/27 08:49...
- Page 56 Nota: per ottenere prestazioni ed efficienza ottimali del prodotto, durante il rifornimento tenere presente la capacità utile netta (limite di carico). Nota: Para un rendimiento y una eficiencia óptimos del producto, asegúrese de tener en cuenta la capacidad neta utilizable (límite de carga) al llenarlo. G590-G591_GD879-GD880_ML_A5_v18_20240927.indb 56 G590-G591_GD879-GD880_ML_A5_v18_20240927.indb 56 2024/9/27 08:49...
- Page 57 Charge de fluide frigorigène Kältemittelfüllung Koelmiddelvulling Carga de refrigerante Carica refrigerante EN Power / Current 870W/ 870W/ 870W/ 870W/ Puissance / Courant Leistung / Stromstärke Vermogen / Stroom Potencia / Potencia Alimentazio / Corrente G590-G591_GD879-GD880_ML_A5_v18_20240927.indb 57 G590-G591_GD879-GD880_ML_A5_v18_20240927.indb 57 2024/9/27 08:49 2024/9/27 08:49...
- Page 58 13. Double Stable Door Gastro Fridge G-Series Upright: 13. CW195 (& -E) 1. Slimline Fridge 440Ltr 1200Ltr 1. G590 (& -E) 14. CW196 (& -E) 2. Slimline Freezer 440Ltr 14. Double Stable Door Gastro Freezer 2. G591 (& -E) 15. CW197 (& -E) 3.
- Page 59 +44 (0)845 146 2887 Eire 040 – 2628080 01 60 34 28 80 BE-NL 0800-29129 BE-FR 0800-29229 0800 – 1860806 901-100 133 G590-G591_GD879-GD880_ML_A5_v18_20240927.indb 59 G590-G591_GD879-GD880_ML_A5_v18_20240927.indb 59 2024/9/27 08:49 2024/9/27 08:49...
- Page 60 G590-G591_GD879-GD880_ML_A5_v18_2024/09/27 G590-G591_GD879-GD880_ML_A5_v18_20240927.indb 60 G590-G591_GD879-GD880_ML_A5_v18_20240927.indb 60 2024/9/27 08:49 2024/9/27 08:49...
Need help?
Do you have a question about the G590 and is the answer not in the manual?
Questions and answers