Advertisement
Quick Links
Advertisement

Related Manuals for Kogan KAVWACI22YA


Summary of Contents for Kogan KAVWACI22YA
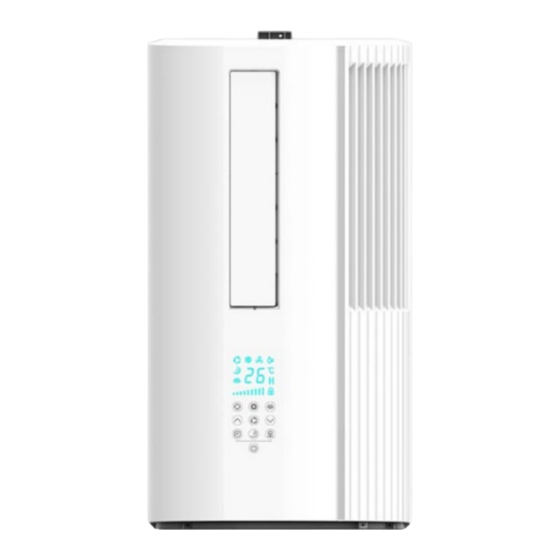
- Page 1 INVERTER VERTICAL WINDOW AIR CONDITIONER 2.2KW KAVWACI22YA...
- Page 2 Safety & Warnings Overview Installation Operation Cleaning & Care Troubleshooting Notes...
- Page 3 SAFETY & WARNINGS Ensure to read all instructions in this user guide prior to first use. Retain this user guide for future reference. Misuse may cause injuries to people and damage property. READ ALL INSTALLATION INSTRUCTIONS BEFORE MOUNTING THE STANDARD FRAME ONTO YOUR WINDOW TO PREVENT FROM FALLING.
- Page 4 • If you notice damage to the power plug or power cord, cease the use of the appliance and contact help.Kogan.com for support. • When placing the appliance, pay attention to the minimum distance from walls and other objects. For storage and operating conditions, see the 'Cleaning and Care' section of this user guide.
- Page 5 OVERVIEW Air Conditioner Front Panel Vertical Blade (Auto Swing) Level Blade (Manual Swing) Filter Control Panel Power Cord Indoor Water Outlet...
- Page 6 Back Panel Outdoor Air Inlet Outdoor Water Outlet Outdoor Air Outlet Mounting Bracket Base Plate...
- Page 7 Window Frame Bracket Standard Frame Fix plate Frame screws Flexible side panel Sealing skin Sealed stretch skin Unit lock screw Slide fixing screw Unit lock Fixed side plate Foam seal Protection Plate...
- Page 8 Avoid a location where the operation noise will disturb your neighbours. If you the air conditioner is emitting abnormal sounds during operation, cease use immediately and contact help.Kogan.com for support. Electrical safety If any electrical work is required for the installation of this appliance, it must be performed by a licenced trade professional.
- Page 9 Power safety • To prevent potential danger, avoid using an extension cord or connecting the power cord to other electrical equipment. • In the event there are two power sockets available, do not share the outlet with another appliance. • Ensure the electrical rating of the appliance matches the rating of the power outlet (220V 16A or higher).
- Page 10 Frame parts description ① Standard frame ② Fix plate ⑦ Frame screws ⑧ Flexible side panel ③ Sealing skin ⑨ Sealed stretch skin ④ Unit lock screw ⑩ Slide fixing screw ⑤ Unit lock ⑥ Fixed side plate outdoor indoor Fix plate: (x2) (upper frame &...
- Page 11 Any accessories and parts that are not used must be keep in a safe place. Window Type • Window frames must have grooves. • If there are no grooves are present, or the location is difficult to install, contact help.Kogan.com for support.
- Page 12 Window Size Requirements 85 ~ 140cm 140 ~ 190cm 50cm Standard frame: The opening width of the window should be more than 46 cm. (2) The height of the window opening must be more than 90 cm and the maximum cannot exceed 145 cm.
- Page 13 Complete Diagram 85 ~ 140cm Outdoor Indoor Installation Location When selecting an installation location, ensure the following considerations are taken: • There are no obstructions in front of the cold air outlet. • Hot air is not being vented near the unit. •...
- Page 14 Bracket Installation Window Position Open the window to be installed a. The thickness of the convex groove of the window between the brackets is 1-10mm. b. The thickness of the convex groove of the window between the brackets is 10-63mm. Remove the fixing plate ②...
- Page 15 Bracket Installation Internal Frame Slide Fixing Screw Standard Frame When the standard mounting frame is placed on the window, the bracket retaining plate of the mounting frame is installed in the first groove of the window. To increase the height of the mounting frame, stretch the inner frame upward to ensure that the bracket retaining plate above the mounting bracket is installed in the first groove above the window.
- Page 16 Installation the Air Conditioner Note: To ensure refrigerant stability, wait at least 2 hours after receiving the product before installing the air conditioner. Remove the unit lock screw ④ and retain it for later. ④ Unit lock screw ⑤ Unit lock...
- Page 17 Place the base of the air conditioner on the standard mounting bracket. The two sides of the bottom and the Frame inner black seals on the sides of rubber the bracket are attached Rear panel respectively. The groove at recessed part the bottom of the bracket snaps into the groove on the air conditioner unit to...
- Page 18 removed unit lock screw ④. Upon completion, double check the air conditioner to Once the air conditioner is seated correctly, secure it in place using the previously make sure it is properly secured. ④ Unit lock screw Note: If the air conditioner is not completely secure, double check that the brackets and unit lock are properly aligned and seated correctly.
- Page 19 Window Lock Installation After the air conditioner is installed, place the window lock in the window groove, on the opposite side of the window where the air conditioner is installed. Turn the knob on the window lock in a clockwise direction to lock it firmly against the window. Window 25-42mm Disassembly...
- Page 20 OPERATION Operation Panel and Remote Control Press this button to operate air conditioner in the automatic AUTO mode. POWER Turn the air-conditioner ON/OFF CHILD LOCK Press this button to lock the operation panel. TIMER Press this button to turn the timer ON/OFF Press this button to change the fan speed (high, middle or low).
- Page 21 Timer To set the timer to turn off the air conditioner: Ensure the air conditioner is currently on. Press the TIMER button to set the timer. Press the UP and DOWN keys to set the desired time. For times between 0-6 hours, each adjustment changes the time by 0.5 hours.
- Page 22 Fan mode: Press the MODE button to select the fan mode. The corresponding indicator will light up. Press the FAN button to select the appropriate fan speed. The speeds cycle through low, mid, and high. Press the SWING button to turn the swing function on or off. Note: Temperature is not adjustable in this mode.
- Page 23 CLEANING & CARE Note: Turn off the air conditioner and remove the plug connected to a power supply before cleaning. Cleaning the surface Wipe the surface of the air conditioner with a soft, damp cloth. Do not use any solvents such as benzene, alcohol, or gasoline.
- Page 24 Draining water When the full water indicator is displayed, the machine will stop working. In this case, it is necessary to remove the excess condensed water. Remove the indoor water drain plug or the outdoor water drain plug to drain out the water. Note: Draining water through the indoor drain hole requires a barrel or a bucket that can hold water to prevent the water from flowing to the floor directly.
- Page 25 Use an appropriate refrigerant detector before and during work to detect potentially toxic or flammable atmospheres. Ensure that leak detection equipment is suitable for use with all applicable refrigerants (non-sparking, adequately sealed, or intrinsically safe). Presence of Fire Extinguisher If hot work is required on the refrigerating equipment or any associated parts, ensure appropriate fire extinguishing equipment (dry powder or CO2 fire extinguisher) is available nearby.
- Page 26 Only work on intrinsically safe components in the presence of a flammable atmosphere. Use test apparatus with the correct rating and replace components only with parts specified by Kogan.com Cabling Ensure cabling is not subject to wear, corrosion, excessive pressure, vibration, sharp edges, or adverse environmental effects.
- Page 27 • Keep hoses or lines short to minimize contained refrigerant. • Position cylinders appropriately as per instructions. • Ensure the refrigerating system is earthed before charging. • Label the system when charging is complete. • Avoid overfilling the system. • Pressure-test with appropriate purging gas before recharging. •...
- Page 28 TROUBLESHOOTING Note: Do not repair or disassemble the air conditioner yourself. Repairs done by unqualified persons may cause damage to the air conditioner. Problem Cause Solution Turn on the power after There is no power. plugging into the electrical socket. The water level indicator Drain water from the air displays ‘FL’.
- Page 29 Check the frame and air The air conditioner is The air conditioner is not conditioner to ensure proper making loud noises. installed correctly. and correct installation. Wait for 3 minutes until the Compressor is not Overheat protection is on. temperature drops and then working turn on the air conditioner.
- Page 30 NOTES...
- Page 32 Need more information? We hope that this user guide has given you the assistance needed for a simple set-up. For the most up-to-date guide for your product, as well as any additional assistance you may require, head online to help.kogan.com...
Need help?
Do you have a question about the KAVWACI22YA and is the answer not in the manual?
Questions and answers