Advertisement
Quick Links
Instructions
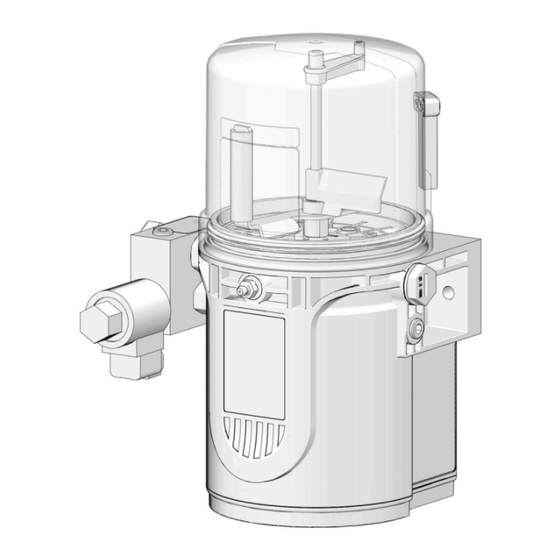
G-MINI
Pump
For dispensing NLGI Grades #000 to #2 greases with Grease Jockey
professional use only.
Not approved for use in explosive atmospheres or hazardous (classified) locations.
Model 25V700, 2 Liter, 12 VDC
Model 25V701, 1 Liter, 12 VDC
2000 psi (14 MPa, 138 bar) Maximum Working Pressure
Important Safety Instructions
Read all warnings and instructions in this
manual before using the equipment. Be
familiar with the proper control and
usage of the equipment. Save these
instructions.
Related Manuals
Find English manuals and any available translations at
www.graco.com.
English
Manual
Description
Number
Electric Grease Jockey
3A5082
Lubrication System
334662
Grease Jockey Lubrication Controller
3A2960
™
GLC 2200
®
Jockey
®
Automatic
Lubrication Controller
3A9381A
®
Injector system. For
EN
Advertisement

Related Manuals for Graco G-MINI Jockey 25V700


Summary of Contents for Graco G-MINI Jockey 25V700
- Page 1 Read all warnings and instructions in this manual before using the equipment. Be familiar with the proper control and usage of the equipment. Save these instructions. Related Manuals Find English manuals and any available translations at www.graco.com. English Manual Description Number ® Electric Grease Jockey...
- Page 2 Technical Specifications ....23 Graco Standard Warranty ....24...
- Page 3 Safety Symbols Safety Symbols The following safety symbols appear throughout this manual and on warning labels. Read the table below to understand what each symbol means. Symbol Meaning Symbol Meaning Follow Pressure Relief Procedure Cleaning Solvent Hazard Read Manual Equipment Misuse Hazard Wear Personal Protective Moving Parts Hazard Equipment...
- Page 4 General Warnings General Warnings The following warnings apply throughout this manual. Read, understand, and follow the warnings before using this equipment. Failure to follow these warnings can result in serious injury. WARNING SKIN INJECTION HAZARD High-pressure fluid from dispensing device, hose leaks, or ruptured components will pierce skin. This may look like just a cut, but it is a serious injury that can result in amputation.
- Page 5 General Warnings WARNING EQUIPMENT MISUSE HAZARD Misuse can cause death or serious injury. • Do not operate the unit when fatigued or under the influence of drugs or alcohol. • Do not exceed the maximum working pressure or temperature rating of the lowest rated system component.
- Page 6 Component Identification Component Identification Key: Reservoir Bearing Feed Line Reservoir Vent (1 L model only) Wire Harness Pump Element Wire Harness Timer Connection* Accessory Port (pressure switch) Zerk Inlet Fill Fitting CPC Power Connector Wire Harness Vent Valve Solenoid Connection Return to Reservoir Stirring Paddle *25V702 timer kit for the Grease Jockey timer includes an...
- Page 7 Typical Installation Typical Installation Key: Reservoir CPC Power Connector Fluid Outlet Controller Wire Harness Power Connection Wire Harness Pump Connection Vent Valve Injector Bearing Feed Line Wire Harness Wire Harness Timer Connection Main Feed Line Pump AA T-Fitting 3A9381A...
- Page 8 AUTOMATIC SYSTEM ACTIVATION HAZARD Graco Kit 26C916 10 A fuse kit is available from Graco. Unexpected activation of the system could result in Recommendations for Pump Usage in serious injury, including skin injection and amputa- Harsh Environments tion.
- Page 9 Installation Power CPC DC - 5 Wire (Non-Controller) Power Cable CPC DC Part No.: 127780 - 15 ft. (4.5 m), 127781 - 20 ft. (6.1 m), 127782 - 30 ft (9.1 m) Pin Out Not Used Not Used -VDC Black +VDC Low-Level White...
- Page 10 Installation Power CPC DC - 5 Wire (Controller) Power CPC DC - 3 Wire (Non-Controller) Power Cable CPC DC Power Cable CPC DC Part No.: 127780 - 15 ft. (4.5 m), 127781 - 20 ft. (6.1 m), Part No.: 127783 - 15 ft. (4.5 m) 127782 - 30 ft (9.1 m) Pin Out Pin Out...
- Page 11 • Torque fluid outlet fitting (H) to 30 to 35 ft-lb (40 to only be used with a Graco G-Mini Jockey Pump. It 47 N•m) using two wrenches in opposite directions is not intended for use with any other product.
- Page 12 Setup 5. Reinstall the nut (2), washer (3), and fitting (5) into NOTICE the manifold (1) and the mounting bracket (6) as • Always clean fitting (D) with a clean dry cloth shown in F . 7. Securely fasten into position. prior to filling the reservoir.
- Page 13 Setup Prime the Pump It is not necessary to prime the pump every time the pump is filled. The pump only requires to be primed the first time it is used, or if it is allowed to run dry. 1. Disconnect the system plumbing. 2.
- Page 14 Pump ON (Run) time. If alternative two wrenches working in opposite directions on the ON / OFF times are required, contact Graco Cus- fluid outlet bolt (H) and the outlet fitting to slowly tomer Service for assistance.
- Page 15 Maintenance Typical Low-Level Output Response with Low-Level Fluid . 10 Maintenance Frequency Component Required Maintenance Daily and at Refill Fill Fittings Keep all fittings clean using a clean dry cloth. Dirt and debris can damage the pump and the lubrication system.
- Page 16 Recycling and Disposal Recycling and Disposal End of Product Life At the end of the product’s useful life, dismantle and recycle it in a responsible manner. • Perform the Pressure Relief Procedure, page 14. • Drain and dispose of fluids according to applicable regulations.
- Page 17 Troubleshooting Troubleshooting Follow Pressure Relief Procedure, page 14, before checking or repairing the equipment. NOTE: Check all possible problems and causes before disassembling the equipment. Problem Cause Solution Unit does not power on. Incorrect or loose wiring Refer to wiring and installation diagrams, pages 9 to 10 Tripped external fuse from using Replace lubricant with a lubricant...
- Page 18 Parts Parts 3A9381A...
- Page 19 Parts Part No./Description Ref. Part Description Qty. Ref. Part Description Qty. Nut, mach hex, Models 25V700 and Reservoir, 1 L, included in kit 1a◆ 25V701 26C943, Model 25V701 O-ring, 258, buna-n, green, Model Reservoir, 2 L, included in Kit 35❊ 1b❊...
- Page 20 Kits and Accessories Kits and Accessories Fuse Kits Kit 25V705 - Injector Bracket Kit Description Kit 26C916 Bracket, mounting, manifold injector Tube, manifold, injector Description Fitting, elbow, 90 deg, 9/16 orb to sae Fuse, 10A, 12 V Screw, cap, hex hd Holder, ATO Line Fuse Washer, plain Terminal, connector, butt splice...
- Page 21 Dimensions Dimensions Height - A Width - B Depth - C Model Inches Inches Inches 12.2 14.29 3A9381A...
- Page 22 Dimensions 1 L Pump Mount 1 L and 2 L Pump Mount with Grease 2 L Pump Mount Jockey Injector Bracket Installed 3A9381A...
- Page 23 Technical Specifications Technical Specifications G-Mini Pump Metric Maximum fluid working pressure 2000 psi 14 MPa, 138 bar Power 12 VDC 9-16 VDC; 4 A (cont) 48 W, 9.5 A (peak) 114 W, inrush/locked rotor 12 A Pump Outlet 9/16 in. SAE straight thread o-ring boss (female) Reservoir Size 25V701 1.0 L...
- Page 24 With the exception of any special, extended, or limited warranty published by Graco, Graco will, for a period of twelve months from the date of sale, repair or replace any part of the equipment determined by Graco to be defective.
Need help?
Do you have a question about the G-MINI Jockey 25V700 and is the answer not in the manual?
Questions and answers