Advertisement
Quick Links
Advertisement

Subscribe to Our Youtube Channel
Related Manuals for Draper 36313


Summary of Contents for Draper 36313
- Page 1 Original Instructions Version 1 WET & DRY VACUUM CLEANER 36313...
- Page 2 All photographs and drawings within this manual are document is part of the product; retain it for the life supplied by Draper Tools to help illustrate correct of the product, passing it on to subsequent holders. operation of the product.
- Page 3 2. Contents 1. Preface 10. Maintenance and Troubleshooting 1.1 Product Reference 10.1 Cleaning and Replacing the Cartridge Filter 1.2 Revisions 10.2 Cleaning Wet Foam Filter 1.3 Understanding the Safety Content of This Manual 10.3 Troubleshooting 1.4 Copyright © Notice 11. Spares, Returns and Disposal 2.
- Page 4 3. Product Introduction 3.1 Intended Use Any other application beyond the conditions established for use will be considered misuse. Draper Tools accepts This vacuum cleaner has a 18 litre tank and is designed no responsibility for improper use of this product.
- Page 5 4. Explanation of Symbols Read the instruction manual Continuous A-weighted sound power level Class II construction Mandatory action required (Double insulated) Net product weight Warning! WEEE – Waste Electrical & Electronic Equipment Do not incinerate or throw onto fire Do not dispose of Waste Electrical & Electronic Equipment in with domestic rubbish European conformity Rated voltage...
- Page 6 If the power supply cord is damaged, it must be replaced way and understand the hazards involved. Children by Draper Tools, an authorised service agent or similarly shall not play with the appliance. Cleaning and user qualified personnel in order to avoid a hazard.
- Page 7 5. Health and Safety Information The value of the fuse fitted is marked on the pin face of the plug. Should the fuse need replacing, use a small plain-slot screwdriver to remove the fuse cover. Ensure the substitute is of the correct rating, approved to BS 1363/A and ASTA or BS Kite marked.
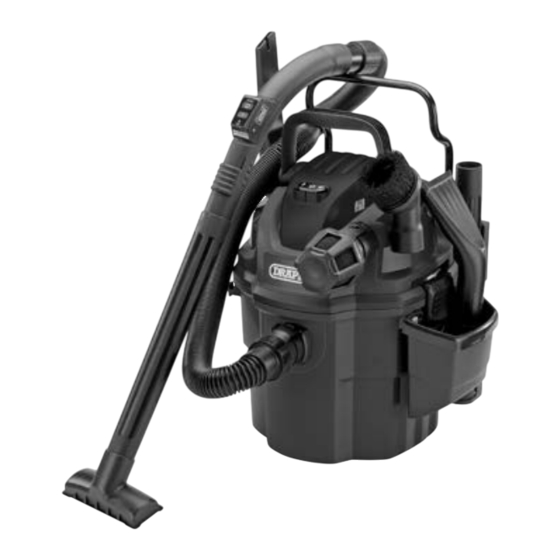
- Page 8 6. Identification and Unpacking 6.1 Product Overview (17) (14) (16) (13) (11) (15) (12) (10) Power head 10. Latch × 2 Hose holding rod 11. Mounting rack Power switch 12. Release lever Blower port 13. Accessory holders Air/Noise diffuser 14. Handle Vacuum port 15.
- Page 9 If any part is damaged or missing, do not attempt to use the product. Please contact the Draper Helpline; contact details can be found at the back of this manual. 1 × Vacuum unit (M2) 1 ×...
- Page 10 7. Preparation Instructions Important: Before preparing or adjusting this product, 3. Remove all the accessories from inside the tank. read and understand all the safety instructions listed in this manual. 7.1 Unpacking & General Assembly Important: Ensure that the vacuum cleaner is unplugged from the power supply before assembling.
- Page 11 7. Preparation Instructions 2. Fit the nut (S) into the slot of the expansion bolt. Turn the nut and bolt together for two full turns to ensure nut and screw are secure. Fig. 5 2. Select a location on a wall stud or brick wall that is less than 5metres from an electrical outlet.
- Page 12 7. Preparation Instructions 7.4 Fitting the Vacuum to the Rack 4. Attach the tool caddy (G) using the two hooks on the container. Fig.12. 1. Measure the distance from the top screw hole of the rack to the closest electrical outlet and add 5m for the power cord.
- Page 13 7. Preparation Instructions 7.6 Assembly for Use (Fig.14 – Fig.17) 3. Insert the locking end of the hose (C) or (D) into the vacuum port (6) of the tank and turn to lock in place. Note: The vacuum is supplied ready for dry vacuum cleaning.
- Page 14 8. Operating Instructions Important: Before operating this product, read and understand all the safety instructions listed in this manual. Ensure that the product is fully assembled and correctly prepared for use. 8.1 Dry Vacuuming (Fig.18 – Fig.21) 1. Ensure the vacuum is unplugged from the power outlet.
- Page 15 8. Operating Instructions 8.3 Blower Function 1. Ensure the vacuum cleaner is switched off and unplugged. 2. Check that the tank is empty before using the blower. 3. Remove the diffuser and fit the end of the hose to the blower port (4) and lock into position.
- Page 16 9. Remote Control Operation 9.1 Using the Remote Control 1. Fit the remote control hand grip (L) to the suction hose. 2. Set the power switch (3) on the vacuum cleaner to the remote control position (Fig.26). Fig. 28 3. Then within 15 seconds, press and hold either the ‘ON’...
- Page 17 9. Remote Control Operation Fig. 30 Fig. 33 3. Remove the cover from the handle. 6. Replace the foam battery cover and refit the cover to the handle. 7. Align the triangle with the unlock symbol and slide the cover until it aligns with the locked symbol. Fig.
- Page 18 • If the plug or power supply cord is damaged it must, 10.2 Cleaning Wet Foam Filter for safety reason be replaced by Draper tools, an authorised repairer or similarly qualified person in 1. Lift off the foam filter (E).
- Page 19 Draper Tools Product or corrosive substances. Helpline for details of your nearest authorised agent. Draper Tools will endeavour to hold any spare parts, if applicable, for seven years from the date that it sells the final matching stock item.
- Page 20 Product Helpline: +44 (0) 23 8049 4344 Telephone Sales Desk: +44 (0) 23 8049 4333 General Enquiries: +44 (0) 23 8026 6355 Please contact the Draper Tools Product Helpline for repair and servicing enquiries. © Published by Draper Tools Limited © Published by Draper Tools Limited...
Need help?
Do you have a question about the 36313 and is the answer not in the manual?
Questions and answers