Table of Contents
Advertisement
Quick Links
Advertisement
Table of Contents

Subscribe to Our Youtube Channel
Related Manuals for Draper 90107


Summary of Contents for Draper 90107
- Page 1 Original Instructions Version 2 230V 15L WET & DRY VACUUM CLEANER 90107...
-
Page 2: Product Reference
All photographs and drawings within this manual are document is part of the product; retain it for the life supplied by Draper Tools to help illustrate correct of the product, passing it on to subsequent holders. operation of the product. -
Page 3: Table Of Contents
2. Contents 1. Preface 1.1 Product Reference 1.2 Revisions 1.3 Understanding the Safety Content of This Manual 1.4 Copyright © Notice 2. Contents 3. Product Introduction 3.1 Intended Use 3.2 Specification 4. Health and Safety Information 4.1 General Health and Safety Precautions 4.2 Additional Health & Safety For Vacuum Cleaners 4.3 Connection to the Power Supply 4.4 Residual Risk... -
Page 4: Product Introduction
DIY around the home. Any other application beyond the conditions established for use will be considered misuse. Draper Tools accepts no responsibility for improper use of this product. 3.2 Specification Stock No. -
Page 5: Health And Safety Information
If the power supply cord is damaged, it must be replaced instruction concerning use of the appliance in a safe by Draper Tools, an authorised service agent or similarly way and understand the hazards involved. Children qualified personnel in order to avoid a hazard. -
Page 6: Residual Risk
4. Health and Safety Information The value of the fuse fitted is marked on the pin face of the plug. Should the fuse need replacing, use a small plain-slot screwdriver to remove the fuse cover. Ensure the substitute is of the correct rating, approved to BS 1363/A and ASTA or BS Kite marked. -
Page 7: Identification And Unpacking
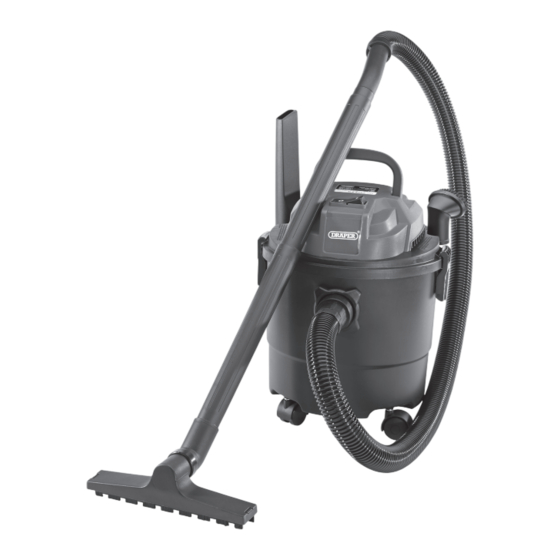
5. Identification and Unpacking 5.1 Product Overview (6) (6) ON/OFF switch Retaining clips Carrying handle Tank Blower port (rear of vacuum) Accessory holders Motor/pump housing Vacuum port – 7 –... -
Page 8: What's In The Box
If any part is occurred during shipment. damaged or missing, do not attempt to use the product. Please contact the Draper Helpline; contact details can be found at the back of this manual. 3 x Extension tubes... -
Page 9: Assembly Instructions
6. Assembly Instructions Important: Before preparing or adjusting this product, read and understand all the safety instructions listed in this manual. Ensure that the vacuum cleaner is unplugged from the power supply before assembling. Note: Remove all the accessories from inside the tank before fitting the castors and setting up the vacuum cleaner. -
Page 10: Setting Up The Vacuum Cleaner
7. Setting Up the Vacuum Cleaner • Ensure the vacuum is unplugged from the power outlet before assembling. Fig. 3 5. Fit the required extension tubes (A) and attachment Fig. 2 to the end of the hose. − Use the double function floor brush (E) on hard ... -
Page 11: Operating Instructions
8. Operating Instructions 8.2 Wet Vacuuming Important: Before operating this product, read and understand all the safety instructions listed in this 1. Ensure the vacuum is unplugged from the manual. Ensure that the product is fully assembled power outlet. and correctly set up for use. 2. -
Page 12: Blower Function
8. Operating Instructions 8.3 Blower Function 1. Ensure the vacuum cleaner is switched off and unplugged. 2. Check that the tank is empty before using the blower. Fig. 9 3. Connect the flexible hose to the blower port (3), align the notch with the arrow on the port housing. Then turn anticlockwise to lock in place. -
Page 13: Maintenance And Troubleshooting
• If the plug or power supply cord is damaged it must, • Clean and maintain the vacuum cleaner correctly for safety reason be replaced by Draper Tools, and regularly to ensure optimum performance. an authorised repairer or similarly qualified person in order to avoid a hazard. -
Page 14: Spares, Returns And Disposal
This warranty period covers parts and labour for 12 months from the date of Your Draper Tools guarantee is not effective until you can purchase. Where tools have been hired out, the warranty produce, upon request, a dated receipt or invoice to period covers 90 days from the date of purchase. -
Page 15: Explanation Of Symbols
12. Explanation of Symbols WEEE – Read the instruction manual Waste Electrical & Electronic Equipment Do not dispose of Waste Electrical & Electronic Equipment in with domestic rubbish Wear face mask and safety glasses European conformity For indoor use only; do not expose to rain UK Conformity Assessed Class II construction... -
Page 16: Contact Details
Product Helpline: +44 (0) 23 8049 4344 Telephone Sales Desk: +44 (0) 23 8049 4333 General Enquiries: +44 (0) 23 8026 6355 Please contact the Draper Tools Product Helpline for repair and servicing enquiries. © Published by Draper Tools Limited © Published by Draper Tools Limited...
Need help?
Do you have a question about the 90107 and is the answer not in the manual?
Questions and answers