Advertisement
Quick Links
Advertisement

Subscribe to Our Youtube Channel
Related Manuals for Tech Controllers EU-M-12t


Summary of Contents for Tech Controllers EU-M-12t
- Page 1 EU-M-12t...
- Page 3 TABLE OF CONTENTS Safety ....................................4 Description of the device..............................5 III. Installing the Controller ..............................5 First startup ..................................8 Main screen description ..............................9 Main screen ..................................9 Zone Screen .................................. 10 Controller functions ..............................12 Operation mode ................................12 3.1.
- Page 4 SAFETY Before using the device for the first time the user should read the following regulations carefully. Not obeying the rules included in this manual may lead to personal injuries or controller damage. The user’s manual should be stored in a safe place for further reference.
- Page 5 III. INSTALLING THE CONTROLLER The EU-M-12t panel is intended to be mounted in an electrical box and should only be installed by a suitably qualified person. In order to mount the panel on the wall, screw the rear part of the housing onto the wall (1) and slide the device into to (2).
- Page 6 WARNING Danger of injury or death due to electric shock on live connections. Before working on the device, disconnect its power supply and secure it against accidental switching on. CAUTION Incorrect wiring may damage the controller. The panel should be connected to the first or last controller due to the fact that the panel itself cannot be equipped with a terminating resistor.
- Page 7 GREEN YELLOW VCC/BROWN GND/ WHITE YELLOW GREEN VCC/BROWN GND/WHITE GND/WHITE BROWN B/GREEN A/YELLOW...
- Page 8 CAUTION Registration will only be successful if the system versions* of the registered devices are compatible with each other. * system version – version of the device (EU-L-12, EU-ML-12, EU-M-12t) communication protocol. CAUTION Once the factory settings have been restored or the panel has been unregistered from the EU-L-12, the registration...
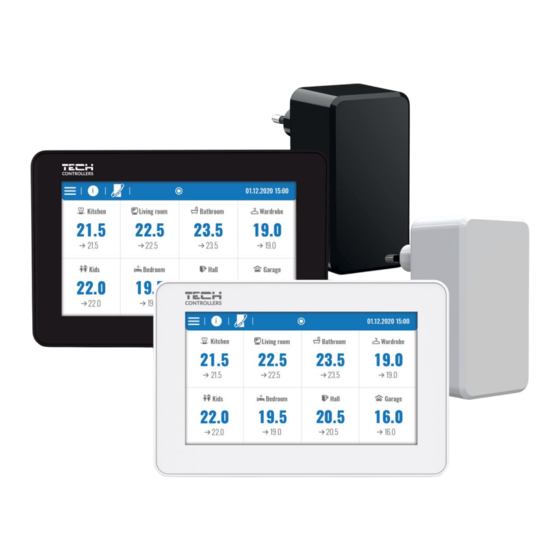
- Page 9 V. MAIN SCREEN DESCRIPTION 1. MAIN SCREEN 1. Enter the Controller Menu 2. Panel information, e.g. connected modules, operation modes, external sensor, etc. (viewable after clicking this area) 3. OpenTherm enabled (information viewable after clicking this area) 4. Function enabled: Heating stopping from date 5.
- Page 10 2. ZONE SCREEN 1. Exiting the Zone screen to the main screen 2. Name of the zone 3. Zone status (table below) 4. Current time 5. Active operation mode (can be changed from the screen by clicking this area) 6. Current zone temperature, after clicking the floor temperature (if a floor sensor is registered), 7.
- Page 11 PARAMETER MENU ➢ Activity – the function is used to enable/disable the zone. When the zone is disabled, it will not be displayed on the main screen of the controller. ➢ Pre-set temperature – enables the editing of the pre-set temperature in a given zone •...
- Page 12 The function allows you to activate the selected operation mode in all controllers for all zones. The user has a choice of normal, holiday, economy and comfort modes. The user can edit the factory mode values using the EU-M-12t panel or the EU-L-12 and EU-ML-12 controllers.
- Page 13 4. ZONES The function is used to enable/disable individual zones in the controllers. If a zone is blank and cannot be marked, it means that no sensor or room controller has been registered in it. Zones 1-8 are assigned to the main controller (EU-L-12), while zones 9-40 are assigned to EU-ML-12 in the order in which they were registered.
- Page 14 7. FITTER’S MENU Master module Fitter's Additional modules menu Zones External sensor Heating stopping Anti-stop settings Max. humidity DHW settings OpenTherm Language Repeater Function Factory settings 7.1. MASTER MODULE 7.1.1. REGISTER The function is used to register the panel in the main EU-L-12 controller. The registration process is described in chapter IV. First startup.
- Page 15 ROOM SENSOR • Sensor selection – this function is used to register a sensor or room controller in a given zone. It has the option of choosing an NTC wired sensor, an RS wired sensor or a wireless one. The registered sensor can also be deleted. •...
- Page 16 • Minimum and maximum opening The function allows you to set the minimum and maximum opening of the actuator in order to obtain the pre-set temperature. Protection - When this function is selected, the controller checks the temperature. If the pre-set temperature is exceeded by the number of degrees in the Range parameter, then all actuators in a given zone will be closed (0% opening).
- Page 17 • Maximum temperature - The maximum floor temperature is the floor temperature threshold above which the contact will be opened (switching off the device) regardless of the current room temperature. • Minimum temperature - The minimum floor temperature is the floor temperature threshold above which the contact will be shorted (switching on the device) regardless of the current room temperature.
- Page 18 • In the ML-12 controller, select: Menu → Fitter’s menu → Master Module → Module Type → Wired/Wireless → Register The ML-12 add-on module can also be registered via the EU-M-12t panel: • In the panel, select: Menu → Fitter’s menu → Additional Modules → Module 1…4 → Module Selection → Wired/Wireless → Register •...
- Page 19 CAUTION The operation function of the voltage-free contact in a given zone must be enabled. 7.2.7. PUMP The function is used to switch on the remote pump operation (starting the pump from a slave controller) and to set the delay time for switching on the pump operation.
- Page 20 The function based on the outside temperature allows to determine the mean temperature, which will work on the basis of the temperature threshold. If the mean temperature exceeds the specified temperature threshold, the controller will switch off the heating of the zone in which the weather control function is active. •...
- Page 21 ➢ CH set point temperature – the function is used to set the CH set point temperature, after which the reheating will turn off. ➢ DHW settings • Operation mode - a function that allows you to select the mode from schedule, time mode and constant mode.
- Page 22 VII. SOFTWARE UPDATE To upload new software, disconnect the controller from the network. Insert the USB flash drive containing the new software into the USB port, then connect the controller to the network. CAUTION The process of uploading new software to the controller may only be carried out by a qualified installer. After changing the software, it is not possible to restore the previous settings.
- Page 23 EU Declaration of Conformity Hereby, we declare under our sole responsibility that EU-M-12t manufactured by TECH STEROWNIKI II Sp. z o.o., head-quartered in Wieprz Biała Droga 31, 34-122 Wieprz, is compliant with Directive 2014/53/EU of the European parliament and of the Council of 16 April 2014 on the harmonisation of the laws of the Member States relating to...
Need help?
Do you have a question about the EU-M-12t and is the answer not in the manual?
Questions and answers