Advertisement
Quick Links
Advertisement

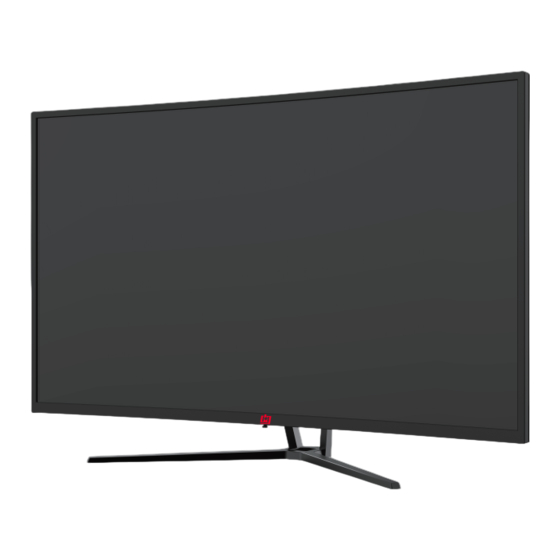
Summary of Contents for Deco Gear DGVIEW390
- Page 1 39” 2560x1440 QHD165Hz E-LED Curved Gaming Monitor INSTRUCTION MANUAL MODEL: DGVIEW390...
- Page 3 Precaution Before using this product, please read this User Manual carefully and keep it well Keep the monitor away from water sources or damp places, such as bath rooms, kitchens, basements and swimming pools. Make sure the monitor is placed on a flat surface. If the monitor falls down, it may cause human injury or device damage.
- Page 4 Cables supplied may vary with purchased products. Figures in this User Manual are for reference only. Display screen DP cable Power cable Screws Mount hexagon irons Stand 38.5” 2560x1440 QHD165Hz E-LED Curved Gaming Monitor INSTRUCTION MANUAL MODEL: DGVIEW390 Base User Manual...
- Page 5 Installation nstallation of base 1. Open the package to take out foams wholly and put them on a flat tabletop. Foam Foam 2. Take out the base, the stand and 3 screws and lock the stand to the bottom of the base with these 3 screws.
- Page 6 4. Lock the rotary shaft set taken out to the stand with 2 screws, align the base and stand components assembled in Step 3 to the slot of the machine and clip them. (Note: Slide the quick disassembly button up with the fingers to take out the base and stand components) 5.
- Page 7 Installation of mount (optional) 1. Open the package to take out foams wholly and put them on a flat tabletop. Foam Foam 2. Take out the upper foam and toggle the quick-disassembly button to take out the rotary shaft set fastened on the whole monitor.
- Page 8 3. During padlocking of the monitor, do not pinch the screen with the hands to avoid damaging the screen. Install the mount to the mount stud by referring to the user manual of the wall hanging hard wall(purchased separately). Tips: the mounting hole distance of the mount for the product is 100×100mm.
- Page 9 Adjustment of monitor -20° -5° Tilting angle -5.0°(±2.0°)- +20°(±2.0°)
- Page 10 Instructions for use Description of buttons Button Function Power button: press to turn on/off the display Exit/Hotkey: Press to return to the previous menu/Quickly switch color format Down button: Press to move down in the menu/Quickly enter the scene mode Menu key: press to enter the submenu/Quickly enter the main menu Up key: Move up in the menu/Quickly enter the game cursor screen Explanation of indicator light...
- Page 11 Cable connection * The bottom interface configuration at the back of the monitor varies with products. * Note: If the power cable or signal cable is damaged, you must replace it with special soft cables or special components purchased from the manufacture or maintenance department. HDMI interface Use the HDMI cable to connect the HDMI IN Use the HDMI-DVI cable (not included) to connect...
- Page 12 OSD menu Menu description The color and shape of the OSD menu of the actual computer may be slightly different from them shown in the figure. Specifications of the OSD menu may change with improvements of functions without prior notice. The screen display (OSD) menu can be used to adjust settings of the monitor and is shown on the screen after the monitor is powered on and the button is pressed.
- Page 13 Functions of the monitor vary with models, and the functions in this manual are for reference only. Type-C Input Source HDMI 1 HDMI 2 HDMI 3 Brightness 0-100 Blacklevel 0-100 Brightness/ Contrast Contrast 0-100 Off/On Gamma 1.8/2.0/2.2/2.4/2.6 Pictrue Mode Standard/Photo/Movie/Game/FPS/RTS Color Setting Color Temperature Warm/Cool/USER...
- Page 14 Specification Product Name LCD Monitor Product model DGVIEW390 Screen Size 39 inch (98cm) Aspect Ratio 16:9 Viewing Angle 178°(H) / 178°(V) Pixel pitch 0.333 (W) x 0.333(H) mm Contrast ratio 4000:1(TYP) Color 16.7M Resolution 2560x1440 165Hz Refresh Rate 100-240V~ 50/60Hz, 2.2A...
- Page 15 Supported resolution and refrech rate HDMI1[2.0] HDMI2 [2.0] HDMI3 [2.0] Detailed Timing Detailed Timing Detailed Timing 2560x1440@60Hz 2560x1440@60Hz 2560x1440@60Hz 2560x1440@120Hz 2560x1440@120Hz 2560x1440@120Hz 2560x1440@144Hz 2560x1440@144Hz 2560x1440@144Hz 1280x1440@60Hz 1280x1440@60Hz 1280x1440@60Hz Entablished Timing Entablished Timing Entablished Timing 720x400@70Hz-IBM.VGA 720x400@70Hz-IBM.VGA 720x400@70Hz-IBM.VGA 640x480@60Hz-IBM.VGA 640x480@60Hz-IBM.VGA 640x480@60Hz-IBM.VGA 640x480@75Hz-VESA 640x480@75Hz-VESA 640x480@75Hz-VESA...
- Page 16 Deco Gear 80 Carter Drive Edison, NJ 08817...
- Page 19 DGVIEW390 39S1R DECO GEAR 说明书 20211217 1 4 0 x210mm 蒋武波...


Need help?
Do you have a question about the DGVIEW390 and is the answer not in the manual?
Questions and answers