Table of Contents
Advertisement
Advertisement
Table of Contents

Related Manuals for Deco Gear DGVIEW490


Summary of Contents for Deco Gear DGVIEW490
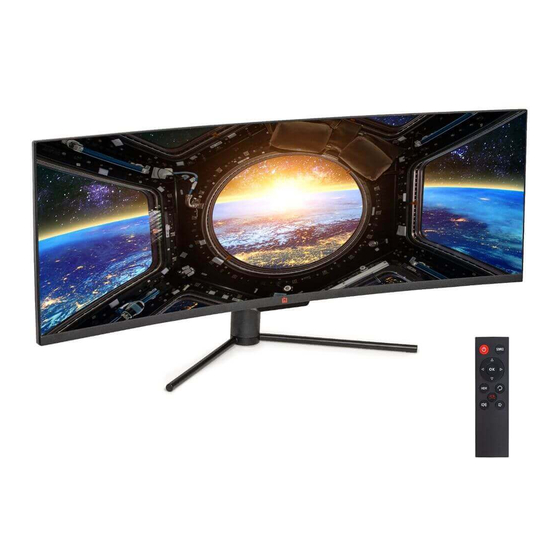
- Page 1 49”CURVED 3840x1080 144Hz GAMING MONITOR...
-
Page 3: Table Of Contents
Table of Contents Part 1 : Safety Precautions..............4 Part 2 : Box Contents .................5 : Product Overview ..............6 Part 3 3.1 – Monitor Buttons .................6 3.2 – Monitor Ports ................6 : Remote Control ..............7 Part 4 : Stand Installation ..............8 Part 5 : Wall Mounting................9 Part 6... -
Page 4: Part 1: Safety Precautions
Part 1: Safety Precautions Read and observe the following warnings and information below. Before cleaning, always unplug your monitor. It is recommended that you use dry cloth or lightly damp cloth to clean your monitor. Dry cloth is, however, the safest. If using damp cloth, wait for your monitor to completely dry before plugging it in again. -
Page 5: Part 2: Box Contents
Part 2: Box Contents Stand Stem x 1 Monitor x 1 (with Attached Bracket) 12 mm Screws x 4 Screws x 4 (for Mounting) Stand Base x 1 Power Cable x 1 (AC 100-240V, 50/60Hz) DP Cable x 1 U ser Manual x 1 •... -
Page 6: Part 3: Product Overview
Part 3: Product Overview 3.1 – Monitor Buttons M Menu Button: Press to display the OSD menu or enter sub-menus. Down Button: Press to move down in the menus. Up Button: Press to move up in the menus. E Exit Button: Press to exit. Power Button: Press to turn the monitor on/off. -
Page 7: Part 4: Remote Control
Part 4: Remote Control : Press to turn the monitor on or off. : Press to switch between HDMI or DP input. : After entering the OSD settings menu, press any of the arrow buttons to move within the menu. After entering the navigation menu, press to enter the LED effects console. -
Page 8: Part 5: Stand Installation
Part 5: Stand Installation Keep the foam underneath the monitor before attaching the stand. Open the package, take out the product with foam still attached, and gently place it on a desktop or table. Lock the base and stem with three screws. Stem Screws (12 mm x3) Base... -
Page 9: Part 6: Wall Mounting
5. When remove the base, take off the decorative cover of the back shell and pull down the quick remove button to remove the base. Button To avoid damage, do not touch the screen when moving the monitor. Part 6: Wall Mounting This monitor ONLY includes screws which may be used when attaching the monitor to a mount. - Page 10 2. Remove the original screws x 4 ( ) from the opening in the back of the monitor. Follow the directions received with your mount, stand, or accessory and install the monitor on the anything to the back of the monitor. Refer to the image ( ) for correct screw placement.
-
Page 11: Part 7: Connectivity Options
Part 7: Connectivity Options 7.1 – Connecting the Power Cable Connect the included power cable to the power connector, and then plug the other end into an wall outlet. Power Cable 7.2 – Connecting Your Earphones Plug in your earphones to receive audio signals from your monitor. If your earphones are connected to the monitor and audio devices are connected to your computer at the same time, the audio devices will not produce sound. -
Page 12: Dp Connectivity
7.3 – DP Connectivity In order for the monitor to receive DP signals from the computer, use the DP cable to connec t the monitor to the computer. DP Cable (Included) DP OUTPUT 7.4 – HDMI Connectivity In order for the monitor to receive HDMI signals from the computer, use an HDMI cable to connect the monitor to the computer. -
Page 13: Part 8: Basic Operation
Part 8: Basic Operation Insert one end of the DP cable into your PC’s graphics card. Other connection types may be used. Additional cables not included. For optimal refresh rate (or “performance”), it is recommended to use a DP (display port) or HDMI cable with the monitor’s corresponding connector. -
Page 14: Part 10: Osd
Part 10: OSD The On-Screen Display (OSD) Menu may be used to adjust your monitor’s settings and appears on screen after turning on the monitor and pressing the M button. When using the monitor for the rst time, settings will automatically adjust to optimal settings according to your computer’s con guration and parts etc. -
Page 15: Osd Menu Functions
10.1 – OSD Menu Functions Main Menu Sub-Menu Options Description Input Source HDMI 1 (2.0); NONE Switch to HDMI signal input HDMI 2 (1.4); HDMI 3 (1.4) NONE Switch to DP signal input Brightness/ Brightness 0~100 Adjust display brightness Contrast Contrast 0~100 Adjust display contrast... -
Page 16: Part 11: Led Effects System Console
Main Menu Sub-Menu Options Description Multi-Window Multi-Window Off, PIP Mode, Select PIP/PBP modes according to the PBP 2Win number of input signals etc. Sub Win2 Input DP, HDMI1, Select according to input signal for PIP/ HDMI2, PBP mode HDMI3 PIP Size Small, Adjust the PIP/PBP display window size Medium,... -
Page 17: Part 12: Rgb Ranges And Gameplus Switching
2. Press button on monitor or press on remote to enter the LED Effects menu. LED Effects System Console Resolution:1920x1080@60Hz Green Blue Mode Normal 3. Press to select the settings. • Highlight the desired option, and press M 4. Press E to exit the current settings. Items Options Description... -
Page 18: Part 13: Troubleshooting
Part 13: Troubleshooting 13.1 – General Problems The screen is blank • Press the power button to turn the monitor on. • Con rm the brightness and contrast settings are set normally. • • If your source is a notebook or laptop, make sure it’s powered on and set to mirror or extension mode. -
Page 19: Pip (Picture In Picture) Input Information
Image jitter/moire pattern • Nearby electric equipment may be interfering with the monitor. Light indicator is on or flashing, but there is no image displayed on screen • Check if the monitor power is on. • Check if the graphics card is installed properly. •... -
Page 20: Part 14: Information
Part 14: Information 14.1 – Item Detail Model Number DGVIEW490 Screen Size 49’’ Curvature 1800R Viewing Angle 178° (H)/178° (V) Aspect Ratio 32:9 Resolution 3840x1080p Backlight E-LED Typical Brightness Default Color Temperature 6500 Contrast Ratio 3000:1(Static); 1000000:1(Dynamic) Dot Pitch 0.3114(H) x 0.3114(V) -
Page 21: Supported Displayport
15.1 Supported DisplayPort 800 x 600 @ 60Hz,75Hz 1024 x 768 @ 60Hz, 75Hz 1280 x 720 @ 60Hz 1280 x 768 @ 60Hz 1280 x 960 @ 60Hz 1280 x 1024 @ 60Hz 1366 x 768 @ 60Hz 1440 x 900 @ 60Hz 1600 x 900 @ 60Hz 1680 x 1050 @ 60Hz 1920 x 1080 @ 50Hz,60Hz,100Hz,120Hz... - Page 22 15.2 Supported HDMI Resolution HDMI1 HDMI2 HDMI3 800 x 600 @ 60Hz,75Hz 800 x 600 @ 60Hz,75Hz 800 x 600 @ 60Hz,75Hz 1024 x 768 @ 60Hz, 75Hz 1024 x 768 @ 60Hz,75Hz 1024 x 768 @ 60Hz, 75Hz 1280 x 720 @ 60Hz 1280 x 720 @ 60Hz 1280 x 720 @ 60Hz 1280 x 768 @ 60Hz...
-
Page 23: How To Choose A High Refresh Rate For Win10
16.1 How to choose a high refresh rate for WIN10 1. Right-click “Display settings” on the desktop;(Pls refer to the below picture) View Sort by Refresh Paste Paste shortcut NVIDIA Control Panel Display settings Personalize 2. Click “Advanced display settings” (Pls refer to the below picture) - Page 24 3. Click “Display adapter properties of Monitor 1” (Pls refer to the below picture) 4. Click “Monitor” (Pls refer to the below picture)
- Page 25 5. Click “Screen Refresh Rate(S)”: Options (Pls refer to the below picture) 6. Select the refresh rate which you like, Then click the “Apply” (Pls see the below picture) (ps : The highest refresh rate is depends on the monitor which support, Pls refer to the below picture)
- Page 26 7. After clicking the “Apply”, you must click “Keep changes” then the monitor switch to refresh rate which you like.(Pls refer to the below picture)
-
Page 27: How To Choose A High Refresh Rate For Win7
16.2 How to choose a high refresh rate for WIN7 1. Right-click “Screen resolution (C)” on the desktop;(Pls refer to the below picture) View Sort by Refresh Paste Paste shortcut Graphics Properties... Graphics Options SVN Checkout... TortoiseSVN Screen resolution Gadgets Personalize 2. - Page 28 3. Click “Monitor” and Choose ”Monitor Settings”, then choose any refresh rate which you like, Finally Click the “Apply”.
-
Page 29: Other Useful Information(Cont.)
To return the product for replacement or refund within the 1 year, the original purchaser must pack the product securely and send it postage paid with a description of the reason for replacement or refund, proof of purchase, and include your order number on the package, to the following address: Deco Gear 80 Carter Drive Edison, NJ 08817... -
Page 30: Notice For Fcc
Notice for FCC The terms HDMI and HDMI High-Definition Multimedia Interface, and the HDMI Logo are trademarks or registered trademarks of HDMI Licensing Administrator, Inc. in the United States and other countries. - Page 31 902-H3C2C-20005-A H3C2C DGVIEW490 202004 140*210mm 120g双铜+80g双铜骑钉彩印 注:页数不够可加空白页 change list: 1.增加HDMI LOGO 分辨率和刷新率信息20200402...
Need help?
Do you have a question about the DGVIEW490 and is the answer not in the manual?
Questions and answers
How can i use my DGVIEW490 all on one screen , the whole screen , immersive, utilizing the entire screen without bezels and, without it looking like its set on wide mode ? Thank you
To display content on the entire Deco Gear DGVIEW490 screen without bezels and without it appearing in wide mode, use the monitor's "Display Aspect Ratio" setting. Set it to "1:1" or "Auto" instead of "Wide Screen" or "4:3". This ensures the content is scaled appropriately without stretching while utilizing the full screen.
This answer is automatically generated