Advertisement
Quick Links
维修手册
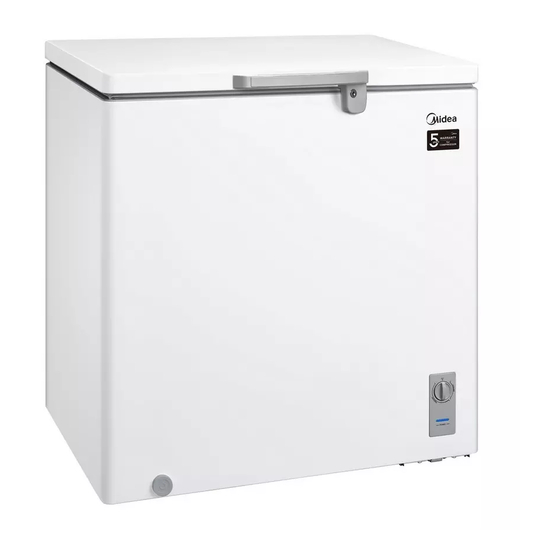
The picture in this service manual is only for reference, and specific appearance
and configuration are subject to the real product.
本手册主要讲授方法,具体的作业技能需要工程师通过日常工作积累。
This manual mainly teaches the method, the specific work skill needs engineer to
accumulate through the daily work.
Service Manual
CHEST FREEZER SERIES
市场型号
Applicable Models
HS-262CN
本手册中图片均为参考示意图,具体外观和配置以实物为准。
编制
周天宇
评价工程师 QA:李新旺
审核
SVC:刘记成
会签
梁本磊
经营长:刘超
批准
SVC: 光陶帅
工厂型号
Model Code
Applicable Models
UR-BD202-DQ
22032010005581
1
Service Manual_
基准编码
Advertisement

Related Manuals for Midea HS-262CN


Summary of Contents for Midea HS-262CN
- Page 1 CHEST FREEZER SERIES 市场型号 工厂型号 基准编码 Applicable Models Model Code Applicable Models HS-262CN UR-BD202-DQ 22032010005581 本手册中图片均为参考示意图,具体外观和配置以实物为准。 The picture in this service manual is only for reference, and specific appearance and configuration are subject to the real product. 本手册主要讲授方法,具体的作业技能需要工程师通过日常工作积累。 This manual mainly teaches the method, the specific work skill needs engineer to accumulate through the daily work.
- Page 2 Manufacturers or distributors are not responsible for the content of the Manual and interpretation thereof. Midea Refrigerators Technical Maintenance Manual Copyright @2017 All rights reserved. Replication of all or part of the Manual in any forms shall not be allowed without written approval by the Overseas Sales Corporation of Midea Refrigerators.
- Page 3 Service Manual_ Contents 重要更新说明 SIGNIFICANT UPDATE NOTES (NONE) .................5 2. 安全警示规范 SAFETY WARNING CODE ......................6 2.1 作业安全警告 W ....................6 ARNING FOR OPERATION SAFETY 2.2 冷媒安全须知 S AFETY INSTRUCTION FOR REFRIGERANT ..................8 3. 运输 TRANSPORT ..............................9 3.1 搬运 H ANDLING .................................
- Page 4 Service Manual_ 10. 压缩机 COMPRESSOR ............................. 28 10.1 压缩机的开停控制规则 C ..........28 OMPRESSOR ON AND OFF ONTROL SPECIFICATIONS 11. 故障排除方法 TROUBLESHOOTING METHOD ..................... 29 11.1 不制冷 N OT COOLING ............................29 11.2 压缩机不工作 N ....................30 O WORKING OF COMPRESSOR 11.3 温控器故障-过冷...
- Page 5 Service Manual_ 重要更新说明 Significant update notes (None) 涉及 C、D 类重要设计变更时,需要在本章节添加相应的内容或文件,且以下情况的变更必须 体现:1)电控件结构、原理发生变更时;...
- Page 6 Service Manual_ 安全警示规范 Safety Warning Code Warning for operation safety 作业安全警告 Important Safety Instructions CAUTION RISK OF ELECTRIC SHOCK DO NOT OPEN This symbol indicates that dangerous voltage constituting a risk of electric shock is present within your freezer. This symbol indicates that there are important operating and maintenance instructions in the literature accompanying your freezer.
- Page 7 Service Manual_ CONNECTING ELECTRICITY Electrical Shock Hazard. Failure to follow these instructions can Plug into a grounded 3-prong outlet. result in death, fire, or electrical shock. Do not remove the ground prong. Do not use an adapter. WARNING Electric Shock Hazard Failure to follow these instructions can result in electric shock, fire, or death.
- Page 8 Service Manual_ 13) Do not store or use gasoline or any flammable liquids inside or in the vicinity of this freezer. 14) Do not use extension cords or ungrounded (two-prong) adapters with this freezer. If the power cord is too short, have a qualified electrician install an outlet near the freezer. Use of an extension cord can negatively affect the freezer’s performance.
- Page 9 Service Manual_ 运输 Transport Handling 搬运 Handling 搬运 1) 在移动中保护冰箱,如图所示,使用加垫的手推车。 2) 拆除冰箱所有包装材料和底垫再搬运到室内安放。 3) 放置 2 小时再通电运行。 1)Protect the refrigerator in moving it,Same as shown as lef t photo, please move it by handcart with cushion 2)Remove all packing materials and bottom cushion, the m ove into house for placement 3)After moving it to appropriate location, wait for 2 hours bef ore power on.
- Page 10 Service Manual_ 安装和调试 Installation and commissioning Door Disassembly and Assembly 门体拆装 当整机无法进入室内时,需要对门体拆除。The refrigerator door needs to be dismantled if it cannot enter the room in the whole. Installation location 安装位置 安装位置 Installation location 需要选择通风的位置,有利于散热提升性能、降低能耗。 Location that is easy for ventilation shall be chosen to facilitate heat dissipation, enhance its performance and reduce the energy consumption.
- Page 11 Service Manual_ 产品配置和尺寸 Product configuration and dimension Main parts and their names 主要部件及名称 (本图片为参考示意图,具体外观和配置以实物为准)(The picture is only for reference, and specific appearance and configuration are subject to the real product) Door handle Shutter 门把手 百叶窗 ❶ ❺ ❷ 灯(可选)Lamp (optional) Temperature-control panel 温控面板...
- Page 12 Service Manual_ External dimension 外观尺寸 Size (mm) 描述Description 代码Code 尺寸 高度Height to Top of Case 宽度Width 深度/铰链Depth/Hinge 深度Depth 1336 开门高度Height (Door open) (本图片为参考示意图)(The picture is only for reference)
- Page 13 Service Manual_ Location of S/N 序列号的位置 有些产品在箱体的右侧的下部也有 S/N. Some products also have S/N on the lower part of the right side of the Cabinet.
- Page 14 Service Manual_ 产品规格 Product specification Electrical parameters 电气参数 Product Name UR-BD202-DQ 产品名称 Applicable Models HS-262CN 市场型号 Item Specification 项目 规格 Refrigerant R600a 制冷剂 Compressor 压缩机 FZ59E1C Starter(PTC) QP2-4R7 启动器 Overload protector(OLP) DRB35X61A1 过载保护器 Integrate PTC+OLP None 整体式启动器+保护器 Variable frequency driver 变频驱动板...
- Page 15 Service Manual_ Circuit diagram 电路图...
- Page 16 Service Manual_ 制冷管路系统和冷气循环路线 Refrigerating piping system and circulating route of cooling air Refrigerating piping system 制冷管路系统 ❶压缩机→❷右冷凝器→❸左冷凝器→❹干燥过滤器→❺毛细管→❻蒸发器 ❶Compressor→❷Right condenser→❸Left Condenser→❹Dry filter→❺Capillary tube→❻Evaporator Special soldering position 特殊焊点位置...
- Page 17 Service Manual_ 部件拆装 Dismantling of parts Parts on the door 门上部件 Door seal 门封条 1)从拐角处拽起门封 Pull the door seal from the corner 2)用力直至门封全部脱离门胆槽,取下门封 Take efforts until door seal totally detaches from door inner liner groove, remove the door seal 3)将四角先固定,按压平整 Fixing the four corners and pressing smoothly.
- Page 18 Service Manual_ 逆时针方向旋转取下内水管盖 Counterclockwise to remove the pipe cover Light system(None) 灯系统 Compressor case 压缩机仓 Power cord 电源线 1)用工具从一侧将通风窗盖板撬开 1)Open the cover plate from the side with the tool 2)打开盖板,取出电源线插头,再将盖板盖上 Open the cover plate, take out the power cord, and then cover the cover plate shutter 百叶窗...
- Page 19 Service Manual_ 1)截断压缩机管路 Cut off the compressor pipeline. Cut off the process pipeline. -❶截断工艺管 Cut off the low-pressure muffler. -❷截断低压回气管 Cut off the high-pressure exhaust -❸截断高压排气管 pipe. 2-1)拆卸螺钉 Remove the screws(for some models) -外侧 2 个螺钉 Two screws outside -内侧 1 个螺钉 One screw inside 2-2)拆卸卡簧...
- Page 20 Service Manual_ 4)拆卸保护罩 Remove the protective cover Pry the protective -从上部慢慢撬开保护罩,使得卡扣脱落 cover slowly from the upper part, Pull it out and remove it. -向外拔出拆下 5)拆卸启动器和保护器 Remove the starter and protector 依次拔下启动器与保护器(可以使用螺丝刀慢慢撬下) Unplug the starter and protector (you can use a screwdriver to pry it slowly) 6)松开压缩机底板的固定螺钉,将压缩机连同底板一起从...
- Page 21 Service Manual_ 8)用割管器割断冷凝器❽,用毛细管钳剪断毛细管❾ Use Pipe cutter cut off the condenser tube❽, then Shear off capillary ❾ by the capillary tube scissors. 9) Replace the compressor and 更换压缩机进行管路焊接 welding the compressor pipeline. Welding the process pipeline. -❿焊接工艺管 Welding the low-pressure muffler. -⓫焊接低压回气管...
- Page 22 Service Manual_ 12)系统充注制冷剂。 Perfusion refrigerant. 13)使用大力钳夹紧工艺管中间部位,然后对工艺管⓯封 焊。 Use the vise grip pliers clamp the middle of the process pipe, then seal welding process tube⓯. 压缩机仓管路系统 Piping system in the compressor case Temperature-control box assembly Capillary 温控组件 毛细管 ❶ ❽ ❷ 右冷凝器管路-1 Right condenser pipeline-1 Compressor Assembly Board 、...
- Page 23 Service Manual_ Temperature-control assembly 温控组件 Temperature-control box assembly view 温控盒组件视图 screw Temperature-control panel 螺钉 温控面板 ❶ ❹ Temperature-control box TEMP. control knob 温控盒盖 温控旋钮 ❷ ❺ 温控器 Thermostat 指示灯/指示灯孔盖 Indicator light ❸ ❻ Disassembly 拆装 1)用手将温控盒上弹片按下取出温控盒组件。注意:温控 盒共有下方两个弹片,需要使用较大力量按压弹片。建议 按住一个弹片向前推出一个角部,逐个推出。Take out of temperature control box assembly by pressing shrapnel with the hands.
- Page 24 Service Manual_ 3) Pull out the wiring harness and indicator 将线束拔掉 light 4)使用工具将温控旋钮拔出 Pull out the control knob 5)将固定温控器的螺母拆下 Pull out the fixed nut of the thermostat...
- Page 25 Service Manual_ 6) 取下指示灯和温控器,逆操作完成安装。remove the indicator light and thermostat, the reverse operation is for assembly Hinge 铰链 铰链拆装 inge disassembly and assembly 1)拆掉所有螺钉 Pull down all screws。 2)把门移开,取出铰链,逆操作完成安装 Move the door, take out two hinges, the reverse operation is for assembly...
- Page 26 Service Manual_ 功能和操作 Function and operation Operation panel 操作面板 Temperature control 温度控制 不带指示灯 1) 先将冷柜与电源接通; 2) 箱内的温度是通过温控旋钮来调节的,温控旋钮顺时针旋转, 箱内的温度降低;在“COOLING”范围内, 表示箱内温度为冷藏,在“FREEZING”范围内,表示箱内温度为冷冻; 3) “OFF”档位表示压缩机停止运行。 Control panel without indicator light 1. Connect the freezer to power supply; 2. The temperature in the box is adjusted by the temperature control knob, the temperature in the box is reduced by the clockwise rotation of the temperature control knob, in the range of "COOLING", the temperature in the box is refrigerated, in the range of "FREEZING", the temperature in the box is frozen 带指示灯...
- Page 27 Service Manual_ reduced by the clockwise rotation of the temperature control knob, in the range of "COOLING", the temperature in the box is refrigerated, in the range of "FREEZING", the temperature in the box is frozen; 3. “OFF” stands for stopping working. High temperature an alarm (None) 高温报警...
- Page 28 Service Manual_ 压缩机 Compressor 10.1 Compressor on and off Control specifications 压缩机的开停控制规则 1.1 满足下列条件之一,压缩机停机: Tr ≤ Trt; 压缩机连续运行时间超过(含)3 小时(停机 5 分钟); 1.2 下列条件全部满足时,压缩机开机: Tr ≥Trk 压缩机停机时间 ≥ 5min ★在 1.1 项、1.2 项均不满足的情况下,压缩机维持原状态不变。 1.1 When one of the following conditions is met, the compressor stops: 1) Tr ≤...
- Page 29 Service Manual_ 故障排除方法 Troubleshooting Method 11.1 Not cooling 不制冷...
- Page 30 Service Manual_ 11.2 No working of compressor 压缩机不工作 11.3 Thermostat malfunction-Undercooling 温控器故障-过冷...
- Page 31 Service Manual_ 11.4 Light is not on 灯不亮 11.5 Noise 噪音...
- Page 32 Service Manual_ Figures and details of repair parts 维修零部件图示和明细 此部分内容请到 TSP 系统中查看 See this section in the TSP.
- Page 33 MIDEA appliances after sales website tsp.midea.com For more information about Midea appliances after sales, please visit the tsp.midea.com For more information about the service manual, please visit the tsp.midea.com For more information about the EV and SBOM, please visit the...
Need help?
Do you have a question about the HS-262CN and is the answer not in the manual?
Questions and answers