
Subscribe to Our Youtube Channel
Related Manuals for GAPOSA QC600


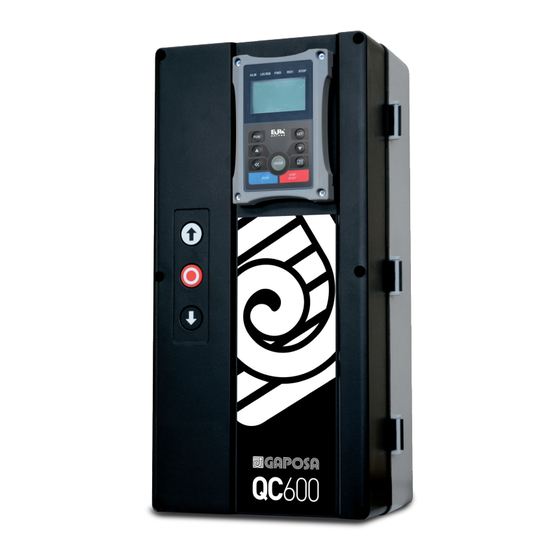
Summary of Contents for GAPOSA QC600
- Page 1 QC600 QC600S QC600W 0,75 kW 2,20 kW 3,00 kW MULTIFUNCTION CONTROL UNIT WITH INVERTER Ver PCB 7-0104 R1021 Ver SW 29/31...
-
Page 3: Important Safety Instructions
IMPORTANT SAFETY INSTRUCTIONS Specific use The control unit is specifically for doors moved with a motor. Safe operation is only guaranteed with normal specific use. The motor must be protected against rain, weather and ag- gressive environmental conditions. No liability is accepted for damage caused by other applications or failure to observe the information in the manual. No modifications are permitted, otherwise the declaration of conformity will be deemed void. -
Page 4: Technical Details
QC600W: Primary 400VAC winding is thermal protected by built-in thermal transformer fuse. Both secondary windings are overload protected by multifuses. QC600 Max motor load by 3~230VAC: 0.75kW / Max motor current: 5 A Motor output QC600S Max motor load by 3~230VAC: 2,2 kW / Max motor current: 10 A... - Page 5 INVERTER QC600W 3~400VAC QC600 PE L1 L2 L3 QC600S QC600W 1~230VAC 3~400VAC PE L1’ N PE L1’ L2’L3’ PE PE U V W QC600 QC600S 1~230VAC PE L1 N U V W PE PE PE N L1’ N’ AUX3 DISPLAY...
- Page 6 WARNING: if you power a motor with a power mode other than that for which it is set you can damage the motor and the control unit and put at risk the safety of the installer. QC600 / QC600S QC600W 1~230V...
- Page 7 PE PE U V W 2.3 ELECTROBRAKE CONNECTION Connect one of the terminals of the electric brake wire to neutral connection straightener (flying clamp) and the other Terminal to the Terminal AUX2 the terminal box X6: QC600 230V~ PHASE NEUTRAL MOTOR...
-
Page 8: Basic Programming
4_ ELECTRONIC LIMITS WITH ENCODER The encoder limits switch wires are connected according to the diagram of fig. 3. ATTENTION: if you connect a control unit pre-set for mechanical limits to a motor with encoder limits, the motor does not perform correctly. - Page 9 IMPORTANT NOTES Please follow the installation requirements of the GAPOSA motors. For example, if an encoded motor is installed in a way which the encoder direction is reversed, it will not run correctly and may put at risk things and/or people.
- Page 10 Check that motor and control unit are connected as shown in section 5. By following the instructions in section 8.1, select the parameter 11 to the value 05 or 06 depending on the engine GAPOSA used. In this case the D15 LED will flash 2 times until both limit switches are not set.
- Page 11 9.3_ UP LIMIT SWITCH POSITION TUNING (PARAMETER 13) 1 3 : 1 3 : r u n STOP STOP STOP RESET RESET RESET 1. Following the PARAMETERS and VALUES management procedure described in Section 6.3, select the PARAMETER 13 2. Select parameter 13 using the buttons UP and DOWN 3.
- Page 12 10_ OPERATION MODE (PARAMETER 01) The control unit is pre-set in dead-man control mode (PARAMETER 01, VALUE 01). It is possible, however, to define different working modes by modifying the value of PARAMETER 01: Hold-to-run UP 0 1 : 0 1 Hold-to-run DOWN (Put a bridge in X3 terminal 23-24 when there is no safety device) Impulsive UP 0 1 : 0 2...
- Page 13 12_ AUTOMATIC CLOSING (PARAMETER 32) Parameter 32 allows the selection of the door automatic closing after a selectable period of time. Important: parameter 32 is visible and accessible only if parameter 01 has been set in impulsive mode 3 2 : : 0 0 : 0 0 3 2 :...
- Page 14 15_ INTERLOCK (PARAMETER 36) The Interlock function stops the automatic closing if activated, to prevent a closing of the door. The countdown on the display shows the value of the pre-set waiting time. To activate the Interlock function, with the door in its UP limit position, hold the STOP button or the emergency stop button for more than 5 seconds.
- Page 15 16.1_ AUTOMATIC CLOSING FROM INTERMEDIATE POSITION (PARAMETER 17) You can set the automatic closing even from the intermediate position setting the PARAMETER 17. 1 7 : : 0 0 : 0 0 1 7 : STOP STOP 0 0 : RESET RESET Activate the automatic closing function (paragraph 12)
- Page 16 17.1.1_ ADDITIONAL PHOTO MOUNTED IN THE DOOR FRAME (ONLY POSSIBLE WITH ELECTRONIC LIMITS). After selecting the right parameter value run mode is available by pressing stop. Location of photo will now be learned by running from close to open position. The door will stop when the photo is no longer blocked and the control unit will change back to parameter number automatically Using the buttons UP and DOWN vary the value: - Value 04: Photo 1 connected and mounted in the door frame...
- Page 17 - Value 05: Wireless edge with test function on X20 s.out - Value 06: Light curtain with OSE output 5. Press the STOP button to confirm the tuning and return to the PARAMETER field. 6. To leave the set-up mode, place the DIP1 in OFF. Note: • that actual edge must be connected but not activated before this setup.
- Page 18 18_ REACTION – FAILURE ON PHOTO OR SAFETY EDGE LIST (PARAMETER 02) By means of PARAMETER 02, it is possible to determine the behaviour of the damper as a result of an error in the photocell or moving rib. 0 2 : 02: 0 0 02: 0 0 0 0 :...
- Page 19 6. To leave the set-up mode, place the DIP1 in OFF 22_ ADDITIONAL RADIO RECEIVER SLOT QCMR500 (OPTIONAL) - “GO FUNTION” WARNING: The QCMR500 in conjunction with the QC600 inhibits the use of the second photocell on terminal block X12 input PHOTO1 ADIO...
- Page 20 - Value 03: MODE OF OPERATION “STEP BY STEP” every time the signal of the transmitter is activated, it accomplishes the following commands: UP > STOP > DOWN > STOP sequentially. NOTE: if the AUTOMATIC CLOSURE has been programmed, during the pause the signal of the transmitter will extend the pause by resetting the timer of the automatic closure.
- Page 21 25_ SERVICE COUNTER (PARAMETER 58) Use service counter to make service interval on doors. 5 8 : : 0 0 : 0 0 5 8 : STOP STOP 0 0 : RESET RESET 1. Put DIP 1 (S3) in ON position, PARAMETER digits start blinking 2.
- Page 22 Using the procedure for programming the parameters and values (see section 6.3) set the parameters from 100 to 109 to enter the data on the motor plate used. Nominal motor power (kW) 1 0 0 : 1 . 1 rated motor Voltage (V) [QC600/QC600S] 1 0 1 : 2 3 0 rated motor Voltage (V) [QC600W] 1 0 1 : 4 0 0 nominal motor current (A) 1 0 2 : 5 .
- Page 23 Door speed Point from which to begin the transition from high to low speed High speed Low speed Door STOP HIGH SPEED LOW SPEED Open/close Acceleration Deceleration Deceleration MOTION MOTION door time Note! All acceleration/deceleration times, are seconds from 0 Hz → max Hz / max Hz → 0 Hz. (Max Hz = parameter 109) 29_ ELECTRONIC COUNTER AND LAST 10 ERRORS STOP E : 0 3...
- Page 24 30_ DISPLAY IN RUN MODE The display will in run mode show status of limits, some inputs or error codes if they occurs. When power up the software version is showed shortly. • Nothing active. (4 chairs symbol) GO function active • Door is stopped between limits and no errors are (Note that the door only can be closed by GO function, found.
- Page 25 31_ PARAMETER LIST shaded (Note: values shows factory settings) : 0 0 OPERATION MODE : 0 0 AUTOMATIC CLOSING FROM INTERMEDIATE POSITION 0 1 : 0 1 Hold-to-run UP; Hold-to-run DOWN 1 7 : 0 0 Not active 0 1 : 0 2 1 7 : 0 1 Impulse UP;...
- Page 26 : 0 0 : 0 0 CAR WASH FUNCTION SPECIAL UPING 8 4 : 0 0 Normal function 3 3 : 0 0 No car wash function Special open function: Photo active time in 0,1 sec. Units (e. g. 15 = 1,5 sec.) 3 3 : 0 1 Open signal with high priority.
- Page 28 Gaposa srl - via Ete, 90 - 63900 Fermo - Italy T. +39.0734.220701 - F. +39.0734.226389 - info@gaposa.com www.gaposa.com 3ISTREN.QC600...
Need help?
Do you have a question about the QC600 and is the answer not in the manual?
Questions and answers