Advertisement
Dyness B4850 Battery and Solis S6 Series
Setup Guide
Introduction
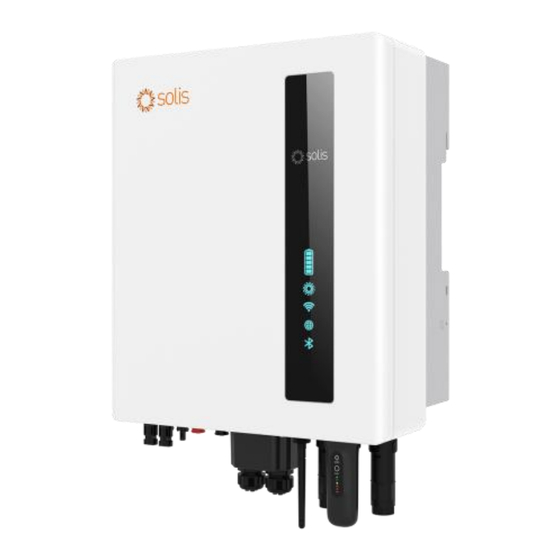
Setting up the Solis S6 inverter with Dyness B4850 batteries is a crucial step in ensuring your solar power system
operates efficiently. This article provides a step-by-step guide to help you connect and configure these devices
properly. We will walk you through the entire process, from connecting power and communication cables to
finalizing the inverter settings. By following these instructions, you'll ensure a seamless integration between the
inverter and battery, maximizing the performance and longevity of your solar energy setup.
Advertisement
Table of Contents

Related Manuals for Ginlong solis S6


Summary of Contents for Ginlong solis S6
- Page 1 Setup Guide Introduction Setting up the Solis S6 inverter with Dyness B4850 batteries is a crucial step in ensuring your solar power system operates efficiently. This article provides a step-by-step guide to help you connect and configure these devices properly. We will walk you through the entire process, from connecting power and communication cables to finalizing the inverter settings.
-
Page 2: Table Of Contents
Table of Content Checklist • Step 1: Connect Cables to the Inverter • Step 2: Switch On the Battery • Step 3: Activate Breaker/Fuse Between Inverter and Battery • Step 4: Inverter Setup • Step 5: Charge Battery • Step 6: Shut Down Procedures •... -
Page 3: Step 1: Connect Cables To The Inverter
Step 1: Connect Cables to the Inverter 1. Power Down Devices: Ensure both the inverter and the battery are completely powered off. Connect Cables to the Inverter: Power and Communication Cables: Begin by connecting the power cable and communication (comm) cable to the inverter. 2. - Page 4 4. Meter Wiring: Connect meter interfaces A and B to CT pins 9 and 10, respectively. Connect CT pins 3 and 4 to the power grid neutral (N) and live (L) terminals, respectively. Connect the RS485 output of the power meter to the RS-485 meter interface on the inverter using the provided network cable.
- Page 5 Ensure the CT clamp is attached to the live wire of the power grid (the arrow indicates the end of the grid). 5. Battery and Inverter Connection: Use a standard pin-to-pin cable for connections between the battery and the inverter, as well as between batteries.
- Page 6 Connecting the Dyness B4850 with the Inverter: INV-BAT Connection: Connect from the master CAN IN to the inverter BMS port. • BAT-BAT Connection: Connect from the master CAN OUT to the slave1 CAN IN, then from slave1 CAN • OUT to slave2 CAN IN, and so on.
- Page 7 Connecting the Dyness Powerbox Pro with the Inverter: INV-BAT Connection: Connect from the master CAN IN to the inverter BMS port. • BAT-BAT Connection: Connect from the master box CAN OUT to the slave1 box CAN IN, then from slave1 •...
- Page 8 The master unit's factory default setting is 0010, so there’s no need to open the cover to make any • changes. You can use it directly as is. If only one Powerbox Pro is used, it will function as the master unit by default. •...
-
Page 9: Step 2: Switch On The Battery
Step 2: Switch On the Battery Turn on the ON/OFF switch for all batteries. Then, press and hold the master switch (SW) for 3 seconds to power on all the batteries. For devices like the Powerbox Pro, press and hold the power switch for 3 seconds to power on the battery. Step 3: Activate Breaker/Fuse Between Inverter and Battery Install a DC breaker or fuse between the inverter and battery to protect both devices. -
Page 10: Step 4: Inverter Setup
Step 4: Inverter Setup To establish a local connection, ensure that your device's Bluetooth is enabled. Open the SolisCloud App and DO NOT LOGIN. 1: Navigate to the "More Tools" button on the bottom right-hand side. 2: Click on "Local Operation." 3: Select the "Connect with Bluetooth"... - Page 11 4: Your device should appear in the "Nearby Devices" section. Click on your device and verify the serial number. 5: Click on "Select account type." 6: Choose the "Installer" option.
- Page 12 7: When accessing the inverter for the first time, you will be asked to set a password. Please follow the on-screen instructions. Once the password is set, press “Set Password”. After saving the password, you will now be connected to your inverter.
- Page 13 Quick Settings Overview The Quick Settings will appear on your screen. These are the 5 basic settings that need to be configured for the inverter to function properly. 1: Begin by setting the correct inverter time, or simply follow the phone time and press 'Next Step.' 2: Choose the correct battery model, in our case “Dyness LV”.
- Page 14 4: In the next step, choose the correct Grid code for your area. 5: Grid Codes are sorted by country names. 6: Please choose the correct country code one and click on “Save”. (If you are unsure about which grid standard to use, contact your local energy provider for more details.)
- Page 15 7: In the last step of the Quick Settings, choose the mode that you want to apply. There are four different modes available: Self-Use Mode • Feed-in Priority Mode • Peak Shaving Mode • Off-Grid Mode •...
- Page 16 As a working mode you will most likely use the Self-Use mode. Self-Use Mode is designed to optimize the consumption of solar energy within a residential setting. In this mode, the system prioritizes directing all photovoltaic (PV) energy generated towards powering the home. Any surplus energy not immediately required by the household is intelligently stored in connected batteries.
- Page 17 D: If you want to set a specific charging or discharging value on your inverter, please first press "Add time" and then choose accordingly – Charging or Discharging Times. E: In the next step, please choose the actual time range for either Force Charge or Discharge. F: Once the Charge/Force charge period has been set, you will see the details on the screen.
- Page 18 G: The Self-Use Mode provides you with the option to set a Battery reserve value. Please toggle the switch to activate the battery reserve mode. H: You can set a range between 20% and 100% of the battery SOC. The inverter will strive to maintain the battery at the chosen set level.
- Page 19 After selecting and configuring your preferred mode, the quick setup of the device is finished. On the app, you should now observe a graphical representation illustrating the energy flow within the inverter system. This graphic typically displays the current PV power, grid input, loads, and battery status. In the provided example, no loads are connected, thus the graphic will appear in grey.
-
Page 20: Step 5: Charge Battery
Step 5: Charge Battery Initiate the inverter to start charging the battery to 100% to calibrate the State of Charge (SOC). Step 6: Shut Down Procedures For Powerbox Pro: 1. Disconnect the inverter's AC side. 2. Turn off the DC breaker on the Powerbox Pro. 3.
Need help?
Do you have a question about the solis S6 and is the answer not in the manual?
Questions and answers