EGO CTA9500 Manual
- Operator's manual (54 pages) ,
- Operator's manual (94 pages) ,
- Repair manual line (23 pages)
Advertisement
Troubleshooting
| Problem | Possible Cause | Fault Position | Test & Solution |
Blade stuck | Blade worn or stuck due to resin. | Blade | Replace the worn blade with a new one or clean the resin. |
Noise | Lack of grease in gearbox. | Gear case | Add grease |
Tool List For Repair
| NO. | Tool List | SPEC | Remark |
| 1 | Hexagon Wrench | 4mm, 2mm | |
| 2 | Cross screwdriver |
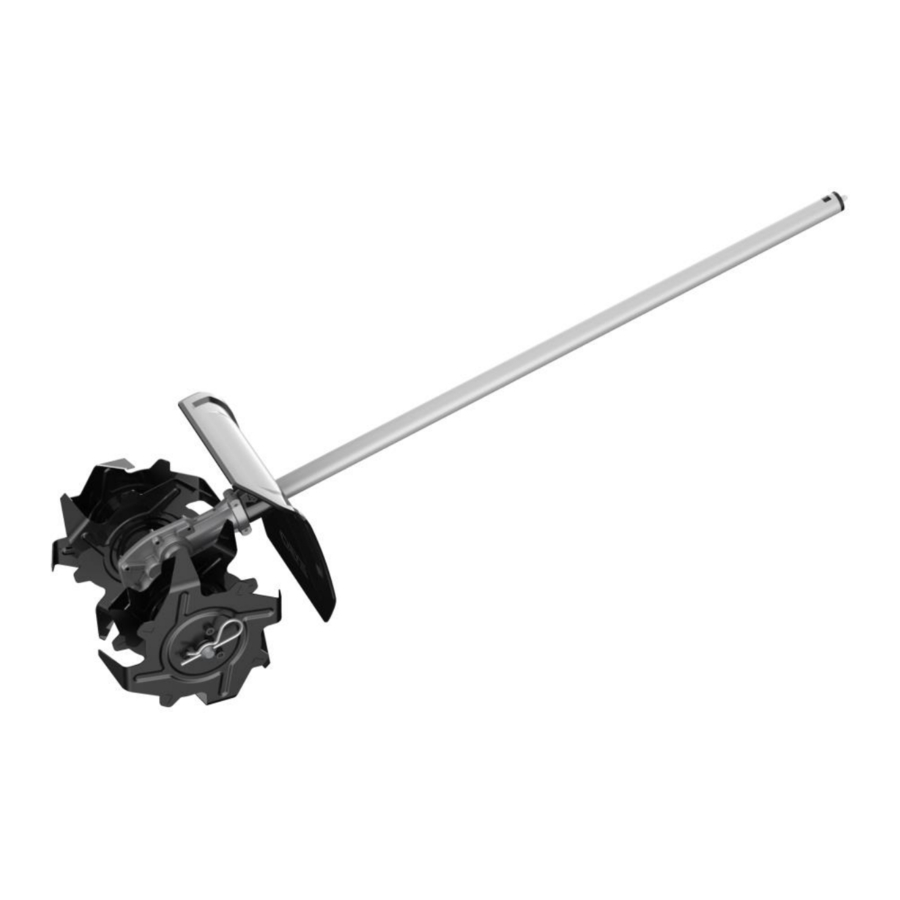
Replace the Right/Left Outer Blade Set
Disassemble the Right/Left Outer Blade Set
- Remove the spring pin and loosen the three screws1# with the Hexagon Wrench.


| Description | Part Number | Qty. |
| Spring pin | 5670479001 | 2 |
| Screw1# | 5620667001 | 3 |
- Remove the right outer blade set and loosen the screw2# using the Cross screwdriver. If any parts were broken, replace them.


| Description | Part Number | Qty. |
| Right Outer Blade | 3706735001 | 1 |
| Outside flange shaft | 3521094001 | 2 |
| Outside holding ring | 3129563001 | 2 |
| Screw 2# | 5620039002 | 1 |
| Right Outer Blade Set | 2825756002 | 1 |
NOTICE: If any part was damaged in the left outer blade set, please exchange them following the steps above.

| Description | Part Number | Qty. |
| Left Outer Blade | 3706734001 | 1 |
| Outside flange shaft | 3521094001 | 2 |
| Outside holding ring | 3129563001 | 2 |
| Screw 2# | 5620039002 | 1 |
| Left Outer Blade Set | 2825758002 | 1 |
Assemble the Right/Left Outer Blade Set

- Install the outside flange shaft into the outside holding ring and tighten the screw2#.
- Install the right outer blade into the outside flange shaft and tighten the three screws1#.
- Place the right outer blade set onto the output shaft

- Insert the spring pin into the locking hole.


NOTICE: The stamped side with the "Right" should always face outward.
TIPS: The process to install the left out blade is as described above..
NOTICE: For correct operation of the cultivator, the blades must be installed in the correct orientation. Symbols R and L are stamped on the blades and the gearbox.

Replace the Right/Left Inner Blade Set
Disassemble the Right/Left Inner Blade Set

- Disassemble the right outer blade as shown in the "Disassemble the Right/left Outer Blade Set" section.
- Loosen the three screws1# to Remove the right inner blade set. If any parts were broken, replace them.
- If the inside holding ring is damaged, loosen the two screws2# to exchange it.
| Description | Part Number | Qty. |
| Right Inner Blade | 3706733001 | 1 |
| Inside flange shaft | 3521093001 | 2 |
| Inside holding ring | 3129565001 | 2 |
| Screw 1# | 5620667001 | 3 |
| Screw 2# | 5620039002 | 2 |
| Right Inner Blade Set | 2825757002 | 1 |
NOTICE: If any part was damaged in the left inner blade set, please exchange them.

| Description | Part Number | Qty. |
| Left Inner Blade | 3706732001 | 1 |
| Inside flange shaft | 3521093001 | 2 |
| Inside holding ring | 3129565001 | 2 |
| Screw 1# | 5620667001 | 3 |
| Screw 2# | 5620039002 | 2 |
| Left Inner Blade Set | 2825755002 | 1 |
Assemble the Right/Left Inner Blade Set
- Put the inside flange shaft on the output shaft (Fig.1).

- Insert the right inner blade into the output shaft and tighten the three screws1# (Fig.2).
![]()
- Assemble the right outer blade set as shown in the "Assemble the Right/Left Outer Blade Set" section (Fig.3).
![]()


NOTICE: The stamped side with the "R" should always face outwards..
TIPS: Assembly of the left inner blade can follow the steps above.
NOTICE: The blades that have tines facing in both directions must be mounted on the inside, closest to the gear box.

Replace the Tube Assembly
- Remove the sleeve from the tube.

- Loosen the bolt from the guard, and take the guard from the shaft. Change if the guard is damaged.


| Description | Part Number | Qty. |
| Sleeve | 3128734001 | 1 |
| Guard | 3403025001 | 1 |
| Bolt | 5620334004 | 1 |
- Loosen 2 pcs Hexagon Socket Screws to remove the tube assembly. And replace a new tube assembly.


| Description | Part Number | Qty. |
| Hexagon Socket Screw | 5620019004 | 2 |
| Connecting Piece | 3706608001 | 1 |
| Tube assembly | 2825763002 | 1 |

- Insert the connecting piece into the hole of the tube.
- Connect the tube assembly with the gear case assembly and tighten the two hexagon socket screws.
Replace the Gear Case Assembly
- Remove the blade set as is shown in the "Replace the Right/Left Outer Blade Set" and "Replace the Right/Left Inner Blade Set" section, then remove the tube assembly from the gear case assembly as is shown in the "Replace the Tube Assembly". Replace the gear case assembly if any part was damaged in it.


| Description | Part Number | Qty. |
| Gear case assembly | 2826284001 | 1 |
- Assemble the blade set as is shown in the "Replace the Right/Left Outer Blade Set"and "Replace the Right/Left Inner Blade Set" section, then connect the tube assembly with the new gear case assembly as is shown in the "Replace the Tube Assembly".


Upon continuous product improvement, please using the latest SBOM & Parts list to order spare parts if necessary.
Documents / ResourcesDownload manual
Here you can download full pdf version of manual, it may contain additional safety instructions, warranty information, FCC rules, etc.
Advertisement


Need help?
Do you have a question about the CTA9500 and is the answer not in the manual?
Questions and answers