Advertisement
Quick Links
维修手册
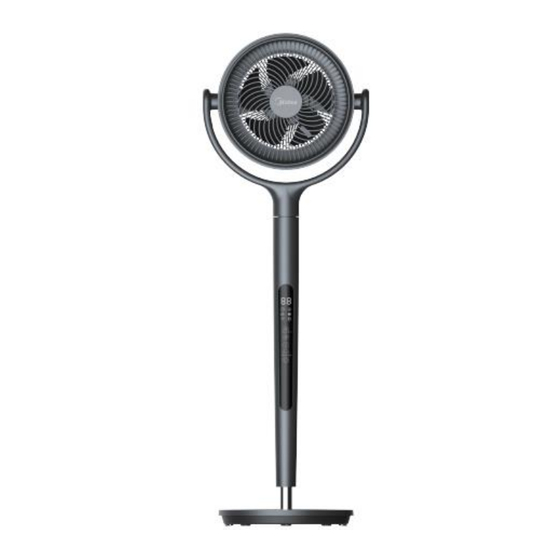
(本图片为参考示意图,具体外观和配置以实物为准)(The picture is only for reference, and
specific appearance and configuration are subject to the real product)
编制
审核
批准
维修手册
Service Manual
Applicable Models
适用机型
FG18-24LXW、FG18-24LX
Prepared by
Reviewed by
Approved by
Service Manual, 2019 v1.0
王金庚
曾垂雨
吴孔升
1 / 17
Advertisement

Summary of Contents for Midea FG18-24LXW
- Page 1 维修手册 Service Manual, 2019 v1.0 Service Manual 维修手册 Applicable Models 适用机型 FG18-24LXW、FG18-24LX (本图片为参考示意图,具体外观和配置以实物为准)(The picture is only for reference, and specific appearance and configuration are subject to the real product) Prepared by 编制 王金庚 审核 Reviewed by 曾垂雨 批准 Approved by 吴孔升...
-
Page 2: Important Safety Notice
Midea Environment Appliance Technical Maintenance Manual Copyright @2017 All rights reserved. Replication of all or part of the Manual in any forms shall not be allowed without written approval by the Overseas Sales of Midea Environment Appliance. 安全警示规范 Safety Warning Code WARNING Read these instructions. - Page 3 维修手册 Service Manual, 2019 v1.0 Keep these instructions. Follow all instructions. Do not use this appliance near water. This appliance is intended to be used in household and similar environments. Clean only with a damp cloth. Install in accordance with the manufacturer’s instructions. Do not defeat the safety purpose of the polarized or grounding-type plug.
- Page 4 维修手册 Service Manual, 2019 v1.0 整机拆卸 Dismantling of appliance 1、先用螺丝刀拆卸下底盘的螺杆,拿出机身。 用螺丝刀敲一下透明窗位置立柱背部,将透明 窗敲出,取下透明窗 1. First remove the screw of the chassis with a screwdriver and take out the fuselage. Knock the transparent window on the back of the post with a screwdriver, knock out the transparent window, remove...
- Page 5 维修手册 Service Manual, 2019 v1.0 • 4、拆开装饰盖支架,将接头螺钉拆卸; 将接 头拆下 4. Disassemble the decorative cover bracket and remove the connector screws; Remove the joint 5、将网罩螺钉拆下,拆下装饰圈,拆卸前网 罩 5, remove the mesh cover screw, remove the decorative ring, remove the front mesh cover 5 / 17...
- Page 6 维修手册 Service Manual, 2019 v1.0 • 6、拆卸网罩索姆;拆卸风叶 6, remove the net cover Som; Removing blade • 7、将外壳的两颗螺钉拆卸,拿出外壳 7. Remove the two screws of the shell and take out the shell • 8、将支架两端的螺钉拆卸,拿出支架 8. Remove the screws at both ends of the bracket and take out the bracket 6 / 17...
- Page 7 维修手册 Service Manual, 2019 v1.0 • 9、将左边压线板拆卸,拿出压线板 9. Remove the left pressure plate and take out the pressure plate • 10、将侧板两颗螺钉拆卸,取下侧板 10. Remove the two screws of the side panel and remove the side panel 7 / 17...
- Page 8 维修手册 Service Manual, 2019 v1.0 • 11、将转轴套 3 颗螺钉拆卸,拿出转轴和轴 套 11. Remove the 3 screws of the shaft sleeve and take out the shaft and shaft sleeve • 12、将电机支架 3 颗螺钉拆卸,拿出电机组 件 12. Remove the 3 screws of the motor support and take out the motor assembly •...
- Page 9 维修手册 Service Manual, 2019 v1.0 • 14、拆下侧板两颗螺钉;拆下上下摇头步进电 机组件 14. Remove two screws from the side panel; Remove the up-and-down shaking head stepper motor assembly 3、整机组装 The whole machine assembly • 1、拿取电机组件,安装在后网罩上,打 3 颗螺 钉紧固 1. Take the motor assembly, install it on the rear mesh cover, and fasten it with 3 screws 9 / 17...
- Page 10 维修手册 Service Manual, 2019 v1.0 • 2、安装压线板并紧固 3 颗螺钉 2. Install the wire pressing plate and tighten the 3 screws 3、 将电机支撑架安装在电机轴上, 并紧固 3 颗 螺钉;将电机组件安装在后网罩并紧固 3 颗螺 钉 3, install the motor support frame on the motor shaft, and fasten 3 screws; Install motor assembly on rear mesh cover and secure 3 screws 4、将转轴套和转轴穿过线束安装在后网罩上,...
- Page 11 维修手册 Service Manual, 2019 v1.0 • 5、将侧板安装在后网罩两端,并两端紧固 2 颗螺钉 5. Install the side panel at both ends of the rear mesh cover, and secure 2 screws at both ends • 6、安装风叶和风叶索母 6. Install wind blades and wind blades • 7、安装外壳,并紧固两颗螺钉 7.
- Page 12 维修手册 Service Manual, 2019 v1.0 8、安装支架,并将电机线压在支架线槽,并两 端分别紧固 3 颗螺钉 8. Install the support, and press the motor wire into the support wire slot, and fasten 3 screws at both ends 9、 安装电路板, 并安装支撑座和感温探头, 并 紧固两颗绝缘垫圈螺钉 9, Install the circuit board, and install the support base and temperature probe, and tighten the two insulation washer screws 10、...
- Page 13 维修手册 Service Manual, 2019 v1.0 11、 安装接头并紧固 3 颗螺钉;将机头线传入接 头组件,并将接头安装在支架上 11. Install the joint and fasten 3 screws; Pass the head wire into the connector assembly and install the connector on the bracket • 12、紧固接头 4 颗螺钉,并在出线口打油 12. Tighten the 4 screws of the connector and oil the outlet 13 / 17...
- Page 14 维修手册 Service Manual, 2019 v1.0 • 13 将机头线端子对插在电路板上,并粘贴防火 布固定 13 Connect the cable terminals of the machine head to the circuit board, and attach a fireproof cloth to secure the connectors 14、安装立柱,并在立柱背面紧固两颗沉头螺 钉;安装透明窗 14. Install the column, and fasten two countersunk screws on the back of the column;...
- Page 15 维修手册 Service Manual, 2019 v1.0 • 15、安装前网罩,并紧固螺钉;安装支架装 饰盖 15, install the front mesh cover, and tighten the screws; Install bracket trim cover 16、安装底盘、紧固底盘螺杆;将机器立起安 装装饰圈 16, install the chassis, tighten the chassis screw; Stand the machine upright to install the decorative ring 15 / 17...
-
Page 16: Fault Code And Solutions
维修手册 Service Manual, 2019 v1.0 常见故障及解决方法 Fault code and solutions 故 障 代 码 故障内容 Fault 显示 维修方法步骤 Display Steps for maintenance methods Fault code content A、家庭的电源插座故障:检查插座是否有电,如出现故 障更换。 B、产品内部各部分故障: B1、电路板故障:电路板损坏,插线脱落; B2、内部接线故障:内部线断;故障:电路板损坏,插 线脱落; 不能正常启动 B3、电机故障:烧坏或热熔断器断路。 It is not normal to 处理方法:分段检查,逐一排除找到原因后进行修理。 start A, home power socket failure: check whether the socket has electricity, if there is a malfunction replacement. - Page 17 如需获得厂家详细技术咨询,请联系: xxx@midea.com 生活电器事业部 外销 地址:中国广东省中山市东凤镇东阜路和穗工业园东区 28 号 Midea Environment Appliance If you need to get detailed technical information from the manufacturer, please contact: xxx@midea.com Environment Appliance Division Overseas Sales Address: Eastern 28th, Hesui industrial Park, Dongfu Road, Dongfeng Town, Zhongshan City,...


Need help?
Do you have a question about the FG18-24LXW and is the answer not in the manual?
Questions and answers