PICO 4 Ultra Series Manual
- User manual ,
- Setup manual (7 pages) ,
- User manual (102 pages)
Advertisement
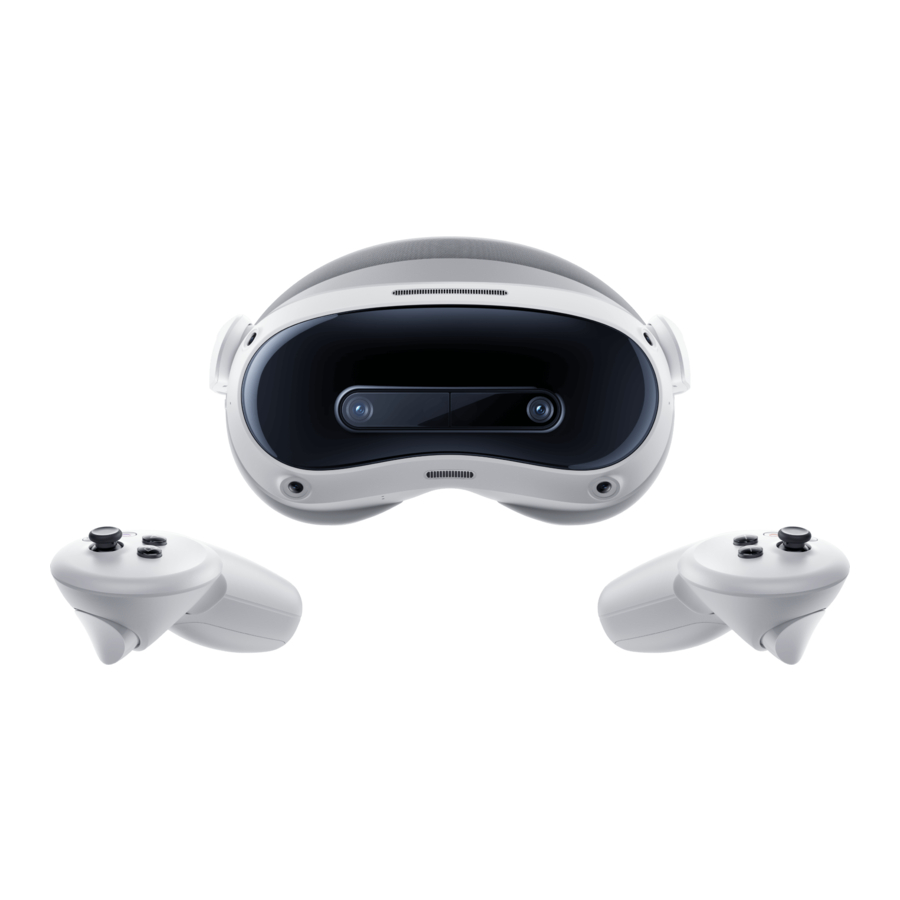
6 Degrees of Freedom VR
The device can track your translational and rotational movements in all directions (up/down, left/right, forward/backward, pitch, roll, and yaw). Your movements in the real world will be captured and translated to what you see in the virtual world when using the appropriate content.
The product does not have any cables, so make sure you are in a safe environment while exploring the virtual world.
- Prepare a clean, safe and well lit space of at least 2 × 2 meters. Avoid using the product in rooms with single-colored walls, large reflective objects (such as glass panes and mirrors), or moving images/objects.
- Remove the protective film from the front cameras of the VR headset and wear the lanyards connected to the controllers.
- Set up your environment by following instructions on the VR Headset screen.
![]()

Note: The "Safety Area" feature of the product cannot guarantee your safety in the set gaming area. Stay alert to any safety risks.
Quick Guide
Installing the battery batteries
Pull out the insulation film in the battery case.

Toggle the battery case button to open the case and replace the batteries.

Note: 1.5V AA alkaline batteries are recommended.
Power on the controllers
First power-on: After you pull out the insulation film, the controllers will be automatically powered on (with a blue indicator flashing).
Subsequent power-ons: Press the "Home" button on the controller to power it on (with a blue indicator flashing).

Power on the headset
Long press the POWER button for 3 seconds until the status indicator turns white.

Wear the headset and adjust it to ensure a comfortable fit and view
- Raise the rear part of the head strap and wear the headset. Adjust the headset so that you have a clear, unobstructed view.
- After the headset fits into place, buckle up the rear part of the head strap and tighten the strap dial.


Note: This product does not support vision correction. If you need vision correction, wear your glasses or lens inserts while using this product.
Fine-tune the head strap top strap
Fine-tune and tighten the top strap to reduce the pressure on your forehead.

Adjust the pupil distance
In System Settings, go to "Settings" > "Display" to adjust the pupil distance. Tap "+" or "-" to fine-tune the pupil distance until you have a clear view.


Do not tamper with the binoculars with brute force to avoid damage!
Improper pupil distance may result in double vision or eyestrain. An accurate pupil distance helps you see a clearer image and relieves eyestrain.
Product Details
Headset Status Indicator
White indicator constant: Powering on or in operation
Blue indicator flashing: Powering off
Red indicator flashing: Low battery
Indicators off: Sleeping or powered off
Charging Status Indicator
Charging while powered off
Yellow indicator constant: Charging while powered off. Battery level lower than 98%
Red indicator constant: Charging. Battery level lower than 20%
Green indicator constant: Charging complete. Battery level higher than 98% or full
Charging while powered on
White indicator constant: Charging while powered on. Battery level lower than 98%
Red indicator constant: Charging. Battery level lower than 20%
Green indicator constant: Charging complete. Battery level higher than 98% or full
Device Overview

- Power
Power on: Press and hold for 3 seconds
Power off: Press and hold for 3 seconds
Force restart: Press and hold for 10 seconds
Press to enter Sleep Mode when powered on
Press to wake up when in Sleep Mode - Status Indicator
- Face Cushion
- Volume
- RGB Perspective Camera
Do not block the camera when using the product -
- IR Emitters
- Depth Camera
Do not block the camera when using the product
- Top Strap
Removable - Strap Dial
- Tracking Camera
Do not block the camera when using the product - USB-C Compatible Port
- Left/Right Speaker
- Proximity Sensor
Wear the headset, and the system will wake up automatically
Take off the headset, and the system will enter Sleep Mode automatically - VST Indicator
When the VST camera is turned on, the white indicator will stay constant
When images are being saved, the white indicator will flash
Controller Status Indicator
Off: Connected or powered off
Blue indicator constant: Firmware upgrading
Blue indicator flashing: Connecting
Red and blue indicator flashing alternately: Waiting for pairingprogress
Red indicator flashing: Unable to power on due to low battery level

- Menu Button
- Home Button
Power on: Press
Power off: Press and hold for 6 seconds
Exit: Press
Screen recentering: Press and hold for 1 second while powered on - Grip Button
- Battery Case
Opening: Toggle the button to pop out the battery case
Installation: Press until it fits into place - Status Indicator
- Joystick
- Capture Button
Screenshot: Press
Recording: Press and hold - Trigger Button
Note: The lanyard can be attached to the controller as shown in the image.

Operating Instructions
Head Control Mode
When the controllers are not connected, you can interact with the home screen by moving your head to direct the crosshairs over your intended selection and clicking the Volume Up/Down button on the VR Headset.
Switching the pointer of the master controller
In the home screen, short press the Trigger of the corresponding Controller to switch the pointer of the master Controller.
Recentering the screen
Wear the headset and look straight ahead. Press and hold the "Home" button of the controller (or the "Volume Down" button of the headset in Headset mode) for at least 1 second to recenter the screen and position the menu to your front.
Disconnecting the controller
Press and hold the "Home" button until the controller status indicator turns red and the controller vibrates. The controller will now be disconnected from the headset and powered off. Controllers do not need to be powered off manually, as they will be automatically powered off to save power in the following scenarios:
- When the headset enters Deep Sleep Mode (after it is taken off for a certain period of time)
- When the controllers are disconnected in the headset's "Controller Management" screen
- When the headset is powered off
Adding a new controller
If you need to add a new controller (the headset can connect up to two controllers, a left one and a right one) or disconnect a controller and re-connect it, go to"Settings" > "Controller", click on "Pair" and press and hold the "Home" button and the "Trigger" button of the controller simultaneously until the controller status indicator flashes red and blue alternately. Then follow the instructions on the headset screen.
Entering and exiting Sleep Mode
Method 1: The system will enter Sleep Mode automatically after you take off the headset for a certain period of time. It will automatically wake up when you wear the headset.
Method 2: Press the "Power" button of the headset to enter or exit Sleep Mode.
Hardware reset
Resetting the headset
If the headset is unresponsive or the image gets stuck when you press the "Power" button, press and hold the "Power" button for 10 seconds or longer to restart the headset.
If the visual in the VR Headset freezes, or the VR Headset does not respond after short press the Power button, you can press the Power button of the VR Headset for more than 10 seconds to reboot the VR Headset.
Resetting the controller
If the controller is unresponsive when you press the "Home" button or any other buttons, or if the virtual controller on the headset screen gets stuck, remove the batteries to restart the controller.
Vision correction
This device does not support vision correction. The headset can be worn with most standard glasses that have a frame width of less than 150mm.
Installing glasses spacer
If you have glasses collision with headset lens or pressure on the bridge of nose, please follow the picture to install Glasses Spacer to increase the space. You can install or not according to your situation.
- Remove the face cushion.
- Install the Glasses Spacer on the Headset.
![]()
- Install the Face Cushion on the Glasses Spacer.
![]()


* Note: Disassemble the Glasses Spacer
Replacing the face cushion
The face cushion can get flaccid and discolored when cleaned multiple times or used for a long time. You can have it replaced with a new one if necessary.
Replacing the top strap
- Remove the face cushion
- Hold the metal buckle of the head strap and press it down until it can be taken out, as shown in the image below

- Fit the face cushion back

Important Health & Safety Notes
- Please read the Safety and Warranty Guide before using the product.
- This product is designed and intended to be used in an open and safe indoor area, free of any tripping or slipping hazards. To avoid accidents, remain conscious to the potential confines of your physical area and respect the boundary of your virtual area whenever you see it. Be sure to wear the lanyards when using the Controllers. Make sure that there is enough space around your head and body (at least 2 meters by 2 meters) to stretch your arms to avoid damage or injury to yourself, others, and your surroundings.
- Children aged 12 or younger are not recommended to use this product. Keep the headset, controllers and accessories out of children's reach. To avoid accidents, users aged 13 and over should be supervised by an adult while using this product.
- This product does not support vision correction. If you need vision correction, keep your glasses on while using the product and take care not to scratch your glasses on the headset lenses. Take care to protect the optical lenses from scratches caused by sharp objects. Use a soft eyeglasses cloth to clean the lenses and avoid causing scratches that may affect the viewing experience.
- Extended periods of use may cause slight dizziness or eyestrain. Take a break after 30 minutes and do eye exercises or look into the distance to relieve eyestrain. Stop using the product immediately if you experience any discomfort. If the discomfort persists, consult a doctor.
- Exposing the headset to direct sunlight or ultraviolet light (in outdoor environments, cars, on balconies, or windowsills) may result in permanent yellow spots on the display. Damage of this nature is not covered by the product warranty.
- You can adjust the pupil distance in "System Settings". However, note that the headset may come into contact with your nose bridge if the pupil distance is set to the minimum value. With the headset on, you can go to "Settings" > "Display" to adjust the pupil distance manually. Note that improper pupil distance may result in double vision or eyestrain.
- This product comes with an "Eye Protection Mode", which passes the Low Blue Light certification by TÜV SÜD (Germany). It uses software algorithms to reduce the amount of blue light in the three-color channel and protect your eyes. Images will appear yellowish in this mode. You can go to "Settings" > "Display" > "Color" > "Eye Protection" to turn this feature on or off.
* Product and packaging are updated regularly, and the functions and contents of the standalone headset may be upgraded in the future.
Therefore, the content, appearance and functionality listed in this manual and product packaging are subject to change and may not reflect the final product. These instructions are for reference only.
* Carefully read this user guide before using the product and share this information with any other users, as it contains important safety information. Keep the user guide as reference for the future.
The essential tool for PICO all-in-one VR, helping you manage your headset better

Documents / ResourcesDownload manual
Here you can download full pdf version of manual, it may contain additional safety instructions, warranty information, FCC rules, etc.
Advertisement


Need help?
Do you have a question about the 4 Ultra Series and is the answer not in the manual?
Questions and answers