
Related Manuals for PICO 4 Ultra


Summary of Contents for PICO 4 Ultra
- Page 2 用户指南 User Guide...
- Page 11 Important Health & Safety Notes headset may come into contact with your nose bridge if the pupil distance is set to the minimum value.With the headset on, you can go to “Settings” ► “Display” • Please read the Safety and Warranty Guide before using the product. to adjust the pupil distance manually.
- Page 12 Quick Guide 6 Degrees of Freedom VR The device can track your translational and rotational movements in all directions ❶ (up/down, left/right,forward/backward, pitch, roll, and yaw). Your movements in Installing the battery batteries the real world will be captured and translated to what you see in the virtual world Pull out the insulation film in the Toggle the battery case button when using the appropriate content.
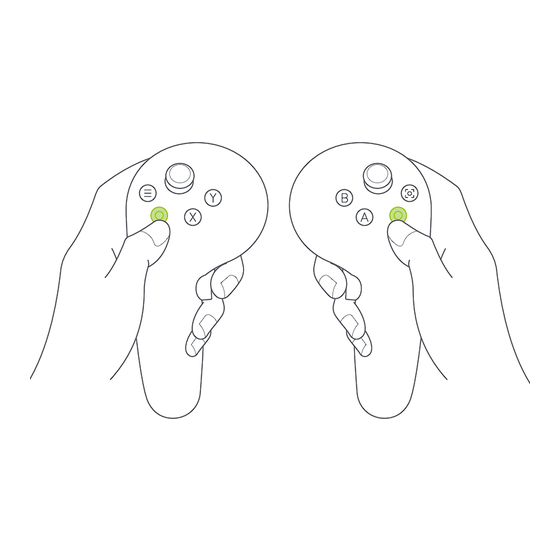
- Page 13 ❷ ❸ Power on the headset Power on the controllers First power-on: After you pull out the insulation film, the controllers will be auto- Long press the POWER button for 2 seconds until the status indicator turns white. matically powered on (with a blue indicator flashing). Subsequent power-ons: Press the “Home”...
- Page 14 ❹ Wear the headset and adjust it to ensure a comfortable fit and view ❺ Fine-tune the head strap top strap • Raise the rear part of the head strap and wear the headset. Adjust the headset so Fine-tune and tighten the top strap to reduce the pressure on your forehead. that you have a clear, unobstructed view.
-
Page 15: Product Details
❻ Adjust the pupil distance Product Details In System Settings, go to “Settings” ► “Display” to adjust the pupil distance. Tap “+” or “-” to fine-tune the pupil distance until you have a clear view. Headset Status Indicator White indicator constant: Powering on or in operation Blue indicator flashing: Powering off Red indicator flashing: Low battery Indicators off: Sleeping or powered off... - Page 16 ① ③ ⑫ ⑦ Aan-uitknop Gezichtskussen Bovenste band Nabijheidssensor ④ Inschakelen: 3 seconden lang drukken Volumeknop Verwijderbaar Zet de headset op en het systeem wordt ⑧ ⑤ Draaiknop Uitschakelen: 3 seconden lang drukken automatisch wakker RGB-perspectiefcamera ⑨ Opnieuw opstarten forceren: 10 seconden lang Zet de headset af en het systeem schakelt Volgcamera Blokkeer de camera niet bij gebruik van het...
- Page 17 Note: The lanyard can be attached to the controller as shown in the image. Controller Status Indicator ① ③ ⑥ Off: Connected or powered off Menu Button Grip Button Joystick ⑦ ② ④ Blue indicator constant: Firmware upgrading Home Button Battery Case Capture Button Blue indicator flashing: Connecting...
- Page 18 Operating Instructions indicator flashes red and blue alternately. Then follow the instructions on the headset screen. Head Control Mode Entering and exiting Sleep Mode When the controllers are not connected,you can interact with the home screen by Method 1: The system will enter Sleep Mode automatically after you take off the moving your head to direct the crosshairs over your intended selection and click- headset for a certain period of time.
- Page 19 Installing glasses spacer Replacing the face cushion If you have glasses collision with headset lens or pressure on the bridge of nose, The face cushion can get flaccid and discolored when cleaned multiple times or please follow the picture to install Glasses Spacer to increase the space. You can used for a long time.
- Page 20 The essential tool for PICO all-in-one VR, helping you manage your headset better...
Need help?
Do you have a question about the 4 Ultra and is the answer not in the manual?
Questions and answers