Advertisement
WARNING
 Do take care to locate and install the booster so that it is not liable to become trapped by a moveable seat or in a door of the vehicle.
This booster is designed ONLY for child weighing 15-36kg (approximately 3-12 years old or under).
Any straps of vehicle seat should be tightened and not twisted.
Failure to properly use this booster increases the risk of serious injury or death in a sharp turn, sudden stop or crash.
DO NOT use another manufacturers soft goods with this booster. See your retailer for Joie replacement parts only.
DO NOT use in any configuration not shown in the instructions.
According to accident statistics, Children are safer when properly restrained in rear vehicle seating positions, rather than front seating positions. For a vehicle with a front passenger air bag, refer to your vehicle owner's manual as well as these instructions for a booster installation.
NEVER leave your child unattended.
NEVER leave luggage or other objects unsecured in a vehicle, they are liable to cause injuries in the event of a collision.
NEVER leave a booster unsecured in your vehicle. An unsecured booster can be thrown around and may injure occupants in a sharp turn, sudden stop or crash. Remove it or make sure that it is securely belted in the vehicle.
Replace the booster after an accident of any kind. An accident can cause damage to the booster that you cannot see.
DO NOT modify your booster or use any accessories or parts supplied by other manufacturers.
NEVER use a booster if it has damaged or missing parts. DO NOT use a cut, frayed or damaged vehicle seat belt.
 The booster can become very hot if left in the sun. Contact with these parts can burn your child's skin. Always touch the surface of any metal or plastic parts before putting your child in the booster.
Please do not use this child restraint if the child restraint has dropped from a significant height, hit the ground at a considerable speed, or has visible signs of damage. We are not responsible to replace if the child restraint has been damaged under these abnormal conditions. A new child restraint will need to be purchased when any of the aforementioned conditions occurs.
NEVER give this booster to someone else without also giving them this manual.
NEVER use a second-hand booster or a booster whose history you do not know.
DO NOT use this booster without the soft goods.
The soft goods should not be replaced with any besides the ones recommended by the manufacturer, because the soft goods constitute an integral part of the booster performance.
DO NOT use any load bearing contact points other than those described in the instructions and marked on the booster.
DO NOT face your booster toward the rear of the vehicle.
To avoid burns, never put hot liquids in your cupholders.
DO NOT use this booster for more than 10 years after the date of purchase, as parts may degrade over time, or from exposure to sunlight, and may not perform adequately in a crash.
After your child is placed in this booster, the safety belt must be used correctly, and ensure that any lap strap is worn low down, so that the pelvis is firmly engaged.
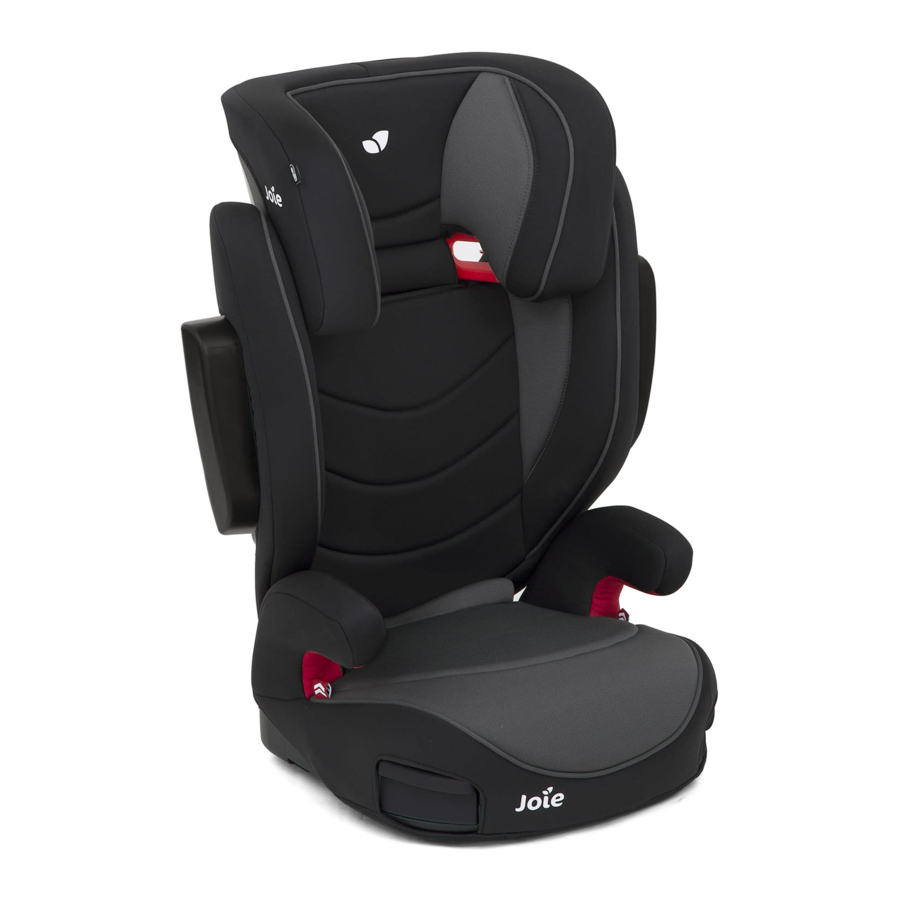
Parts List
Make sure all parts are available before assembly. If any part is missing, please contact local retailer. No tools are required for assembly.

- Head Support
- Lower Back Support
- Armrest
- Base
- Adjustment Button
- Cupholders
- Head Support Adjustment Lever
- Shoulder Belt Guide
- Side Impact Shield
- Latch Connector
This product is suitable for use with children weighing 15-36kg (approximately 3-12 years old).
Please confirm
This booster can be installed using a 3 point retractable adult seat belt approved to ECE Regulation No. 16 or other equivalent standards.
Emergency
In case of emergency or accidents, it is most important to have your child taken care of with first aid and medical treatment immediately.
Product Information
Read all the instructions in this manual before using this product. If in doubt, consult either the booster manufacturer or the retailer.
- This booster is a 'Universal' child restraint. It is approved to UN ECE regulation 44, 04 series of amendments, for general use in vehicles and it will fit most, but not all, car seats.
- A correct fit is likely if the vehicle manufacturer has declared in the vehicle handbook that the vehicle is capable of accepting a 'Universal' child restraint for this age group.
- This booster has been classified as 'Universal' under more stringent conditions than those which applied to earlier designs which do not carry this notice.
For Installation with Latch System and 3-point-belt
- This booster is a 'Semi-Universal' child restraint. It is approved to UN ECE regulation 44, 04 series of amendments for general use in vehicles fitted with ISOFIX anchorages systems.
- It will fit vehicles with positions approved as ISOFIX positions (as detailed in the vehicle handbook), depending on the category of the booster and of the fixture.
- If in doubt, consult either the booster manufacturer or vehicle manufacturer.
| Product | Booster |
| Suitable for | Child weighing15-36kg |
| Mass Group | Group 2/3 |
| Materials | Plastics, metal, fabrics |
| Patent No. | Patents pending |
Product Assembly
Assemble Head Support
see images  -
- 


- Booster taken from the carton as
![]()
- Flip head support and lower back support over as shown.
![]()
Squeeze adjustment lever  -1 and slide two pieces together until they snap into place. -2
Assemble Lower Back Support
see images  -
- 
When attaching backrest to base, please press backrest down strongly."U"-shaped hooks on bottom of backrest will interlock with bars on base.


Shake the backrest to make sure the recline mount is correctly fixed.
Do not use this booster base separately.
Assemble Side Impact Shield
see images  -
- 
Align the side impact shield with the slot of lower back support plastics mounts, and then insert to lock. 
The completely assembled booster is shown as


Height Adjustment for Head Support

see images 
Concerns on Installation
see images  -
- 


Installation with 3-point-belt
see images  -
- 
If vehicle is equipped with ISOFIX, the vehicle lower anchor points may be visible at the vehicle seat crease. See your vehicle owner's manual for exact locations, anchor identification, and requirements for use.
- Place the booster in forward-facing position on a forwardfacing vehicle seat with anchors, hook latch connectors to vehicle anchors.
![]()


NEVER put two latch connectors on one vehicle ISOFIX anchor unless specifically allowed by the vehicle manufacturer.
- Secure the booster firmly by pushing it downward with knee or hand while pulling the adjustment belt.
![]()

- For ease of unhooking, extend the adjustment belt to its maximum length while pressing the adjustment button.
![]()


The latch connectors can be detached for use from the compartment on the bottom where it is stored. 

- Please make sure that the backrest of the child safety seat rests flat against the backrest of the car seat so that the child seat is under no circumstances in a reclined position.
![]()
Pull the vehicle safety belt and pass through the belt path![]() , and then buckle it up.
, and then buckle it up. ![]() -3
-3


Position shoulder belt through the shoulder belt guide shown in  -1
-1
DO NOT position vehicle belt over top of the armrests. It must pass underneath the armrests. -2
The booster can not be used if the vehicle safety belt buckle (female buckle end) is too long to anchor the booster securely. -4
The lap belt must be low own on hips. The booster is shown as
To ensure the correct head support height is obtained, the bottom of the headrest MUST be even with the top of child's shoulders as shown in  and the shoulder belt must be positioned in the red zone as shown in
  .
.

Place a booster firmly against the back of a forwardfacing vehicle seat equipped with a lap/shoulder belt.
Have your child sit in a booster with their back flat against back of a booster.
NOT as shown in . Fasten buckle and pull up on the shoulder belt to tighten ![]() .
.

If the belt lays across child neck, head or face, readjust head support height.
Belt must not be twisted.
Use Cupholders

see images 
Detach Soft Goods

see images 
Open 2 pairs of buttons and 6 pairs of elastics on the back of soft goods to remove it.
Pull down to remove button as -1
To refit the seat pad simply reverse the steps above.
Care and Maintenance
Please wash the soft goods and inner padding with cold water under 30°C.
Do not iron the soft goods.
Do not bleach or dry clean the soft goods.
Do not use undiluted neutral detergent, gasoline or other organic solvent to wash the booster. It may cause damage to the booster.
Do not twist the soft goods and inner padding to dry with great force. It may leave the soft goods and inner padding with wrinkles.
Please hang dry the soft goods and inner padding in the shade.
Please remove the booster from the vehicle seat if not in use for a long period of time. Put the booster in a cool, dry place and somewhere your child cannot access it.

Documents / ResourcesDownload manual
Here you can download full pdf version of manual, it may contain additional safety instructions, warranty information, FCC rules, etc.
Advertisement


Need help?
Do you have a question about the trillo LX and is the answer not in the manual?
Questions and answers