Advertisement
- 1 Product information
- 2 Overview
- 3 Installation
- 4 Tap operation
- 5 Selection of LED intensity
- 6 User interface
- 7 Parameterization via app
- 8 Troubleshooting
- 9 Maintenance
- 10 Filter operation and replacement
- 11 CO₂ cylinder operation and replacement
- 12 Removal of the product
- 13 Safety information
- 14 Documents / Resources
Product information
Franke Mythos Water Hub Sparkling can filter, cool and carbonize tap water. It offers the option of filtered, chilled and carbonated water from a single tap. Mythos Water Hub All-in-One can furthermore boil tap water. It offers the option of filtered, boiling, chilled and carbonated water from a single tap.
Function of the product
Filter
To ensure good water quality and to protect the product against limescale deposits, a filter must be connected to Franke Mythos Water Hub. The filter reduces unwanted flavor carriers and impurities in drinking water before it is dispensed by means of a flow-through process. The filter material binds heavy metal ions such as lead, copper and cadmium. The integrated activated carbon reduces unwanted turbidity, organic impurities, odors and flavors as well as chlorine residues in the filtrate. Depending on the mineralization and hardness degree of local tap water, a different kind of filter should be used.
Capacity
Franke Mythos Water Hub is equipped with a 425 g CO₂ cylinder that delivers approximately 60 liters of carbonated water. Optionally, an external CO₂ cylinder can be added for higher demands. In that case the pressure reducer of the external CO₂ cylinder has to be adjusted to 5 bar. The input pressure on the unit should never exceed 6 bar. The reservoir of the unit holds 2.2 liters of chilled water, 0.6 liters of carbonated water and an additional 4 liters of pressurized boiled water. The flow rate varies, depending on the water supply pressure and the type of tap. When chilled or carbonated water is dispensed, Franke Mythos Water Hub immediately refills with cold tap water.
Cooling principle
The temperature of the carbonated water depends on the temperature of cooled water in the reservoir. The temperature range of chilled and carbonated water is internally adjusted on the optimal temperature set.
Boiling principle (only for Franke Mythos Water Hub All-in-One system)
The temperature range of boiling water can be adjusted between 60 to 105°C. If the temperature setting is adjusted to 105°C, the tap volume is approx. 2.6 liters above 99°C. For higher output quantities, the hot water temperature will be lower while cold water flows into the boiler during the process of drawing water and begins to mix with the hot water.
 Franke Mythos Water Hub does not have a separate boiling water outlet for connecting a mixing valve. If the house installation does not have a hot main water supply that can be directly connected to the tap, it is not possible to draw hot water by adjusting the single-lever mixer on the tap. Alternatively, the temperature of the boiling water can be set between 60 and 105°C using the app.
Carbonation
The CO₂ content of the carbonated water is approx. 5.0 to 5.5 g/l in optimal conditions. This value cannot be adjusted but a mixing with chilled water is possible to reach a lower degree of carbonation. After the withdrawal of carbonated water, there is a short follow-up run of chilled still water to flush the remaining CO₂ out of the line. This function prevents the tap from dripping which is caused physically due to the expansion of CO₂.
Holiday mode
A holiday mode can be activated. Therefore, the device reduces the boiling temperature to 60°C and the temperature of the chilled and carbonated water to 15°C.
Note: The taste and appearance of conditioned water is dependent on many factors e.g. the mineralization and hardness degree of local tap water.
Note: Some tap dripping is normal, especially together with carbonated water. Note: If you are on vacation for more than two weeks, it is recommended to switch off the unit. This is done via unplugging the device or switching it to holiday mode.
Note: If no conditioned water is dispensed for approximately 14 days, we recommend flushing all conditioned water options (filtered, filtered /chilled, filtered/chilled/carbonated, filtered/boiling) for one minute each. This will refill the reservoir with fresh water and ensure optimal water quality.
Overview
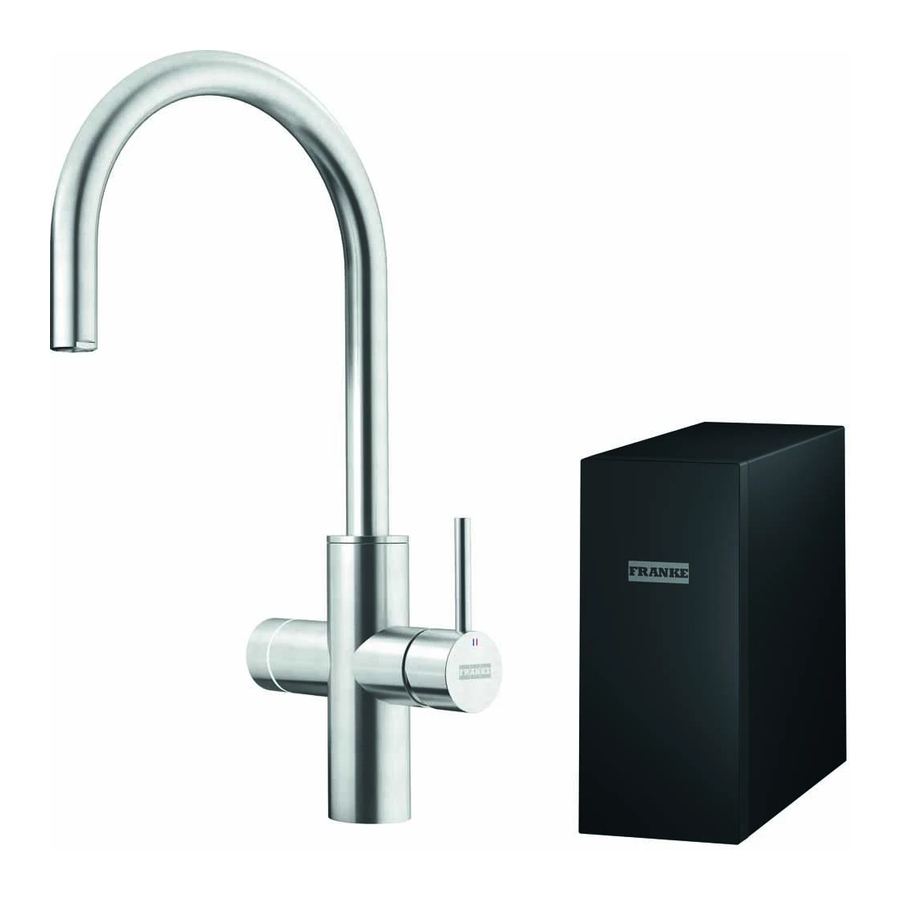
The package of Franke Mythos Water Hub contains the following components:

- Device
- Water filter cartridge
- CO₂ cylinder
- Installation kit
Mythos Water Hub All-in-One - content

Mythos Water Hub Sparkling - content

- Tie-wrap
- Expansion water hose
- Safety valve flat in/out
- T-Joint drain
- Flexible water hose (red tag, 1 m, M15, G1/2'')
- Flexible water hose (blue tag, 1 m, G3/8'', G3/8'')
- T-Piece 3/8''
- Clamp 20/22 mm
- Clipboard screw 4 × 25 pc.
- Hat filter metal EU
- Flat gasket G3/8''
- Stem adapter ASA 0806M
- Flat gasket G1/2'' (only for UK version)
- Adapter 1/2''F – 3/8''M (only for UK version)
- Sheet metal open-end wrench 20/13 mm
Mythos Water Hub All-in-One

Mythos Water Hub Sparkling

- Tap hot water
- Tap cold water
- Tap conditioned water
- Communication cable
- Cold water house installation
- Drain house installation
- Hot water house installation
- Tie-wrap
- Expansion water hose
- Safety valve flat in/out
- T-joint drain
- Flexible water hose (red tag, 1 m, M15, G1/2'')
- Flexible water hose (blue tag, 1 m, G3/8'', G3/8'')
- T-Piece 3/8''
- Clamp 20/22 mm
- Clipboard screw 4 x 25 pc.
- Hat filter metal EU
- Stem adapter ASA 0806M
Franke Mythos Water Hub
Franke Mythos Water Hub can only be connected to designated electronic taps from Franke with a compatible software version.
Check the details in the "Installation manual".
Ambient conditions
The device may only be connected to a water supply with constant drinking water quality according to local specifications and a constant flow pressure between 1 and 10 bar at a water temperature of 5°C to 30°C. The ambient temperature must be between 10°C and 32°C (climate rating: SN) with a relative air humidity of max. 75% and a max. installation altitude of 2000 m above sea level.
Connections
For the installation of Franke Mythos Water Hub, a mains water connection and a GFCI-protected separate power circuit with a suitable mains connection fused by at least 10 A and a permanent voltage supply of 220-240 VAC/50 Hz are necessary. Angle valves must already be installed.
| General specifications | |
| Dispensing water types | Filtered chilled water |
| Filtered carbonated water | |
| Filtered ambient water | |
| Filtered boiling water | |
| Operation | Operation via electronic tap |
| Parametrization | Parametrization via app (BLE) |
| Minimum installation dimensions | Height > 440 mm |
| Width > 200 mm | |
| Depth ≥ 550 mm | |
| Weight netto (empty) | 20 kg |
| Weight netto (filled) | 27 kg |
| Supply voltage | 220-240 VAC/50 Hz |
| Load | 7.5 A |
| Plug | EU-version = Type 303A acc. to CEE7 UK version = Type G/BS 1363 British 3 Pins |
| Max. power consumption | All in One: 1725 W (±10%) Sparkling: 230 W |
| Standby power consumption | All in One: 19 W (cooling & boiling on) Sparkling: 5.5 W (cooling on) |
| Sound pressure level (free- standing) | 37 ± 4 dB in operation mode 0 dB in standby mode |
| IP rating | IPx1 |
| Certifications | CE-UKCA |
| Filtered chilled water | |
| Volume of reservoir | 2.2 l |
| Cooling principle | Direct cooling |
| Temperature control range | approx. 4-10°C, not adjustable |
| Flow rate w/o compensator | approx. 2.5 l/min @ 3 bar |
| Cooling time | ∆T = 10 K in 8 minutes (from 20°C to 10°C) (25°C to 5°C: approx. 35 minutes) |
| Filtered carbonated water | |
| Volume of reservoir | 0.6 l |
| Cooling principle | tank-in tank setup |
| Carbonation | Carbonation system with injection Booster Pump |
| Temperature control range | approx. 4-10°C, not adjustable |
| Flow rate | approx. 2 l/min @ 3 bar |
| Carbonation level | approx. CO content 5.0-5.5 g/l 2 |
| Filtered boiling water (only All in One) | |
| Volume of reservoir | 4.0 l, pressurized boiler |
| Temperature control range | approx. 60-105°C, adjustable via app |
| Flow rate | approx. 2 l/min @ 3 bar |
| Boiling time | 15°C to 100°C: approx. 15 minutes |
| Water heating energy efficiency class | A |
| Filter (check the instruction manual included) | |
| Filter type | Protection Filter (Franke Pro M Connect filter or Franke Clear Water filter) |
| Diameter filter cartridge | 95 mm |
| Height filter cartridge | 245 mm |
| Filter head | Bayonet |
| Filter capacity | Approx. 1700 liter at 10 °dH |
Tools required for installation
- 1 × wrench size 24 mm,
- 1 × wrench size 22 mm,
- 1 × wrench size 20 mm,
- 1 × wrench size 19 mm,
- 1 × wrench size 13 mm,
- carpet knife,
- crosshead screwdriver (or screwdriver & PZ bit),
- handsaw,
- tape measure,
- pencil.
Depending on the existing infrastructure additional tools may be required, e.g. slotted screwdriver for corner valve.
Never use serrated tools in order to avoid damage. Where necessary, always use the appropriate tools for tightening the coupling.
Cleanliness and hygiene during installation
Contamination of water-bearing parts (e.g. seals, hose connections, threads, etc.) must be strictly avoided during installation. We recommend thorough hand cleaning and avoiding skin contact with surfaces that will later be in contact with drinking water.
Installation
General points for installation
Placement of Franke Mythos Water Hub
Ensure sufficient space in the kitchen cabinet and easy accessibility for service and maintenance work. There must be enough space at the back of the unit for the warm air from the exhaust to escape (min. 5-10 cm). Therefore, Franke recommends a depths of min. 550 mm, a width of min. 200 mm and a height of min. 440 mm for the cabinet.
Ventilation of the kitchen cabinet
For a good performance of Franke Mythos Water Hub, the kitchen cabinet in which the unit is installed must be sufficiently ventilated. Therefore, an opening of approx. 20 × 40 cm (800 cm²) in the rear panel of the cabinet or similar openings in the base plate with at least 5 cm clearance to the floor and at the sides must be provided.
We recommend installing Franke Mythos Water Hub in the following order:
- Prepare the installation.
- Install the safety valve (only for All in One unit).
- Connect the water supply.
- Connect device.
Install the pressure relief valve as high as possible in the kitchen cabinet (only for All-in-One unit).
During installation, tight each connection carefully.
Installation steps
When transporting Franke Mythos Water Hub to the installation site, cooling fluid may have run into the lines. To ensure that the cooling fluid has run back, the device may only be switched on following a pause of at least 2 hours.
Note: The installation can be prepared, but the power supply for the device must not be switched on at this stage.
Check the details in the "Installation manual".
Prepare the installation (only for All in One unit) ("Installation manual")
- Check if all installation requirements are fulfilled e.g. space, connections etc.
- Turn off the mains water supply and close the angle valves. If not available, mark the existing cold and hot water connection.
- Install tap.
Install the safety valve (only for All in One unit) ("Installation manual")
- The shut-off cock of the safety valve (3) must be closed. Check by turning the cock to the right. The expansion relief valve of the safety group is factory calibrated to 8 bar.
Notice: For safety reasons, water may escape from the blow-off line when heating up during operation. - Connect the flexible water hose (5, red tag) to the safety valve (3).
Notice: Install the safety group against the flow direction indicated by the arrow on the backside of the safety group. - Connect the expansion water hose (2) to the safety valve (3).
Notice: Ensure that the hose is fully inserted and that there is no gap between the safety valve and the hose from which water can leak. - Mount the safety valve (3) at the highest point below the deck in the cabinet and screw in the clipboard screws (9).
Notice: The safety valve (3) must be positioned clearly above the connection to the drain. This ensures that the water flows only into the drain and not back to the safety group. The distance to the unit must be < 1 m to use the enclosed flexible water hose. - Connect the T-join drain (4) to the drain. Connect the other end of the expansion water hose (2) to the T-joint drain (4).
Notice: The drain of the safety valve needs to be placed after the syphon. If necessary, the expansion water hose can be shortened with a knife. Make sure the cut edge is straight. Ensure that the hose is fully inserted.
Notice: Form a water lock with the expansion water hose (2) and secure it with the tie-wrap (1).
Connect the water supply ("Installation manual")
- Connect the T-piece (7) and hat filter (10) to the cold water installation (E) and cold water connection (B).
For UK: connect the adapter (18-19) between cold water installation (E) and T-piece (7).
Notice: It is extremely important to install the hat filter. - Connect the flexible water hose (6, blue tag) to the T-piece (7).
- Connect the hot water connection (A) of the tap to the hot water installation (G).
For UK: connect the adapter (18-19) between cold water installation (E) and T-piece (7). - Connect the unit connection (C) of the tap to the stem adapter (11).
Connect Franke Mythos Water Hub ("Installation manual")
- Connect the flexible water hose (6, blue tag) to the unit ("Water IN" connection).
- Connect the flexible water hose (5, red tag) to the unit ("Safety Valve" connection).
Notice: Make sure that the hose is not blocking any other connection. - Connect the stem adapter (11) to the unit ("Water OUT" connection).
Notice: Make sure that the hose is not blocking any other connection. - Connect the communication cable (D) of the tap to the unit ("Com" connection).
Notice: Make sure that the plug is fully inserted.
Notice: Check that there is enough room for all the components and make sure that the hoses are not bent, twisted or pulled tight. They should be routed without kinks. Do not place multiple socket outlets or portable power supplies at the rear of the unit.
Filter installation ("Installation manual")
- Remove the front cover.
- To remove the cleaning cup tilt the filter head forward and turn the cleaning cup by approx. 90 degrees to the left.
Notice: The cleaning cup is required for the regular cleaning procedure and shall be kept. - Insert the filter cartridge into the filter head and turn the filter cartridge by approx. 90 degrees to the right until it cannot be tightened any further. Tilt the filter head backwards.
- Do not install the CO₂ cylinder yet.
- Turn on the mains water supply, open the angle valves and check the installation for seal integrity. Water must not leak from any point.
Note: It is recommended to use only filter with RFID tag (i.e. Pro M Connect filter) otherwise the filter LED (B) lights up red instead of green.
Start-up procedure
During the start-up, Franke Mythos Water Hub must be flushed once; this is done automatically during the process.
To prepare the unit for use, the start-up is recommended in the following order:
- Make sure that the tap is correctly aligned above the sink.
- Check the cold and warm water connection with the manual handle to make sure that the water supply is working.
- Plug in the power cord.
Notice: Make sure that the power cord is not bent, trapped or damaged. - The first start-up process takes approx. 20 seconds.
Notice: Do not interrupt the process by pressing any button or unplugging the device. - After the device starts up, the LEDs on the tap will light up. Press the Reset/Standby button on the unit briefly (<2 s) to run the first flushing program.
- The first flushing program takes approx. 5-6 minutes.
Notice: Do not interrupt the process by pressing any button or unplugging the device. Otherwise, a full restart is required. The device must be unplugged and the process must be restarted from step 3. - After the first flushing program, the LEDs on the knob will light up.
Notice: The tap must already be filled with water, i.e. the initial flushing must have been completed before you activate the CO₂ supply.
CO₂ cylinder installation ("Installation manual")
- Remove the protective cap from the CO₂ cylinder, tilt the CO₂ connection forward and screw the CO₂ cylinder into the CO₂ pressure reducing valve by turning it to the right until it cannot be tightened any further. Tilt the CO₂ connection backwards.
Notice: The CO₂ cylinder must be thoroughly tightened so that a tight seal is formed. Some gas may escape, and a hissing noise may be heard. Keep tightening, until it can not get any further. No more gas should be heard escaping. - After the CO₂ cylinder is assembled, the LEDs on the user interface will light up.
- Install the front cover.
- The unit cools down and heats up for approx. 25 minutes, after which the device is ready for use.
Notice: The final carbonation quality will be established after using the product for a few days.
Tap operation
Operation of electronic knob
- The electric knob in standby mode doesn't react on rotary movement.
- To activate the electronic knob press briefly 1x.
![]()
- Turn forward or backward the electronic knob to choose desired kind of water - LED color is changing with the move.
![]()
- For continuous flow of chosen water hold electronic knob pressed.
Deactivation: Release the knob.
![]()
- For chosen amount of water 0.5, 1 or 2 liters press briefly the electronic knob according to the information in the table below.
Deactivation: Press briefly 1x.
![]()
- Hold the object to be filled close to the tap so that the object surrounds the delivery opening of the tap. This will prevent water from splashing.


| LED color | Function | Operation | LED display | |||
| Press | Press and hold | Press 2x | Press 3x | |||
| White | Standby mode* | Activate knob by pressing 1x LED | - | Lights | ||
| Red | Boiling water | Continuous water flow until releasing the knob | 1 l water output (interruption by additional press) | 2 l water output (interruption by additional press) | Running | |
| Blue Turquois | Cold filtered water Filtered water | Continuous water flow until releasing the knob | 0.5 l water output (interruption by additional press) | 1 l water output (interruption by additional press) | ||
| Green | Cold "sparkling" water | |||||
| Light green | Cold "sparkling" water "medium" | |||||
* No function with rotary movement
Selection of LED intensity
After 60 seconds of not using the tap it will switch automatically into the sleeping mode status, 50% LED intensity.
To change the sleeping mode setting you have to follow the below instruction.
- Activate the tap by pressing the electronic knob once.
- Press the electronic knob 5 times.
- The LED start flashing.
- Turn the knob to the preferred setting by turning the knob forward or backwards:
- 50% intensity, default,
- 10% intensity,
- Switched off fully.
- Press and hold the electronic knob for 2 seconds to confirm. LED flashes 3 times for confirmation.
User interface

- CO₂-level
- Filter runtime
- Cleaning
- Connectivity
- Reset/Holiday mode
CO₂-level
| Status LED | Meaning |
| Constant: Green | CO₂ > 3 bar |
| Flashing: Red | CO₂ < 3 bar/CO₂ cylinder empty |
Filter runtime
(only for filters with RFID tag)
| Status LED | Meaning |
| Constant: Green | Remaining filter time > 10% |
| Flashing: Red | Remaining filter time ≤ 10% |
| Constant: Red | Remaining filter time ≤ 0% or last filter change > 6-12 months depending on water hardness i.e. filter change required |
Cleaning
| Status LED | Meaning |
| Constant: Green | No cleaning required |
| Flashing: Red | Cleaning required if last cleaning > 6 months |
| Flashing: Blue (countdown) | Cleaning process running |
To start the cleaning program, press the button for 5 seconds.
Connectivity
| Status LED | Meaning |
| Constant: White | Connection active |
| Off | Connection inactive |
| Flashing: Blue | Connection pairing mode |
The device can be connected to an app.
- To activate the connection, press the button for 5 seconds until all LEDs are flashing blue.
- To deactivate the connection, press the button for 10 seconds.
Reset/Holiday mode
| Status LED | Meaning |
| Constant: Green | Operation mode active |
| Flash: Green | Device restarts |
| Flash: Red | Holiday mode activated |
- To reset/restart the unit, press the button for 5 seconds.
- To start the holiday mode, press the button briefly for less than 2 seconds.
- To wake up the unit from holiday mode, press any button.
In the event of an error, all buttons flash red.
Disconnect the power supply for at least 10 seconds and restart the device. If that does not help, please contact the customer service.
Parameterization via app
The device can be parameterized via an app to adjust different settings e.g. the temperature of boiling water.
Download the app on the App Store or on Google Play.


Troubleshooting
| Fault | Possible Cause | Solution |
| Water leakage at the tap connection | Connecting pipe of cold/hot water loose. | Tighten with an open-jaw spanner. |
| Connecting pipe of cold/hot water union seal faulty or damaged. | Replace the seal. | |
| Water leakage at the connection to the drain | Too little insertion depth or the pipe has not been cut straight. | Check the insertion depth of the hose and the cutting edge. |
| Angled installation of the safety valve. | Check that the safety valve is installed horizontally and there is no gap to the drain hose. | |
| Water leakage at the connections of the device | Connecting pipe of cold/hot/conditioned water loose. | Tighten with an open-jaw spanner. |
| Connecting pipe of cold/hot/conditioned water union seal faulty or damaged. | Replace the seal. | |
| Water leakage at a hose | Brittle or broken hose. | Replace the leaking hose. |
| Water leakage in the device | Leakage in the device. | Unplug the device and contact customer service. |
| The safety valve leaks | Expansion during water heating. | No failure, normal functioning. |
| Continuous dropping due to dirt. | Manually operate the knob on the expansion relief valve to eliminate dirt particles. | |
| Replace the safety valve. | ||
| Hissing noises from the unit | The CO₂ cylinder is not correctly tighten. | Rotate the CO₂ cylinder to the right with decent force until it cannot be tightened any further. |
| Use a new CO₂ cylinder as the sealing surface might be damaged. | ||
| The internal pressure reducer is faulty or damaged. | Contact customer service. | |
| Tap supplies no water | The angle valves of the water supply installation are closed. | Open the angle valves, check the working of the hot and cold water. |
| The main water valve is closed. | Open the main water valve. | |
| Hoses are kinked. | Straighten the kinked hoses. | |
| Tap is clogged. | Inspect the tap and clean the aerator. | |
| Filtered, chilled, carbonated, boiling water cannot be drawn | Filter not installed correctly. | Rotate the filter cartridge to the right with decent force until it cannot be tightened any further. |
| No connection between the tap and the device. | Plug in the cable connector of the communication cable securely. | |
| The installation kit is installed incorrectly. | Check the correct installation of the installation kit. | |
| Boiling water can not be drawn | Device was used without filter in areas with high content of lime in drinking water. | Contact customer service. |
| The boiler is faulty. | Contact customer service. | |
| CO₂ is drawn out of the tap instead of water | The high-pressure pump is faulty. | Contact customer service. |
| The drawn water contains no or little CO₂ | The CO₂ cylinder is empty or not connected. | Replace or correctly connect the CO₂ cylinder. |
| Drain about 1 liter of sparkling water if the CO₂ cylinder was empty before. | ||
| Check the connecting hoses for correct installation. | ||
| If an external CO₂ cylinder is used, the pressure reducer must be adjusted to 5 bar. | ||
| Use only standard CO₂ cylinders with 425 g and a trapezoidal thread (TR 21×4). | ||
| The water is not cooled sufficiently and therefore cannot absorb enough CO₂. | Wait until the cooling unit has cooled the water to a sufficient level. | |
| The pressure reducer in the device is faulty. | Contact customer service. | |
| The drawn chilled and carbonated water is too hot | A lot of water was drawn within a very short time. | Wait until the cooling unit has cooled the water to a sufficient level. |
| The cooling is faulty (compressor is not running). | Contact customer service. | |
| Overheating of the device. | Ensure sufficient ventilation in the cabin and reduce ambient temperature. | |
| The device operates with less performance | The hot water mains connection is used for the water inlet of the device. | Ensure that the cold water mains connection is used for the inlet of the device. |
| The device cannot be switched on | The mains plug is not inserted. | Insert the mains plug into a GFCI- protected wall plug socket. |
| The mains plug or cable is damaged or defective. | Contact customer service. | |
| No power supply. | Check the socket fuse, if any, and the GFCI. | |
| Contact your electrical system installer. | ||
| Leakage sensor active. | Unplug the device and contact customer service. | |
| Software problem. | Disconnect the power supply for at least 10 sec and restart the device. | |
| Short-circuit in the device. | Unplug the device and contact customer service. | |
| The cleaning process is not running | Cleaning cup not installed correctly. | Rotate the cleaning cup to the right with decent force until it cannot be tightened any further. |
| The device cannot connect to the app | Connectivity on the device is deactivated. | Activate the connection. |
| The device shows an unknown color code | Failure of the device. | Disconnect the power supply for at least 10 sec and restart the device. |
| Contact customer service. |
If you can't manage your malfunction or defect please contact the Franke service desk, installer or retailer.
Maintenance
General maintenance
- Clean the tap only with Franke tap cleaner. Visit our Franke webshop.
Do not use cleaning agents containing a solvent or acid, such as lime scale removers, household vinegar or cleaning agents with acetic acid. These substances damage the surface. The tap will become matt and scratched.
- Limescale deposits can be prevented by drying the tap after use.
- If limescale deposits occur, remove these using a citric acid-based cleaning agent.
- Always use original Franke parts for maintenance or repair. This guarantees the safety and proper function of the product and safeguards any warranty claims.
- Replacement or repair of parts may only be carried out by Franke Service.
Cleaning
For hygienic and health reasons, the Franke Mythos Water Hub must be cleaned every 6 months. We recommend the cleaning of the unit in the following order:
- Make sure that the tap is correctly aligned above the sink during the cleaning process.
- Remove the front cover.
- If a cleaning process is required, the LEDs on the user interface will light up.
- Tilt the filter head forward, turn the filter cartridge by approx. 90 degrees to the left and pull it down. This will unlock it from the filter head and enable it to be removed.
Notice: During this process, incoming tap water supply and outgoing filtered water valves in the filter head shut-off automatically. It may happen that a small amount of expansion water leaks from the filter head due to peaks in pressure. Please keep this in mind and place a suitable container underneath the filter head. - Insert one cleaning tablet (Franke recommend to use "Bevi Tab Aqua", alkaline cleaning tablets) into the cleaning cup.
Notice: Using alternate cleaning tablets may result in the device not being cleaned properly. - Insert the cleaning cup into the filter head and turn the cleaning cup by approx. 90 degrees to the right until it cannot be tightened any further. Tilt the filter head backwards.
- Press the Cleaning button (C)
![]() on the unit for 5 seconds until the LED (C) is flashing blue to run the cleaning program.
on the unit for 5 seconds until the LED (C) is flashing blue to run the cleaning program. - The cleaning program takes approx. 75 minutes. In the meantime, a countdown will be visible on the user interface. First, all LEDs light up green and then gradually switch off one by one.
Notice: Do not interrupt the process by pressing any button or unplugging the device. Otherwise, the process will break off and needs to be finished with a 40-minute flushing process by pressing the blue flashing Cleaning button (C)![]() .
.
Before flushing process, remove the cleaning cup and insert a filter cartridge (new or a used one with remaining filter validity). - After the cleaning program, the LEDs on the user interface will light up.
- Tilt the filter head forward, turn the cleaning cup by approx. 90 degrees to the left and pull it down. This will unlock it from the filter head and enable it to be removed.
Notice: During this process, incoming tap water supply and outgoing filtered water valves in the filter head shut-off automatically. It may happen that a small amount of expansion water leaks from the filter head due to peaks in pressure. Keep this in mind and place a suitable container underneath the filter head.
Notice: The cleaning cup is required for the regular cleaning procedure and shall be kept. - Insert the filter cartridge (new or a used one with remaining filter validity) into the filter head and turn the filter cartridge by approx. 90 degrees to the right until it cannot be tightened any further. Tilt the filter head backwards.
- After a valid filter cartridge is inserted, press the filter button (B) on the unit briefly (<2 s). The LEDs on the user interface will light up.
- Install the front cover.
 on the unit for 5 seconds until the LED (C) is flashing blue to run the cleaning program.
 It is recommended to clean the ventilator fan of the unit once a year with a brush or a vacuum cleaner.
Descaling tap aerator
Always use a citric acid-based descaling agent. Other substances will damage the material!
Loosening and tightening can be made easier by wrapping an elastic band around the sleeve of the tap aerator. Take care that the sleeve of the tap aerator is not damaged by the use of tools.
Limescale deposits will appear on and alongside the tap aerator.
- Unscrew the sleeve of the tap aerarator.
- Clean the tap aerator using a suitable descaling agent.
- Place the tap aerator into the sleeve.
- Place the gasket onto the tap aerator and screw on the sleeve finger-tight.
Check the details in the "Installation manual".
Repairs
The device shall only be repaired by Franke or by qualified personnel trained by Franke. Opening Franke Mythos Water Hub by unqualified personnel voids the warranty.
To ensure safe operation, use only the spare parts specified by the manufacturer. Otherwise, all warranty and liability claims against the manufacturer will be void.
Filter operation and replacement
A reliable system function can only be achieved if the filter cartridge is replaced on a regular basis. The change cycles depend on the application and associated water consumption.
We recommend replacing the filter cartridge no later than 12 months depending on usage.
Failure to replace the filter will void the warranty.
If the filter is not used for more than four weeks, the filter cartridge must be replaced.
Reprocessing of used filter cartridges is not possible. Used filter cartridges can be disposed of hazard free in domestic waste.
Filter replacement steps
We recommend replacing the filter cartridge in the following order (check the details in the "Installation manual"):
- Make sure that the tap is correctly aligned above the sink.
- Remove the front cover.
- If a new filter cartridge is required, the LEDs on the user interface will light up.
- Tilt the filter head forward, turn the filter cartridge by approx. 90 degrees to the left and pull it down. This will unlock it from the filter head and enable it to be removed.
Notice: During this process, incoming tap water supply and outgoing filtered water valves in the filter head shut off automatically. It may happen that a small amount of expansion water leaks from the filter head due to peaks in pressure. Please keep this in mind and place a suitable container underneath the filter head. - Insert the filter cartridge into the filter head and turn the filter cartridge by approx. 90 degrees to the right until it cannot be tightened any further. Tilt the filter head backwards.
- If the filter cartridge has an RFID tag, the device recognizes the new filter and the installation date and the filter counter are reset automatically.
If the filter cartridge has no RFID tag, press the Filter button (B)![]() continuous to light up red.
continuous to light up red. - The light on the electronic knob will be orange; press the electronic knob for starting the flushing program. This takes approx. 2-3 minutes.
Notice: The flush water could be milky or cloudy at first. This is due to the dispersing air and will clear up quickly. - Install the front cover.
 continuous to light up red.
Filter setting for water hardness
- Keep knob pressed for 10 sec. LED starts flashing.
- Turn backwards for corresponding water hardness setting.
- Press button for 2 sec. for selection confirmation. LED flashes 3x briefly for setting confirmation.
| Water hardness | LED color | Filter lifetime |
| <10°dh* | light blue | 12 months |
| 10-15°dh | yellow | 10 months |
| 15-20°dh | light green | 8 months |
| >20°dh | purple | 6 months |
| * default setting | ||
| LED color | Warnings for filter change | |
| Orange | 1 month before filter change, LED lights up orange constantly (50%), at end of runtime LED orange pulsating | |
| Red/Orange | No filter/RFID tag not detected | |
CO₂ cylinder operation and replacement
After approx. 60 liters of carbonated water have been drawn, the water jet becomes weaker and the carbon dioxide content lower.
Below 3 bar, the device shows a signal on the keyboard and on the tap to replace the CO₂ cylinder. If it is completely empty, no carbonated water can be drawn from the unit.
The system supports CO2 cylinders without additional flavour with 425 g and a trapeizodal thread. It is compatible with the standard cylinders available from major marketplaces.
- CO₂ cylinders shall be maintained or repaired only by authorized personnel.
At the end of its life, if for example the sealing is insufficient, it must be disposed of locally in accordance with the applicable regulations or better be returned with the local bottle deposit system.
CO₂ cylinder replacement steps
We recommend replacing the CO₂ cartridge in the following order (check the details in the "Installation manual"):
- Remove the front cover.
- If a new CO₂ cylinder is required, the LEDs on the user interface will light up.
- Tilt the CO₂ connection forward and slowly unscrew the used CO₂ cylinder by turning it to the left. This will unlock it from the CO₂ pressure reducing valve and enable it to be removed.
Notice: The empty CO₂ cylinder can be returned at your local return station for a refill. - Remove the new CO₂ cylinder from its packaging and check for any damages.
- Remove the protective cap from the new CO₂ cylinder and screw the CO₂ cylinder into the CO₂ pressure reducing valve by turning it to the right until it cannot be tightened any further. Tilt the CO₂ connection backwards.
Notice: It is important that the CO₂ cylinder is thoroughly tightened so that a tight sealing is formed. Some gas may escape, and a hissing noise may be heard. Keep tightening, until it cannot get any further. No more gas should be heard escaping. - After the CO₂ cylinder is assembled, the LEDs on the user interface will light up as shown on the left.
- Install the front cover.
| LED color | Warnings for CO₂ cylinder change |
| Green | If pressure <3 bar, LED pulses green; xL soda can still be obtained |
Removal of the product
We recommend removing the product in the following order (check the details in the "Installation manual"):
- Make sure that the tap is correctly aligned above the sink.
- Unplug the power cord.
- Turn off the mains water supply and close the angle valves.
- Remove the front cover.
- Tilt the CO₂ connection forward and slowly unscrew the used CO₂ cylinder by turning it to the left. This will unlock it from the CO₂ pressure reducing valve and enable it to be removed.
- Install the front cover.
- Disconnect the communication cable (D), flexible water hose (6, blue tag) and the stem adapter (11) at the end of the unit water connection (C).
![]()
Danger of scalding! The safety valve (3) with the flexible water hose (5, red tag) should never be disconnected from the unit! - (Only for All-in-One device) Demount the safety valve (3) from the wall and disconnect the expansion water drain hose (2).
- The unit with the connected safety valve can now be safely removed from the cabinet.
![warning]() Notice: The Franke Mythos Water Hub must always be transported in appropriate packaging. If a device is returned to Franke, it must be shipped without a CO₂ cylinder.
Notice: The Franke Mythos Water Hub must always be transported in appropriate packaging. If a device is returned to Franke, it must be shipped without a CO₂ cylinder.
Safety information
Intended use
Install the product as described in this manual and in accordance with the applicable installation, safety and local water supply regulations!
The system is designed for indoor use in a private kitchen in households, usually in the kitchen environment. It may also be used in semi-public places, such as a staff kitchen in stores, offices or other business establishments, if the performance limitations are observed.
The user is responsible for all cleaning and maintenance requirements.
Any use beyond the intended use is considered misuse.
Unintended use
The installation of Franke Mythos Water Hub is not permitted:
- In areas where there is an increased risk of contamination, e.g. in dusty, unventilated or humid environments or in areas around doors and windows.
- On uneven or sloping surfaces or in the immediate vicinity of toilets.
- In escape routes.
- Directly next to a heat source e.g. heater (at least 20 cm away) and areas with direct sunlight over a long period of time.
- In places that make cleaning and maintenance of the unit difficult.
- In places without sufficient ventilation.
- Outdoors.
Safety notes

There is a CFC-free refrigerant in the cooling circuit of the unit. It is flammable and may leak if the cooling circuit is damaged!
- Make sure that no parts belonging to the cooling circuit are damaged.
- If the coolant circuit should ever be damaged, avoid open fire and ignition sources and ensure good ventilation.
- Do not connect a defective unit to the mains.
There is a danger to life due to suffocation if CO₂ is inhaled!
- The minimum room size in which the system is installed must be at least 5 m2. If the room has a ceiling height of less than 2 m, this value increases.
- If larger cylinders are used, the free floor space must be matched proportionately to the volume.
- The use of an external CO₂ cylinder is in the responsibility of the user.
Live parts inside the device!
- The device may only be opened by trained and qualified personnel.
Install the product as described in this manual and in accordance with the applicable installation, safety and local water supply regulations.
Do not use the product for purposes other than those for which it is intended as described in this manual.
Modifications in or on the device are only permitted by Franke or by qualified personnel trained by Franke.
To ensure safe operation, use only the spare parts specified by the manufacturer. Otherwise, all warranty and liability claim against the manufacturer will be void.
This appliance is not intended for use by persons (including children) with reduced physical, sensory, or mental capabilities unless they are supervised or instructed in its use by a person responsible for their safety.
This appliance can be used by children aged from 8 years and above and persons with reduced physical, sensory or mental capabilities or lack of experience and knowledge if they have been given supervision or instruction concerning use of the appliance in a safe way and understand the hazards involved. Cleaning and user maintenance shall not be made by children without supervision.
Children should be supervised to ensure that they do not play with the appliance.
Keep the plug and the cable out of the reach of children.
People who are not yet familiar with Franke Mythos Water Hub must be instructed how to use it safely and be informed of the potential hazards especially associated with the use of the boiling water tap.
For immunocompromised persons or babies, it is generally recommended to boil the water. When using a filter with decalcification (Pro M Connect filter), the water in the filter will be enriched with sodium and may cause problems for sodium-sensitive persons or babies. If necessary or in doubt, contact a physician or customer service.
Restrictions of use for vulnerable individuals: According to the recommendations of the German Society for Hospital Hygiene and the Robert Koch Institute, drinking water from water dispensers is not recommended in health care facilities and nursing homes for the elderly, due to possible immune deficiencies of the patients caused by illness, therapy or age. Likewise, the consumption of tap water and thus also the use of water from drinking water dispensers is generally to be avoided for persons with immune deficiency.
The device is designed for indoor operation in a closed room (usually a kitchen), e.g. below a sink. It may only be connected to a water supply with constant drinking water quality according to local specifications. In drinking water systems with pressure rinsers, pressure variations can lead to problems with the outflow pressure.
The device may only be connected to a GFCI-protected mains connection.
Always use the hose set delivered with the device. The current one, available in the installation, cannot be reused.
In the event of adverse changes to the water quality within the domestic installation due to construction work in the building, it must be ensured that the unit is cleaned and disinfected by the user before recommissioning. Any debris (e.g. rust particles) from the water line may harm the function of the unit and must be avoided.
At the installation location, Franke Mythos Water Hub, shall be protected from mechanical damage, heat and direct sunlight, open flames and the danger of frost.
The device shall be placed in an upright position.
Connect the plug to a socket complying with current regulation, located in an accessible place.
For Class I appliances, check that the domestic power supply guarantees adequate earthing.
The device requires a permanent air exchange to ensure that the installation site cannot heat up due to the warm exhaust air. An opening in the rear panel of the cabinet or a similar opening in the base plate must be provided.
The power cable shall be laid in such a way that no damage can occur. If the cable or the plug is damaged, it must be replaced by a specialist. If the signal cable to the tap is damaged, the complete tap must be replaced.
A damaged power cable must be replaced with an identical one by Franke or by qualified personnel trained by Franke.
Check the hose supply lines to the tap and the device once a year. A leak at those points will immediately lead to water damage. If necessary, contact the customer service.
All standard CO₂ cylinders without additional flavor with a volume of 425 g and a trapezoidal thread (TR 21×4) may be used in the unit. The actual sealing surface of the CO₂ cylinder should be clean and free of any scratches or dents. When screwing in the cylinder, always ensure that it is fitted tightly. When screwing in, there may be a slight hissing sound and a small amount of CO₂ may escape, which is normal.
CO₂ cylinders are under pressure. Protect them from over heating by direct sunlight or other heat sources. Store the CO₂ cylinder in an environment where heating of the cylinders cannot occur. In case of using an external CO₂ cylinder, the instructions of the supplier shall be strictly followed. The CO₂ cylinder should never be laid down horizontally.
If CO₂ escapes into the room, ventilate the room, and leave it for some time to ensure a sufficient supply of fresh air. Even the total amount inside of a 425 g cylinder is not sufficient to reach lifethreatening concentrations in the air if it escapes.
If you transport the unit, the CO₂ cylinder shall be uninstalled.
Do not use osmosis water or highly filtered water in the system. It can lead to problems in the level control.
It is not permitted to operate Franke Mythos Water Hub without a filter.
If Franke Mythos Water Hub is connected to a water supply with a water softener and the water hardness is below 7°dKH a freshwater filter (Franke Clear Water filter) should be used instead of a standard filter with decalcification (Franke Pro M Connect filter).

Never use serrated tools in order to avoid damage. Where necessary, always use the appropriate tools for tightening the coupling.
Always keep safety tags and notes on the product in a legible condition. Replace damaged safety tags and notes immediately!
At the installation location, Franke Mythos Water Hub must be protected from mechanical damage, heat and direct sunlight, open flames and the danger of frost.
Tiled and stone sinks will not withstand boiling water; the difference in temperature can cause these to crack. Always open the cold water tap when pouring out boiling water and preferably pour the boiling water directly into the drain.
As a result of the ongoing improvement of our products and/or systems, illustrations in this document may differ from the appliance as delivered.
Filter cartridge
The use of a Franke filter is mandatory to protect the product against limescale deposits. It is mandatory to change the filter based on the water hardness table.
After storage at a temperature of 0°C, the filter must first be stored for 24 hours at room temperature before it is installed.
The filter cartridge must not be opened or damaged.
The filter cartridge and the system must be intensively flushed after a prolonged standstill period and/or during maintenance work (2 liters of flushing water after 1 week standstill; 10 liters of flushing water after 4 weeks' standstill).
The filter cartridge must be replaced if, after commissioning, it has not been in operation for 3 months.
Support and Warranty page

Documents / Resources
References
Download manual
Here you can download full pdf version of manual, it may contain additional safety instructions, warranty information, FCC rules, etc.
Advertisement


Need help?
Do you have a question about the Mythos and is the answer not in the manual?
Questions and answers