
Subscribe to Our Youtube Channel
Related Manuals for Franke Maris Water Hub


Summary of Contents for Franke Maris Water Hub
- Page 1 Maris Water Hub EN Installation and user manual 3-in-1 mechanical boiling water system Support and Warranty page...
-
Page 2: Table Of Contents
Table of contents About this manual Safety information General Filter cartridge Warranty Installation instructions Product information System Active boiling mechanical Filter Boiler Installation General starting points for installation Installation steps Operation Operation of boiler Decommissioning boiler Taking boiler out of service Switching on for the first time Tap operation Boiling water handle operation... - Page 3 Maintenance General maintenance Replace filter (120.0305.558) Descaling tap aerator Disposal...
-
Page 4: About This Manual
Use the device described in this user manual commissioning of the product. only according to the intended use. Symbol Meaning FRANKE reserves the right to make modifications to the product without prior Warning symbol. Warning against notice. All information correct at time of risks of injury. -
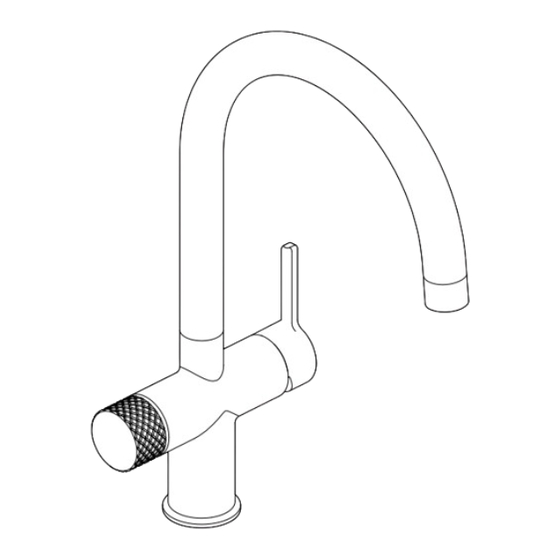
Page 5: Tap
Filter cartridge www.franke.com Franke cannot be held responsible for The use of a Franke filter is mandatory costs, damage or personal injury if the to protect the product against lime scale product is not operated in accordance with deposits. -
Page 6: Installation Instructions
Installation instructions Never use serrated tools in order to avoid damage. Where necessary, always use the appropriate tools for tightening the coupling. Minimum bending radius after installation min : Ø DN 6 = 50 mm Ø DN 8 = 60 mm Ø... -
Page 7: Product Information
Product information System Water supply pressure (min.) 100 kPa/14.5 psi/1 bar Water supply pressure (max.) 500 kPa/72.5 psi/5 bar Flow rate boiling water 2 - 4 l/min * 2.5 bar Flow rate cold water 5 - 9 l/min * Flow rate hot water 5 - 9 l/min * * The flow rate varies, depending on the water supply pressure and the type of tap. -
Page 8: Filter
Particle Microplastics The use of a Franke filter is mandatory to protect the product against lime scale deposits. It is mandatory to change the filter based on the water hardness table. Failure to replace your filter will invalidate your warranty. -
Page 9: Boiler
Boiler Boiler 4 liters Dimensions [H x W] 340 x 229 mm Net weight 4.5 kg Contents Voltage 230 VAC Power 2100 W (+5%/-10%) Load 9.2 A Standby mode max. 14 W IP classification IPX4 Storage temperature <105°C Heating time [ΔT 100 K] 15 min Operating pressure (max.) 800 kPa / 116 psi / 8 bar... - Page 10 Icon legend Product information Warning Sign / Caution / Hazard Scope of Delivery Inspect Montage Determine position Tooling Equipment Open Do not use tools Close Measure Discard Drill Cold water Screw Warm water Spanner Boiling water Do not / Forbidden result Tighten finger-tight Do, OK! / Result Check push fitting...
-
Page 11: Installation
Installation General starting points for installation Installation steps Perform the following steps before starting 1. Installing 3-in-1 tap (see page 14) installation. 2. Installing filter (see page 15) 1. Stop valves must already be installed. 3. Installing pressure relieve valve (see page 16) 2. - Page 13 min. 40 mm Ø 35 mm min. 30 mm ø 35 mm max 45 mm max 37 mm > 10 mm < 10 mm R max ≥ 50 mm...
- Page 14 19 mm 24 mm G3/8 UK only 3/8“ => 1/2“ G1/2 20,8 ±0,3 19 mm...
- Page 16 100o...
- Page 17 100o 15 min.
- Page 18 Not included 112.0698.563...
- Page 19 100o 100o...
- Page 20 100o 100o 15 min.
- Page 21 Not included 112.0698.562 100o...
- Page 23 100o 15 min.
-
Page 24: Operation
Operation Operation of boiler Decommissioning boiler Briefly pressing the ON/STANDBY button 1. Remove the plug of the boiler from the wall switches between the boiler modes ON and plug socket. STANDBY. 2. Start the water flow on the electronic knob. 3. -
Page 25: Switching On For The First Time
Switching on for the first time 4. Inspect the installation for leaks after Ensure that the boiler is filled with water! commissioning. Boiler Water reaches boiling temperature after 1. Operate the mixer tap and flush with warm approximately 15 minutes. water for 1 minute (fig. 1). -
Page 26: Continuous Boiling Water Outlet Operation - Potfiller
Continuous boiling water outlet operation - potfiller Pull to the limit switch. To keep the water boiling continuously, push until the impact. 4. To unlock the handle, just pull it 5. Automatic return of anti-scald and automatically snaps safety. safety via spring-back-safety tap. -
Page 27: Filter Installation / Filter Replacement
The use of a Franke filter is mandatory to Filter lifetime protect the product against lime scale deposits. It is mandatory to change the filter based on the Water <10°dH = 12 months... - Page 28 Cause Remedy Remove the plug of the boiler from the wall plug socket. Boiler leaking Shut off the water supply. Contact Franke. Tap leaking Shut off the water supply. Contact Franke. Tap supplies no water Cause Remedy Hose(s) kinked. Inspect the hose(s) and straighten the kinked hose(s).
- Page 29 Visit our Franke webshop. safety and proper function of the product and safeguards any warranty claims. Clean the tap only with Franke tap cleaner. Replacement or repair of parts may only be Do not use cleaning agents containing a carried out by Franke Service.
- Page 30 Replace filter Over the course of time, lime scale deposits (120.0305.558) will appear on and alongside the tap aerator. Turn filter clock wise to remove from filter Unscrew the sleeve of the tap (fig. 1). head. Clean the tap aerator using a suitable Turn new filter anti clock wise to install.
- Page 33 franke.com...
Need help?
Do you have a question about the Maris Water Hub and is the answer not in the manual?
Questions and answers