Table of Contents
Advertisement
Quick Links
Advertisement
Table of Contents
Troubleshooting

Related Manuals for furniture123 AmberGlo AGL073


Summary of Contents for furniture123 AmberGlo AGL073
- Page 1 USER MANUAL MEDIA WALL ELECTRIC FIREPLACE AGL073 40 Inch AGL067W 50 Inch AGL068W 60 Inch AGL069W 70 Inch Thank you for choosing this electric fireplace. Please read this manual before using or installing this electric fire and keep it safe for future reference.
-
Page 2: Table Of Contents
CONTENTS SAFETY PARTS SUPPLIED BEFORE INSTALLATION MEDIA WALL REQUIREMENTS PREPARING THE FIRE FOR INSTALLATION INSTALLATION OPERATION CARE AND MAINTENANCE SUPPORT TECHNICAL SPECIFICATIONS PRODUCT FICHE... -
Page 3: Safety Information
SAFETY INFORMATION When using electrical appliances, basic safety precautions should always be followed, including the following: IMPORTANT: Read all instructions and warnings carefully before starting • installation. Failure to follow these instructions may result in a possible electric shock or fire hazard and will void the warranty. Before connecting the appliance, be sure that the main voltage available •... - Page 4 There may be a trace of odour during the first few minutes of initial use or after • a storage period. This is normal and will quickly disappear. If the glass is damaged, do not use the heater in order to avoid a hazard. •...
-
Page 5: Manual Handling
MANUAL HANDLING • One person should be sufficient to lift the heater. If, for any reason, it is considered too heavy, then obtain assistance. • When lifting, always keep your back straight. Bend your legs and not your back. • Avoid twisting at the waist. -
Page 6: Parts Supplied
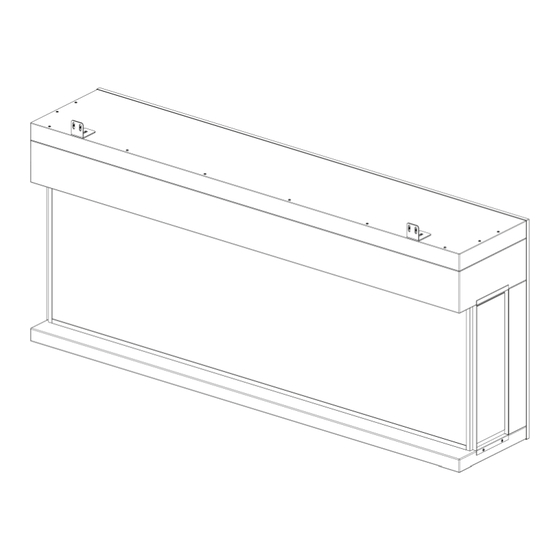
PARTS SUPPLIED NOTE: Pictures and contents in this manual may differ from the product due to continuous product improvement. PART DIAGRAM DESCRIPTION L-shaped bracket 2 PCS M5x10 screw 2 PCS M4X14 screw 4 PCS AGL073 – 12 PCS AGL067W - 16 PCS Logs AGL068W - 20 PCS AGL069W - 24 PCS... -
Page 7: Before Installation
BEFORE INSTALLATION NOTE: Two people are recommended for installation. There are multiple ways to personalise the look of your media wall fire, which should be considered before installation. IMPORTANT: Always measure the fire you have received for the installation dimensions, as these may change due to product development. -
Page 8: Media Wall Requirements
MEDIA WALL REQUIREMENTS Several factors must be considered when planning the construction of your media wall to ensure its success. We advise you to thoroughly read the installation instructions and understand the process before designing or constructing your media wall. STRENGTH AND STABILITY OF THE STRUCTURE The structure must be designed to be structurally sound and able to support the weight of the fire and any other items/shelving built into it. -
Page 9: Preparing The Fire For Installation
PREPARING THE FIRE FOR INSTALLATION Remove the screws holding the fixing bracket above the front glass panel, then carefully remove the bracket, and keep both the bracket and screws safe for reinstallation. Step Remove the 8 screws holding the side panels in place and then carefully remove the side panels from each side and keep them safe for reinstallation. - Page 10 Replace the unit's glass panel, taking great care not to damage the glass. This would follow the same method as removal; when tilting the glass, ensure that the power switch is initially in the ON position to allow the glass to pass. You must remember to switch this back off before continuing.
-
Page 11: Installation
INSTALLATION Loosely fix the L-shaped brackets [A] into the chosen mounting points (Front or rear) on the top of the fire using SCREWS (B) and SHAKE PROOF WASHER (E). Step Slide the fire into position within the media wall. Adjust the brackets so that they sit flush with the wooden batten and so that the fire is in its intended position. - Page 12 Remove the fire from the media wall, and fully tighten the brackets in the marked position on the top of the fire before sliding the fire back into position. Step Secure the brackets to the media wall using SCREWS (C) Step...
-
Page 13: Operation
OPERATION The heater control panel is located on the right side of the heater. O/I: Press the switch into the I position to turn the appliance on. Press the switch into the O position to turn the appliance off. DISPLAY REMOTE CONTROL CONTROL PANEL 2 AAA batteries required (NOT INCLUDED) -
Page 14: Remote Control
REMOTE CONTROL The remote control works best when used at the same level as the fire. A slight delay may occur after a function is chosen using the remote. Please allow time before pressing the next button. When the unit is turned on using the switch, press the power button to start the POWER unit. -
Page 15: Before You Start
SETTING UP THE WIFI APP This is designed as a general guide to the setup. There may be differences in the interface and features available due to product development and features of the model. BEFORE YOU START • Ensure your router provides a standard 2.4 GHz connection. •... -
Page 16: App Connection
APP CONNECTION Due to continuous product improvement, some images may differ from the current app. You NOTE: can download it from the Apple or Google Play Store. 1. Press the register button at Read the Privacy policy 3. Enter your email the bottom of the screen. - Page 17 SETTING UP YOUR HOME WITHIN THE APP The app allows you to have multiple homes, rooms, and devices, so you will need to set up at least one to get started. 1. Select ‘Me’ at the bottom of 2. Create and name your home, 3.
-
Page 18: Connecting To The Unit
CONNECTING TO THE UNIT 2. Hold down the flame Turn the fire on using the 3. On the app, now select the 'Add' effect button for 3 power button. Hold down the button in the top corner. Then 'Add seconds to turn the Power button for 3 seconds to Device'. -
Page 20: Home Screen
CONTROLLING THE DEVICE VIA THE APP HOME SCREEN Voice Control: Press to give verbal Add Device: Add a device instructions for operation. to the app and go through the setup process. Name of Heater: Press to enter the Device Screen Home: Return to home screen from the Smart Scene and Profile screens... -
Page 21: Device Screen
DEVICE SCREEN Back: Returns to the Device Name Home Screen Current Temperature: Desired Displays what the Temperature: current temperature Displays what has been set as the target room temperature. Increase Desired Decrease Desired Temperature Temperature Temperature range Temperature range 15-40⁰C 15-40⁰C Settings: Enter the settings menu. -
Page 22: Device Settings
DEVICE SETTINGS HEAT: To turn the heat on or off. FLAME COLOUR: Click to change the flame colour. BACKLIGHT COLOUR: Click to change the backlight colour, FLAME BRIGHTNESS: Change the flame brightness or turn the flames on or off. OPEN WINDOWS: Turn on open window detection. -
Page 23: Profile Tab
PROFILE TAB The profile tab allows you to edit both your details and use the added features of the unit. HOME MANAGEMENT Home Management provides options for managing your TUYA account, such adding home, adding removing rooms, and sharing devices with family. -
Page 24: Care And Maintenance
CARE AND MAINTENANCE When cleaning the appliance, the power should be disconnected, and the unit should be cool. Dust can be removed by lightly wiping the glass surface with a clean, lint-free cloth or paper towel. Fingerprints or other marks can be removed using a damp cloth and a good- quality household glass cleaner. -
Page 25: Waste Electrical Recycling
Is the unit plugged into the mains? Is the fuse OK? Switch the unit off and wait ten minutes to see if the issue is resolved. Restart the unit. www.furniture123.co.uk/content/customer-services 0330 390 3062 Office hours: 9 AM - 5 PM, Monday to Friday... - Page 26 Model identifier(s): AGL073 AGL067W AGL068W AGL069W Item Symbol Value unit Item unit Heat output Type of heat input, for electric storage local space heaters only (select one) Nominal heat manual heat charge control, with integrated output thermostat Minimum heat Manual heat charge control with room output and/or outdoor temperature feedback (indicative)
- Page 27 PSTI STATEMENT OF COMPLIANCE Description: MEDIA WALL ELECTRIC FIREPLACE Model Number: AGL073, AGL067W, AGL068W, AGL069W. Manufacturer: electriQ, 2A Trident Business Park, Leeds Road, Huddersfield, HD2 1UA PSTI Contact: TiSecurity@buyitdirect.co.uk We have prepared this statement of compliance and can confirm that this product is compliant with the deemed compliance conditions in Schedule 2 of The Product Security and Telecommunications Infrastructure (Security Requirements for Relevant Connectable Products) Regulations 2023.
Need help?
Do you have a question about the AmberGlo AGL073 and is the answer not in the manual?
Questions and answers