
Subscribe to Our Youtube Channel
Related Manuals for InHand FWA02


Summary of Contents for InHand FWA02
-
Page 1: Table Of Contents
InHand Networks Help Center 5G FWA02 Product Quick Guide Table of contents Overview 1. 2. Panel Introduction 3. Equipment Installation 3.1 Insert SIM Card 3.2 Attach Antennas 3.3 Install the 5G FWA02 3.3.1 Desktop Installation 3.3.2 Wall-mounted Installation 3.4 Power Cable Installation 3.5 Inspection after Installation 3.5.1 Check the Device Installation... -
Page 2: Packing List
7. LED Indicators Overview This manual is for the installation and operation of the 5G FWA of InHand Networks. Before installation, please confirm the product model and accessories in the package and purchase a SIM card from the operator that supports the local network. Please refer to the actual product for specific operations. -
Page 3: Panel Introduction
USB: Type-C interface supporting USB2.0 protocol 3. Equipment Installation Precautions for installation. Power Supply: Please use the power adapter included in the package. FWA02 supports a voltage input range of 9-48V. Please pay attention to the voltage level. Environmental requirements: Working temperature: -10℃~50℃; Storage temperature: -40℃~85℃. -
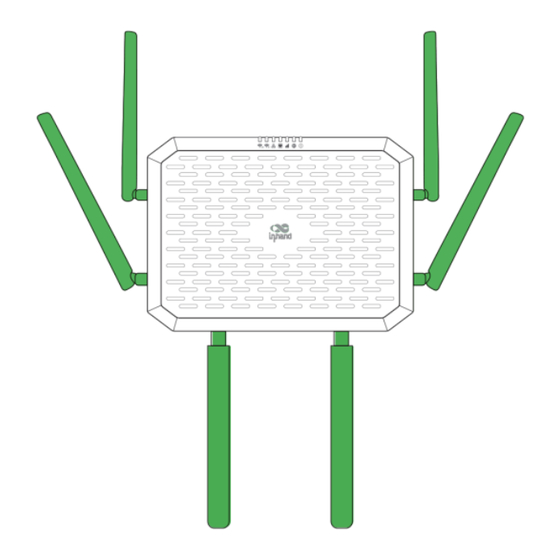
Page 4: Attach Antennas
5G FWA02 supports dual nano SIM cards. 1. Insert a 4FF SIM card (or two as needed) :Slide the SIM card cover downward to remove it, then insert the SIM cards) accordingto the following diagram. 2. To remove the SlM, press the middle of the SlM inward and it will pop outward from the SIM slot. -
Page 5: Wall-Mounted Installation
Fig. 3-3-2-a Pre-drill holes 2. The mounting holes at the bottom of the device are L-shaped. Align the mounting holes and push down gently to complete the fixation. https://help.inhand.com/portal/en/kb/articles/5g-fwa02-product-quick-guide... -
Page 6: Power Cable Installation
If the power switch is on, the Power LED will turn on. Fig. 3-4 Power on the device 3.5 Inspection after Installation 3.5.1 Check the Device Installation desktop installation: ensure that the device won't fall due to cable dragging. https://help.inhand.com/portal/en/kb/articles/5g-fwa02-product-quick-guide... -
Page 7: Check The Power Supply
2. Log into the InCloud APP. Clicking the "Device" directory below to enter the [Device] page and clicking the menu button in the upper right corner, after that select [Add Device]. You can scan the QR code on the FWA02 to add the device. - Page 8 1. You are supposed to power off the device first, then insert the SIM card into the card slot, connect the 5G antenna to the device, and establish a wired connection between the 5G FWA02 and your PC using an Ethernet cable.
-
Page 9: Wired Networking
1. Insert the SIM card while the device is powered off, connect the antennas to the device, and log in to the InCloud APP. 2. Navigate to the "Device" section below to access the [Device] page, then click the menu button in the upper right corner and select [ Add Device]. Then scan the QR Code on the 5G FWA02 to add the device. https://help.inhand.com/portal/en/kb/articles/5g-fwa02-product-quick-guide... -
Page 10: Connect Via Pc
4. If the device fails to connect to the network after adding it, you can click "Configure local device" to set up the device for cloud connectivity. The 5G FWA02 is configured with default Https access and Wi-Fi AP functionality. 4. Scan the QR code on the unit's nameplate, and the app will establish a Wi-Fi connection with the FWA02 automatically. - Page 11 Static IP: Users can assign a static IP address obtained from the ISP or upstream network device manually. PPPoE: Users can set the PPPoE service on the WAN port and then this device can dial up to the Internet through the broadband service. https://help.inhand.com/portal/en/kb/articles/5g-fwa02-product-quick-guide...
-
Page 12: Remote Manage Platform
5. Remote Manage Platform 5.1 InCloud Manager 5.1.1 Register/Login the InCloud Manager 1. Open your web browser and visit InCloud at the following address: https://star.inhandcloud.com/. This will take you to the InCloud registration and login page. (We recommend using Chrome) https://help.inhand.com/portal/en/kb/articles/5g-fwa02-product-quick-guide... -
Page 13: Adding Devices To The Platform
Fig. 5-1-1-b Bind a Mobile Phone Number 5.1.2 Adding Devices to the Platform Log in to the InCloud Manager platform, then go to "Device" and click "Add" in the navigation menu. Fill in the device's serial number and MAC address to add it. https://help.inhand.com/portal/en/kb/articles/5g-fwa02-product-quick-guide... -
Page 14: Quick User Guide
SYS indicator for the first time blue after holding the Reset button 2. Release the key and the blue flashes. 3. Press and hold the reset button again, release the solid blue light and enter the system startup phase. 6.2 Log and Diagnostic Data https://help.inhand.com/portal/en/kb/articles/5g-fwa02-product-quick-guide... -
Page 15: Led Indicators
Steady in green - Port works properly Blink in green - Data transferring Wi-Fi 2.4G Off - AP mode disabled Blink in green - AP mode enabled https://help.inhand.com/portal/en/kb/articles/5g-fwa02-product-quick-guide... - Page 16 Steady in green - The STA device successfully connects to this device Off - Disconnected Wi-Fi 5G Blink in green - 5G AP function enabled Steady in green - Wi-Fi clients connected successfully https://help.inhand.com/portal/en/kb/articles/5g-fwa02-product-quick-guide...
Need help?
Do you have a question about the FWA02 and is the answer not in the manual?
Questions and answers