Advertisement
Part List

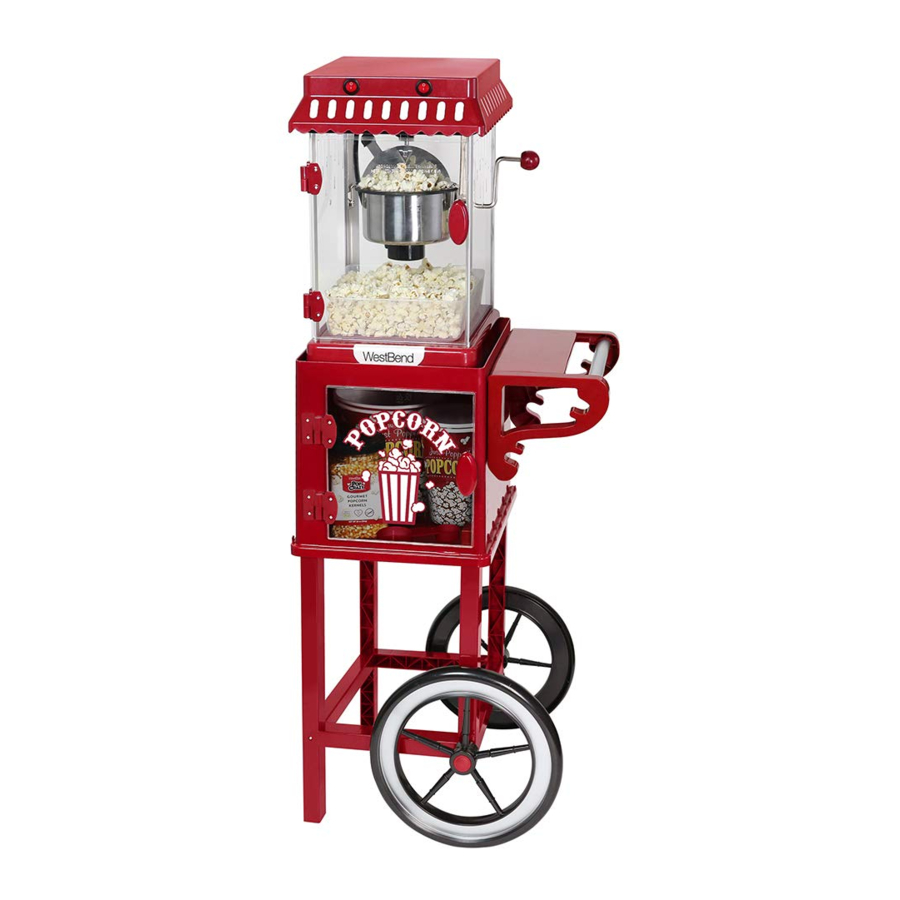
PARTS

Assembly
Remove all packaging materials.
Step 1: Insert support crossbeam (small pegs on ends) and axle crossbeam (larger pegs on ends) into one h-shaped side bracket. The axle crossbeam should sit so that the fluted-side will face the floor when the cart is upright. Screw in support crossbeam. Place the other h-shaped side bracket over the crossbeams.
Screw in support crossbeam.

Step 2: Place the wheels, painted side out, over the axle crossbeam pegs, then affix with washer and screw. Cover openings with cap covers.

Step 3: Attach the cabinet base to the legs. Affix with screws Scre wall 4 corners to attach to the legs.

Step 4: Assemble the handle and prep tray. Insert the prep tray into the handle side, aligning the screw holes. Screw into place. Insert the handle tube into the opening. Repeat with other handle side.

Step 5: Attach the handle assembly. Slide the assembled handle into the slots in the cabinet. Press in until the tabs click in place. Screw the handles in from the top and bottom.

Step 6: Turn the cabinet upside down, place the cabinet base/cart assembly into the cabinet then use the 4 black wider screws to affix the cabinet and cabinet base.

 Note: The wheels are attached to the same side as the handle assembly.
Place the popcorn popper on to the cart. The popcorn popper has suction cup feet for added security. Your popcorn cart is now ready for use.
Documents / ResourcesDownload manual
Here you can download full pdf version of manual, it may contain additional safety instructions, warranty information, FCC rules, etc.
Advertisement


Need help?
Do you have a question about the PCMC20RD13 and is the answer not in the manual?
Questions and answers