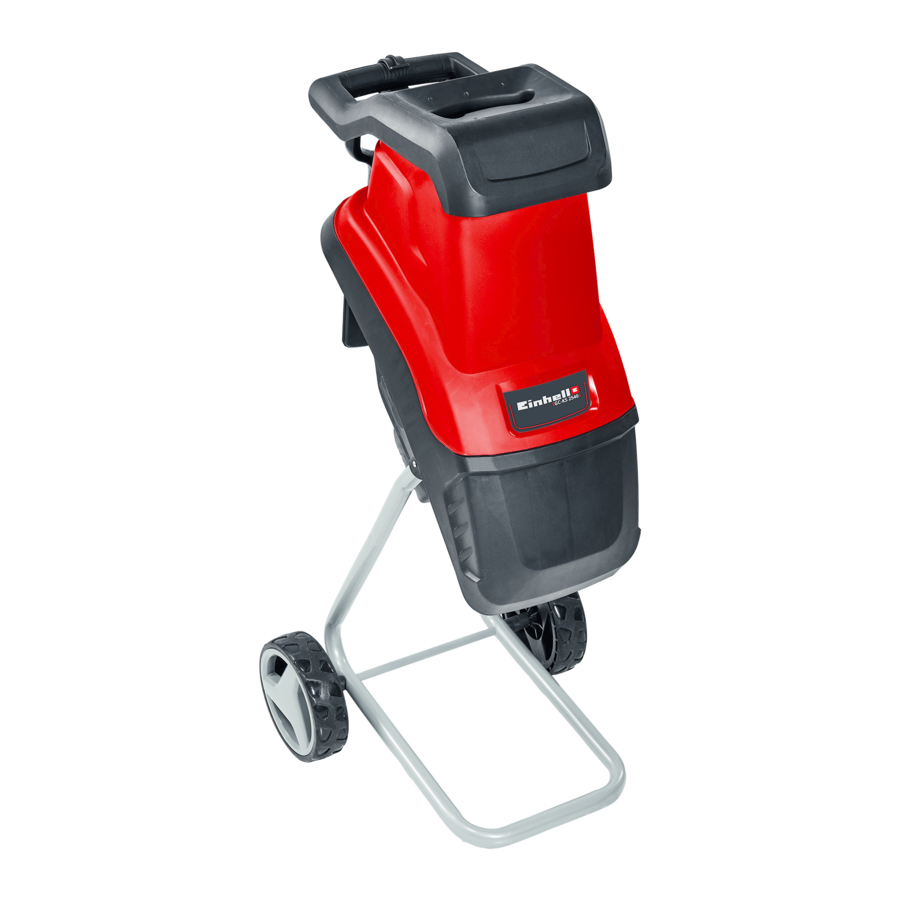
EINHELL GC-KS 2540 (34.303.34) Manual
- Original operating instructions (119 pages) ,
- Operating instructions manual (13 pages) ,
- Original operating instructions (21 pages)
Advertisement
Safety regulations

When using the equipment, a few safety precautions must be observed to avoid injuries and damage. Please read the complete operating instructions and safety regulations with due care. Keep this manual in a safe place, so that the information is available at all times. If you give the equipment to any other person, hand over these operating instructions and safety regulations as well. We cannot accept any liability for damage or accidents which arise due to a failure to follow these instructions and the safety instructions.


Read all safety regulations and instructions.
Any errors made in following the safety regulations and instructions may result in an electric shock, fire and/or serious injury.
Keep all safety regulations and instructions in a safe place for future use.

READ CAREFULLY BEFORE USE
KEEP FOR LATER REFERENCE
Read these operating instructions carefully before you use the machine.
This equipment is not designed to be used by people (including children) with limited physical, sensory or mental capacities or those with no experience and/or knowledge unless they are supervised by a person who is responsible for their safety or they have received instructions from such a person in how to use the equipment safely. Children must always be supervised in order to ensure that they do not play with the equipment.

The ON/OFF switch must be set to OFF and the power plug removed from the socketoutlet before cleaning or doing any other work on the shredder and whenever the cable becomes tangled. The shredder will continue to run briefly after it is switched off.
- The operator is responsible for the safety of third parties within the working radius of the shredder.
- Make sure that the shredder is properly closed (loading funnel and ejector) before you start up the motor.
- The shredder must be placed on a flat and firm surface where it can stand securely.
- Always wear gloves and safety goggles when working with the shredder.
- We recommend ear-muffs when working with shredders which have no noise-insulating features.
- Each time before you leave the shredder, switch off the motor and pull out the ignition key, spark plug connector or power plug.
- Maintenance and cleaning work on the shredder as well as the removal or adjustment of any safety devices may only be performed when the motor is at a standstill and the ignition key, spark plug connector or power plug has been pulled out.
- The safety devices supplied with the shredder (e.g. the ejector) must be used.
- The shredder must be assembled correctly before it is put into operation.
- Examine the shredder each time before you use it. Do not use the shredder if any safety devices are damaged or worn. Never put safety devices out of operation.
- Use the shredder only for the purpose specified in these instructions.
- Work only in good visibility.
- Always make sure of your footing while working.
- Never leave the shredder unattended at your work place. Store the shredder in a safe place during interruptions.
- If you interrupt your work to move to a different position it is imperative to switch off the shredder while you are moving there.
- Never use the shredder in the rain or in moist or wet conditions.
- Protect the shredder from the damp and rain.
- Always wear suitable clothing to protect your head, hands and feet from injury. Wear a helmet, goggles or visor, high boots or strong shoes, long trousers made of tough material, and work gloves.
- Keep the shredder away from other persons, particularly children and pets.
- Do not use the shredder without protection device.
The guard is vital for your safety and for the safety of others, and it is also essential for the grass trimmer to work correctly. Failure to observe this instruction will not only create a potential hazard, it will also result in the loss of your rights under the warranty.
- Keep the air vents clear of dirt.
- After use, unplug the machine and check it for damage.
- When you are not using the shredder, keep it in a dry place out of the reach of children.
- Check the screws regularly to see that they are properly tightened.
- The mains voltage must be the same as the voltage specified on the rating plate.
- Power cables used with the shredder must not be of a lighter duty class than HO7RN-F rubber-insulated flexible cables according to DIN 57282/VDE 0282 with a minimum diameter of 1.5 mm2. Plug connectors must be equipped with earthing contacts and the coupling must be rain-water-protected.
- Use only original replacement parts for repair and maintenance purposes.
- Have repairs carried out only by a qualified electrician.
- Examine the shredder for signs of wear or damage each time before you use it and after any collisions. Have essential repairs carried out without delay.
- Never use replacement parts or accessories which are not foreseen or recommended by the manufacturer.
- Pull out the power plug before carrying out any inspection, cleaning or other work on the shredder and whenever it is not being used.
- Before you begin your work, examine the material you want to shred. Remove any foreign bodies. Continue to watch out for foreign bodies while you are working. If you come across any foreign bodies while shredding, shut down the machine and remove the items in question.
- Keep the machine away from other persons, particularly children and pets.
- Use the machine only in the way described in these operating instructions.
- The electric circuit must be protected at least by a 16A fuse.
- The efficiency of the machine will be greatly reduced if a connecting cable with too small a cross section is used. A conductor cross section of at least 3x1.5 mm2 is required for cables up to 25 m long, and one of at least 3x2.5 mm2 for cables longer than 25 m.
- If the machine has to be lifted for transporting, be sure to switch off the motor first and wait for the cutter to come to a standstill. Each time before you leave the machine, switch off the motor and pull out the power plug. Before you connect the machine to the power supply, make sure that the loading funnel is properly connected to the motor housing and the release screw tightened.
- If the garden refuse shredder vibrates excessively, turn off the motor, pull out the power plug, and find out immediately what is causing the vibrations. Intensive vibration is usually a sign that something is wrong.
- Do not wear loose clothing or clothing with hanging belts or cords.
- Do not use the machine on a paved area that has been graveled where discharged material may cause injuries.
- Ensure that the loading funnel inlet is empty before you start the machine.
- Keep your head and body away from the infeed opening.
- Do not move your hands, other body parts or clothing into the infeed chamber, ejector chute or near other moving parts.
- Make sure that you are balanced and standing on a firm surface at all times. Do not stretch forwards. Never stand higher than the machine when feeding material into it.
- Keep away from the discharge zone when you start the machine.
- If foreign bodies get into the cutting tool or the machine generates unusual noises or vibrates in a strange way, switch off the motor immediately and allow the machine to come to a standstill. Pull the plug and carry out the following work:
- Check the machine for signs of damage
- Check that all the parts are secure and tighten them if necessary.
- Have any damaged parts replaced or repaired, but use only spare parts of the same type and equivalent quality
![burn hazard]() If the machine is blocked switch off the motor and pull the plug before you start the cleaning procedure. Ensure that the motor is clear of waste and other accumulations to protect the motor from suffering damage or possibly catching fire.
If the machine is blocked switch off the motor and pull the plug before you start the cleaning procedure. Ensure that the motor is clear of waste and other accumulations to protect the motor from suffering damage or possibly catching fire.- Ensure that all the covers and guards are in position and in good working order.
- Do not tip the machine whilst the motor is running.
- Switch off the machine before you fit or remove the collection container.
- The tool may only be used outdoors (i.e. not in the vicinity of a wall or any other ridged object)
- Damaged or illegible labels must be replaced
- Allow the tool to cool before carrying out any maintenance work, adjustments, etc.
- Never use the machine while other people are nearby.
- When inserting material take special care to ensure that it does not contain any metal, stones, bottles, cans or other foreign bodies.
- Do not allow processed material to accumulate within the discharge area; this could prevent the machine being able to discharge correctly and result in material recoiling through the infeed opening.
- When servicing the cutting tool, remember that it may still be moving due to the starting mechanism, even if the motor is not running because of the cover interlock.
- Children must not be permitted to use the machine.
- Wear ear protectors and safety goggles. Wear these throughout the time the machine is in operation.
- Before starting the machine, check all screws, nuts, bolts and other fastening materials to ensure that they are secure and that all covers and guards are in position. Damaged or illegible labels must be replaced.
- Connect the equipment to the power supply only via an earth-leakage circuit breaker with max. 30mA tripping current.

Explanation of the symbols used (see Fig. 10)
- Important! Read the operating instructions and follow the warnings and safety instructions
- Danger - rotating cutters. Keep your hands and feet away from the openings when the machine is running.
- Important! Keep other persons and animals away from the danger zone.
- Important! Protect the machine from the damp and never expose it to rain.
- Important! Always wear safety goggles, ear muffs, protective gloves and heavy-duty work clothes!
- Switch off the machine and pull the power plug before making adjustments, cleaning the machine or if the cable is tangled or damaged.
- Wait until all parts of the machine have come to a complete stop before touching them.
- Protection class II; double-insulated
- Noise emission complies with Directive 2000/14/EC!
Layout and items supplied
Layout

(Fig. 1/2)
- Loading funnel inlet
- Loading funnel
- Motor housing with cutter plate
- Prodder
- Complete chassis
- Wheels
- Axle
- Transport handle
- Mains plug
- Mounting for prodder
- On/Off switch
- Release screw
- Wheel hubs
- Hex-wrench
- Screw for chassis assembly
- Wheel fastening screw
- Washer, outside
- Sleeve
- Shredded debris bag
Items supplied
Please check that the article is complete as specified in the scope of delivery. If parts are missing, please contact our service center or the sales outlet where you made your purchase at the latest within 5 working days after purchasing the product and upon presentation of a valid bill of purchase. Also, refer to the warranty table in the service information at the end of the operating instructions.
- Open the packaging and take out the equipment with care.
- Remove the packaging material and any packaging and/or transportation braces (if available).
- Check to see if all items are supplied.
- Inspect the equipment and accessories for transport damage.
- If possible, please keep the packaging until the end of the guarantee period.
The equipment and packaging material are not toys. Do not let children play with plastic bags, foils or small parts. There is a danger of swallowing or suffocating!
- Garden shredder
- Pusher
- Shredded debris bag
- Original operating instructions
- Safety instructions
Proper use
This electric garden refuse shredder is designed only for shredding organic garden waste. Place biologi-cally degradable material, e.g. leaves, branches, dead flowers etc., into the loading funnel inlet.
Do not use the equipment for soft materials such as, e.g. kitchen waste, or for juicing fruit or vegetables, because these kinds of materials could clog the shredder and damage the equipment.
The equipment is to be used only for its prescribed purpose. Any other use is deemed to be a case of misuse. The user / operator and not the manufacturer will be liable for any damage or injuries of any kind caused as a result of this.
Please note that our equipment has not been designed for use in commercial, trade or industrial applications. Our warranty will be voided if the machine is used in commercial, trade or industrial businesses or for equivalent purposes.
Technical data
| Mains voltage: | 220 - 240 V ~ 50 Hz | |
| Power input: | 2500 W (P40) | |
| 2000 W (S1) | ||
| Branch diameter: | max. 40 mm | |
| LpA sound pressure level: | 96,2 dB | |
| K uncertainty | 3 dB (A) | |
| LWA sound power level: | 106 dB | |
| Weight: | 10,7 kg | |
| Protection class: | II | |
| Protection type: | IPX4 | |
The product can be operated both in continuous mode with rated input power of 2,000 W and in intermittent mode with rated power input of 2,500 W (P40). (P40) means that each cycle of operation in intermittent mode is comprised of an on-load operation time of max. 40s and a no-load operation time of 60s.
Keep the noise emissions and vibrations to a minimum.
- Only use appliances which are in perfect working order.
- Service and clean the appliance regularly.
- Adapt your working style to suit the appliance.
- Do not overload the appliance.
- Have the appliance serviced whenever necessary.
- Switch the appliance off when it is not in use.
- Wear protective gloves.
Residual risks
Even if you use this electric power tool in accordance with instructions, certain residual risks cannot be rules out. The following hazards may arise in connection with the equipment's construction and layout:
- Risk of injury from entrapment if you reach into the loading chute;
- Risk of scratches, cuts or crush injuries if you work without wearing safety gloves;
- Risk of eye damage from parts being thrown out or whiplashing cuttings if you do not wear safety goggles;
- Risk of damage to hearing if no suitable ear protection is used.
Before starting the equipment
Before you connect the equipment to the mains supply make sure that the data on the rating plate are identical to the mains data.

Always pull the power plug before making adjustments to the equipment.
The garden shredder is delivered unassembled. The chassis and the wheels must be fitted before use. Follow the operating instructions step-bystep and use the pictures provided as a visual guide to easily assemble the machine.
Assembling the chassis

(Fig. 3)
- Place the motor housing upside down on the floor.
- Insert the chassis (Item 5) into the provided openings as far as it will go.
- Secure the chassis, as shown in Fig. 3, using the screws (Item 16).
Assembling the axle and wheels
Mount the chassis as shown in Figs. 4a-4e.
- Insert the axle through the chassis (Fig. 4a)

- Fit the sleeves on both sides (Fig. 4b)

- Attach the wheels on both sides
- Insert a screwdriver through the holding hole on the axle and secure the wheels with the screws (Fig. 4c)

- Fit the wheel caps to the wheels; make sure that the clips (A) on the wheel caps latch into the recesses on the wheels.


Fitting the prodder holder

Press the holder for the prodder (10) onto the transport handle as shown in Fig. 5.
Fitting the shredder debris bag
(Fig. 6a-6b)
As an option you can fit the supplied shredder debris bag to the equipment. To do so, hang the shredder debris bag (Fig. 20) on the hooks provided for the purpose (Item B).


Operation
Please observe the statutory regulations governing noise abatement during operating times, which may differ from town to town.
Connecting up the machine and switching it on
- Connect the coupling on the equipment connection cable (extension) to the power cable (Fig. 1/Item 9). Be sure to observe the relevant information in the safety instructions.
- The machine can be switched ON (switch position "I") and OFF (switch position "0") using the ON/OFF switch (Figure 1/Item 11).
Note: The machine cannot be switched on if there is no voltage being supplied to it. If the power supply is interrupted, the machine will switch off automatically (switch position "0"). The machine cannot be switched on again until the voltage supply has been re-established and the ON/OFF switch has been moved to position "I".
Overload protection
(Motor circuit-breaker)
- The motor is protected from overloads by an overload switch.
- In case of overloading the equipment will shut down automatically. To restart, set the On/Off switch to the position „I".
- If the motor fails to start, clean the ejector chute.
Practical tips
- Be sure to observe the safety instructions (see supplied booklet).
- Wear work gloves, goggles and ear protection.
- The material is drawn into the shredder automatically.
Long pieces of material projecting out of the funnel inlet may whiplash when it is drawn in – keep a safe distance between yourself and the machine.
- Judge the quantity of material which you put into the funnel inlet so that the funnel does not clog.
- If you want to shred withered, damp material that has been lying in the garden for several days, alternate between putting in this material and branches. This will help to prevent the loading funnel becoming clogged with material.
- Do not shred soft waste (e.g. kitchen waste) – put it straight in the compost box.
- Entangled branches and leaves should be tho roughly shredded before loading any more material.
- Do not allow the discharge opening to become clogged with shredded material – risk of pile-ups.
- Do not cover the ventilation slits.
- Do not place heavy material or thick branches into the machine continuously. This may cause the blade to jam.
- Use the prodder (Fig. 1/Item 4) to remove jammed objects from the funnel inlet, use a hook to remove jammed objects from the ejector opening.
- Swing open the loading funnel (Fig. 7/Item 2) by opening the release screw (Fig. 7/Item 12) and remove it. You can now remove blockages from the inside of the equipment. To assemble, proceed in reverse order.


Wear work gloves! Risk of injury from the cutters.
Safety
The shredder has a safety switch (Fig. 8/Item C) in its interior on the motor housing. The control unit (release screw) (Fig. 8/Item 12) for it is located on the loading funnel.
If the loading hopping is not perfectly position or if it is not pressed against the motor housing, the safety switch will trip and prevent the motor from working. If this situation occurs, open the loading funnel as described above. Carefully clean the interior. Close the loading funnel again as described above and ensure that when you switch on the machine again the loading funnel is correctly position and the safety screw is screwed right in.

NEVER undo the release screw (Figure 1/Item 12) without first switching off the machine at the ON/OFF switch (Figure 1/Item 11) and disconnecting the coupling on the machine connection cable (extension) from the machine plug.
Replacing the power cable
If the power cable for this equipment is damaged, it must be replaced by the manufacturer or its after-sales service or similarly trained personnel to avoid danger.
Cleaning & maintenance and ordering of spare parts
Always pull out the mains power plug before starting any cleaning work.
Maintenance and storage
- Clean the machine regularly. This will help to keep the machine in good working order and is the basis for a long working life.
- Keep the vent slots clean while you work.
- Clean the plastic body and other plastic parts with a mild household cleaning agent and a damp cloth. Do not use any aggressive agents or solvents for cleaning purposes.
- Never clean the shredder by spraying with water.
- Prevent water getting inside the machine at all cost.
- Check the chassis securing screws from time to time to ensure that they are tight.
- If you do not intend to use the shredder for a lengthy period, protect it from corrosion using environmentally friendly oil.
- Store the device in a dry room.
- Store the device out of reach of children.
- When you have finished your work, pull the loading funnel forwards and clean the inside. Use a brush to remove deposits from metal parts on the inside. Apply a thin coating of oil to the cleaned blade plate and blades.
- When you close the loading funnel, make sure that the safety switch and the release screw are clean.
Replace/sharp and change blades
The blades on the blade plate are replaceable. If you have to replace any blade, you must only use genuine blades to ensure that they meet the relevant quality and safety criteria.
Please note: For safety reasons we recommend that you have all sharpening and blade replacement work carried out by a specialist workshop.
Always wear heavy duty working gloves
- Swing open the loading funnel (Fig. 7/Item 2) by opening the release screw (Fig. 7/ Item 12) and remove it.
- Undo the six Philips screws (Fig. 9a/Item D) and remove the cover plate

- Secure the rotary disk so that it cannot rotate (for example by jamming it with a screwdriver, see Figure 9b)

- Undo the four blade screws (Fig. 9b/Item E) and remove the blades (Fig. 9b/Item F)
- Each of the blades can be turned once as they are ground sharp on both ends. Then they must be replaced by new blades.


To assemble, proceed in reverse order.
Ordering replacement parts
Please quote the following data when ordering replacement parts:
- Type of machine
- Article number of the machine
- Identification number of the machine
- Replacement part number of the part required
For our latest prices and information please go to www.Einhell-Service.com
Spare blade Art. No.: 34.059.30
Troubleshooting guide
| Fault | Possible cause | Remedy |
The machine does not work |
|
|
Shredding performance unsatisfactory |
|
|
Warranty certificate
In the unlikely event that this equipment develops a fault, please contact our service department at the address shown on this guarantee card.
Warrantor/Service:
Einhell UK Ltd, Unit 10, 1st Floor, Champion's Business Park, Arrowe Brook Road, Upton, Wirral, CH49 0UQ
To assert your guarantee claim, register the defective equipment at: www.Einhell-Service.com. You will need to provide proof of purchase of the new item of equipment.
Documents / Resources
References
Download manual
Here you can download full pdf version of manual, it may contain additional safety instructions, warranty information, FCC rules, etc.
Advertisement


Need help?
Do you have a question about the GC-KS 2540 and is the answer not in the manual?
Questions and answers