Table of Contents
Advertisement
Quick Links
Advertisement
Table of Contents

Related Manuals for DCS FS Series


Summary of Contents for DCS FS Series
- Page 1 This Owner's Manual is provided and hosted by Appliance Factory Parts. DCS DCS48D-BQRN Owner's Manual Shop genuine replacement parts for DCS DCS48D-BQRN Find Your DCS Grill Parts - Select From 274 Models -------- Manual continues below --------...
- Page 2 Dynamic Cooking Systems, Inc. THE PROFESSIONAL DS, FS SERIES GRILL Use and Care Guide Models: ■ DCS27FS-BQ ■ DCS27FS-BQR ■ DCS36DS-BQAR ■ DCS36DS-BQR ■ DCS36DS-BQA ■ DCS48DS-BQAR ■ DCS48DS-BQR ■ DCS48DS-BQA...
-
Page 3: A Message T O Ou R Custome Rs
A Message T o Ou r Custome rs Thank you for selecting this DCS Professional “DS & FS” Series Grills. Because of these appliances unique features we have developed this Use and Care Guide. It contains valuable information on how to properly operate and maintain your new appliance for years of safe and enjoyable cooking. -
Page 4: Table Of Contents
T able Of Contents SAFETY PRACTICES & PRECAUTIONS ................3-4 GRILL MODELS ............................5 GAS REQUIREMENTS ........................6-7 LOCATING GRILL / BUILT-IN CLEARANCES ..............8-9 BUILT-IN CONSTRUCTION DETAILS ................10-11 LEAK TESTING .............................12 INSTALLER FINAL CHECKLIST ....................13 BURNER ADJUSTMENTS ......................13-14 USING THE GRILL ........................14-16 LIGHTING INSTRUCTIONS ....................16-17 USING THE SMOKER SYSTEM ....................18... -
Page 5: Safety Practices & Precautions
Safety Practices & Precautions IMPORTANT SAFETY NOTICE: Certain Liquid Propane dealers may fill liquid propane cylinders for use in the grill beyond cylinder filling capacity. This “Overfilling” may create a dangerous condition. “Overfilled” tanks can build up excess pressure. As a safety device, the tanks pressure relief valve will vent propane gas vapor to relieve this excess pressure. - Page 6 Safety Practices & Precautions For personal safety, wear proper apparel. Loose fitting garments or sleeves should never be worn while using this appliance. Some synthetic fabrics are highly flammable and should not be worn while cooking. Only certain types of glass, heat-proof glass ceramic, earthenware, or other glazed utensils are suitable for grill use.
-
Page 7: Grill Models
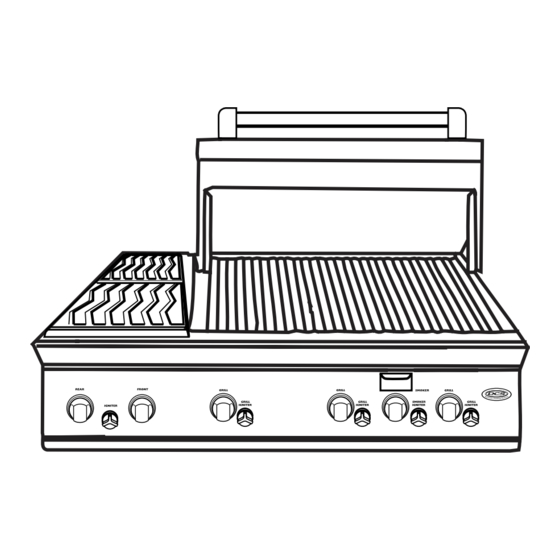
Grill Models DCS48DS-BQAR DCS48DS-BQR DCS48DS-BQA DCS48DS-BQ DCS36DS-BQAR DCS36DS-BQR DCS27FS-BQ DCS36DS-BQA DCS27FS-BQR... -
Page 8: Gas Requirements
Gas Requi rements Verify the type of gas supply to be used, either FIG.01 Natural Gas (36BQR Shown) natural or L.P., and make sure the marking on the appliance rating plate agrees with that of the supply. The rating plate is located on the inside back wall of the Grill. -
Page 9: L.p.tank Requirements
Gas Requi rements the grill inlet pipe to avoid shifting any internal gas lines of the grill. Ensure that the regulator arrow points in the direction of gas flow towards the unit, away from the supply. Do not forget to place the installer supplied gas valve in an accessible location. -
Page 10: Locating Grill/Built-In Clea Rances
Do not build the Grill under overhead unprotected combustible construction. If the Grill is to be placed into a combustible enclosure, an approved insulated jacket is necessary and is available from your dealer. Use only the DCS insulated jacket which has specifically been designed and tested for this purpose. -
Page 11: Built -In Grill Clea Rances
Built -In Grill Clea rances FIG.03 27FS Models " GENERAL (36DS / 48DS MODELS): The Grill is designed for easy placement into masonry enclosures. For non-combustible applications the grill drops into the opening shown in (Fig. 05) and hangs from its side flanges. A deck is not required to support it from the bottom.When using the insulated jacket in a combustible enclosure application, see (Fig. -
Page 12: Built-In Construction Details
Built In Const ruction Details FIG.05 36 / 48 Models... - Page 13 Built In Const ruction Details FIG.06 27F Models " "...
-
Page 14: Leak Testing
Leak T esting GENERAL: Although all gas connections on the grill are leak tested at the factory prior to shipment, a complete gas tightness check must be performed at the installation site due to possible mishandling in shipment, or excessive pressure unknowingly being applied to the unit. Periodically check the whole system for leaks, or immediately check if the smell of gas is detected. -
Page 15: Installer Final Checklist
Installe r Checklist/Bu rne r Ad justments INSTALLER FINAL CHECKLIST: ❏ ❏ ❏ Specified clearances main- Air shutters adjusted. Unit tested and free of leaks. tained to combustibles. ❏ ❏ Adjustable low setting satis User informed of gas supply ❏ Nylon straps removed from factory. -
Page 16: Burner Adjustments
Bu rne r Ad justments /Using The Grill WARNING: IMPORTANT! Before lighting . . .Inspect the gas supply piping or hose prior to turning the gas "on". If there is evidence of cuts, wear, or abrasion, it must be replaced prior to use. -
Page 17: Using The Grill
Using The Grill The replacement pressure regulators and hose assembly must be the type specified by the manufacturer. Do not use the grill if the odor of gas is present.The pressure regulator and hose assembly supplied with the unit must be used. If the unit is L.P., screw the regulator into the tank and leak check the hose and regulator connections with a soap and water solution before operating the grill. -
Page 18: Lighting Instructions
Using The Grill/Lighting Inst ructions USING THE GRILL L.P. GAS: Grilling requires high heat for searing and proper browning. Most foods are cooked at the “Medium” heat setting for the entire cooking time. However, when grilling large pieces of meat or poultry, it may be necessary to turn the heat to a lower setting after the initial browning.This cooks the food through without burning the outside. -
Page 19: Flame Height
Lighting / Rangetop Bu rne r Inst ructions Once the left or right burner is lit, the adjacent burner(s) can be lit by the cross-lighting method. For center burners to cross light, light the adjacent far left or right burner using the standard or match light procedure. -
Page 20: Using The Smoker System
Using The Smoke r System 36/ 48 MODELS ONLY: FIG. 17 36 / 48 Grill Smoker System The smoker system on each grill consists of a stainless steel slide out tray which is positioned above a 5,000 BTU burner.The burner is controlled by a precision brass valve which is capable of being turned down to very low heat levels.The system may be used alone for low temperature roasting and smoking or in conjunction with any... -
Page 21: Using The Rotiserrie Burner
Using The Rotisse rie Bu rne r BQRS AND BQARS SERIES ONLY: FIG. 20 36 / 48 Grill Rotisserie System The grill rotisserie system is designed to cook items from the back using infrared heat. The location of the burner allows the placement of the rotis basting pan (included) beneath the food to collect juices and drippings for basting and gravy. - Page 22 Using The Rotisse rie Bu rne r Open the lid. Push and turn the control knob to the “Lite” position. Press the safety valve button, hold in, and begin turning the rotary igniter button located next to the rotis knob. It may be necessary to turn the igniter knob several times until the burner lights.
-
Page 23: Care And Cleaning
Ca re And Cleaning GRILL RACKS: The easiest way to clean the grill is immediately after cooking is completed and after turning off the flame.Wear a barbeque mitt to protect your hand from the heat and steam. Dip a fine brass bristle barbeque brush in tap water and scrub the hot grill. -
Page 24: Burner Removal
Bu rne r Removal And Cleaning RANGETOP BURNERS: FIG. 22 The grill power burners (BQRS Models Only) are cast iron and occasionally it will be necessary to remove surface rust to ensure proper performance. Frequency of cleaning will depend on the climate &... -
Page 25: Troubleshooting
Troubleshooting is for general purposes only. If the problem persists and you feel you require service, contact your dealer or the nearest authorized agency to perform service. Only authorized agencies can perform warranty service. Call DCS Customer Service at (888) 281-5698. -
Page 26: Parts Lists
Grill Bu rne r Assembly ITEM DESCRIPTION PART NO. Grill Rack S/S 27F 19014-02 Grate 36/48 S/S 18197-01 Grate 36/48 18197 Radiant 32218-02 Ceramic Rods 32224 Radiant Cap 32264 6a 27”C/ Heat Shield w/Assy. 32220 C/Heat Shield w/Assy. 32268 7a SS Grill Burner 32217 7b Air Shutter Screw 12003-2... -
Page 27: Grill Body Parts List
32212-06-PA Handle Tube 36DBQ 32048-03 Valve Panel 27DBQ 32272-03-PA Handle Tube 27 32048-05 Valve Panel 27DBQR 32272-01-PA Warming Rack 48DBQ/36DBQA 32248-01 DCS Logo 17129-01 Warming Rack 48DBQA 32248-02 Torx Screw 15002-41 Warming Rack 36DBQ 32248-03 Drip Pan 48D 30645-2 Warming Rack 27DBQ... -
Page 28: Grill Body Assembly
Grill Body Pa rts List 355fig.05.eps... -
Page 29: Rotisse Rie Assembly
Rotisse rie Assembly ITEM DESCRIPTION PART NO. Rotisserie Motor 27D 32069-02 Rotisserie Handle 18040 Rotisserie Motor Bracket 27F 32346 Meat Holder Assembly 19010-02 15021-09 Rotisserie Rod 48dbqar 19054-05 Bolts 15150 Rotisserie Rod 48dbqr 19054-02 Thermocouple 13007-2 Rotisserie Rod 36dbqar 19054-04 Electrode Rotisserie 13055-5 Rotisserie Rod 36dbqr... -
Page 30: Smoker Burner Assembly / Parts List
Smoke r Bu rne r Assembly ITEM DESCRIPTION PART NO. Smoker Tray w/assembly 32231 Screw 15139 Screw 15139 Smoker /Burner Support 32226 Smoker Plate 32228 Control Valve 13017-01 Smoker Pull Handle 18204-01 Orifice L.P. 13005-71 Screw 15139 Orifice Natural 13005-59 Electrode Smoker 13012-6 Bezel... -
Page 31: Grill Ca Rt Pa Rts List
48 Grill Ca rt Pa rts list ITEM DESCRIPTION PART NO. Axle 41062 Side Shelf Tray 41067 8” Solid Rubber Wheel 18264 Side Shelf End Cap 14205 Hub Cap 41075-01-SP Side Shelf Assembly 18212 Torx Screw 15002-45 Bolt 15003-06 Right Door Assembly 41098-02 Left Body Panel 41053... -
Page 32: Grill Cart Assembly / Parts List
36 Grill Ca rt Pa rts List ITEM DESCRIPTION PART NO. Pull Handle 18204-02 Side Shelf Tray 41067 Right Door Assembly 41113-01 Side Shelf End Cap 14205 Screw 15001-13 Side Shelf Assembly 18212 Door Stop Tab 41094 Bolt 15003-06 Hex Bolt 15002-17 Left Body Panel 41053... -
Page 33: Grill Cart Assembly / Parts List
27F Grill Ca rt Pa rts List ITEM DESCRIPTION PART NO. Front Door Panel 41139 Hub Cap 41075-SP Pull Handle 18204-01 Wheel 18098 Door Liner 41140 Axle Spacer 41151 Spring 15198-01 Axle 41150 Keps Nut 15021-04 Side Panel R/H 41145-02 Washer Nylon 15199 Bottom Panel... -
Page 34: Before You Call For Service
See page 21, follow troubleshooting guide first, then call for service if not resolved. For warranty service, contact your local DCS authorized service agency. Provide him with the Model Number, Serial Number, and date of installation, and a brief description of the problem. If you need assistance in locating the authorized service agency in your area please contact our DCS Customer Service Department for an authorized service agent near you, our number is (888) 281-5698. -
Page 35: Length Of Warranty
DCS to be defective. Replacement will be F.O.B. DCS, and DCS will not be liable for any transportation costs, labor costs, or export duties. This warranty shall not apply, nor can we assume responsibility for damage that might... - Page 36 Notes...
- Page 37 Notes...
- Page 38 Notes...
- Page 39 As product improvement is an ongoing process at DCS, we reserve the right to change specifications or design without notice. 5800 Skylab Road, Huntington Beach, CA 92647 Tel: (714) 372-7000 Part No. 17355 Rev. B Fax: (714) 372-7001 Customer Service (888) 281-5698 Litho in USA 12/2004 www.dcsappliances.com...
Need help?
Do you have a question about the FS Series and is the answer not in the manual?
Questions and answers