Advertisement
Quick Links
Advertisement

Subscribe to Our Youtube Channel
Related Manuals for Matrix PERFORMANCE Series


Summary of Contents for Matrix PERFORMANCE Series
-
Page 2: Table Of Contents
PRODUCT OWNERSHIP GUIDE Fitness equipment requires adjustments and maintenance that are part of owning or leasing equipment. These adjustments and maintenance are not part of your equipment’s warranty, nor are they defects in the equipment. The following will provide information on how to perform these adjustments and maintenance when needed. -
Page 3: Cardio Equipment
CARDIO EQUIPMENT... -
Page 4: Leveling Equipment
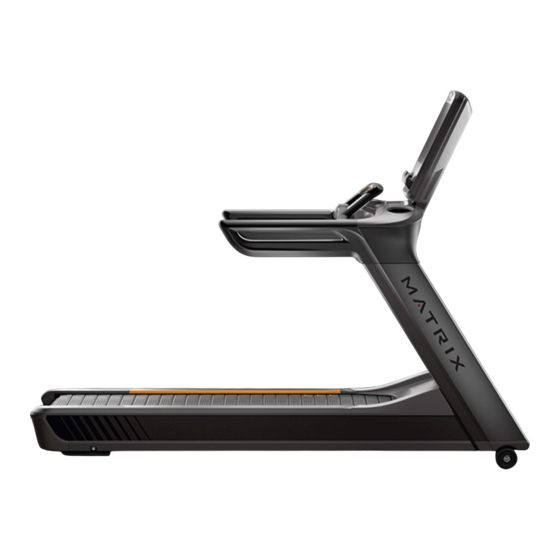
CARDIO EQUIPMENT LEVELING EQUIPMENT: TREADMILLS 7 & 5 SERIES TREADMILLS TOOLS NEEDED • 6 mm Allen socket and ratcheting wrench INSTRUCTIONS 1. On the right side of the treadmill, just in front of the rear foot, you will find two leveling shims. Remove one or both (Fig. -
Page 5: Tools Needed
CARDIO EQUIPMENT LEVELING EQUIPMENT: CLIMBMILLS PERFORMANCE, ENDURANCE & 7, 5, 3 SERIES CLIMBMILLS TOOLS NEEDED 6 mm Allen socket and ratcheting wrench • INSTRUCTIONS Start with the leveling feet all the way up (turn clockwise). Once the Climbmill is placed, the frame should be resting on the floor. - Page 6 CARDIO EQUIPMENT LEVELING EQUIPMENT: ASCENT TRAINERS & SUSPENSION ELLIPTICALS PERFORMANCE, ENDURANCE & 7, 5, 3, 1 SERIES TOOLS NEEDED • 6 mm Allen socket and ratcheting wrench INSTRUCTIONS Start with the leveling feet all the way up (turn counterclockwise), so the frame is resting on the floor. If the unit is not level, adjust the leveling feet as needed using a 6 mm Allen socket and wrench (Fig.
- Page 7 CARDIO EQUIPMENT LEVELING EQUIPMENT: UPRIGHT, HYBRID & RECUMBENT CYCLES PERFORMANCE, ENDURANCE & 7, 5, 3 SERIES TOOLS NEEDED 6mm Allen socket and ratcheting wrench • INSTRUCTIONS Start with the leveling feet all the way up (turn counterclockwise), so the frame is resting on the floor. If the unit is not level at that point, adjust the leveling feet as needed using a 6 mm Allen socket and wrench (Fig.
-
Page 8: Treadmill Belt Adjustments
CARDIO EQUIPMENT TREADMILL BELT ADJUSTMENTS TOOLS NEEDED: • 8 mm Allen socket and ratcheting wrench 8 mm Allen T-handle wrench • After the treadmill is placed, the belt must be checked for proper tension and alignment (centering). It’s recommended to check the belt tension and alignment after the first week of use. Temperature and humidity can cause the belt to stretch at different rates. - Page 9 CARDIO EQUIPMENT TREADMILL BELT ADJUSTMENTS FIG. 1 FIG. 2 FIG. 3 TIGHTENS RIGHT SIDE OF ROLLER TIGHTENS LEFT SIDE OF ROLLER Find the logo on the belt. Are there tension markers? If NO, follow the steps below to tension. The two 8mm hex bolts in the end caps adjust the rear roller position. To move the roller out (closer to you), turn both clockwise.
- Page 10 CARDIO EQUIPMENT TREADMILL BELT ADJUSTMENTS TREADMILL BELT ALIGNMENT The two 8 mm bolts in the end caps adjust the rear roller position. To align the belt to the center of the running deck, turn the bolt on the side that the belt moved and turn clockwise. To move the belt to the right, turn the left bolt counterclockwise (see image below).
- Page 11 CARDIO PRODUCT: BASIC CLEANING AND MAINTENANCE CHECKLIST...
-
Page 12: Basic Cleaning And Maintenance Checklist
For cleaning on frame-, pads- and plastic parts, use mild soap and water mixture in spray bottle (10:1 water to soap). For cleaning LCD screen we recommend North cleaning wipes or similar screen cleaning. The checklists below are maintenance recommendations beyond the daily cleaning of the equipment. MATRIX TREADMILL (MODELS WITH RUNNING BELT) MONTHLY Tasks... - Page 13 MATRIX TREADMILL (MODELS WITH RUNNING BELT) QUARTERLY To clean under a treadmill: • Press “Go” then press “Incline Up” until it has reached max incline • Press the “e-stop” then unplug the treadmill from the floor/wall outlet and lay the cord over the motor cover onto the running belt (disconnect coax if present as well) •...
-
Page 14: Treadmill Plus - Running Belt
CARDIO PRODUCT: BASIC CLEANING AND MAINTENANCE CHECKLIST The checklists below are maintenance recommendations beyond the daily cleaning of the equipment. MATRIX TREADMILL (PERFORMANCE PLUS - SLAT BELT) MONTHLY Tasks Clean console with approved cleaner Wipe entire frame and shrouds with approved cleaner Inspect power cord &... -
Page 15: Climbmill
Jul Aug Nov Dec Clean console with approved cleaner Empty & clean dust tray Clean the Control Zone IR windows; 7/5 & Performance Series Wipe entire frame and shrouds with approved cleaner Inspect power cord Test emergency stop functions Remove side service covers & inspect for... - Page 16 QUARTERLY OR BI-ANNUALLY Tasks Clean console with approved cleaner Empty & clean dust tray Clean Control Zone IR windows; 7/5 and Performance Series Wipe entire frame and shrouds with approved cleaner Inspect power cord Test emergency stop functions Test handgrips for proper function...
-
Page 17: Ascent Trainer / Elliptical
Note: If units are not plugged in but being used self-powered, check the voltage of the battery on the frame. If less than half charged, plug in for 24 hours to recharge. Matrix offers a for purchase sweat tray that covers the bottom frame under a user. To purchase, please contact your local Matrix Customer Support. - Page 18 CARDIO PRODUCT: BASIC CLEANING AND MAINTENANCE CHECKLIST MATRIX RECUMBENT, HYBRID & UPRIGHT CYCLE MONTHLY Tasks Aug Sep Nov Dec Clean console with approved cleaner Recumbent only – clean seat track* Wipe entire frame and shrouds with approved cleaner Inspect power cord Inspect pedals &...
-
Page 19: Recumbent, Hybrid & Upright Bike
CARDIO PRODUCT: BASIC CLEANING AND MAINTENANCE CHECKLIST MATRIX RECUMBENT, HYBRID & UPRIGHT CYCLE QUARTERLY Tasks Clean console with approved cleaner Recumbent only – clean seat track* Wipe entire frame and shrouds with approved cleaner Inspect power cord Test handgrips for proper function... -
Page 20: Virtual Training Cycle
CARDIO PRODUCT: BASIC CLEANING AND MAINTENANCE CHECKLIST MATRIX VIRTUAL TRAINING CYCLE (CXV MODEL) MONTHLY Task May Jun Wipe entire frame and shrouds with approved cleaner Clean seat and handlebar post Visually inspect pedals for tightness Test console for proper operation... -
Page 21: Contact Us
www.casallpro.com...
Need help?
Do you have a question about the PERFORMANCE Series and is the answer not in the manual?
Questions and answers