Table of Contents
Advertisement
Quick Links
Download this manual
See also:
User Manual
Advertisement
Table of Contents

Related Manuals for Mpio FY 500


Summary of Contents for Mpio FY 500
- Page 1 User’s Manual FY500...
- Page 2 - Products and products described in this manual are the trademark or registered trademark For more information on the MPIO products, visit our web site on the Internet. You can find of the corresponding company or organization, and ™ or mark not always displayed many answers to the customer’s various enquiries, or upgrade the product performance...
-
Page 3: Safety Precautions
You should back up the data saved in the product before requesting the after service. MPIO will consider that the customers have backed up their data before sending it to MPIO for after service. MPIO will not back up your data upon receiving the after service request. Additionally, MPIO will bear no responsibility over data loss... -
Page 4: Table Of Contents
Table of Contents Getting Started Listening to FM Radio ..........29 Setting Screen Display ..........45 Searching Radio Frequency Manually (Scan Mode) ..29 Customer Support Safety Precautions ...........4 Select Visualization ..........45 Searching Radio Frequency Automatically (Scan Mode) ...29 Product Features ............8 Setting Language .............46 Menu Structure ............61 Setting Save Channel ..........29 Components .............9... -
Page 5: Product Features
License Real Player program is bundled with this product, which enables to author MP3 file and use the Note music library. Actual player may vary slightly from images shown, and subject to change without notice. Broken accessories may be purchased separately at MPIO Service Center. -
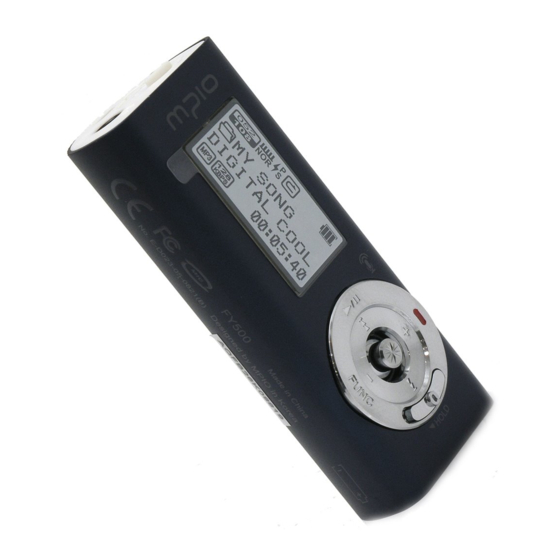
Page 6: Name Of The Parts
Name of the Parts Using the Lever Neck String Hole USB Connector Earphone Jack Functioning by pushing the lever up, down, left, right direction and pressing it. Pressing the Lever: Press the lever down or press and hold it. Pushing Up : Push the lever or push and hold it up. Pushing Down: Push the lever or push and hold it down. -
Page 7: Connecting To A Pc
System Requirement Installing the Software IBM PC How to install windows 98 device driver, MPIO utility and other utility. System: USB Interface 2.0, Standard device and a CD-ROM Drive equipped CPU: Pentium 133MHz or faster Memory: 64MB or more Insert the Installation CD into the CD-ROM Drive. - Page 8 Click the [Finish] button to finish the installation. Click the [Next] button. Check the MPIO Utility icon on the desktop to All the utility programs will be installed. confirm installation. The user can select the programs needed to install.
-
Page 9: Connecting To A Pc With A Usb Cable
Check “Search for the driver for your device”, click the [Next] button. Windows 98/ME: [Control Panel] → [Systems] → [Device Manager] → [Hard Disk Controllers]→ MPIO FY500 USB Device Windows 2000/XP: [Control Panel] → [Systems] →[Hardware]→[Device Manager] →[Disk Drives]→ MPIO FY500 USB Device... -
Page 10: Using Removable Disk Function
Windows 98/ME: [ Control Panel ] → [ Systems ] → [ Device Manager ] → Click [ Hard Disk Controllers ]→ MPIO FY500 USB Device Click Drag & Drop: Select the data store, click and hold down the left mouse button to drag the files into the Removable Disk drive, and then release the left mouse button. -
Page 11: Using Removable Disk
To Stop (Turning Power OFF) Select USB Mass Storage Device from the list of hardware, and click the [Stop] button. When the “Stop a Hardware Device” window appears, select MPIO FY500 USB Device. Pressing button pauses during playback and it is automatically turned-off if there is no Then, click the [OK] button and disconnect the USB Cable. -
Page 12: Adjusting Volume / Using Hold Switch
Adjusting Volume / Using Hold Switch Switching Mode Use the Hold function so that other buttons do not work during playback. To use the Hold function, push the switch in the direction of the arrow. -
Page 13: Voice Recording
Voice Recording Using Navigation Mode Uses navigation function for more convenient to search folders or files you wish. Voice recording starts if REC button is pressed during pause. Voice Recording does not work while music is playing. Press the lever during playback or in pause to enter Navigation Mode. A file list will appear on the LCD screen. -
Page 14: Setting My List
Setting My List Deleting File Setting My List Press FUNC button after moving to the file you want to delete in navigation mode. A pop up menu will appear. Press the FUNC button after moving to the file you want in navigation mode. Push the lever toward direction to select Delete and then, push the lever toward direction or... -
Page 15: Finding Music / Voice Recording Files
Finding Music / Voice Recording Files Listening to FM Radio Press and hold the FUNC button to switch to FM Mode. (Refer to “Switching Mode” on page 23) Fast Forward / Rewinding During Playback Searching Radio Frequency Manually (Scan Mode) Searching Radio Frequency Automatically (Scan Mode) Push the lever in directions during playback to Fast forward / rewind the music. -
Page 16: Changing Radio Frequency Saved
Listening to FM Radio Recording FM Radio Records the selected FM Radio broadcast Changing Radio Frequency Saved Press the REC button to start FM radio recording while listening to FM radio. Press the lever to select the number of saved channel after the save channel screen appears and then, push the lever toward direction. -
Page 17: Setting Repeat
Setting Repeat Setting Menu Press the REC button in the start position of the music/voice file to repeat during playback. appears on LCD window and icon is blinking. WESTLIFE-MY LOVE 00:00:30 Press the REC button again to release repeat. Pause is usable during Sector Repeat. -
Page 18: Changing The Eq Setting
Changing the EQ Setting Setting User EQ You can define your own EQ effect by adjusting the setting values in each frequency range, Select Audio in the menu. instead of the pre-defined EQ setting values. Push the lever in directions to select EQ and then, push the lever in direction or press it to enter. -
Page 19: Setting 3D Sound Effect
Changing Play Order Setting 3D Sound Effect Select ‘How to playback’ of the music files saved. 3D sound effect will enhance your music experience. Select Audio in the menu. Select Audio in the menu. Push the lever in directions to select Repeat and then, push the lever in direction or press it to enter. -
Page 20: Setting Fm Radio
Setting FM Radio Saving Channel in Menu Setting FM Frequency Bandwidth Set by pressing and hold the FUNC button after change to FM radio mode. Select the FM frequency band to receive. Saving channel in menu can not be set in music mode. Select FM Radio in menu. -
Page 21: Setting Fm Sound
Setting FM Radio Setting FM Sound Setting Auto Channel Save Select the sound modes for FM Radio. Set by pressing and hold the FUNC button after change to FM radio mode. Auto Preset menu can not be set under the other mode. Select FM Radio in menu. -
Page 22: Setting Seek Steps
Setting FM Radio Setting Recording Setting the Quality of Voice Recording Setting Seek Steps Set the quality of voice recording. Select the seek steps for scanning frequencies. Select Recording in menu. Select FM Radio in menu. Push the lever in directions to select Voice-Quality and then, push the lever in direction Push the lever in... -
Page 23: Setting The Quality Of Fm Recording
Setting Recording Setting Screen Display Select Visualization Setting the Quality of FM Recording Select the visualization shown at the bottom of the LCD screen. Set the quality of FM recording. Select Recording in menu. Select Display in menu. Push the lever in directions to select FM-Quality and then, push the lever in direction or Push the lever in... -
Page 24: Setting Language
Setting Screen Display Setting Language Setting Track Information Indicator Assigning the language of ID3 tag of the music can display the accurate information of the file. 55 differences of Set the Music file information shown in the LCD screen. languages support ID3 tag in total. English, Korean, Traditional Chinese, Simplified Chinese, Japanese, Spanish and Russian support ID3 tag with menu among 55 languages. -
Page 25: Setting Playing Time Indicator
Setting Screen Display Setting Playing Time Indicator Setting Scroll Speed Select the Playing Time indicator shown in the LCD screen. Adjust the scroll speed of the text shown in the LCD screen. Select Display in menu. Select Display in menu. Push the lever in directions to select Playing Time and then, push the lever in direction... -
Page 26: Setting Lighting Time
Setting Screen Display Setting Contrast Setting Lighting Time You can adjust the contrast of the LCD window. Set the light time for the LCD screen. Select Display in menu. Select Display in menu. Push the lever in directions to select Contrast and then, push the lever in direction or Push the lever in directions to select Backlight Time and then, push the lever in... -
Page 27: Setting Lyrics
On : The device will automatically play music once the power is turned On. Caution Any file format that MPIO does not support might not be able to display the lyrics even if they have lyrics’ information. The lyrics’ display function can not be supported depends on area. -
Page 28: Setting Memorized Playback
Setting System Setting Fade In Setting Memorized Playback Fade in setting increase the music volume steadily so that the user is not surprised by the loud When turned On, the Resume function allows the player to begin playing music from music. -
Page 29: Confirming Device Information
Setting System Setting Sleep Timer Confirming Device Information When listening to music or FM radio, you can set up the device so that the power is Check the version of firmware saved on the device, using memory size and the information of the automatically turned OFF after a certain period of time. -
Page 30: Setting Auto Power Off Time
Setting System Setting Auto Power Off Time Initializing to Default Auto Power Off function turns the power OFF when a certain period of time passes after Resets all the user’s menu settings and initializes all menu settings to default settings. the music is paused or stopped. -
Page 31: Setting Playback Speed
Setting System Menu Structure Setting Playback Speed Playback speed can be adjustable and it is very useful on studying foreign language. Select System in menu. Push the lever in directions to select Speed Control and then, push the lever in direction Audio FM Radio... -
Page 32: Formatting
Click Click Note Click The captured screens of MPIO Utility may vary for the user’s PC environment. MPIO Utility cannot be run under MAC OS. For information regarding MPIO Utility installation, refer to [Installing the software] on page 13. Click... -
Page 33: Storing Default Settings
When formatting the device using the Windows FORMAT Command, it must be formatted in FAT or FAT16. To use the device after it has been formatted, the default settings must be restored using MPIO Utility. Refer to page 65 [Storing Default Settings] for more information. -
Page 34: Upgrading Firmware
Click the [ OK ] button after the Hardware Safely After clicking the [ OK ] button, the first part of Refer to page 13 [Installing the software] for information on how to install MPIO Utility. Removed message appears as shown. -
Page 35: Upgrading Firmware In Macintosh
If the battery is completely discharged (flat), the player cannot be turned on. Download the firmware upgrade for Macintosh at MPIO website, uncompress it and save it on the computer. Replace with battery with new one and turn the player on. -
Page 36: Product Specifications
0 ~ 40 Upgrading the firmware is too hard. Try using the bundled MPIO utility. Mac users can just copy the provided file into FY500. Note The actual memory available to use may differ from the product’s memory capacity due to the logical file system.
Need help?
Do you have a question about the FY 500 and is the answer not in the manual?
Questions and answers